jQuery: Aufruf von Objekt-Methoden im Rahmen der Event-Behandlung und der .each()-Funktion für Selektionen

Will man Funktionalitäten, die man in Javascript/jQuery-Projekten erfolgreich entwickelt hat, wiederverwenden, muss man modular arbeiten und seine Funktionen in übergeordneten Einheiten kapseln. Wie einige meiner Leser wissen, versuche ich diese Anforderungen u.a. über die Etablierung abstrakter Control-Objects [CtrlOs] und definierte “Methoden” solcher Objekte umzusetzen.

Einerseits können Konstruktorfunktionen für abstrakte CtrlOs über ihren “prototype” zusammenhängende funktionale Verfahren im Sinne einer reinen Funktionalklasse bündeln.
Anderseits repräsentieren CtrlOs in meinen Web-Projekten bei Bedarf aber auch zusammenhängende Web-Bereiche sowie deren konkrete HTML-Objekte. Sie bündeln dann alle erforderlichen Methoden zum Umgang mit Ereignissen auf diesen Objekten. CtrlOs abstrahieren dabei soweit als möglich von der konkreten HTML-Ausprägung und führen zu einer allgemeineren Repräsentation bestimmter HTML-Schlüssel-Objekte im JS-Code – wenn nötig über die Definition weiterer geeigneter Unter-Objekte des CtrlOs. Wiederverwendbarkeit reduziert sich dann meist auf ein geeignetes Matching der IDs von Schlüsselelementen sowie ein Matching von Selektionskriterien für einen neuen Anwendungskontext (sprich für eine andere Webseite).

Beispiele:
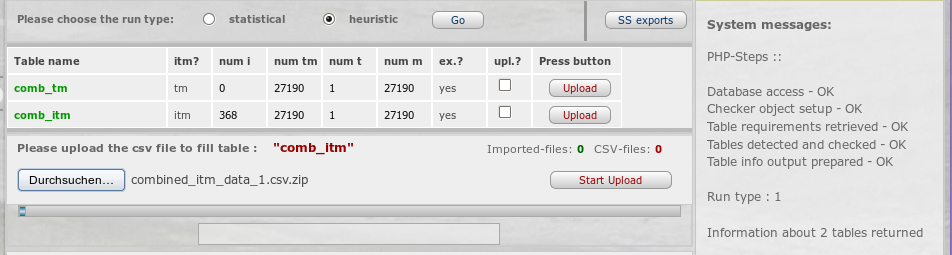
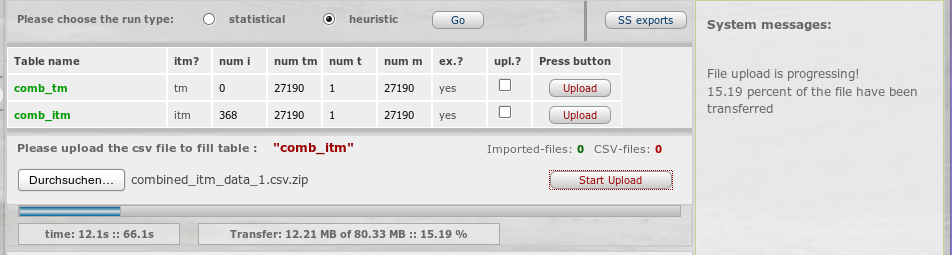
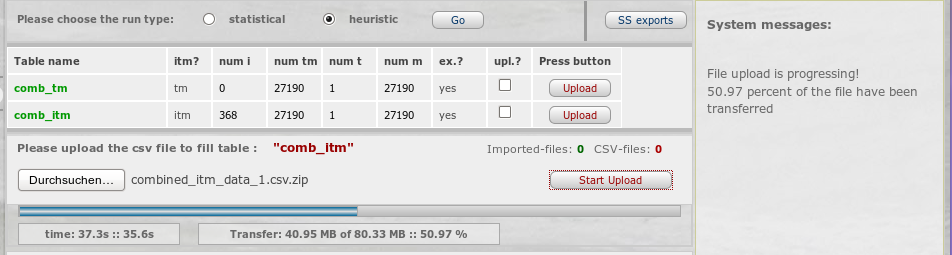
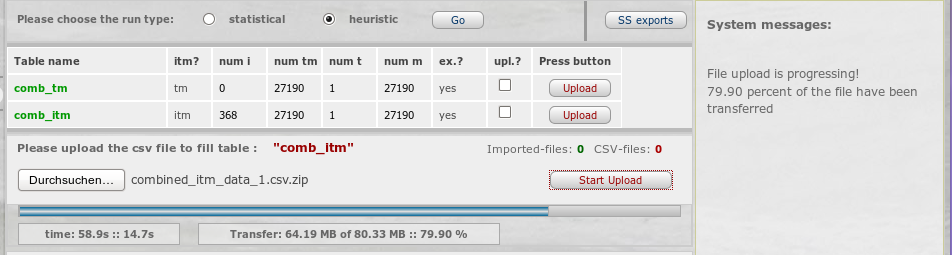
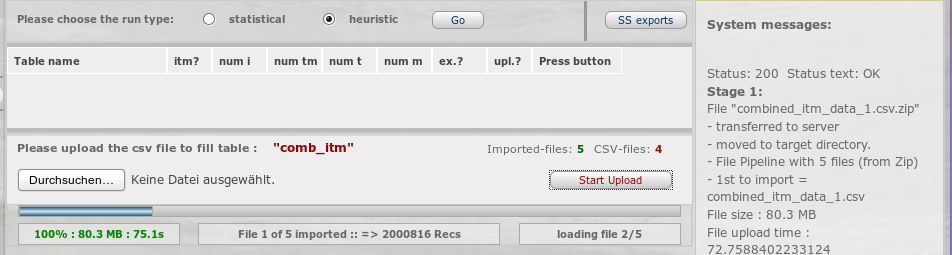
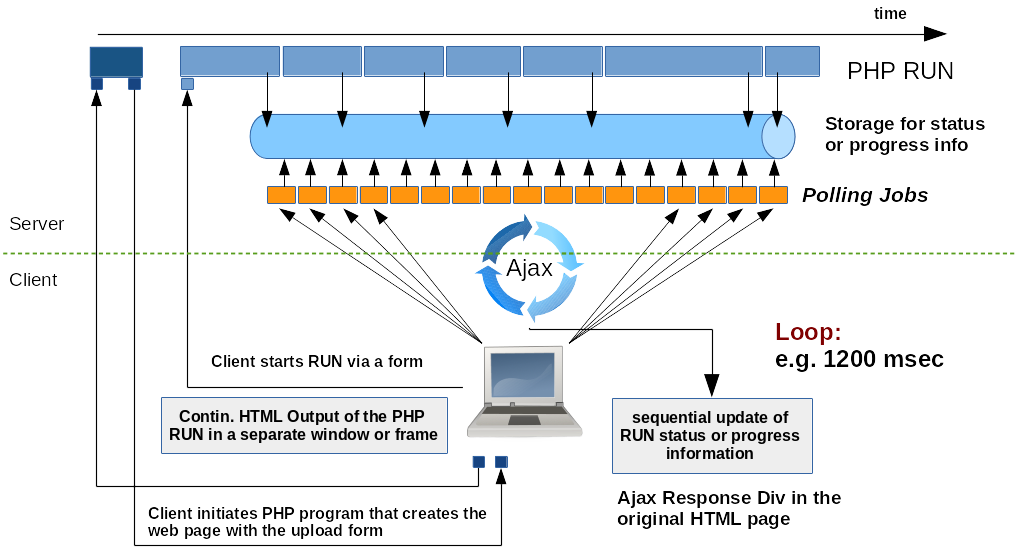
Für die Steuerung einer Bildgalerie auf unterschiedlichen Webseiten ist z.B. lediglich der übergeordnete Container für die Bilder zu bestimmen und es sind geeignete Kriterien zur jQuery-Selektion der beinhalteten Bilder über Parameter zu definieren. Und schon können die meisten vordefinierten Methoden des CtrlOs wieder zum Einsatz kommen. Ein anderes Beispiel würde etwa die Kontrolle der Ajax-Interaktionen eines normierten Form-Elements mit einem PHP-Server zur Durchführung und Statusüberwachung eines Dateiuploads bieten. Auch hier lassen sich alle Funktionalitäten in Methoden eines relativ abstrakten und wiederverwendbaren CtrlOs bündeln.

Unter “Methoden” verstehe ich dabei allgemeine Funktionsobjekte, die als Elemente der fundamentalen “prototype”-Eigenschaft der Konstruktor-Funktionen für das CtrlO und ggf. der Konstruktorfunktionen für Sub-Objekte des CtrlO definiert werden. (In Javascript stellen Funktionen Objekte dar.)

Ziel ist es also, die gesamte Event-Behandlung und auch andere Aufgaben vollständig über “Methoden” eines für die jeweilige Aufgabe “fachlich” zuständigen CtrlOs und eventueller passend definierter Unterobjekte abzuwickeln. Das CtrlO entspricht somit einem (Singleton-) Container, der die Funktionalität zur Abwicklung aller auftretenden Ereignisse und Aufgaben in geordneter und wiederverwendbarer Weise kapselt. (Über den “prototype”-Mechanismus lässt sich dann natürlich auch eine “Vererbung” in komplexeren Projekten realisieren.)

Nun ist jQuery ursprünglich nicht auf eine solche Logik ausgerichtet; es sind daher ein paar Klimmzüge erforderlich, um HTML-Objekte einer Webseite mit Methoden abstrakter JS-Objekte zu koppeln. Vor allem der this-Operator und sein unter jQuery oftmals wechselnder Kontext führen dabei immer wieder zu Missverständnissen und Kapriolen.

So lenken jQuery’s Event-Behandlungs-Funktionen, die für jQuery-Objekte (Selektionen) ausgeführt werden, den this-Kontext in den aufgerufenen Callback-Funktionen auf das jeweilige HTML-Element um. Sind die Callbacks nun Methoden eines CtrlO-Objekts, so passt dies meist nicht zu der Erwartung, die den Entwickler beim Methoden-Design geleitet haben dürfte – nämlich, dass this in der Methode auf das CtrlO-Objekt selbst verweist.

Ich werfe daher zunächst einen Blick auf den $.proxy()-Mechanismus, der einem unter jQuery zumindest im Fall des Event-Handlings hilft, die erforderlichen Aufgaben an CtrlO-Methoden zu delegieren und den Kontext des this-Operators gezielt auf das CtrlO selbst zu setzen.

Danach wende ich mich einer Frage zu, mit der man es auch immer wieder zu tun bekommt:

Wenn man innerhalb einer CtrlO-Methode über eine Selektion von HTML-Objekten mittels der jQuery-Objekt-Funktion $(..).each( …) iteriert – wie delegiert man dann die anstehenden Aufgaben zur Behandlung der selektierten HTML-Objekte an eine (andere) geeignete “Methode” des abstrakten CtrlOs?
Und wie nutzt man dabei den this-Operator, so dass wir einerseits eine Referenz auf das CtrlO selbst und andererseits aber auch eine Referenz auf das aktuell zu behandelnde HTML-Objekt erhalten?

Wir werden sehen, dass sich der Aufruf der gewünschten CtrlO-Methode nicht ganz so bequem wie im Falle der Event-Behandlung über den $.proxy()-Mechanismus bewerkstelligen lässt; wir werden aber auch sehen, dass ein solcher Aufruf über einen kleinen Trick durchaus auf einfache Weise und ohne Informationsverlust möglich ist.

CtrlOs und Einsatz des $.proxy()-Verfahrens zur Delegation der Event-Behandlung an Objekt-Methoden bei gleichzeitiger Kontrolle des this-Operators

Das Abfangen von Events und die anschließende Delegation der funktionalen Bearbeitung an Methoden eines CtrlOs kann man relativ bequem über den $.proxy()-Mechanismus erledigen. Man registriert dazu im Rahmen der Definition der Event-Behandlung mittels geeigneter jQuery-Objekt-Funktionen (wie etwa “click()” ) die Funktion $.proxy() als primären Callback der Event-Behandlungs-Funktion – also z.B. click( $.proxy(), …). Der Funktion $.proxy() selbst wird dann einerseits eine Kontext-Referenz und eine Methode des CtrlO zur Event-Behandlung als Callback übergeben. Diese Verschachtelung von Callbacks hört sich kompliziert an – sie ist faktisch aber sehr bequem. Der Ansatz führt typischerweise zu Code-Abschnitten der unten angegebenen Art.

Voraussetzungen: GOC (“Global Object Controller”) definiert im Beispiel ein globales Objekt; um ein Zumüllen des globalen Kontextes zu vermeiden, werden die benötigten CtrlOs im GOC erzeugt. Wir nehmen für unser Beispiel vereinfachend an, dass die IDs benötigter HTML-Elemente über irgendwelche Parameter ermittelbar sind.


GOC = new Constr_GOC(); 

function Constr_GOC() {
    ....	
    this["CtrlO_Form"] = new Constr_CtrlO_Form( ...parameterS ...); 
    ....
    this["CtrlO_Form"].register_form_events(); 
    ...
}

//  Constructor of a CtrlO for a certain form-Tag  
// -----------------------------------------------
function Constr_CtrlO_Form(... parameters ...) {
    ....
    // gather or define concrete IDs of relevant HTML-objects 
    // by some appropriate evaluation methods
  
    this.id_form     = "#" + " ... (evaluation of parameters) ..."; 	
    this.id_rad_stat = "#" + ...; 	
    this.id_rad_heur = "#" + ...;
    this.id_but_chk  = "#" + ...;
    .....
    ....
}

// Proxy solution to register event handlers for HTML-elements   
// -----------------------------------------------------------
// The behaviour of the HTML-elements shall be controlled by CtrlO-methods 

Constr_CtrlO_Form.prototype.register_form_events = function() {
	
	console.log("From Form - registering event handlers for some key elements of the form");
		
	// Click on any of the radio buttons
	// ----------------------------------
       	$(this.id_rad_stat).click(
       	    jQuery.proxy(this, 'radio_click')
      	);
        $(this.id_rad_heur).click(
            jQuery.proxy(this, 'radio_click')
        );
        $(this.id_rad_both).click(
            jQuery.proxy(this, 'radio_click')
        );
			
	// Button_Click 
	// ----------------
	$(this.id_but_chk).click(
	    jQuery.proxy(this, 'click_event')
	); 
		
	// Submit Event 
	// ------------
	$(this.id_form).submit(
	    jQuery.proxy(this, 'submit_ajax_chkfiles')
	); 
			
};	

// 
Methods of the CtrlO 
// ------------------------------- 
Constr_CtrlO_Form.prototype.radio_click = function(e) {
    .....
    e.preventDefault(); 
    // get the JS-pointer to the HTML-Object for which the event e was triggered   	
    var pointerToHtmlObject = e.target;  	
    ....
    // var attribute = $(pointerToHtmlObject).attr(.....); 
    ....	
}
Constr_CtrlO_Form.prototype.click_event = function(e) {
    ....
}
Constr_CtrlO_Form.prototype.submit_ajax_chkfiles = function(e) {
    ...
}

 
Zuerst werden die IDs relevanter HTML-Schlüssel-Objekte anhand verfahrensspezifischer Kriterien identifiziert. Dann werden Event-Listener und -Handler für diese HTML-Objekte über geeignete jQuery-Funktionen registriert. Die Callbacks ‘radio_click’, ‘click_event’, ‘submit_ajax_chkfiles’ entsprechen im Beispiel Methoden, die über den prototype der Konstruktorfunktion für das instanziierte CtrlO bereitgestellt werden. Der this-Parameter, der an die $.proxy()-Funktion übergeben wurde, weist dabei auf das Objekt “CtrlO_Form” – dieses wiederum ist ein Element des GOC.

Der Aufruf von Callbacks als Event-Handler über jQuery-Objekt-Funktionen wie “.click()” führt dazu, dass der this-Operator innerhalb der im Eventfall ausgelösten Funktion auf das HTML-Objekt (!) verweist. Dies gilt auch, wenn der Callback eine Objektmethode sein sollte. jQuery setzt intern den Kontext für den this-Operator in expliziter Weise! Das führt regelmäßig zur Problemen, da ein Entwickler bei der Ausformulierung von Methoden als Teil des “prototype” eines Konstruktors in der Regel erwartet, dass this auf das (später) erzeugte Objekt zeigen wird.

Das Zwischenschalten der $.proxy()-Funktion sorgt im obigen Beispiel deshalb dafür, dass die jeweils genannte Methode zur Eventbehandlung aufgerufen wird und dass der this-Operator innerhalb der aufgerufenen Methode (wie erwartet) auf das CtrlO und nicht auf das HTML-Objekt zeigt, für das der Event ausgelöst wurde.

Wie aber erhält man nun in der CtrlO-Methode einen Zeiger auf das HTML-Object? Nun dies ist über das Event-Objekt von JS möglich, dass der Methode über den proxy()-Mechanismus automatisch übergeben wird:

Constr_CtrlO_Form.prototype.radio_click = function(e) {...}

e.target liefert dann den gewünschten Zeiger auf das HTML-Objekt. Dieser Zeiger lässt sich dann wiederum für jQuery-Selektionen und zugehörige Funktionen einsetzen.

Der $.proxy()-Mechanismus erlaubt so die vollständige Übergabe der Event-Behandlung an Methoden abstrakter Objekte. Das Verfahren lässt sich im Gegensatz zum Beispiel natürlich auch auf den Aufruf der Methoden anderer Objekte als des aktuell aktiven Objekts verallgemeinern.

jQuery’s .each()-Funktion und der this-Operator

Das obige Beispiel hat verdeutlicht, dass die Kontrolle über den this-Operator für die Delegation der Eventbehandlung an abstrakte Objekt-Methoden wichtig ist.

Nun delegiert auch die Funktion .each() eines jQuery-Objekts (sprich einer Selektion), die Durchführung von Aufgaben im Zusammenhang mit jedem der identifizierten HTML-Objekten an eine Funktion, die als Callback mit vordefinierten Parametern – nämlich (index, element) – festgelegt werden muss (s. https://api.jquery.com/each/). Wie lenkt man die Aufgabendurchführung aber statt dessen auf eine passende Methode eines CtrlOs um? Und wohin weist der this-Operator innerhalb der zu definierenden Callback-Funktion?

Betrachten wir zunächst, wie die .each()-Funktion im Zusammenhang mit Selektionen praktisch zum Einsatz kommt. Wir nehmen im nachfolgenden Beispiel an, dass bestimmte IMG-Tags einer Bilder-Galerie durch die CSS-Klasse “enlarge” gekennzeichnet sein sollen. Die Verwendung von .each() sieht dann im einfachsten Fall etwa so
aus:


// iterate over all (IMG-) tags with css class="enlarge"
// -----------------------------------------------------
$(".enlarge").each(
	function () {
		// Note: this in this function points to the HTML object, here an identified IMG tag 
		.....
		// Code to perform actions, e.g. on the HTML object
		// console.log("id des HTML-Elements : " + $(this).attr("id"); 
		..... 	
	}	
);

 
Wir führen eine Selektion durch und definieren innerhalb von each() eine Callback-Funktion, die dann bestimmte Dinge im Zusammenhang mit jedem der ermittelten HTML-Objekte des DOM-Baums der Webseite durchführt. Z.B. könnten wir dessen Attribute oder CSS-Eigenschaften verändern oder aber Event-Listener implementieren, etc..

Wichtig ist, sich zu vergegenwärtigen, dass der this-Operator innerhalb der Funktion “function() {…}”, die pro Element der Selektion ausgeführt werden soll, auf das aktuell betroffene HTML-Element verweist! Gemeint ist hier tatsächlich die JS-Referenz auf den DOM-Knoten – und kein JQuery-Objekt einer Selektion. Dieser Unterschied ist wichtig : Will man nämlich jQuery-Funktionen, die für Selektionen (also ein jQuery-Objekt) definiert sind, anwenden, so ist zuvor $(this) zu bilden !

“function() {…}” muss bestimmte formale Voraussetzungen bzgl. der Parameter erfüllen. Deshalb kann man “function() {…}” nicht so ohne weiteres durch Callback-Verweise auf beliebige Funktionsobjekte des JS-Codes ersetzen. Es ergibt sich daher die Frage:

Wie kann man über die innerhalb von each() definierten Callback-Funktion “function() {…}” Methoden eines CtrlOs aufrufen und die Referenz auf den DOM-Knoten dabei weiterverwenden?

Nehmen wir mal an, unser Code-Schnipsel von oben sei Teil einer Methode eines CtrlOs, welches wiederum als Element eines globalen Objects GOC definiert sei. Innerhalb des CtrlO-Konstruktors werde im Beispiel eine Initialisierungs-Methode “init_img_control()” aufgerufen; sie möge die Selektion von (IMG-) Tags anhand der CSS-Klase “enlarge” durchführen und pro (IMG-) Tag Aktionen zur späteren Bildkontrolle ausführen. Diese Aktionen seien in der Methode “set_img_nr()” des CtrlO definiert:


GOC = new Constr_GOC(); 

function Constr_GOC() {

    ....
    this.CtrlO_Manipulate_Pics = new this['Constr_CtrlO_Manipulate_Pics']( ...parameter, ...);
    ....
    ....
    // Konstruktor eines CtrlO - this refers to the GOC 
    // -----------------------
    this.Constr_CtrlO_Manipulate_Pics = function(.. parameter, ...) {
        ....
        var numOfImgs = 0; 
        ....
        // "this" refers here to the CtrlO which is created via the present constructor 		
        ...
        this.init_img_control();
        .... 
    };

    // CtrlO-Methode init_img_control()
    // -----------------------------------	
    this['Constr_CtrlO_Manipulate_Pics'].prototype.init_img_control = function() {
	
        // this refers to the CtrlO
        ....
        $(".enlarge").each(
            function () {
                // Note: this points here to an HTML object, 
                // an identified img tag with the CSS class "enlarge" 
                ....
                // Code to perform actions, e.g. on the HTML object

                // console.log("id des HTML-Elements : " + $(this).attr("id"); 

                // ... We WANT TO CALL set_img_nr() - BUT HOW TO DO IT PROPERLY ??? ....
                .....
            }	
        );
        .....
        .....
    };

    // CtrlO-Methode set_img_nr() - to be used for each IMG-tag
    // -----------------------------------------------------------	
    this['Constr_CtrlO_Manipulate_Pics'].prototype.set_img_nr = function(ref_to_img_tag) {
        ....
        var img_nr = 0; 
        // Count the number of identified IMG tags
        this.numOfImgs++; 
        img_nr = this.numOfImgs; 
        ... 
        $(ref_to_img_tag).attr("imgNum", img_nr.toString() );  
        ....
    };

}

 
Wir haben hier nebenbei für Interessierte noch eine weitere zusätzliche Kapselung im GOC vorgeführt:

Die Konstruktor-Funktion für das CtrlO kann selbst als Element des globalen GOC definiert werden. Das GOC-Objekt erzeugt dann das CtrlO als weiteres Unterobjekt durch expliziten Verweis auf das als Konstruktor zu verwendende Funktionsobjekt (this[“Name_des_Funktionsobjekts“]) nach dem new-Operator. Dass sowas tatsächlich geht, ist hier aber nur eine Randnotiz (siehe hierzu den Blog-Artikel Javascript: Einsatz des new-Operators mit Variablen und dynamischer Vorgabe der Konstruktorfunktion).

Im Beispiel wird per “$(..).each()”-Funktion über selektierten Objekte iteriert; wir möchten dabei z.B. gerne jedes der per $(“.enlarge”) ermittelten <IMG>-Tags um eine neues künstliches Attribut ergänzen; so könnten wir in diesem Attribut etwa eine Nummer hinterlegen, die wir später zur Identifikation des Bildes nutzen. Die Attribut-Ergänzung soll im Beispiel über die Methode “set_img_nr()” des CtrlOs GOC[“CtrlO_Manipulate_Pics”] geschehen.

Das Dumme ist nun, dass this innerhalb von “function() {…}” auf das aktuell identifizierte HTML-Element – also ein <IMG class=”enlarge” … >-Tag – verweist. Wir müssen das CtrlO daher anders referenzieren. Aus Gründen der besseren Wiederverwendbarkeit wollen wir zur Identifikation des CtrlOs aber keinen Bezug auf eine explizite Bezeichnung von Unterobjekten des GOC heranziehen; wir woll vielmehr auf ein geeignetes “this” zurückgreifen, das unmittelbar auf das CtrlO verweist. Andererseits soll aber die CtrlO-Methode “set_img_nr()” auch einen Verweis auf den aktuellen HTML-Knoten (also das IMG-Tag) als Parameter erhalten.

Ein wenig Nachdenken führt zu folgender Lösung für die Methode init_img_control() :


    this['Constr_CtrlO_Manipulate_Pics'].prototype.init_img_control = function() {
	
        // this still refers to the CtrlO
        ....
        ....
        // Use a helper variable to store the reference to the CtrlO

       var this_CtrlO = this;  // "this_CtrlO" points to the CtrlO (=GOC["CtrlO_Manipulate_Pics"])
                               // we could have called the helper variable also "that"
        ....
        $(".enlarge").each(
            function () {
                // Note: "this" now points to the HTML object, here an identified img tag 
                // Note: the variable "this_CtrlO" is found by implicit search in nested JS-functions 
                ....				
                .....
                // Code to perform actions, e.g. on the HTML object
                // console.log("id des HTML-Elements : " + $(this).attr("id");
                .....
                // we refer to the appropriate method of the CtrlO via the helper variable  
                // and provide the reference to the <IMG> tag (=this) as a parameter 

                this_CtrlO.set_img_nr(this); 
                ....
            }	
        );
        .....	
    };

 
Alles gut!
Der Profi erkennt sofort den klassischen Trick: Wir merken uns vor der Durchführung der jQuery-Selektion die Referenz auf das CtrlO in einer lokalen Hilfs-Variablen “this_CtrlO”. Da wir uns vor der Selektion ja noch im Kontext
einer gewöhnlichen Objekt-Methode befinden, verweist “this” dort ja noch auf das übergeordnete Objekt.

In der Callback-Funktion “function() {…}”, die innerhalb von .each() definiert wird, rufen wir dann die gewünschte Methode des CtrlO explizit unter Nutzung der Objekt-Referenz “this_CtrlO.Methodenname” auf. Die Variable wird im Lösungsansatz durch implizite Suche im Kontext der umgebenden, kapselnden Funktion init_img_control() gefunden.

Innerhalb der Callback-Funktion “function() {…}” verweist this nun jedoch auf das aktuell zu behandelnde HTML-Objekt der Selektion. Diese Referenz auf das HTML-Objekt können wir deshalb als Parameter (this) an die Objektmethode übergeben. Das zu bearbeitende HTML-Objekt kann danach auch in der CtrlO-Methode eindeutig identifiziert und bearbeitet werden.

Hinweis: Das zwischenzeitliche Speichern der this-Referenz in einer anderen Variablen entspricht in anderen Lehrbuchbeispielen oft dem Einsatz einer Hilfsvariablen “that”.

Unschöne impliziter Variablen-Suche

Wir haben uns mit dem obigen Lösungsansatz allerdings ein unschönes Thema für die Code-Pflege eingehandelt, das mit dem Hoisting von Variablen in Funktionen zu tun hat und in komplexeren Codes bei Unachtsamkeit zu Problemen führen kann: Die Variable “this_CtrlO” darf innerhalb von “function() {…}” an keiner Stelle über var-Statements redefiniert werden – auch nicht nach dem Statement “this_CtrlO.set_img_nr(this);”. Man erkennt leider nicht zwingend, dass es sich eigentlich um einen Parameter handelt, der nach unten durchgereicht wird. Das würde man gerne etwas expliziter sehen.

Man könnte diesem Thema einerseits dadurch ausweichen, dass man die Werte in Variablen speichert, die über das GOC explizit adressiert werden. Das würde unsere Kapselung aber auch wieder durchbrechen. Besser erscheint eine Übergabe der Referenz als Parameter in den each()-Bereich. Ein anderer Ansatz besteht deshalb in der expliziten Übergabe an eine sog. “immediate function” – das ist zwar auch nicht optimal, aber schon ein wenig besser. Man erkennt die Variable wenigstens als Parameter. Ganz nach unten durchreichen kann man die Referenz auf das CtrlO in diesem Falle halt leider nicht.


    this['Constr_CtrlO_Manipulate_Pics'].prototype.init_img_control = function() {

        // this still refers to the CtrlO
        ....
        ....
        // Use a helper variable to store the reference to the CtrlO

        var this_CtrlO = this;  // "this_CtrlO" points to the CtrlO (=GOC["CtrlO_Manipulate_Pics"])
                                // we could have called the helper variable also "that"
        ....
        ( function (pointer_CtrlO) {	
              $(".enlarge").each(
                  function () {
                      // Note: "this" now points to the HTML object, here an identified img tag 
	
                      // get external reference to the CtrlO
                      var CtrlO = pointer_CtrlO; // best at the top of the function code 
                      ....				
                      .....
                      CtrlO.set_img_nr(this); 
                      ....
                  }	
              );
          }
        )(this_CtrlO);
        .....	
    };

 
Man beachte: Die “immediate function” wird im Kontext des vorliegenden Beispiels in der Initialisierungssfunktion “init_img_control” nur genau einmal ausgeführt.

Fazit

Über die Callback-Funktion, die innerhalb der “.each()”-Funktion für Selektionen zu definieren ist, lassen sich auch Methoden eines abstrakten Control Objects [CtrlO] zur Behandlung der selektierten HTML-Objekte aufrufen. Das gilt selbst dann, wenn die Selektion $(..).each( ..) innerhalb einer anderen
Methode desselben CtrlOs vorgenommen wird. Dem Kontextwechsel des this-Operators in den verschiedenen Code-Bereichen der Funktionen beugt man durch rechtzeitige Zwischenspeicherung in einer geeigneten lokalen Hilfsvariable im Scope der kapselnden Methode vor. Die this-Referenz auf das selektierte, aktuell zu behandelnde HTML-Objekt kann man den CtrlO-Methoden als Parameter übergeben. Damit können Aufgaben, die im Rahmen von .each() durchzuführen sind, vollständig an geeignete Methoden von Control Objects delegiert werden.

Viel Spaß weiterhin mit jQuery, Javascript und der Kapselung von Funktionalität in Objekt-Methoden.

Responsive fluid multi-column layouts – main menu control with JS/jQuery and font-size adaption – V

We continue with our series on responsive and at the same time fluid layouts with multiple columns :

Responsive fluid multi-column layouts – the DIV order problem – I
Responsive fluid multi-column layouts – the DIV order problem – II
Responsive fluid multi-column layouts – the DIV order problem – III
Responsive fluid multi-column layouts – with a responsive horizontal menu – IV

In the first article we had posed the problem of a required DIV order for an efficient realization of responsive fluid layouts. A complete overview over our responsive test scenario and over related HTML/CSS codes was given in articles II and III. In the fourth article of the series we looked at the responsive adaption of an originally horizontal menu to different viewport width ranges. So far all without Javascript [JS].

At small viewport widths (our so called viewport width Range I; see the second article of this series for a definition of viewport width ranges) we offered a “menu button” instead of a complete horizontal menu line. A mouseOver event over the button container (and in smartphones a tap on the menu button) opened the menu – but now in an adapted vertical form. See the pictures included in our last article.

Because no Javascript was used, the user had to move the mouse outside the visible button and menu areas to make the menu disappear. On a smartphone he/she would have to tap the finger to a point outside the visible menu area. Though functional (e.g. for users who deactivated JS) this kind of handling could be confusing. JS/jQuery gives us the chance to improve the situation by reacting to button clicks. We shall implement the required functionality in an object oriented way.

JS in addition gives us the opportunity to load or exchange CSS files. This may help us to react to the detection of mobile devices and e.g. adjust font-sizes by loading an adapted CSS file.

We shall discuss and apply both JS based techniques to our simple responsive test example. So, be prepared for a long code intensive article and switch the coffee machine on. Those who are impatient and rather would study code first may jump to this paragraph.

New objective for user interaction with the menu button

A more consistent handling of successive clicks on our “menu button” and of resize events after clicks would be:

  • A first click on the menu button in Range I should make the menu visible (in vertical form and above all other page elements).
  • A subsequent second click should hide the menu again.
  • A “mouseover” event should become obsolete.
  • When we resize the browser menu on a desktop by mouse dragging or on a smartphone by device rotation the menu should return to the original form and visibility defined by the CSS settings for the viewport width range reached.

In other words: The menu button in Range I should work like a toggle button for successive clicks and viewport resizing shall give the standard CSS settings priority again.

Before reading further about a series of details you may want to try our simple test example:
https://linux-blog.anracom.com/examples/fluid/fluid_standard2.html

Toolset and JS strategy

We will use jQuery. Our JS strategy will be to create a “control object” [CtrlO] based on a constructor with prototype functions (“methods”) to manage the event handling. The approach of delegating event handling to object methods may appear unusual to JS beginners – but the initially required code overhead (in comparison to elementary “onClick”-handlers for the HTML elements) eventually leads in my opinion to a much better structured and manageable code for more complex pages – one CtrlO for each distinguished UI interaction area. This blows up the JS discussion a bit – but may be an interesting side aspect for some readers.

We assume that the reader is already familiar with the HTML code for the menu and the related CSS definitions presented in the last article. Before starting a in depth JS code discussion we first discuss some typical obstacles to overcome.

General challenges of a Javascript involvement for responsiveness

There are two major challenges that arise when you want to realize responsiveness mainly via Javascript and not only via CSS width conditions of the form

@media screen and (max-width : ….) { CSS statements for defined viewport width ranges }

To understand the type of problems that may occur imagine a user who continuously changes the viewport width up and down – e.g. by changing the browsers window size with the mouse on a desktop or indirectly by using the browsers scaling functionality. On a smartphone he/she could rotate the device from vertical to horizontal orientation and back again. Both actions trigger frequent or even permanent window “resize”-events to which the browser must react properly.

Problem 1: Priority of CSS property changes done by JS

One important thing is that CSS properties changed by Javascript – e.g. during the transition over viewport width threshold – automatically get a high priority:

Whatever CSS properties of HTML elements you set explicitly with JS: The change works as if a the property was changed inline for the affected DOM tree element (or as if a new line were added to the bottom of your CSS code). This in turn means: All previous settings – including the ones for the viewport width ranges – are overwritten! As a consequence your responsiveness may be hampered. E.g., if you at a viewport width threshold changed the position property of an HTML element to “absolute” via Javascript it would without any further measures stay so afterwards – even if your viewport width changes and your CSS rules for a certain viewport width range said “position:relative;”.

You could avoid this by using the CSS “!important” flag for the affected CSS properties in your CSS rules for certain viewport width ranges. But this “protection” of the property setting may in realistic scenarios conflict with other temporal and reasonable changes inflicted by other user UI interaction in a certain viewport range.

Alternatively you could check all the time by JS whether some new resize events are triggered in your browser and compare the present viewport size to threshold values and reset properties by Javascript again. This leads to problem 2. Actually, for most practical cases there is a more intelligent way to deal with this problem. See below.

Problem 2: Permanent tracking of resize events and aligning of CSS property settings between JS and our basic CSS definitions

If you need to make property changes via JS in certain viewport ranges, JS must get information about the present size of the viewport and must restore desired CSS property values. Your JS could react to the “window.onResize” event – which fires permanently as long as the browser window size changes. Ok, but if you have to
follow this event permanently and make all the same decisions all the time then JS will consume CPU time. And depending on the kind and depth of decisions this can have a significant effect on performance. On the other side you MUST align the decisions made on the Javascript side with your standard CSS settings for viewport width ranges defined in your CSS files, or inline CSS definitions for tags in the HTML code (i.e. in your CSS file). Together with problem 1 this may become a logical challenge.

Some rules to overcome possible obstacles of JS usage in responsive scenarios

How to circumvent the obstacles discussed above? In my opinion rule number 1 is:

You should always build your responsiveness mainly on pure CSS definitions for width ranges and involve JS only where and when absolutely necessary or helpful. The advantages in my opinion are: A CSS centered approach is more efficient, definitions for responsiveness are concentrated at one point and directly connected to other layout definitions, most of the maintenance does not require any programming knowledge and the performance of the browser gets much better.

In our specific test case: Involve JS only for the handling of the users interaction with the menu button in Range I and restrict the use of JS for this button – as it is only visible in viewport width Range I.

If you follow this main rule then the combination of two simple additional “tricks” can be helpful:

  • Make your JS functionality intelligent enough to react to resize events only when necessary and restore the old conditions as soon as a resize happens. But do it only once (!) to avoid a permanent tracking of the resize event and a permanent repetition of decisions and reactions to it.
  • Change CSS property values via loading an additional CSS class into a HTML object. Restoration of the original properties then becomes as simple as just removing the class again from the HTML object.

The first point means that we actually may sometimes track a resize event and react to it – but only under certain conditions. This is possible via dynamically switching the event handling On and Off again. More specifically: The very function that was triggered by an event handler for the resize event may turn off the same event handler!

We shall show below how to realize these rules for our test example. The basic principles can be transferred to more complex tasks.

Removing the existing CSS “hover” pseudo class definitions with jQuery

There is another small obstacle which we need to overcome in our test example. For width Range I we had defined a rollover effect via a “:hover” definition for one of the inner menu containers “div#menu_cont”:

Excerpt of the HTML code for the horizontal main menu

<body onload="init_page();">
<div id="all">
	<div id="head">
		<div id="main_menu_cont">
			<div id="bg_hor_menu"></div>
			<div id="menu_cont" class="hover">
				<a id="hmen_but" title="main menu" href="#"></a>
				<div id="hmen_cont" class="hmen_cont">
					<div id="bg_ver_menu"></div>
					<ul id="menu_lst">
						<li><div class="hmen_pkt"><p><a href="#">h-menu 1</a></p></div></li>
						<li><div class="hmen_pkt"><p><a href="#">h-menu 2</a></p></div></li>
						<li><div class="hmen_pkt"><p><a href="#">h-menu 3</a></p></div></li>
						<li><div class="hmen_pkt"><p><a href="#">h-menu 4</a></p></div></li>
						<li>&
lt;div class="hmen_pkt"><p><a href="#">h-menu 5</a></p></div></li>
						<li class="hm_li_right"><div class="hmen_pkt"><a id="but2" href="#"></a></div></li>
						<li class="floatstop"></li>
					</ul>
				</div>
			</div>
			<p class="floatstop"> </p>
		</div>
	</div>
....
....
</div>
....
....


@media screen and (max-width : 539px)  {
....	
	div#menu_cont:hover div.hmen_cont {
		visibility: visible; 
	}
....
}

 
This provided us with a working solution for browsers with deactivated JS. However, when the target browser allows for JS we do not want this CSS pseudoclass definition to be active, because the “hover” effect shall be replaced by clicks on our menu button.

Unfortunately there is no way to change pseudo class definitions directly with JS or jQuery. Therefore, we move our “hover” settings into a class “hover” which we already smuggled into the HTML code of “div#menu_cont” above.

@media screen and (max-width : 539px)  {
....	
	/*
	div#menu_cont:hover div.hmen_cont {
		visibility: visible; 
	}
	*/ 
	
	div.hover:hover div.hmen_cont {
		visibility: visible; 
	}

....
}

 
What is the advantage? With the help of JS and jQuery we can easily remove CSS classes from a tag. So, if JS is activated in the target browser one of our first actions would be to remove the class “hover” from the “div#menu_cont” element – and we would get rid of the hover effect completely. Thus, we do not need to remove our hover statement from the CSS code and remain prepared for non-JS situations.

A word about font sizes for mobiles

Although it is convenient to use a responsive design as a first step to adapt web pages to smartphones and other mobile devices there is much truth in the statement that responsiveness is not equal to a dedicated mobile support.

First the general user interaction with an interface of limited physical dimensions is different from working on a desktop. Related aspects can be taken care of in responsive HTML/CSS/JS-definitions – but it includes logically more consideration than just planning reactions to small viewport widths in terms of pixels.

Another problem is the fact that due to the physical pixel density on mobiles a responsive layout without adjusting font-sizes may not be helpful. Especially for elderly people who have difficulties with reading small letters. Even if we do not want to investigate and distinguish pixel densities of different smartphones in detail, we would in general like to use bigger font-sizes on a smartphone than on a desktop browser:

Bigger font-sizes in certain viewport width ranges?
One first approach could be to enlarge font-sizes for small viewport width ranges. The disadvantage of this approach is that it also leads to enlarged fonts in desktop browsers, too, when the user shrinks the browser’s window width. But especially on a desktop we do not need to enlarge the normal font-size for narrow browser windows. There it is even counterproductive! So, if you follow a policy to raise font-size values for small viewport widths, do it moderately and without exaggeration.

Check for mobile browsers and load adapted CSS files with larger fonts!
With Javascript I personally would follow a different approach:

  • Firstly, I would use JS to check for a mobile browser and
  • secondly, I would enlarge text(!)-fonts if a mobile browser is detected –
    without changing dimensions of other HTML objects.

We can achieve font-size changes simply by

  • either appending an additional style sheet
  • or replacing the existing style sheet with another style sheet

that contains new font-size definitions and another adjustments for mobiles for all width-ranges. Whether you replace or append might be a question of complexity. If you intend to change important viewport width thresholds I would choose a replacement strategy. When appending additional statements it may become very difficult to see and plan what has to be changed. For our simple test case will will append an additional file. (Its easier to see what we have changed, then.)

What do we need to take care of when changing font-sizes?
Personally, I scale almost all dimensions of my HTML objects by “em” or “rem”. In such a case we would NOT change the overall font-size definition in the <html>- or <body>-tag because this would rescale the whole page layout. We only change the font-settings and adjust other special size related properties for <p> and other tags in the additional CSS file! Note that changed font-sizes may in particular require an adjustment of (min-)heights, line-heights, margins and paddings, also of surrounding elements in our basic layout.

Another topic is the setting of width thresholds for menu adaptions: We saw in the last article that we set our width thresholds for changing padding/margin-values of menu elements such that we avoided wrapping into several menu lines. However, as we have explained, these threshold values depend on the font-size, too. Therefore, we need to adapt or introduce new viewport width thresholds for our menu behavior.

The modified HTML and CSS file

For reasons of completeness we list both the modified HTML and its CSS file below.

HTML file for our test case

<!DOCTYPE html>
<html>
<head>
<meta charset="UTF-8">
<meta name="viewport" content="width=device-width, initial-scale=1">
<title>fluid standard 2</title>
<link id="myMainCSS" href="css/fluid_standard2.css" rel="stylesheet">
<!-- The following CSS sheet will be loaded by JS  -->
<!--<link href="css/fluid_standard2_mobile.css" rel="stylesheet">-->

<script type="text/javascript" src="scripts/jquery-2.1.1.min.js"></script>
<script type="text/javascript" src="scripts/detectmobilebrowser_jQuery.js"></script>
<script type="text/javascript" src="scripts/response2.js"></script>
</head>

<body onload="page_init();">
<!-- 3 spalten layout -->
<div id="all">
	<div id="head">
		<div id="main_menu_cont">
			<div id="bg_hor_menu"></div>
			<div id="menu_cont" class="hover">
				<a id="hmen_but" title="main menu" href="#"></a>
				<div id="hmen_cont" class="hmen_cont">
					<div id="bg_menu"></div>
					<ul id="menu_lst">
						<li><div class="hmen_pkt"><p><a href="#">h-menu 1</a></p></div></li>
						<li><div class="hmen_pkt"><p><a href="#">h-menu 2</a></p></div></li>
						<li><div class="hmen_pkt"><p><a href="#">h-menu 3</a></p></div></li>
						<li><div class="hmen_pkt"><p><a href="#">h-menu 4</a></p></div></li>
						<li><div class="hmen_pkt"><p><a href="#">h-menu 5</a></p></div></li>
						<li class="hm_li_
right"><div class="hmen_pkt"><a id="but2" href="#"></a></div></li>
						<li class="floatstop"></li>
					</ul>
				</div>
			</div>
			<p class="floatstop"> </p>
		</div>
	</div>


	<div id="outer_cont">
		<div id="bg_left0"></div>
		<div id="bg_right0">
			<!-- do not remove ! -->
			<div id="bg_right_inner0"></div>
		</div>
		<div id="bg_info0"></div>
		
		<div id="float_cont">
			<div id="main_cont">
				<div id="bg_left1"></div>
				<div id="bg_info1"></div>
				
				<div id="info_cont">
					<div id="float_info">
						<div id="bg_info2"></div>
						<div id="info"> 
							<p>Lorem ipsum ... </p>
							<p> </p>
							<p>Lorem ipsum ...</p>
							<p> </p>
							<p>This is the end, my friend<br> </p>
						</div>
					</div>
					<div id="left_nav">
						<div id="bg_left2"></div>
						<div id="left_inner">
							<ul>
								<li><p><a href="#">sub menu point 1</a></p></li>
								<li><p><a href="#">sub menu point 2</a></p></li>
								<li><p><a href="#">sub menu point 3</a></p></li>
							</ul>
						</div>
					</div>
					<p class="floatstop"> </p>
				</div>
			</div>
			
			<div id="right">
				<div id="bg_right2"></div>
				<div id="right_inner">
					<p>Some stupid text - just to show something</p>telekom störung
					<p> </p>
					<p>Some stupid text - just to show something</p>
					<p>Some stupid text - just to show something</p>
				</div>
			</div> 
			
			<p class="floatstop"> </p>

		</div>
	</div>
</div>
</body>
</html>


You see that we now load JS files – first the jQuery file of a present version, then a file suited for jQuery which helps to detect browsers. You can download the latter open source file, which contains a long regex test on browser information, from the following web page:
http://detectmobilebrowsers.com/
The last JS file is our own Javascript code (see below).

CSS file for our test case

@CHARSET "UTF-8";

html {
	font-size:10px;
}

body {
	margin-left:0; 
	margin-right:0;
	margin-top: 0; 
	background-image: url(../image/hg_straa_mp.jpg);
	background-repeat:no-repeat; 
	background-position:top center;
	
	font-family: Arial; 
}

p { 
	font-size: 1.4rem; 
	line-height: 1.6rem;
	margin: 0;
}
	

div#all { 
	position:relative; 
	width:100%; 
	padding-bottom: 1.0rem;
	padding-top: 1.0rem;

}

/* The header region */	
/* *******************/

div#head { 
	position:relative; 
	width:100%; 
	min-height: 3.0rem;
	z-index: 6; 
}

/* The main contents container */
/* *************************** */
	
div#outer_cont { 
	position:relative; 
	width:100%; 
	min-height: 10.0rem;
	margin-top:1.0rem;
	z-index: 1; 
}
	

/* some elementary width definitions */
/* --------------------------------  */
div#left_nav, 
div#bg_left0, 
div#bg_left1  {
	width: 14rem;
}

div#left_nav {
	margin-left: 1.0rem;
	
}

div#right,
div#bg_
right0 {
	width: 27%;
}


/* background elements for all columns in range I */

div#bg_left0, 
div#bg_left1,
div#bg_left2,
div#bg_right0,
div#bg_right_inner0,
div#bg_right2,
div#bg_info0,
div#bg_info1,
div#bg_info2  {
	position: absolute;
	top:0;
	bottom:0;
	border-radius: 0.8rem;
}

div#bg_left0 {
	left:1.0rem;
	background-color: #FFF;
	opacity: 0.5;
	border: 0px solid #F00;
	z-index:1;
}

div#bg_info0 {
	position: absolute;
	left:16.0rem;
	right:27%; 
	background-color: #FFF;
	opacity: 0.85;
	border: 0px solid #00F;
	z-index:1;
}

div#bg_right0 {
	right: 0;
	border: 0px solid #F00;
	z-index:1;
}

div#bg_right_inner0 {
	left: 1.0rem;
	right: 1.0rem;
	background-color: #FEEEBB;
	opacity:0.80;
}


/* The float container and its basic elements */	
/* ****************************************** */

div#float_cont { 
	position:relative; 
	width: 100%; 
	border: 0px solid #FF0000;
	z-index:5;
}

/* floated left main container and 
 * its background elements for range II*/

div#main_cont { 
	position: relative;
	float: left; 
	width:100%;
	min-height: 2.0rem;
	border: 0px solid #009900;
	z-index:1;
}


div#bg_left1 {
	display: none;     
	left:1.0rem;
	background-color: #FFF;
	opacity: 0.75;
	border: 0px solid #F00;
	z-index:1;
}

div#bg_info1 {
	display: none; 
	left:16.0rem;
	right:1.0rem; 
	background-color: #FFF;
	opacity: 0.9;
	border: 0px solid #00F;
	z-index:1;
}


/* The main column */
/* --------------- */


div#info_cont {
	position: relative; 
	width:100%; 
	border:0px #F00 solid;
}

div#float_info { 
	position:relative; 
	float:left;
	width: 100%; 
	/*background-color: #99e;*/ 
	border: 0px solid #FF0000;
	z-index:2;
}


div#info { 
	position: relative; 
	margin: 0 27% 0 16rem;
	width:auto;
	/*background-color: #0f0;*/ 
	padding:0.8rem;
	/*height:200px;*/
	z-index: 1;
}

div#bg_info2 {
	display: none; 
	left:1.0rem;
	right:1.0rem; 
	background-color: #FFB;
	background-color: #FFF;
	opacity: 0.95;
	border: 0px solid #00F;
	z-index:1;
}


/* left column */
/* ----------- */

div#left_nav { 
	position:relative; 
	float:left;
	border: 0px solid #009900;
	margin-left: -100%;
	padding-left: 1.0rem;
	z-index:5;
}

div#left_inner {
	position: relative; 
	width:auto;
	padding: 0.8rem;
	z-index: 2; 
}

div#bg_left2 {
	display: none;     
	left:1.0rem;
	right:1.0rem; 
	border: 0px solid #F00;
	background-color: #FFF;
	opacity: 0.9;
	z-index:1; 
}


/* right column */
/* ------------ */

div#right { 
	float:left;
	position:relative; 
	margin-left: -27%;
	min-height: 2.0rem;
	/*min-width: 15.2rem;*/ 
	/*background-color: #eee;*/ 
	border: 0px solid #009900;
	z-index:2;
}

div#right_inner {
	position:relative;
	width:auto;
	margin-left: 1.0em;
	margin-right: 1.0em;
	padding: 0.8rem;
	z-index: 2;
}

div#bg_right2 {
	display: none;     
	left:1.0rem;
	right:1.0rem; 
	border: 0px solid #F00;
	background-color: #FEEEBB;
	opacity: 0.85;
	z-index:1; 
}


/* Support elements */ 	

p.floatstop {
	clear:both;
	height:0;
	margin:0;
	line-height:0;
	padding: 0;
	font-size: 0;
}


/* contents of the upper horizontal menu */
/*-------------------------------------- */


div#main_menu_cont {
	display: block; 
	position: relative;
	width: auto;   
	margin-left: 1.0rem; 
	margin-right: 1.0rem; 
	min-height: 3.0rem;
}

div#bg_hor_menu {
	display:block; 
	position: absolute; 
	top: 0;
	bottom: 0;
	left: 0; 
	right: 0; 
	
border-radius: 0.8rem;
	background-color: #FFF; 
	opacity: 0.75; 
	z-index: 1; 
}


div#menu_cont {
	display: block; 
	position: relative;
	float:right; 
	width: 100%;  
	min-height: 3.0rem;
	z-index: 2; 
	
	/* helps to center its enclosed container */
	text-align: center; 
}


a#hmen_but {
	display: none; 
	width: 4.6rem;
	height: 2.2rem;
	margin-top:0.2rem; 
	background-color: #A90000;
	border-top: 0.2rem #CCC solid; 
	border-right: 0.2rem #CCC solid; 
	border-left: 0.2rem #AAA solid; 
	border-bottom: 0.2rem #AAA solid; 
}


div.hmen_cont {
	position: relative;
	
	/* display: block; */  
	
	/* makes horizontal centering possible despite undefined width */
	display: inline-block; 
	
	min-height: 3.0rem;
	
	/* A second method of centering - optically determined by the viewport width */
	/*
	width: auto;
	margin-right:0.8em;
	margin-left:0.8em;
	*/
	
	border-radius: 1.0rem;
	
	/* centers the enclosed list ! */
	text-align: center; 
}

div#hmen_cont.vis {
	visibility:visible;  
} 


div#bg_menu {
	display:block; 
	position: absolute; 
	top: 0;
	bottom: 0;
	left: 0; 
	right: 0; 
	border-radius: 0.8rem;
	background-color: #FFF; 
	opacity: 1.0; 
	z-index: 1; 
}


div.hmen_cont ul {
	position: relative;
	
	/* makes horizontal centering possible despite undefined width */
	display: inline-block;
	list-style-type: none;
	/*width: 100%;*/
	margin: 0;
	padding: 0;
	padding-left: 0.4rem;
	padding-right: 0.4rem;
	z-index:2;
}

div.hmen_cont ul li, 
div.hmen_cont ul li.hm_li_left,
div.hmen_cont ul li.hm_li_right {
	float: left;
	padding: 0.2rem 4.0rem 0.2rem 4.0rem;
	margin:0; 
	margin-top:0.2rem;
	height: 2.2rem;
	/*border-left: #ffffff 1px solid;*/
	border-right: #a90000 0.2rem solid;
	min-height: 2.0rem;
}

div.hmen_cont ul li.hm_li_left {
	border-left: #a90000 0.2rem solid;
}	
div.hmen_cont ul li.hm_li_right {
	border-right: 0; 
}	

	
div.hmen_cont ul li.floatstop {
	float:none;
	clear:both;
	height:0; 
	min-height: 0;
	margin:0;
	line-height:0;
	padding: 0;
	font-size: 0;
	border:0;
}

div.hmen_cont ul li a, 
div.hmen_cont ul li a:visited  {
	text-decoration: none; 
	color: #000; 
}

div.hmen_cont ul li a:hover {
	color: #A90000; 
	background-color: #FFFFBB; 
}


a#but2 {
	display: block;
	width: 1.6rem;
	height: 1.6rem;
	background-color: #A90000;
	border-top: 0.2em #CCC solid; 
	border-right: 0.2rem #CCC solid; 
	border-left: 0.2rem #AAA solid; 
	border-bottom: 0.2em #AAA solid; 
}


/* contents of the left vertical menu */

#left_inner ul {
	width:100%;
	min-height: 2.2rem;
	list-style-type: none;
	padding: 0;
	margin: 0;
}

#left_inner ul li {
	width:100%; 
	min-height: 2.2rem;
}


#left_inner ul li a, 
#left_inner ul li a:visited {
	color: #990000;
	
}
#left_inner ul li a:hover {
	color: #000;     
	background-color: #FFFFBB; 
}


/* ---------------------------------------------- */    
	
/* @media screen decision and settings for the horizontal menu */
	
@media screen and (max-width : 860px) {
	
	div.hmen_cont ul li, 
	div.hmen_cont ul li.hm_li_left,
	div.hmen_cont ul li.hm_li_right
	 {
		padding: 0.2rem 1.2rem 0.2rem 1.2rem;
	}
} 


/* @media screen decision and settings for range II */

@media screen and (min-width : 540px) and (max-width :828px) {
    
	div#info { 
		margin: 0 2.0rem 0 16rem;
		background-color:transparent;
	}
   
	div#right { 
		float:left;
		margin-top:1.0rem;
		margin-left: 0;
		margin-right: 0; 
		width:100%;
	 }
    
	div#right_inner {
		margin-left: 1.0rem; 
		
margin-right: 1.0rem;
		width: auto; 
		/* background-color: #FEEEBB; */
		border-radius: 0.8rem;
	}
    
	/*
	 * Switch OFF backgrounds after 1st viewport width transition 
	 */
	div#bg_left0 {
		display: none;  
	}
	div#bg_info0 {
		display:none;  
	}
	div#bg_right0 {
		display: none; 
	}
    
    
	 /*
	  * Switch ON backgrounds after first viewport width transition 
	 */
	 
	 div#bg_left1 { 
		display: block; 
	 } 
	   
	 div#bg_info1 { 
		display: block; 
	 }
	 div#bg_right2 { 
		display: block; 
		opacity: 0.9;
	 }

}

    
/* ---------------------------------------------- */    
  

/* @media screen decision and settings for range I */


@media screen and (max-width : 539px)  {
    
	
	div#info { 
		margin: 0 1.0rem 0 1.0rem;
		/* background-color: #FFB; */
		border-radius: 0.8rem;
	}
	
	
	div#left_nav { 
		margin-top:1.0rem;
		margin-left: 0;
		width:100%;
		padding:0;
	}
	  
	div#left_inner {
		width:auto;
		padding: 0.8rem;
		margin: 0 1.0rem 0 1.0rem;
		/*  background-color: #DDDDDD; */
		border-radius: 0.8rem;
		z-index: 2; 
	}
	
	div#right { 
		float:left;
		margin-top:1.0rem;
		margin-left: 0;
		margin-right: 0; 
		width:100%;
	 }
	
	div#right_inner {
		margin-left: 1.0rem; 
		margin-right: 1.0rem;
		width: auto; 
		/* background-color: #FEEEBB;*/
		border-radius: 0.8rem;
	}
   
	/*
	 * Switch OFF backgrounds after 2nd viewport width transition 
	 */
	
	div#bg_info0 { 
		display: none; 
	 }
	div#bg_info1 { 
		display: none; 
	 }
	 
	div#bg_right0 {
		display: none;  
	}
	 
	div#bg_left0 {
		display: none; 
	}
	div#bg_left1 { 
		display: none; 
	}   
	
	/*
	 * Switch ON backgrounds after 2nd viewport width transition 
	*/
	div#bg_info2 { 
		display: block; 
		opacity: 0.95; 
	}
	div#bg_left2 { 
		display: block; 
		opacity: 0.95; 
	}   
	div#bg_right2 { 
		display: block; 
		opacity:0.9; 
	}


	/*
	* Treatment of the horizontal menu 
	*/
	
	div#bg_hor_menu {
		opacity: 1.0;
	}
	

	div#menu_cont {
		margin-right: 4.0rem; 
		width: 5.0rem;  /* button size ! */
		height: 3.0rem;
	}
	
	a#hmen_but {
		display: block; 
	}


	/*
	div#menu_cont:hover div.hmen_cont {
		visibility: visible; 
	}
	*/ 
	
	div.hover:hover div.hmen_cont {
		visibility: visible; 
	}

	
	div.hmen_cont {
		position: absolute;
		visibility:hidden; 
		top:3.0rem;
		right:0; 
		min-height: 3.0rem;
		
		width: auto;
		min-width: 18.4rem;
		max-width: 25.0rem;
		
		margin-right:0rem;
		margin-left:auto;
		
		padding: 0.8rem; 
		
		background-color: #DDD;
		border-radius: 1.0em;
		
		text-align: left; 
	}
	
	div#bg_menu {
		background-color: #DDD;
		opacity: 1.0;   
	}
	
	
	div.hmen_cont ul {
		position: relative;
		list-style-type: none;
		width: auto;
		margin: 0;
		padding: 0;
	}
	
	div.hmen_cont ul li, 
	div.hmen_cont ul li.hm_li_left,
	div.hmen_cont ul li.hm_li_right {
		float: none;
		padding: 0.2rem 0.4rem 0.2rem 0.8rem;
		width:auto;
		/*border-left: #ffffff 1px solid;*/
		border-right: #a90000 0.0rem solid;
		min-height: 2.0rem;
	}
		
	div.hmen_cont ul li.floatstop {
		float:none;
	}

	div.hmen_cont ul li p {
		margin-top:0; 
		line-height: 1.6rem; 
	
	}

}    

/* extreme case - reached e.g. by Ctrl + */
/* -------------------------------------- */
@media screen and (max-width : 260px)  {
	div#menu_cont {
		margin-right: 4.0rem; 
	}
	
	div.hmen_cont {Additional CSS file to be loaded dynamically for mobiles
		right: -4.0rem;
		width: auto; 
		min-width: 0; 
	}
	
	
div#bg_menu {
		background-color: #DDD;  
	}
	
}	

 
More or less the same as presented in our last article. Note that we have introduced class “.vis” :

div#hmen_cont.vis {
    visibility:visible;
}

We shall use use this class in our Javascript code.

Additional CSS file to be loaded dynamically for mobiles

@CHARSET "UTF-8";
p { 
	font-size: 1.6rem; 
	line-height: 2.0rem;
	margin: 0;
}

	
/* contents of the upper horizontal menu */
/*-------------------------------------- */

div.hmen_cont ul li, 
div.hmen_cont ul li.hm_li_left,
div.hmen_cont ul li.hm_li_right {
	padding: 0.2rem 3.4rem 0.2rem 3.4rem;
	height: 2.4rem;
	min-height: 2.2rem;
	line-height: 2.0rem;
}

/*-------------------------------------- */
	
/* @media screen decision and settings for the horizontal menu */
	
@media screen and (max-width : 860px) {
	
	div.hmen_cont ul li, 
	div.hmen_cont ul li.hm_li_left,
	div.hmen_cont ul li.hm_li_right {
		padding: 0.2rem 1.0rem 0.2rem 1.0rem;
	}
} 
    
/* ---------------------------------------------- */    

/* @media screen decision and settings for range I */

@media screen and (max-width : 539px)  {
    
	div.hmen_cont ul li, 
	div.hmen_cont ul li.hm_li_left,
	div.hmen_cont ul li.hm_li_right {
		padding: 0.2rem 0.4rem 0.2rem 0.8rem;
	}

	div.hmen_cont ul li p {
		margin-top:0; 
		line-height: 2.0rem; 
	}
}    

 
You see that we raised the <p>-font-size from 1.4rem to 1.6rem and adjusted other properties. This change is moderate – the reason being that I was too lazy to adapt the columns of the whole web structure. For larger font-sizes you had e.g. to enlarge the right menu block. But the font-size effect will be visible – and this is enough for demonstration purposes.

The JS code

The JS code is propbably a bit more complicated than the reader expects – but we shall address interesting points in a minute. Still the code at some points is kept relatively simple and can/must of course be improved for real world cases.

JS code to load an additional style sheet for mobiles and to control the menu button actions at small viewport widths in our test example

* JS example to control the menu in a responsive layout
 */


// --------------------------------------------------------
// Constructor declarations
// --------------------------------------------------------

/**
 * Constructor of a global object controller object 
 * - to prevent clattering of the global space
 * - to build all CtrlOs (each CtrlO is a singleton) 
 */
function Anracon_GlobalObjectController(globalContext) {
	
	this.global = globalContext;

	// Prefixes for CtrlOs and their constructors
		this.ctrloPrefix  = "CtrlO_"; 
		this.constrPrefix = "Ctrl_";  

	// CtrlO names - here we have only one CtrlO, 
	// more CtrlOs would be handled on more complex pages
		this.ay_objNames 	 = new Array('Hmenu');   
		this.len_ay_objNames = this.ay_objNames.length; 


	// address of aditional mobile ccs file 
		this.cssMobileFileUrl = "css/fluid_standard2_mobile.css"; 
	
		
    // Initial action to check for Mobile browser and to load additional CSS sheet 
	// or to replace aaditional CSS sheet 	
	// check for mobile browser and react  
	// --------------------------------	
		
		// Shall the CSS file be replaced ? 
		this.replaceCss = false; // false: CSS file will be appended, true: ex. css file will be replaced
		
		// Tag of 
CSS file to be replaced 
		this.cssLinkId = "#myMainCSS"; 
		
		this.mobile = false; 
		if ($.browser != undefined ) {
			if ( $.browser.mobile != undefined ) {
				this.mobile = $.browser.mobile; 
			}	
		}
		
		// Load additional style sheet or replace existing style sheet to enlarge fonts  
		// done already here to avoid unnecessary flickering 
		this.mobile = true; 
		if ( this.mobile ) {
			this.loadCssFile( this.cssMobileFileUrl, this.replaceCss, this.cssLinkId ); 
		}
}


/**
 * GOC method to create all CtrlOs after (!) web page creation 
 * HTML object must exist before instanciating the CtrlOs 
 */
Anracon_GlobalObjectController.prototype.populate = function() {
	
	var ctrloName; 
	var constrName; 
	
	// Loop over all defined CtrlO names
	// ----------------------------------
	for (i=0; i < this.len_ay_objNames; i++) {
		ctrloName  = this.ctrloPrefix  + this.ay_objNames[i];
		constrName = this.constrPrefix + this.ay_objNames[i];
		console.log("constructor_name = " + constrName); 
		
		// Creation of all required CtrlOs 
		// -------------------------------
		// via indirect addressing and indirect call of constructors 
		this[ctrloName] = new this.global[constrName](ctrloName);  
	}
	
	this.pushObjectReferences(); 
};


/**
 * GOC method to dispatch references to every CtrlO across all CtrlOs 
 * each CtrlO should be able to address other CtrlOs 
 *  
 */
Anracon_GlobalObjectController.prototype.pushObjectReferences = function() {
	
	var i=0, j=0; 
	var presentCtrloName = '';
	var globalCtrloName = '';
	var localCtrloName  = ''; 
	
	var localCtrloPrefix = this.ctrloPrefix;  // We use the same name as CtrlOs are singletons
	
	// Loop over all CtrlOs
	// --------------------
	for (i=0; i < this.len_ay_objNames; i++) {
		
		// "Present" CtrlO to which references of OTHER CtrlOs are dispatched  
		presentCtrlOName = this.ctrloPrefix + this.ay_objNames[i];
		console.log("GOC push references into the following CtrlO :: i = " + i + " global CtrlO name = " + presentCtrlOName); 
		
		// Dispatch all other CtrlO references to the present CtrlO 
		// --------------------------------------------------------
		for (j=0; j < this.len_ay_objNames; j++) {
			if (j != i) {
				localCtrloName	= localCtrloPrefix + this.ay_objNames[j];
				globalCtrloName	= this.ctrloPrefix + this.ay_objNames[j];
				
				if ( this[presentCtrlOName][localCtrloName] == null || this[presentCtrlOName][localCtrloName] == 'undefined' ) {
					
					// assign the reference of the other CtrlO to a variable in the present CtrlO
					this[presentCtrlOName][localCtrloName] = this[globalCtrloName]; 
				}
				
				console.log(" reference to " + globalCtrloName + " assigned"); 
			}
		}
	}
}; 


/**
 * GOC method to load additional CSS sheets
 * 
 * @param url  - address of CSS sheet relative ot the HTML file 
 */
Anracon_GlobalObjectController.prototype.loadCssFile = function(url, replaceCss, cssLinkId) {
	
	var linkIdentifier = "<link rel=\"stylesheet\" type=\"text/css\" href=\"" + url + "\">"; 
	var cssLinkToFile = $(linkIdentifier);  // if already there it will not be cloned (see jQuery .append docu) 
	
	var styleSheetSelector = ''; 
	
	if ( replaceCss == undefined ) {
		replaceCss = false; 
	}
	
	if( cssLinkId != undefined ) {
		styleSheetSelector = cssLinkId + "[rel=stylesheet]"; 
	}

	// Non consistent parameters 	
	if ( replaceCss && styleSheetSelector == '') {
		// Include some error handling here .....
		// we just do nothing and thus fall back to the old CSS file 
		return; 
	}
	
	if ( replaceCss == true ) {
		$(styleSheetSelector).attr('href', url);
	}
	
	if ( !replaceCss ) {
		$("head").append(cssLinkToFile);
	}
}; 

r

/**
 * Constructor for the CtrlO which controls 
 * the user interaction with the horizontal menu
 * 
 *  @param obj_name  my own object name in the GOC
 */
function Ctrl_Hmenu(objName) {
	
	// Reference to our GOC
	// ----------------------
		this.GOC = Anracon_GOC;
		this.myName = this.GOC.ctrloPrefix + objName; 
		// other CtrlOs references are received through a dispatching process  	
	
	// HTML IDs = identifiers for jQuery 
	// -----------------------------------	
		this.id_menuCont  = "#" + "menu_cont";
		this.id_hmenuBut  = "#" + "hmen_but";
		this.id_hmenuCont = "#" + "hmen_cont";
		
		this.id_rightInner = "#" + "right_inner"; 
		
	// variables 
	// ----------	
		// button clicked ?   
		this.butMenuClicked = 0;
		// mobile browser ? 
		this.mobile = false; 
		
		
	// Some initial action 
	/// ******************	
		
	// switch off event handler for rollover set by CSS for non JS situations  
	// ------------------------------------
		$(this.id_menuCont).removeClass("hover"); 
			
	// check for mobile browser and react  
	// --------------------------------	
		if ($.browser != undefined ) {
			if ( $.browser.mobile != undefined ) {
				this.mobile = $.browser.mobile; 
			}
		}
		// Add message to the right column for test scenario
		this.rightTxt  = $(this.id_rightInner).html(); 
		this.mobileStr = ''; 
		if ( this.mobile ) {
			this.mobileStr = "<p style=\"color:red; font-weight:bold; margin-top:1.0rem;\">JS: Mobile browser detected!<br>Using bigger font-sizes!</p>" 
		}
		else {
			this.mobileStr = "<p style=\"color:red; font-weight:bold; margin-top:1.0rem;\">JS: No mobile browser detected!</p>" 
		}
		
		// Message 
		this.rightTxt += this.mobileStr; 
		$(this.id_rightInner).html(this.rightTxt); 
		
		// Load additional CSS-sheet
		// --- Not done here, but initially - see GOC ----
		
		
	// register functionality for controlled HTML elements
	// -------------------------
		this.register_events();
		
	console.log("Constructor of Ctrl-Object " + this.myName); 	

}


/**
 * CtrlO method to register events for the active elements of the menu container 
 */
Ctrl_Hmenu.prototype.register_events = function() {

	$(this.id_hmenuBut).click(
		$.proxy(this, 'displayHmenu')
	); 
    
	console.log("From CtrlO Hmenu: Callback for click on menu button registered " );                
};


/**
 * Ctrlo method to display the menu after a click on the menu button 
 */
Ctrl_Hmenu.prototype.displayHmenu = function(e) {
	
	var method = 0;	// 0: load and unload additiinal css class 
					// 1: directly change CSS property visibility
	
	e.preventDefault();
    
	if ( method == 0 ) {
		if ( this.butMenuClicked == 0 ) {
			$(this.id_hmenuCont).addClass("vis"); 
   	   	   	
			// activate handler for window.resize event 
			$(window).on("resize", $.proxy(this, 'removeClassVis') );
   	   	   	
			this.butMenuClicked = 1; 
			console.log("menu button clicked - menu activated" );                
		}
		else {
			// $(this.id_hmenu_cont).css('display', 'none'); 
			$(this.id_hmenuCont).removeClass("vis"); 
			this.butMenuClicked = 0; 
			console.log("menu button clicked - menu deactivated" );                
		}
	}
	else {
		if ( this.butMenuClicked == 0 ) {
			$(this.id_hmenuCont).css('visibility', 'visible'); 
			this.butMenuClicked = 1; 
			console.log("menu button clicked - menu activated" );                
		}
		else {
			$(this.id_hmenuCont).css('visibility', 'hidden'); 
			this.butMenuClicked = 0; 
			console.log("menu button clicked - menu deactivated" );                
		}
	}
};


/**
 * Ctrlo method to remove the visibility class from the menu button 
r
 *  - Note: this helps to avoid trouble with resizing 
 */
Ctrl_Hmenu.prototype.removeClassVis = function(e) {
	console.log("resize event");
	$(this.id_hmenuCont).removeClass("vis");
	this.butMenuClicked = 0; 
   	
	// remove handler for window.resize event to avoid permanent event handling 
	$(window).off("resize");
	
	console.log("class vis removed");

};


// --------------------------------------------------------------
// function declarations 
// --------------------------------------------------------------

/**
 * Function to create all CtrlOs in the GOC
 * more is not required - the rest is done by methods of CtrlOs 
 */
function page_init() {
	
	var GOC_name = "Anracon_GOC";  
	// CtrlO creation 
	this[GOC_name].populate(); 
}


//----------------------------------------------------------------------------
// Executable statements - after all declarations are known to the interpreter 
// ----------------------------------------------------------------------------

// We now create our own container for all CtrlOs 
// required to control the user interaction with elements of our web page  
this.Anracon_GOC = new Anracon_GlobalObjectController(this);


A Global Object Controller [GOC] object

The first thing we do is to create a global object “Anracon_GOC” – a Global Object Controller [GOC] – which shall control a variety of so called “Control Objects” (CtrlOs) for defined regions, i.e. containers, of a web page. A CtrlO contains all required functionality for all interactive GUI elements of the controlled container. Thus, we avoid clattering the global context with functions and variables.

Actually in our case we only need one CtrlO object for our menu container “div#main_menu_cont”. But I have left some parts of method code relevant for the treatment of multiple CtrlOs of more complex pages. The names of all CtrlOs which shall be created should be listed in the array “ay_objNames” of the constructor function “Anracon_GlobalObjectController()” for the GOC-object. Constructor functions of the form “Ctrl_NameoftheCtrlO” must be defined for all CtrlOs, which we want to handle. The name NameoftheCtrlO is the related name saved in the array “ay_objNames”. Prefixes are defined for both the constructor functions and the CtrlO objects.

The prototype “method” defined as “Anracon_GlobalObjectController.prototype.populate” creates all CtrlO objects defined. Do not get confused by the indirect addressing in the statement for object creation – this was done for convenience, i.e. for an automatic assignment of the right object names and the choice of the right constructors based on defined prefixes and the contents of our object name array. You may be astonished that the “new” operator is not followed by a literal. Actually the “new” operator in JS requires the address of a constructor function object – this is in our case provided as the relevant function reference in the global context (remember: a function in JS is itself an object!).

As the CtrlOs must in complex web pages be able to interact with each other, a further “method” defined in Anracon_GlobalObjectController.prototype.pushObjectReferences of the GOC dispatches references of all created CtrlOs to each of the CtrlOs. It is not necessary to discuss details here as we only have one CtrlO to care for.

The method defined as Anracon_GlobalObjectController.prototype.loadCssFile loads the mentioned additional CSS file for mobiles. This method is called in the GOCs constructor in case that the function defined in the file “detectmobilebrowser_jQuery.js” had set a variable of the jQuery object – namely jQuery.browser.mobile – to true. The url is the path or address of
the CSS file to load. The early loading of the additional CSS file helps to prevent page flickering flickering.

Addendum 09.09.2015: We have added some parameters and code to loadCssFile() to show what would have to be done, if we wanted to replace teh original CSS file instead of appending an additional one.

The CtrlO “Anracon_GOC.CtrlO_Hmenu

The object “CtrlO_Hmenu” is based on the constructor function “Ctrl_Hmenu(objName)”. It provides the desired functionality for our main menu container. In our test case the only interactive element is our menu button. The constructor first defines selectors for certain elements of the menu and also the text container in the right column of our layout (see the previous articles).

The first relevant action is to remove the “hover”-effect of our old JS-free solution by removing the defined CSS class “hover”, which we defined from the container “div#menu_cont”. This class triggered the “mouseOver” based remote rollover effect discussed in our last article. No such class – no “hover” and no possible negative impact on our aspired “click”-based control for the menu.

In the next step we display a message in case that we detected a mobile browser. We do this in the right column of our layout. The last step consist of a delegation of the functionality for handling a “click” on the menu-button to a method displayHmenu of the object CtrlO_Hmenu.

This is done by registering the method as a callback with the $.proxy() function of the jQuery object ($). This way we guarantee that the context of the this operator in the callback called during the click event is automatically switched from the event’s HTML object (our menu button “a#hmen_but”) to our pure JS object CtrlO_Hmenu.

If we had not used $.proxy() the context of “this” in displayHmenu() would have been the menu button. (A typical error ….) Read about the right context assignment in the documentation of $.proxy() and other articles on the Internet if you are in doubt.

The method “displayHmenu()” of the CtrlO “CtrlO_Hmenu”

The method displayHmenu() does some tricky things during the click event of “div#hmen_but”. This has to do with the priority of CSS properties set by JS. See the discussion above. The correct behavior is only achieved for “var method=0” – the alternative code is only for purposes of testing of a wrong solution.

To understand the problem of CSS priority let us do a thought experiment and assume that we directly changed the visibility property of “div#hmen_cont” by JS in course of a mouse click event:

First imagine that in the width Range I we just switched the visibility property of our menu after a click on the button to “visible”. No problem: The menu would appear as a vertical block – just as expected and due to our CSS rules for Range I. If we then resized the browser window again to bigger widths (viewport width Range II) the menu would stay visible a while as a vertical block – but at the threshold to Range II it would change its appearance from vertical appearance back to the regular a horizontal menu line. So far so good.

However, what happened if we in Range I clicked a second time on the button and this time used Javascript to change the visibility of the menu to “visibility:hidden”? This is exactly what a user expects as a standard interaction with a toggle button. Then during resizing of the browser window to a bigger width (on a desktop by dragging the window edge with the mouse or in a smartphone by rotating the device to a horizontal orientation) the menu would stay invisible forever and quite independent of the final
viewport width range. This is due to the priority of the CSS property change performed by JS! The same would by the way be true for other property changes directly set by JS. Such a behavior is, of course, not what we want!

We circumvent this problem by not setting properties directly but by loading and unloading an extra class “.vis

div#hmenu_class.vis { visibility:visible;}

for “div#hmenu_cont” at the click-event of”div#hmen_but. See the code.

Now we stumble into the next problem: The unloading should also occur for a resize event of the window – even if we did not click a second time on the button. Otherwise the menu would remain visible to a transition to Range II and a successive transition back to Range I. No harm done – but it does not feel right: when we go to Range I the menu should always disappear and only be shown after a button click.

So, we have to react to the “window.resize” event and unload the class “vis” as soon as this event occurs. But for saving CPU power we want to unload only once and NOT to react all the time to the resize events which fire permanently during window size changes. To achieve this we use the following trick:

When clicking the first time on the menu button we load the class “vis” – and at the same time activate an event handler for the resize event by using jQuery’s $(window).on() function. At a subsequent click we unload the class “vis” and at the same time switch off the event handler by jQuery’s .off() function. We encapsulate the latter 2 steps in a method Ctrl_Hmenu.prototype.removeClassVis of our CtrlO.

Conclusion

This was really a long tour. But, actually, we have realized all our objectives. We have in addition seen that the efforts in our previous articles were not at all in vain. We integrated JS smoothly with the ability to automatically eliminate the few, possibly interfering CSS definitions for the Non-JS solution. Thanks to this approach, we now have a solution for browsers with and without activated Javascript. At least in principle we have also shown how we could react to mobile devices in a more specific way by loading appropriate CSS sheets to adjust font-sizes and other CSS properties.

As we did all JS in an object oriented way our JS code is now prepared to include further methods to control the user interaction in a structured form. We shall make use of this already in the next article. In the meantime you may want to play around with our present example with desktop and mobile browsers:

Address for our test example with Javascript:
https://linux-blog.anracom.com/examples/fluid/fluid_standard2.html
Address for the same example without JS:
https://linux-blog.anracom.com/examples/fluid/fluid_standardx.html

In the next forthcoming article of this series

Responsive fluid multi-column layouts – sub menu adaption with JS/jQuery – VI

we shall deal with the left sided sub menu in a more flexible and user friendly way.

CSV file upload with ZIP containers, jQuery, Ajax and PHP 5.4 progress tracking – VI

In the previous articles of this series about an Ajax controlled file upload with PHP progress tracking

CSV file upload with ZIP containers, jQuery, Ajax and PHP 5.4 progress tracking – V
CSV file upload with ZIP containers, jQuery, Ajax and PHP 5.4 progress tracking – IV
CSV file upload with ZIP containers, jQuery, Ajax and PHP 5.4 progress tracking – III
CSV file upload with ZIP containers, jQuery, Ajax and PHP 5.4 progress tracking – II
CSV file upload with ZIP containers, jQuery, Ajax and PHP 5.4 progress tracking – I

we have shown how we can measure and display the progress of a file upload process with a series of Ajax controlled polling jobs and the progress tracking features of PHP > 5.4. At least in our test example this worked perfectly.

However, for practical purposes and especially when our server users deal with large files we must in addition take better care of some limiting PHP parameters on the server. Both a good server admin and a program developer would, of course, try to find out what file sizes are to be expected on a regular basis and adjust the server parameters accordingly. However, you never know what our beloved users may do. What happens if we talked about file sizes of less than 100MB and suddenly a file with 200MB is transferred to the server?

For which limiting PHP parameters on the server may we run into serious trouble?

Due to security considerations the PHP module interaction with incoming data streams is limited by parameters set for the Apache server. The relevant configuration file is e.g. on Opensuse located at

/etc/php5/apache2/php.ini

The most important limits (set in different sections of the file) are:

; Maximum amount of time each script may spend parsing request data. It’s a good
; idea to limit this time on productions servers in order to eliminate unexpectedly
; long running scripts.
; Default Value: -1 (Unlimited)
; Production Value: 60 (60 seconds)
; http://php.net/max-input-time
max_input_time = 200
 
; Maximum size of POST data that PHP will accept.
; Its value may be 0 to disable the limit. It is ignored if POST data reading
; is disabled through enable_post_data_reading.
; http://php.net/post-max-size
post_max_size = 200M
 
; Maximum allowed size for uploaded files.
; http://php.net/upload-max-filesize
upload_max_filesize =150M
 
; Maximum amount of memory a script may consume (128MB)
; http://php.net/memory-limit
memory_limit = 500M

The description of the first parameter above is somewhat unclear. What is meant by the “time spent on parsing request data”? Is this a part of the (also limited) execution time of the PHP target program of our Ajax transaction? Or is this limit imposed on the time required to read incoming POST data and to fill the $_POST array? If the latter were true a small bandwidth could lead to a violation of the “max_input_time” limit …

Regarding the second parameter the question turns up, whether this
limit is imposed on all transferred POST data including the file data?

The third parameter seems to speak for itself. There is a limit for the size of a file that can be transmitted to the server. However, it is not clear how this parameter affects real world scenarios. Does it stop a transfer already before it starts or only when the limit is reached during the transfer?

Regarding the 4th parameter we may suspect that it becomes important already during the handling (reading, parsing) of the incoming POST data. So, how much of memory (RAM) do we need at the server to handle large files during an upload process?

Warning regarding PHP parameter changes for multi-user situation on real world servers

We were and are discussing a privileged situation in this article series: Only one user uploads exactly one big Zip-container file to a server.

In such a situation it is relatively safe to fiddle around with PHP parameters of the central “php.ini” file (or PHP parameter settings in directory specific files; see the last section of this article). However, as an administrator of a server you should always be aware of the consequences of PHP parameter changes, e.g for memory limits, in a multi-user environment.

In addition you must also take into account that our code examples may be extended towards the case that one user may upload multiple files in parallel in one Ajax transaction.

Remarks on “max_input_time” – you can probably ignore it!

If you look up information about “max_input_time” available on the Internet you may experience that some confusion over the implications of this parameter remains. Especially as PHP’s own documentation is a bit contradictory – just compare what is said in the following manual pages:

 
Therefore, I tested a bit with files up to 1 GByte over slow and fast connections to PHP servers on the Internet. I came to the conclusion that the answer in the following “stackoverflow” discussion
http://stackoverflow.com/questions/11387113/php-file-upload-affected-or-not-by-max-input-time
describes the server behavior correctly. This means:

This parameter has no consequences with respect to connection bandwidth and the resulting upload time required for file data: It does not limit the required upload time. Neither does it reduce the amount of allowed maximum execution time of the PHP program triggered at the end of the file transfer process to the server.

“max_input_time” imposes a limit on the time to read/parse the data

  • after they have completely arrived at the server
  • and before the PHP program, which shall work with the data, is started.

This “parsing” time normally is very small and the standard value of 60 secs should be enough under most circumstances. If these findings are true we do not need to care much about this parameter during our file transfer process to the server. A value of 60 secs should work even for large files of 1 GB ore more on modern servers. At least for a server with sufficient resources under average load.

See also:

 
However, I can imagine circumstances on a server with many users under heavy load, for which this parameter nevertheless needs to be adjusted.

What does the PHP documentation say about the parameters “post_max_size”, “upload_max_filesize” and “memory_limit”?

Regarding these parameters we get at least some clear – though disputable – recommendation from the PHP documentation. At

 
we find the following explanation for “post_max_size”:

Sets max size of post data allowed. This setting also affects file upload. To upload large files, this value must be larger than upload_max_filesize. If memory limit is enabled by your configure script, memory_limit also affects file uploading. Generally speaking, memory_limit should be larger than post_max_size. When an integer is used, the value is measured in bytes. Shorthand notation, as described in this FAQ, may also be used. If the size of post data is greater than post_max_size, the $_POST and $_FILES superglobals are empty. This can be tracked in various ways, e.g. by passing the $_GET variable to the script processing the data, i.e. <form action=”edit.php?processed=1″>, and then checking if $_GET[‘processed’] is set.

Off topic: For those who find the track-recommendation in the last sentence confusing as it refers to $_GET, see e.g.

 
You can add parameters to your URL and these parameters will appear in $_GET, but if you decided to use the POST mechanism for data transfer these URL-parameters are included in the POST data mechanism of HTTP.

The recommendation for memory sizing is misleading in case of file uploads!

Following the recommendation quoted above would lead to the following relation for the PHP setup:

memory_limit > post_max_size > ( upload_max_file_size * number of files uploaded in parallel ).

Regarding the right side: My understanding is that “upload_max_file_size” sets a limit for each individual file during an upload process. See

 
Actually, I find the recommendation for the parameter “memory_limit” very strange. This would mean that somebody who has to deal with an upload file with a size of 2 GByte would have to allow for memory allocation for a single PHP process in the RAM > 2 GByte. Shall we take such a requirement seriously?

My
answer is NO ! But, of course, you should always test yourself ….

To me only the last relation on the right side of the relation chain makes sense during an upload process. Of course PHP needs some RAM and during file uploads also buffering requires sufficient server RAM. But several GByte to control a continuous incoming stream of data which shall be saved as a file into a directory (for temporary files) on the server? No way! I did some tests – e.g. limit the memory to 32 MB and successfully upload a 1 GB file. Therefore, I agree completely with the findings in the following article:

 
See also:

 
So:

Despite you need RAM for buffering during file uploads it is NOT required to use as much physical RAM as the size of the file you want to upload.

However, it may be wise to have as much RAM as possible if you intend to operate on the file as a whole. This may e.g. become important during phases when a PHP program wants to rewrite file data or read them as fast as possible for whatever purpose. A typical example where you may need sufficient memory is image manipulation.

Nevertheless: Regarding the file transfer process to the server itself the quoted recommendation is in my opinion really misleading. And: Do not forget that a high value for “memory_limit” may lead to server problems in a multi-user situation.

“post_max_size” and “upload_max_filesize” as the main limiting PHP parameters for file uploads

So, only the following condition remains:

post_max_size > upload_max_file_size * number of files uploaded in parallel

But this condition should be taken seriously! There are several things that need to be said about these parameters.

  1. A quick test shows: “post_max_size” imposes a limit on all POST data transferred from client – including file data.
  2. Even for situations in which only one file is uploaded I personally would choose “post_max_size” to be several MBs bigger than “upload_max_filesize”. Just to account for overhead.
  3. In case of an upload of multiple files in parallel (i.e. a situation, which we have not studied in this article series) you have to get an idea about the typical size and number of files to be uploaded in parallel. In such a situation you may also want to adjust the parameter

    ; Maximum number of files that can be uploaded via a single request
    max_file_uploads = 20

  4. There may be differences depending on the PHP version of how and when the server reacts to a violation of either of both parameters. For PHP 5.4 it seems that the server does not allow for an upload if either of the parameters is violated by the size of the transferred file(s) – meaning: the upload does not even start. This in turn may lead to different error situations on the server and
    messages issued by the server – depending on which parameter was violated.
  5. From a developer’s perspective it is a bit annoying that the PHP servers reaction to a violation of “upload_max_filesize” is indeed very different from its reaction a violation of “post_max_size”. See below.

Server reactions to violations of “post_max_size” and “upload_max_filesize”

We need to discuss a bit the reactions of a PHP server towards a violation of the named parameters before we can decide how to react within our PHP or Javascript programs in the course of an Ajax transaction.

Server reaction to a violation of “upload_max_filesize”
The Apache/PHP server reacts to a violation of “upload_max_filesize” by a clear message in

$_FILES[‘userfile’][“error”]

where ‘userfile’ corresponds to the “name” attribute of the HTML file input element. A reasonable way how to react to PHP error messages in $_FILES by PHP applications is described in the highest ranked comment of
http://php.net/manual/en/features.file-upload.errors.php
and also here
https://blog.hqcodeshop.fi/archives/185-PHP-large-file-uploads.html

Server reaction to a violation of “post_max_size”
What about a violation of “post_max_size”? We can only react reliably to an error via our PHP target programs if an error number or a clear, structured message is provided. Unfortunately, this is not the case when the sum of uploaded data via POST becomes bigger than “post_max_size”. When the server detects the violation no content at all is made available in $_POST or $_FILES. So, we have no error-message there a PHP program could react to.

However, we can combine

  • a test for emptiness of the superglobals $POST and $_FILES
  • with some HTTP information from the client, which is saved in $_SERVER,

to react properly in our PHP programs. Such a reaction within our Ajax transactions would naturally include

  • the creation of an error code and an error-message
  • and sending both back within the JSON response to the Javascript client for error control.

When we make a POST request to the server a value of the POST content size is provided by the client and available via the variable

$_SERVER[‘CONTENT_LENGTH’].

See:

 
So, for the purpose of error control we will need to add some test code to the “initial” PHP target program “handle_uploaded_init_files.php5” of our Ajax transaction which started the file upload.

Reasonable reactions of our PHP upload and polling programs to a violation of “post_max_size”

Remember that our initial Ajax transaction for upload triggered the server file “handle_uploaded_init_files.php5”. Therefore, we should some additional code that investigates the violation of post_max_size” there. This would probably look similar to:

if (
	isset( $_SERVER['REQUEST_METHOD'] )      &&
        ($_SERVER['REQUEST_METHOD'] === 'POST' ) &&
        isset( $_SERVER['CONTENT_LENGTH'] )      &&
        (
 empty( $_POST ) )
 ) {
	$max_post_size = ini_get('post_max_size');
	$content_length = $_SERVER['CONTENT_LENGTH'] / 1024 / 1024;
	if ($content_length > $max_post_size ) {
		....
		// Our error treatment ....
		$err_code = ....;
		// create an error message and send it to the Ajax client 
		$err_post_size_msg = ".....";
		....
	}

	....
	....
	// transfer the error code and error message to some named element of the JSON object 
	....
	$ajax_response['err_code'] = $err_code;
	$ajax_response['err_msg'] = $err_post_size_msg;
	.....
	$response = json_encode($ajax_response);
	echo $response;
	exit;
}

 
See also:

&nbsP;
Note that we cannot assume a certain timing of the reaction of the main program in comparison to our polling jobs. It may happen that we have already started the polling sequence before the error messages from our first Ajax transaction arrive at the client. Therefore, also our polling jobs “check_progress.php5” should be able to react to empty superglobals $_POST and $_FILES :

if ( ( empty( $_POST ) ) && empty ( $_FILES ) ) {
	// Our error treatment ....
	// create an error message and send it to the Ajax client 
	// refer to messages that may turn up in parallel from the main PHP program
	....
}

 
The different Javascript client methods which receive their respective Ajaj messages should evaluate the error messages and error numbers from the server, display them and, of course, stop the polling loop in case it is still active. As these are trivial programming steps we do not look deeper into them.

Avoid trouble with limiting PHP parameters before starting the file upload

Although we can react to error situations as described above I think it is better to avoid them. Therefore, I suggest to check file size limits before starting any upload process.

In our special situation with just one big Zip-file to upload we can initiate a file size limit check on the server as soon as we choose the file on the client. This means that the Javascript client must be enabled to react to the file selection action and request some information about the parameters “post_max_size” and “upload_max_filesize” from the server. In addition we need a method to compare the server limits with the size of the chosen file.

Looking into
CSV file upload with ZIP containers, jQuery, Ajax and PHP 5.4 progress control – II
we see that we had defined a proper Javascript Control Object [CtrlO] for the upload form

<form id="form_upload" name="init_file_form"  action="handle_uploaded_init_files.php5" method="POST" enctype="multipart/form-data" >

 
which – among other things – contains the file selection input tag:

<input type="
file" name="init_file" id="inp_upl_file" >

 
However, we had not assigned any method to the file selection process itself. We are changing this now:

function Ctrl_File_Upl(my_name) {
	
	this.obj_name = "Obj_" + my_name; 
	
	// Controls related to GOC and dispatched object addresses
	this.GOC = GOC;
        this.SO_Tbl_Info = null; 
        this.SO_Msg      = null; 
			
	// ay to keep the selected file handles 
	this.ay_files = new Array(); 
		
	// msg for 1st Ajax phasefor file upload; 
	this.msg1 = ''; 
		
	// Timeout for file transfer process
	// this.timeout = 500000; // internet servers  
	this.timeout = 300000; 
		
	// define selectors (form, divs) 
	this.div_upload_cont_sel 	= "#" + "div_upload_cont";
	this.div_upload_sel 		= "#" + "div_upload";
	this.p_header_upload_sel 	= "#" + "upl_header" + " > span";
			
	this.form_upload_sel 		= "#" + "form_upload";
	this.input_file_sel 		= "#" + "inp_upl_file";
	this.upl_submit_but 		= "#" + "but_submit_upl";

	this.hinp_upl_tbl_num_sel	= "#" + "hinp_upl_tbl_num";			
	this.hinp_upl_tbl_name_sel	= "#" + "hinp_upl_tbl_name";			
	this.hinp_upl_tbl_snr_sel	= "#" + "hinp_upl_tbl_snr";			
	this.hinp_upl_succ_sel 		= "#" + "hinp_upl_succ";			
	this.hinp_upl_run_type_sel 	= "#" + "hinp_upl_run_type";			
	this.hinp_upl_file_name_sel 	= "#" + "hinp_upl_file_name";			
	this.hinp_upl_file_pipe_sel 	= "#" + "hinp_upl_file_pipe";

	// display the number of extracted and processed files 
	this.num_open_files_sel		= '#' + "num_open_files";
	this.num_extracted_files_sel 	= '#' + "num_extracted_files";
	
	// Other objects on the web page - progress area 
	this.trf_msg_cont	= '#' + "trf_msg_cont";
	this.trf_msg		= '#' + "trf_msg";
	this.imp_msg_cont	= '#' + "imp_msg_cont";
	this.imp_msg		= '#' + "imp_msg";
				
	// Status (!) message box (not the right msg box) 
	this.status_div_cont = '#' + "status_div_cont";
	this.id_progr_msg_p  = "#progr_msg"; 
	
	//progress bar 
	this.id_bar = "#bar"; 
			
	// right msg block
	this.span_main_msg	= "span_msg"; 
	
	// variables to control the obligatory check of the file size 
	this.file_size_is_ok = 1; 
			
	// variables for the Ajax response 
	this.upl_file_succ 	= 0; 
	this.upl_file_name 	= ''; 
        
	// File associated variables
	this.file_name      = '';
        this.file_size_js   = 0; 	// file size detected by JS
        this.file_size      = '';	// file size detected by server
        this.allowed_file_size = 0;	// allowed file size for uploads on the server  
        
	// Processing of files     
        this.num_extracted_files = 0;
	this.file_pipeline 	 = 0; 
	this.import_time 	 = 0; 
	this.transfer_time 	 = 0; 
        
	this.name_succ_dir = ''; 
	this.num_open_files = 1;  

	// transfer time measurement 
	this.date_start = 0;   
	this.date_end = 0; 
	this.ajax_transfer_start = 0; 
	this.ajax_transfer_end 	 = 0; 
			
	// database import time measurement 
	this.date_data_import_start = 0; 
	this.date_data_import_end = 0; 
	this.data_import_start = 0; 
	this.data_import_end = 0; 
			
	this.transfer_time	= 0; 
	this.processing_time = 0; 
	this.time_start = 0; 
			
	// Determine URL for the Form 
	this.url = $(this.form_upload_sel).attr('action'); 
	console.log("Form_Upload_file - url = " + this.url);  				

	// Register methods for event handling 
	this.register_form_events(); 
			 
}	
	
// Method to start uploading the file  
// -------------------------------------------------------------------
Ctrl_File_Upl.prototype.register_form_events = function() {
			
	$(this.input_file_sel).
click(
		$.proxy(this, 'select_file') 
	);
			
	$(this.input_file_sel).change(
		$.proxy(this, 'fetch_allowed_file_size') 
	);
	
	$(this.upl_submit_but).click(
		$.proxy(this, 'submit_form') 
	);
				
	$(this.form_upload_sel).submit( 
		$.proxy(this, 'upl_file') 
	); 
					
}; 

 
The reader recognizes that in contrast to the version of the CtrlO “Ctrl_File_Upl” discussed in previous articles of this series we have added some selector IDs for fields of some other web page areas. But the really important change is an extension of the methods for additional events in “Ctrl_File_Upl.prototype.register_form_events()”:

First, we react to a click of the file selection button of the file input field. This only serves the purpose of resetting fields and message areas on the web page. But we react also to the file selection itself by using the change event of the file input field. This triggers a method “fetch_allowed_file_size()” which retrieves the parameter “upload_max_filesize” from the server.

Note:
We assume here that the server admin was clever enough to set post_max_size > upload_max_filesize!
Therefore, we only will perform a file size comparison with the value of “upload_max_filesize”. If you do not trust your server admin just extend the methods and programs presented below by an additional and separate check for file sizes bigger than “post_max_size”. This should be an easy exercise for you.

Now, let us have a look at the new methods of our Javascript CtrlO :

	
// Method to react to a click on the file selection box 
// ---------------------------------------------------- 
Ctrl_File_Upl.prototype.select_file = function (e) {
	// Call method to reset information and message fields 
	// Note: The following method also deactivates the file submit button !  
	this.reset_upl_info(); 
};

	
// Method to check whether file size is too big   
// ---------------------------------------------
// We check whether the file size is too big 
Ctrl_File_Upl.prototype.fetch_allowed_file_size = function (e) {
			
	this.file_size_is_ok = 0; 
			
	// size of the file im MByte determined on the client 
	this.file_size_js = $(this.input_file_sel)[0].files[0].size/1024/1024;
	console.log("actual file size of chosen file = " + this.file_size_js); 	
			
	// Now trigger an Ajaj transaction 
	var ajax_url = "../func/get_allowed_file_size.php5"; 
	var form_data = ''; 
			
	// 03.07.2015: we avoid setup as this would be taken as the standard for subsequent Ajax jobs 
	$.ajax({
                //contentType: "application/x-www-form-urlencoded; charset=ISO-8859-1",
                // context:  Ctrl_Status
                url: ajax_url, 
		context:  this, 
		data: form_data, 
		type: 'POST', 
		dataType: 'json', 
                success: this.response_allowed_file_size, 
                error: this.error_allowed_file_size
        });
};

// Method for Ajaj error handling during file size check transaction 		
// --------------------------------------------------------------	
Ctrl_File_Upl.prototype.error_allowed_file_size = function(jqxhr, error_type) {
			
	// Reset the cursor 
	$('body').css('cursor', 'default' ); 

	// Error handling
	console.log("From Ctrl_File_Upl ::  got Ajax error for fetch_allowed_file_size" );  
	var status = jqxhr.status; 
	var status_txt = jqxhr.statusText; 
	console.log("From Ctrl_File_Upl.prototype.error_allowed_file_size() ::  status = " + status );  
	console.log("From Ctrl_File_Upl.prototype.allowed_file_size ::  status_text = " + status_txt ); 
	console.log("From Ctrl_File_Upl.prototype.allowed_file_size ::  error_type = " + error_type ); 
			
	var 
msg = "<br>Status: " + status + "  Status text: " + status_txt;    
	this.SO_Msg.show_msg(1, msg); 
};

// Method for Ajaj rsponse handling after file size check transaction 		
// --------------------------------------------------------------			
Ctrl_File_Upl.prototype.response_allowed_file_size = function (json_response, success_code, jqxhr) {
	
	// Reset the cursor 
	$('body').css('cursor', 'default' ); 
				
	var new_msg; 
	var status = jqxhr.status; 
	var status_txt = jqxhr.statusText; 
	console.log("response_allowed_fsize: status = " + status + " , status_text = " + status_txt ); 	

	// The allowed file size on the server
	this.allowed_file_size = json_response['allowed_size'];	
	// parseInt required due to possible MB or GB endings on the server 
	this.allowed_file_size = parseInt(this.allowed_file_size); 
	console.log("allowed file size on server = " + this.allowed_file_size); 	

	// size comparison
	// ----------------
	if ( this.file_size_js > this.allowed_file_size ) {
		this.file_size_is_ok = 0; 
		new_msg = $(this.span_main_msg).html();
		if (new_msg == undefined) {
			new_msg = ""; 
		}
		new_msg += "<br><span style=\"color:#A90000;\">File size too big.</span><br>" +
		"The server allows for files with a size ≤ " +  	
		parseFloat(this.allowed_file_size).toFixed(2) + " MB." + "<br>" + 
		"The size of the chosen file is " + parseFloat(this.file_size_js).toFixed(2) + " MB." + "<br><br>" + 
		"<span style=\"color:#A90000;\">Please choose a different file or reduce the contents !</span>" + "<br><br>" + 
		"If you permanently need a bigger file size limit on the server, please contact your administrator"; 
					
		this.SO_Msg.show_msg(0, new_msg); 
				
	// file size within limits 
	// -------------------------
	else {
		this.file_size_is_ok = 1; 
					
		new_msg = $(this.span_main_msg).html();
		if (new_msg == undefined) {
			new_msg = ""; 
		}
		new_msg += "<br><span style=\"color:#007700;\">File size within server limits.</span><br>" +
		"The server allows for files with a size ≤ " +  parseFloat(this.allowed_file_size).toFixed(2) + " MB." + "<br>" + 
		"The size of the chosen file is " + parseFloat(this.file_size_js).toFixed(2) + " MB." + "<br><br>" + 
		"<span style=\"color:#007700;\">Use the "Start Upload" button to start the file upload!</span>"; 
					
		this.SO_Msg.show_msg(0, new_msg); 
					
		// reactivate the submit button 
		// -----------------------------
		$(this.upl_submit_but).on("click", $.proxy(this, 'submit_form') ); 
		$(this.upl_submit_but).css("color", "#990000"); 
	}
};
	
// Method to reset some form and information fields on the web page 
// ---------------------------------------------------------------
// We have to reset some form and message fields
Ctrl_File_Upl.prototype.reset_upl_info = function() {
				
	var msg_progr = ''; 
	$(this.id_progr_msg_p).html('');
				
	var msg_trf = ''; 
	$(this.trf_msg_cont).css('display', 'none');
	$(this.trf_msg).css('color: #666'); 
	$(this.trf_msg).html(msg_trf);
		    	
	var msg_imp = ''; 
	$(this.imp_msg_cont).css('display', 'none'); 
	$(this.imp_msg).css('color: #666'); 
	$(this.imp_msg).html(msg_imp); 
		    	
	// Deactivate the "Start Upload" Button 
	// ------------------------------------
	$(this.upl_submit_but).off("click"); 
	$(this.upl_submit_but).css("color", "#BBB"); 

	// Reset also the main message area  
	// ----------------------------------------------
	this.SO_Msg.show_msg(0, ''); 

};	

 
This is all pretty straightforward and parts of it are already well known of our
previous descriptions for handling the Ajaj interactions with the server by the help of jQuery functionality.

A short description of what happens is:

  • When you click on the button of the file selection input field contents of fields in the message area of our web page and information fields about upload progress are reset as we assume that a new upload will be started.
  • During reset also the form’s submit button to start a file upload via Ajax/Ajaj is disabled. Note that we use jQuery’s “off(‘event’)”-functionality to to this.
  • As soon as the user selects a specific file we trigger a method which determines and saves the size of the chosen file to a variable and starts an Ajax transaction afterwards. This Ajax interaction calls a target PHP program “get_allowed_file_size.php5” in some directory.
  • The JSON-response of the PHP program is handled by the method
    Ctrl_File_Upl.prototype.response_allowed_file_size.

      The main purpose of this method is to make a comparison of the already determined file size with the limit set on the server and issue some warnings or positive messages. If the file size of the chosen file is within the server’s limit we reactivate our “submit” button of the upload form. (Note that we use jQuery’s “on(‘event’)”-functionality to to this.) Otherwise we keep it inactive – until a more suitable file is chosen by the user.

Thus, by very simple means we prevent any unreasonable upload process already before it can be started by the user.

It remains to show an excerpt of the simple PHP target file:

<?php

// start session and output buffer
session_start();
ob_start(); 

$file_size_limit = ini_get("upload_max_filesize");
$ajax_response = array();
$ajax_response['allowed_size'] = $file_size_limit; 

$ajax_response['sys_msg'] .= ob_get_contents();
ob_end_clean();

$response = json_encode($ajax_response);
echo $response;
exit; 

?>

Nothing special to discuss here.

Can we change the limiting parameters during PHP program execution?

No, we can not. But as a developer you may be able to define directory specific settings both for “post_max_size” and “upload_max_filesize” on the server by uploading “.htaccess”-files or “.user.ini”-files to program directories – if this is allowed by the administrator.

The web page php.net/manual/en/ini.core.php shows a column “Changeable” for all important parameters and the respective allowed change mechanisms.
See also:
http://php.net/manual/en/ini.list.php

Different methods of how to change PHP parameters as a user are described here:

 
However, if you are not a developer but a server admin, preventing users from changing PHP ini-paramters may even be more important for you:

 
Enough for today. In the next article of this series

CSV file upload with ZIP containers, jQuery, Ajax and PHP 5.4 progress tracking – VII

we shall have a look at possible problems resulting from timeout limits set for our Ajax transactions.

CSV file upload with ZIP containers, jQuery, Ajax and PHP 5.4 progress tracking – V

In the previous articles of this series about an Ajax controlled file upload with PHP progress tracking

CSV file upload with ZIP containers, jQuery, Ajax and PHP 5.4 progress tracking – IV
CSV file upload with ZIP containers, jQuery, Ajax and PHP 5.4 progress tracking – III
CSV file upload with ZIP containers, jQuery, Ajax and PHP 5.4 progress tracking – II
CSV file upload with ZIP containers, jQuery, Ajax and PHP 5.4 progress tracking – I

we have studied elements of an Ajax controlled setup to trigger the upload itself and additional independent jobs for progress tracking.

On the Javascript side we first became acquainted with Control objects [CtrlOs] to fully control HTML elements and the Ajax communication of different forms and objects with the PHP server. We then learned that our main PHP job [handle_uploaded_init_files.php5] triggered from the file upload form is of no use for progress tracking.

In the last article we therefore discussed some Javascript methods to start a sequence of independent Ajax controlled polling jobs. Such jobs can retrieve information about the progress of the file upload from the server periodically and in the background. We learned in addition that we may need some adaption of our polling time interval to the measured data transfer rate. We expect to get the rate information from the server together with some standard progress information as e.g. the sum of bytes uploaded at the moment of polling.

The progress information for the file transfer is continuously updated in the $_SESSION array on the LAMP server according to settings in the php.ini configuration file. In this article we now discuss the rather simple PHP job for fetching the information and sending it back to the client (browser).

The PHP polling job to read progress information and send it to the client

The periodically called PHP job, which we named “check_progress.php5”, basically contains four steps:

  • Access the session and start output buffering,
  • instantiate an object which controls information gathering,
  • fetch information from the $_SESSION array,
  • encode and send the JSON object to the Ajax client

PHP program “check_progress.php5”

// start session and output buffer
session_start();
ob_start(); 

// Instantiate progress checker object 
$PC = new ProgressChecker();  

// retrieve and send information 
$PC->check_progr(); 
$PC->encodeAndSendJson(); 
exit; 

// ------------------------------
class ProgressChecker  
{
	//Some variables 
	...
	function __construct() {
		....
	}
	function check_progr() {
		....
	}
	function encodeAndSendJson() {
		....
	}
}

Why did we need the output buffering ob_start()? By using the buffer we control unwanted output produced e.g. by warnings of the PHP interpreter! We want to guarantee that our Ajax client really receives a JSON object (which it expects!) and nothing else. See the third article of this series for more remarks on this
point.

Remark, 05.07.2015: We have corrected a mistake in the originally published code. “ob_end_clean()” was removed from the main program code. Note that “ob_end_clean()” must be performed just before the Ajax response is sent. This happens in the method encodeAndSendJson(); see below.

Although not required we put all functionality into a class. This will give us more flexibility in case we need to extend the functionality of the object for progress tracking later on.

Some variables of the class “ProgressChecker”

In our class we first set some initial values of elements of an array “$ajax_response[]“. This array will later on be encoded as the JSON response object of our Ajax transaction.

	// The array to build the JSON object from 
	var $ajax_response = array();
	// Some useful variables 
	var $percentage = -1;
	// Error handling 
	var $err = 0;
	// variables to compose the key of progress information in $_SESSION
	var $sess_key_progress 	= '';
	var $key_POST = "progress_key";
	
	function __construct() {
		
		$this->ajax_response['sess_key_progress'] = '';
		
		$this->ajax_response['msg'] = '';
		$this->ajax_response['err'] = 0;
		$this->ajax_response['err_msg'] = '';
		$this->ajax_response['sys_msg'] = '';
		
		$this->ajax_response['finalized'] = 0;
		$this->ajax_response['time'] = '';
		$this->ajax_response['secs'] = 0.0;
		$this->ajax_response['diff_secs'] = 0.0;
		$this->ajax_response['end_time'] = '';
		$this->ajax_response['end_secs'] = 0.0;
	
		$this->ajax_response['bytes'] = -1;
		$this->ajax_response['diff_bytes'] = -1;
		$this->ajax_response['total'] = -1;
		$this->ajax_response['percentage'] = -1;
		$this->ajax_response['rate'] = -1.0;
	
		$this->ajax_response['fs_limit'] = -1;
		$this->ajax_response['max_inp_time'] = -1;
	}

 
We organize the information that may be required by the client: the composed key to access progress information in $_SESSION, some time information and real progress information.

“bytes” represents the number of Bytes received so far on the server, “total” is the total number of bytes of the transferred file (i.e. its size), “percentage” is calculated from “bytes” and “total”. In addition we deliver a measured data transfer “rate” in [Bytes/msec]. The reader may compare this with the result handling on the Javascript client side described in the last article of this series.

Last but not least we initialize some variables which shall deliver useful information about parameters set in the “php.ini” file on the server.

You see that we intentionally set some variables to negative values. Such an initialization can help to analyze potential errors on the server and especially after some response has been returned on the client.

Reading progress information from the $_SESSION array

The core of our class is the method check_progress():

function check_progr() {
	
	// Compose the key for the information in the $_SESSION array  
	if (!isset( $_POST[$this->key_POST] ) ) {
		$this->err++;
		$this->ajax_response['err'] = 1;
		$this->ajax_response['err_msg'] .= '<br>The required key was not delivered in $_POST';
	}
		
	if ( $this->err == 0 ) {
		$this->sess_key_progress .= ini_get("session.upload_progress.prefix"). $_POST[$this->key_POST];
		$this->ajax_
response['sess_key_progress'] = $this->sess_key_progress;
	}
		
	// Check for progr. information 
		// We have set session.upload_progress.cleanup = Off
		// So we do have some information here
			
	if (!isset($_SESSION[$this->sess_key_progress]) || empty($_SESSION[$this->sess_key_progress])) {
		$this->err++;
		$this->ajax_response['err'] = 2;
		$this->ajax_response['err_msg'] .= '<br>Error: The progress information could not be read from $_SESSION';
		return; 
	}
			
	// Save some information at the first poll for later rate calculations 	
	if (!isset($_SESSION['first_secs'])) {
		$_SESSION['first_secs'] = microtime(true);
	}
	if (!isset($_SESSION['first_bytes'])) {
		$_SESSION['first_bytes'] = $_SESSION[$this->sess_key_progress]["bytes_processed"];
	}
		
	// Get some php.ini parameters
	$file_size_limit = ini_get("upload_max_filesize");
	$this->ajax_response['fs_limit'] = $file_size_limit; 
	$this->ajax_response['max_inp_time'] = ini_get("max_input_time"); 

	// investigate whether file size is too big and return error 
	$file_size = $total / 1024 / 1024; 
	if ( $file_size > $file_size_limit ) {
		$this->err++; 
		$this->ajax_response['err'] = 3;
		$this->ajax_response['err_msg'] .= "<br>Error: The file has a size of " . number_format($file_size, 2, '.', '') . " MByte and is bigger than the allowed limit on the server (" . $file_size_limit . " MByte)"; 
		return; 	
	}
	
	// Retrieve progress information 
			
	// Bytes
	$current = $_SESSION[$this->sess_key_progress]["bytes_processed"];
	$total 	 = $_SESSION[$this->sess_key_progress]["content_length"];
	
	$this->ajax_response['percentage'] = ($current < $total) ? ($current / $total * 100) : 100;
	$this->ajax_response['bytes'] = $current;
	$this->ajax_response['total'] = $total;
		
	$this->ajax_response['time'] = date('%d.%m.%Y-%H:%M:%S');
	$this->ajax_response['secs'] = microtime(true);
	$this->ajax_response['first_bytes'] = $_SESSION['first_bytes'];
	$this->ajax_response['first_secs'] = $_SESSION['first_secs'];
	$this->ajax_response['diff_secs'] = $this->ajax_response['secs']  - $_SESSION['first_secs'];
	$this->ajax_response['diff_bytes'] = $this->ajax_response['bytes'] - $_SESSION['first_bytes'];
	
	// Rate in bytes / msec
	if ($this->ajax_response['diff_secs'] > 1.0 ) {
		$this->ajax_response['rate'] = floor($this->ajax_response['diff_bytes'] / ( $this->ajax_response['diff_secs'] * 1000.0));
	}
		
	// upload finalized ? if yes => cleanup of $_SESSION 
	$done_upl 	= $_SESSION[$this->sess_key_progress]["done"];
	$done_file 	= $_SESSION[$this->sess_key_progress]["files"][0]["done"];
		
	if ($done_upl && $done_file) {
		$this->ajax_response['end_time'] = $this->ajax_response['time'];
		$this->ajax_response['end_secs'] = $this->ajax_response['secs'];
	
		// cleanup of progress variables
		// the real session will be closed by the upload job
		unset($_SESSION[$this->sess_key_progress]);
		unset($_SESSION['first_secs']);
		unset($_SESSION['first_bytes']);
	}
		
}

 
As we already know, we first have to compose the key to access progress information in the $_SESSION array. We must use

  • both information provided by the client to uniquely identify the file transfer process to which our polling job refers
  • and some specific information of the “php.ini” file.

See the third article of this series for more information about this point. Remember that we explicitly took care about the fact that key relevant information reaches the server first – i.e. before the file data.

In the block of program statements we obviously test
the existence of progress data – and stop our activities with setting an error flag and an error message in our response array. Such an error situation must be recognized and handled on the client side; see the last article of this series.

Then we add some initial time information and byte information to new elements of the $_SESSION array. Obviously, this happens only at the first polling job. This stored information will later on be used for rate estimations.

Important note:

Our simplified approach to rate estimation via additional $_SESSION variables will only work if you trigger exactly one upload process at a time. If you triggered several upload jobs in parallel (i.e. before previously started jobs have finalized and within one and the same session) you would need to make all progress information which you add to $_SESSION dependent on the identifier of the transfer process.

We leave this extension to the reader and assume that different upload jobs are started from the client only sequentially.

We now fetch 2 parameter values from the “php.ini” file: for the maximum allowed size of upload files and the maximum allowed input parsing time. The latter value determines how much time can be used on the server to deal with the transferred (POST) data. This is a critical limit about which the client should be informed.

In addition: If we find that the size of the transferred file is too big, we return an error to the client.

Next, we retrieve progress information, calculate the reached percentage of transferred bytes and estimate a transfer rate. To avoid any problems with divisions by zero we deliver a rate value only after at least a second (i.e. the default the update time interval on the server for progress information) has passed. Remember that these rate values are used on the client side to adapt the polling period to reasonable values.

Finally, we check by some criteria whether the transfer job has already finished and all file data are received. If this is the case, we erase progress related information from the $_SESSION array. This is absolutely necessary if you want to start further upload jobs during the same PHP session.

Important note:

We are only able to retrieve the information about the end of the file transfer if the progress information is not automatically erased from the $_SESSION array by the tracking engine of the server itself. Otherwise our last polling job would almost always run into problems. So, for our Ajax controlled polling to work flawlessly, we must set:
session.upload_progress.cleanup = Off
in our “php.ini”-file – and do some cleanup ourselves.

At this point I also want to remind the reader that our main job for dealing with the uploaded file data may already have started before the last polling job is triggered. Due to the length of polling time interval such a situation is very probable. We had to take care of this situation on the Javascript client side to avoid a confusing mixture or overwriting of returning messages from both PHP jobs; see the last article of this series for more remarks on this point.

Encoding the JSON object

The final step is trivial:

function encodeAndSendJson() {
	$this->ajax_response['sys_msg'] .= ob_get_contents(); 
	ob_end_clean();
	$response = json_encode($this->ajax_response);
	echo $response; 
}

Some example output of the Ajax controlled client/server interaction for the file upload

After all this theory let us now have a brief look of output of the
Ajax interaction between the client and the server. Initially we give the user a chance to select a file

upl_form_1
 
The PHP job that created the web page which contains our upload form also started the required PHP session. You may ignore the upper parts of the displayed excerpt of our web page. The interesting things happen in the lower form which allows for file selection.

The attached information elements (progress bar, small text areas) below actually belong to a separate and different web page area (DIV container) which contains an invisible form for the control of the progress polling jobs.

Note that in the displayed test case we have chosen a ZIP file container (which actually contains 5 files with 5 million records each). Then we start the Ajax controlled transfer with a click on the button “Start Upload”. This job starts the file transfer and the first Ajax transaction. This will trigger the main PHP job “handle_uploaded_init_files.php5” for file processing when the data transfer has finalized.

upl_form_2

In parallel the sequence of polling jobs is automatically started in the background. Each Ajax transaction in the time loop triggers a job “check_progress.php5” on the server, which retrieves progress information from $_SESSION as discussed above. The information of each PHP polling job returned to the client via a JSON object is used to enlarge the progress bar and to display additional information text about the progress.

upl_form_3
upl_form_4

Note the display of the bytes transferred, the time elapsed and the remaining time estimated from the measured rate.

After all file data have been received at the server we display some final information in green on the left side. After that the main PHP job (triggered by our original form submit) takes over and the status bar runs again – this time indicating the processing of the individual files we moved to the server in our Zip file container.

upl_form_6

We turn to the handling of the ZIP container and its contents in one of the next articles of this series.

Adaption of the polling interval

In our previous example the polling period stayed at the lowest boundary of 1200 msec. The file (around 80 MByte) was not big enough for an adjustment at the given rate. However, a different example with a bigger file around 150 MByte shows the adaption of the polling period quite clearly. Excerpts from respective messages in the console.log:

time = 1433754422037, 
polling_
period = 1200

Present upload percentage = 3.0057897183539
rate is 1485, poll_soll = 1501,
polling_period = 1440

Present upload percentage = 5.0072492005327
rate is 1341, poll_soll = 1652  
polling_period = 1652

Present upload percentage = 7.0087017625639
rate is 1235, poll_soll = 1785
polling_period = 1652

Present upload percentage = 8.0094300619559
rate is 1209, poll_soll = 1821
polling_period = 1821

Present upload percentage = 11.011615536811
rate is 1250, poll_soll = 1765
polling_period = 1821


Present upload percentage = 12.012343836203
rate is 1219, poll_soll = 1807
polling_period = 1821

Present upload percentage = 13.013072712274
rate is 1193, poll_soll = 1844
polling_period = 1821

Present upload percentage = 14.013802741702
rate is 1172, poll_soll = 1875
polling_period = 1821

Present upload percentage = 16.015263377239
rate is 1231, poll_soll = 1790 
polling_period = 1821

Present upload percentage = 17.01599225331
rate is 1211, poll_soll = 1818
polling_period = 1821

Present upload percentage = 18.016722859418
rate is 1193, poll_soll = 1844
polling_period = 1821

Present upload percentage = 19.017454042205
rate is 1177, poll_soll = 1868
polling_period = 1821

Present upload percentage = 21.018911217668
rate is 1206, poll_soll = 1825
polling_period = 1821

 
The rate changes from 1200 msec to 1821 msec in 4 steps. That is exactly what we wanted to achieve.

However, there is a glitch of one additional percent every 4th step. This can be explained by the fact that our polling interval allows for around 1.2 % effective change but that we pick up only a 1% change due to the servers settings between 2 polling events. As the update period on the server is a bit smaller and thus a bit asynchronous to our polling events a glitch is bound to happen around every 4th event on the server. The reader may sketch the polling events and boundaries of the update period on the server in a drawing to get a clear understanding. We can ignore the glitch for all practical purposes.

Note that for larger files at the same rate the adaption would take more steps – but the behavior would more or less be the same.

A first conclusion

So far, so good. Obviously, it is possible to use the progress tracking of PHP versions ≥ 5.4 in combination with a series of Ajax controlled polling jobs. The Javascript side was a bit tricky – but we got it working – and we now have full control about the upload process and its messages. At least in principle …

However, there are still some severe issues. Especially, if the upload file is big and the rate is small. Then our mechanism may run into trouble due to parameter settings of the PHP engine. In the next article of this series

CSV file upload with ZIP containers, jQuery, Ajax and PHP 5.4 progress tracking – VI

we will therefore discuss how we can get some control over situations in which violations of server limits become probable.

CSV file upload with ZIP containers, jQuery, Ajax and PHP 5.4 progress tracking – IV

In the last article of this series

CSV file upload with ZIP containers, jQuery, Ajax and PHP 5.4 progress tracking – III
CSV file upload with ZIP containers, jQuery, Ajax and PHP 5.4 progress tracking – II
CSV file upload with ZIP containers, jQuery, Ajax and PHP 5.4 progress tracking – I

we saw that PHP 5.4 may write progress information about file uploads into special elements of the $_SESSION-array on the server. We discussed that the PHP session must already be established before the upload process is started by the web client via an Ajax process.

Furthermore, we have understood the following: The PHP target program which is called by the original Ajax request – i.e. the request that starts the file upload – will not be of any use for sending progress information about the file transfer to the client: The code execution of this PHP program only starts after all POST data, including all file data, have completely been transferred to the server.

So, how do we get the progress information which the server continuously updates in the PHP $_SESSION array from the server to our web client during the upload process? In this article we look at a solution based upon a general polling scheme and respective prerequisites on the client, i.e. on the Javascript side. As we want to transfer the status information in the background we again talk about Ajax controlled jobs.

A sequence of Ajax polling jobs

The situation is very much the same as for long lasting PHP jobs [server RUNs] whose status shall be followed by an Ajax mechanism. This can be solved by starting a sequence of periodic Ajax jobs from the same web page from which the original PHP RUN was started. See e.g. the article
Fallen beim Statuscheck lang laufender PHP-Jobs mit Ajax – IV
in this blog and the following drawing:

polling

These periodic jobs “poll” the progress information from some storage on the server – in our case from the $_SESSION array. Therefore, we call the periodic jobs “progress polling jobs”.

A status monitoring with polling jobs has advantages and disadvantages. One advantage is that it does not depend on special HTML 5 properties or a special jQuery plugin. Another advantage is that we get complete control over what data are exchanged between server and client. One disadvantage is – as we shall see – that we may need to dynamically adapt the polling time interval to the measured rate of the file transfer. A further potential disadvantage is that it may become difficult to react to problems occurring during the ongoing transfer of the file data. We shall have to come back to this point in a later article.

However, in the present article we ignore potential problems and sketch the basic outline of the polling control.

A form for sending information together with each Ajax polling request

On the web page we associate a small form with the polling jobs. This form is
added in a special separate “progress” DIV contaimer of our Template [TPL] for the web page. See: CSV file upload with ZIP containers, jQuery, Ajax and PHP 5.4 progress tracking – II

	<!-- A div to display the upload progress -->
	<div id="progress">
		<form id="form_upl_progr" style="height:0;" action="check_progress.php5" method="POST">
			<input type="hidden" name="progr_key_name" id="hinp_upl_progress_key_name" value="upl">
		</form> 
		<div id="progress_bar_div">
			<div class="outer_bar_div">
				<div id="bar"></div>
			</div>
		</div>
		<div id="progr_msg_cont">
			<div id="progr_msg_bg"></div>
			<div id="progr_msg_div"><p id="progr_msg"></p></div>
		</div>
		<div id="trf_msg_cont">
			<div id="trf_msg_bg"></div>
			<div id="trf_msg_div"><p id="trf_msg"></p></div>
		</div>
		<div id="imp_msg_cont">
			<div id="imp_msg_bg"></div>
			<div id="imp_msg_div"><p id="imp_msg"></p></div>
		</div>
		.....
		.....
	</div>

 
Obviously, we have named the PHP target program collecting status data “check_progress.php5“. In our very basic example the form’s only contents is a hidden input field whose value is the identifier for the upload process.

As we have seen in the last article this identifier information is required to compose the key for accessing progress information in the $_SESSION array. Note that the identifier value is identical to the one of the corresponding hidden input field in the original upload form we discussed in our last article. (In a productive example both these values should be set by the TCO (template controller object) that uses the TPL to create the web page.)

Note: In a real world example it may be necessary to send more information to the server – especially for error or problem handling. Our simple form can easily be extended by more variables to be sent to the server.

In the HTML code of our DIV we have already included some elements whose purpose later on will be to display specific information about the file transfer progress and also the following import of files into the database. The DIV with the id=”bar” will simulate a growing progress bar. For those who prefer a picture – we intend to display something like this:

upl_form

Our “progress” DIV encapsulates the elements of the lower part. There is no need to discuss CSS properties here.

A Javascript CtrlO for the “Progress Information Area” on the web page

We follow our overall Javascript policy to create a “Control object” – a CtrlO – for the “progress” DIV which encapsulates all event handling for the HTML elements plus all Ajax communication handling. We call the correspondent constructor function “Ctrl_Upl_Progr()“.

This CtrlO shall be created as a typical singleton and as part of a GOC object (= Global Object Controller) – i.e. its handle or reference will be assigned to some variable

window.GOC.Obj_Upl_Progr

when the web page is loaded. The GOC may also dispatch information about the existence and the address of the object “GOC.Obj_Upl_
Progr” to other CtrlOs. Without going into details we indicate “dispatching” by a method “GOC.push_object_references()” :

Excerpts from Javascript code of a JS file loaded in the <header>-tag of the upload web page


// Function called by the web page at the onLoad event
function init() { 
	...
	// The CtrlO object for the DIV displaying a form to upload files    
	GOC.Obj_File_Upl = new Ctrl_File_Upl('File_Upl'); 
	
	// The CtrlO object for the Control of the DIV with progress information 
	GOC.Obj_Upl_Progr = new Ctrl_Upl_Progr('Upl_Progr'); 
	...
	...
	// Dispatch references of all other CtrlOs to each of the CtrlOs 
	GOC.push_object_references(); 
}
....
.....
// Constructor function 
function Ctrl_Upl_Progr(my_name) {
       	
	// Required only for possible references to other CtrlOs 
	this.GOC = GOC;
	// The singleton object in the GOC  
	this.obj_name = "Obj_" + my_name; 
        
	// Selectors
	this.id_progr_form	= "#form_upl_progr"; 
	this.id_progr_div 	= "#progr_bar_div"; 
	this.id_bar 		= "#bar"; 
	this.progr_msg_cont 	= "#progr_msg_cont"; 
	this.progr_msg_p 	= "#progr_msg"; 
	this.trf_msg_cont	= '#trf_msg_cont";
	this.trf_msg		= '#trf_msg";
          
	// Register some events  
	this.register_events(); 

	// timer and initial interval for retrieving progress information 
	this.upl_min_polling_interval = 1200; 
 	this.upl_polling_interval = 1200; 
	this.upl_max_polling_interval = 2000; 
	this.upl_progr_timer = null; 
	this.upl_progr_count = 0; 
	this.upl_progr_count_limit = 100; 
           
	// did the last poll job return ?   	
	this.poll_return = 1; 

	// some progress information 
	this.file_size 	= 0;
	this.last_upl_percentage = 0; 
	this.present_upl_percentage = 0; 
       
	// rate of bytes per msec
	this.present_rate = -1.0; 
	this.diff_bytes	= 0.0; 
	this.diff_secs = 0.0; 
	this.first_bytes = 0.0; 
	this.first_secs = 0.0; 
	this.bytes = 0; 
      
	// start time 
	this.start_time = Date.now(); 
 
	// deal with race condition between messages from the last polling job 
	// and response messages from the executing main PHP job   
	this.race_finalized = 0;

	// Parameters for the Ajax connections 
	this.ajax_url = $(this.id_progr_form).attr('action'); 
	this.ajax_return_data_type = 'json';
 
	// Ajax return messages
	this.err = 0; 
	this.msg = ''; 	
	this.err_msg = ''; 	
	this.sys_msg = ''; 	
}   
....
....
/* Container for global objects - the "this"-operator refers here to the Global object - becoming "window" in browsers */ 
this.GOC = new Global_Objects();


For the meaning and purpose of the GOC see also a comment to the second article of our series.

The CtrlO “Obj_File_Upl” for the upload form should already be familiar from a previous article. Although one may dispute the approach of assuming and using “singleton” objects in the context of other Javascript tasks, I find the CtrlO approach very clear and convenient for dealing with well defined web page areas providing a certain service: The reason is that such UI areas are relatively individual; so they should be controlled by equally individual CtrlOs. Nevertheless we still try to obey two rules to avoid any dependency on the “singleton” property :

  • The CtrlO methods should not require any special knowledge about the internal structure of the GOC.
  • The CtrlO methods should still work even if several CtrlO objects of the same type are created (full encapsulation).

The latter may become relevant later; e.g. if you want to upload several distinct files for different purposes on the same web page.

Note that we
call a method “register_events()” to register methods for handling events occurring for elements of our DIV container. This is a central element of a CtrlO.

Polling frequency and progress update period on the server

Note that we set the initial polling time interval on the client to be 1200 msec. This means that (initially) every 1200 msec an Ajax request will be sent to the server. OK – but this raises the question:

How often is the progress information in the $_SESSION array updated on the server? What is the update frequency on the server compared with our polling frequency?

Not surprisingly, the progress update period on the server is defined by some parameters in the file “/etc/php5/apache2/php.ini“:

; How frequently the upload progress should be updated.
; Given either in percentages (per-file), or in bytes
; Default Value: "1%"
session.upload_progress.freq =  "1%"

; The minimum delay between updates, in seconds
; Default Value: 1
session.upload_progress.min_freq = "1"

 
The latter value min_freq has to be an integer. Please, keep in mind that some of the logic we later on implement in our CtrlO only makes sense only if the polling interval on the client is always chosen to be somewhat longer than min_freq on the server.

Now we consider an important question about the whole approach: Can a constant polling interval lead to trouble?

Yes, this is possible. Think about the following situation:

If our connection and the data transfer are very slow we may not see any transfer progress for some polling intervals due to the consequences of the php.ini parameters named above. The progress values may not change although file data arrive continuously – but slowly – at the server.

This may give us a false impression of what is going on and it may impact program decisions whether to stop the polling due to a (falsely) detected potential error situation. In case of a small data transfer rate we obviously should use a relatively long polling time interval to see progress between two consecutive polls. Already this consideration indicates that we need an adaptive polling time interval. Furthermore, we also need to deal with situations where the server responds slowly – i.e. with a period longer than our polling interval. A reasonable approach in such a case is that we should only send a new polling job to the server if we already have received a response to our last polling job. If this is not possible with the chosen polling interval we have to change it. We shall come back to both points below.

Methods of our new CtrlO

What methods does our CtrlO need to control the sequence of Ajax jobs? According to our drawing we need to trigger a time loop. A proper Javascript function for this purpose would be “setInterval()“. However, as the context of the function “setInterval()” is the global object (i.e. the browser window) we have to be careful about how we call the function/method

get_status_by_ajax()

that we want to execute periodically :

// method to initiate the time loop for progress control 
Ctrl_Upl_Progr.prototype.get_status_by_ajax = function(setStartTime) {
	
    	if (typeof setStartTime === "undefined" ) {
    		setStartTime = 0; 
    	}
	if ( setStartTime == 1) {
		this.start_time = Date.now(); 
	}
	this.upl_progr_timer = setInterval(this.progr_submit.bind(this),
 this.upl_polling_interval); 
	if ( this.upl_status_timer != null ) {
		console.log ("upl_progr_timer is set !"); 
	}
    	
	// cleaning the message area of our web page
    	if ( setStartTime == 1  ) { 
    		this.SO_Msg.show_msg(0, '');
    	}
}; 

// Method to trigger submit events for progress polling jobs   
Ctrl_Upl_Progr.prototype.progr_submit = function() {
	$(this.id_progr_form).submit();  
};

// Register events and delegate responsibility to local methods   
Ctrl_Upl_Progr.prototype.register_events = function() {
	$(this.id_progr_form).submit( 
		jQuery.proxy(this, 'poll_progress') 
	);
};

 
The method triggered periodically is obviously one of our CtrlO object – “progr_submit“. This method triggers the submit event for our new form which in turn is registered with a CtrlO callback method “poll_progress“. To delegate the responsibility for the submit event to a local method of the CtrlO we used jQuery’s proxy mechanism. As we used $.proxy() in a previous article of this series we are already familiar with this approach to encapsulate all control mechanisms inside the local CtrlO object.

In addition we introduced a parameter “setStartTime” that distinguishes between the start of a file upload and later calls of the method “get_status_by_ajax(setStartTime)“.

Invocation of a local CtrlO method in setInterval()

A closer look shows that we called the “progr_submit()” method in a special way: Why do we need to attach the “.bind(this)” method to the callback function?

As so often with Javascript and jQuery the question behind this “trick” is what the context of the “this” operator in an objects method will be, when this method is indirectly called as a callback. Naturally, we want the “this” operator to point to our CtrlO, because we want to encapsulate everything there. But as a matter of fact the “this” operator of the methods/functions called by setInterval() will point to the global context! But even this depends a bit on how exactly you call the method:

A call as

this.upl_progr_timer = setInterval(this.progr_submit, this.upl_polling_interval);

would not work for us because the “this” context would point to the global object when the callback is invoked.

A call as

this.upl_progr_timer = setInterval(this.progr_submit(), this.upl_polling_interval);

would work – but only once. Here the context really refers to that of the outside calling function “get_status_by_ajax()”. But this context of the calling function is destroyed directly after the first call. Working around this specific problem would require a closure – see:
http://stackoverflow.com/questions/10944004/how-to-pass-this-to-window-setinterval
http://stackoverflow.com/questions/2749244/javascript-setinterval-and-this-solution
Both closure approaches discussed in the named articles are nice – but actually not necessary for present browsers.

Actually, there is one special way of enforcing the context of the “Obj_Upl_Progr” correctly via using the object’s address in the global context explicitly:

this.upl_progr_timer = setInterval(“GOC.Obj_Upl_Progr.progr_submit()”, this.upl_polling_interval);

Note that the brackets “()” after the method name are required in this type of approach (at least in FF)!

However, you may set a big question mark behind such a program design and its implied consequences because explicit knowledge about the usage of the “Upl_Progr”
class in the GOC is required and the whole approach will only work with singletons. Nevertheless: Our overall design of CtrlOs naturally deals with singletons and a GOC dispatcher – so this solution is somewhat noteworthy. It violates, however, our 2 rules set above.

So, if you want to stay clean use “bind(this)” as in our suggested solution:

this.upl_progr_timer = setInterval(this.progr_submit.bind(this), this.upl_polling_interval);

“bind(context)” sets the context explicitly to the local object from where setInterval is called and will even work in IE > 9. Note that in this approach we do not need to invoke any specific global knowledge about the GOC and that it is not restricted to singletons!

Where from do we start the time loop for polling?

OK, we now have a method to start the time loop for polling. But, we have not yet answered the question, from where and when we start this method. This must of course be done directly after the main job for the file upload has been started. We remember that in
CSV file upload with ZIP containers, jQuery, Ajax and PHP 5.4 progress tracking – II
we started the main job for file uploading and processing by a special method of the responsible CtrlO “Ctrl_File_Upl”. We extend the code now a bit:

Ctrl_File_Upl.prototype.upl_file = function(e) { 
	....
	....
	// Ajax submit  
		
	// URL 
	console.log('upl_file :: url = ' + this.url);
	url = this.url + "?file";
	console.log('upl_file :: submitted url = ' + url);
			
	// Time 
	this.date_start = new Date(); 
	this.ajax_transfer_start = this.date_start.getTime(); 
			
	// Setup and submit Ajax 
	$.ajax({
		// contentType: "application/x-www-form-urlencoded; charset=ISO-8859-1",
		url: url, 
		context:  GOC[this.obj_name],
		timeout: this.timeout,
		data: form_data, 
		type: 'POST', 
		cache: false, 
		dataType: 'json', 
		contentType: false,
		processData: false, 
	
		error: this.error_ajax_file_upl,
		success: this.success_ajax_file_upl
	});
			
	// Start the progress polling 
	// --------------------------	
        this.SO_Upl_Progr.race_finalized = 0; 
        this.time_start = Date.now(); 
        this.SO_Upl_Progr.get_status_by_ajax(1); 
			
};	

 
We just addes some statements that refer to our new CtrlO
“Ctrl_Upl_Progr”. Our GOC dispatcher has made this CtrlO available locally in the CtrlO “Ctrl_File_Upl” via the variable
“this.SO_Upl_Progr”. Hence:

this.SO_Upl_Progr.get_status_by_ajax(1);

The other statements set values to other variables used in the CtrlO “Ctrl_File_Upl” later on.

Ajax Polling Requests

As you already may have expected we now set up and trigger an Ajax request with the method poll_progress(). As our form is fairly simple, we can just serialize the form data and e.g. use the $.post variant of jQuery’s Ajax interface:

Ctrl_Upl_Progr.prototype.poll_progress = function(e) {
         
	//always count polling steps  	
	this.upl_progr_count++; 
        
	// prevent default action of the submit event 
 	e.preventDefault();
    	
	// check against a maximum of periodic calls
 	if ( this.upl_progr_count > this.upl_progr_count_limit ) {
 		clearInterval(this.upl_progr_timer);
 		
console.log("progress timer eliminated"); 
 		this.err_msg += "<br><br>Progress polling was stopped due to max request number reached!"; 
 		this.display_msgs(); 
 		return 1;
 	}
        
	// Increase the polling interval if poll_return is not 1 
 	// No new polling job is started if the last did not yet return 
	if (this.poll_return == 0 ) {
		// Adjust interval 
		if (this.upl_polling_interval < this.upl_max_polling_interval ) {
			clearInterval(this.upl_progr_timer);
			this.upl_polling_interval += 100;
			// delay a bit
			setTimeout(this.get_status_by_ajax.bind(this), 100, 0); 
		}
		// jump over one execution 
		else {
			return 2; 
		}
	}
    		
	// start next poll job
	else {
		console.log("Upl_Progr object - poll_progress() :: ajax url = " + this.ajax_url);
		var form_data = $(this.id_progr_form).serialize(); 
		$.ajaxSetup({
			context:  this
		});
		$.post(this.ajax_url, form_data, this.progress_response, this.ajax_return_data_type);  
		this.poll_return = 0; 
		console.log("Upl_Progr object :: submitted Ajax progress polling query to server" );
	}	
}; 

 
Note that we set the context of the Ajax interface explicitly! Thus, we guarantee that the method

this.progress_response

which deals with the JSON answer to our request gets our CtrlO as the context – meaning that the “this” operator will point to our CtrlO and not to some HTML element. We like to emphasize:

Not setting the context for the “this” operator is a common source of errors and mistakes when using callback methods to handle status events or responses in course of Ajax transactions.

Of course, we could have included all parametrization and the call of the Ajax target program in one statement as in our last article. The usage of $.post() in our example has no other reason than showing and discussing an alternative. The parameter for the type of the return data had already been set to “json” in the constructor function.

Remark 28.07.2105:

Due to a mail of a reader I like to point out that using a combination of $.ajaxSetup() with $.post() may have disadvantages because $.ajaxSetup() sets standards for all coming Ajax transactions. Certainly, you do not want the context of all future Ajax transactions point to “Ctrl_Upl_Progr”. So, you would have to take care to reset this value as required later on. If you absolutely want to use $.post(), a much more intelligent solution would therefore be to use it in the form “jQuery.post([settings])” with “settings” representing an Ajax key/value parametrization object. See http://api.jquery.com/jquery.post/#jQuery-post-settings. Or just keep using $.ajax() here, too.

Counting the number of executing “progress_poll()” is going on unconditionally until a maximum of allowed calls is reached. This helps to avoid an unlimited time loop. Note in addition that we do not submit a new job if the last one did not yet return some answer. If we experience such a situation we adapt by extending our polling interval slowly but systematically until a maximum value is reached. Thereby, we react adaptively to slow servers or slow connections.

Now you may ask: What happens if the upload progress is going on slowly and the maximum allowed numbers of polling calls is too small? Good point! We will react to this by changing the maximum allowed number of poll calls when dealing with the answers of the server – but only if some upload progress is still measurable. See below.

Dealing with the JSON response of the polling jobs
from the server

Now, let us do something about the Ajax response. We expect some element of the JSON object to deliver information about the total size of the file whose upload is ongoing in the background and some information about the percentage of data already transferred to the server. As a simple variant we suggest a method similar to the following code:

Ctrl_Upl_Progr.prototype.progress_response = function(json_progr_result, success_code, jqxhr) {
        
	var msg, err_msg, sys_msg, end_time, count; 
	var poll_soll, poll_diff, poll_rel, time_remain, time_remain_str, time_spent, time_spent_str, time_msg; 
	var div, div_long, p_float_stop, span, span_w; 
	var fs, fs_str, by, upl_bytes, upl_bytes_str, upl_by; 

	// Response  status 
	console.log("Progress response :: received Ajax JSON object from server" );                
	var status = jqxhr.status; 
	var status_txt = jqxhr.statusText; 

	// polling can be continued         
	this.poll_return = 1;     
        
	// error detected by the server ?
	this.err = json_progr_result.err;
	if ( this.err > 0 ) {
		.....
		// general error treatment 
		.....
	}

	// different message types contained in the JSON response  
	this.msg = json_progr_result.msg; 
	this.err_msg = json_progr_result.err_msg; 
	this.sys_msg = json_progr_result.sys_msg; 

	// progress information delivered by the server  
	this.present_upl_percentage = json_progr_result.percentage;
	this.present_rate = json_progr_result.rate; 
	this.file_size = json_progr_result.total;
            
	// Current number of uploaded bytes 
	this.bytes = json_progr_result.bytes; 
	var upl_bytes 	= this.bytes / 1024.0; 
	var upl_by 	= " KB"; 
	if ( upl_bytes > 1024 ) {
		upl_bytes = this.bytes/(1024 * 1024);
		upl_by = " MB"; 
	}
	upl_bytes = upl_bytes.toFixed(2); 
	upl_bytes_str = upl_bytes + upl_by;
		        
	// file_size 
	fs = this.file_size/1024.0;
	by = " KB"; 
	if ( fs > 1024 ) {
		fs = this.file_size/(1024 * 1024);
		by = " MB"; 
	}
	fs = fs.toFixed(2); 
	fs_str = fs + by; 

	// Checking for upload finalization
	end_time  = json_progr_result.end_time; 

	// Shall the associated time loop be stopped ? 
	if ( end_time.length > 0 || this.present_upl_percentage == 100 ) {
		clearInterval(this.upl_progr_timer); 
		console.log("progress timer stopped regularly do to finished upload process on the server");
		// this.present_upl_percentage = 100; 
		this.msg += "<br>File transfer to the server is complete !<br>"; 
	}
        	
	// Set the limit up if the max number is reached but upload is still processing regularly 
	else {
		if (this.present_upl_percentage > 0 && this.present_upl_percentage > this.last_upl_percentage 
		&& ( this.upl_progr_count + 2 > this.upl_progr_count_limit	) ) {
			this.upl_progr_count_limit += 100; 
			console.log("limit for polling counts raised by 100!" ); 
		}
	}
            
	// Display information about percentage - e.g. in form of a progress bar 
	if (this.present_upl_percentage > 0 ) {
		this.last_upl_percentage = this.present_upl_percentage; 
		this.display_upl_percentage(); 
		if ( this.last_upl_percentage < 100 ) {
			this.msg += "<br>File upload is progressing!<br>" 
		}
		this.msg += this.last_upl_percentage.toFixed(2) + " percent of the file have been transferred"; 

		// Display info in special field 
		var msg_trf = "Transfer: " + upl_bytes_str + " of " + fs_str + " :: " + this.last_upl_percentage.toFixed(2) + " %"; 
		$(this.id_progr_msg_p).html(msg_trf);
	}

	// concatenate upload messages and display them 	
	if ( this.err_msg != '' ) {
	       	this.msg += "<br><br>" + "<span style=\"color:#
A90000;\">" + this.err_msg + "</span>"; 
	}
	if ( this.sys_msg != '' ) {
		this.msg += "<br><br>" + this.sys_msg; 
	}
	// Only display messages in a special message area if you do not overwrite
	// messages coming already from the main PHP job or if an error occurred   
	if (this.race_finalized == 0 || this.err > 0  ) { 
		this.display_msgs();
	}
 
        // switch of setInterval's timer in case of error signals from the server 
       	if ( this.err > 0 ) {
       		// For all of the following error types 
       		if ( 1 <= this.err <= 3 )
        		clearInterval(this.upl_progr_timer);
        	}
	}
           
	// Adaption of the polling interval and time estimates 
	if ( this.err == 0 && this.present_upl_percentage > 3 && this.present_rate > 0 ) {
		poll_soll = 1.2 * this.file_size / 100.0 / this.present_rate; 
		poll_soll = Math.round(poll_soll) + 100; 
		poll_diff = poll_soll - this.upl_polling_interval; 
		poll_rel = ( Math.abs(poll_soll - this.upl_polling_interval) ) / this.upl_polling_interval  
     		
		// Only do something if the deviation is bigger than a limit 
		if ( poll_rel > 0.10 ) {
			// Limit the relative change 
			if ( poll_rel > 0.2 ) {
				if (poll_diff < 0 ) {
					poll_soll = 0.8 * this.upl_polling_interval;  
				}
				else {
					poll_soll = 1.2 * this.upl_polling_interval;  
				}
			}
			else {
				if (poll_diff < 0 ) {
					poll_soll = (1.0 - poll_rel) * this.upl_polling_interval;  
				}
				else {
					poll_soll = (1.0 + poll_rel) * this.upl_polling_interval;  
				}
			}
	        			
			if ( poll_soll > this.upl_min_polling_interval) {
				this.upl_polling_interval = poll_soll; 
				if (poll_soll > this.upl_max_polling_interval ) {
					this.upl_max_polling_interval = poll_soll + 100; 
				}
				clearInterval(this.upl_progr_timer);
				// delay a bit
				setTimeout(this.get_status_by_ajax.bind(this), poll_soll, 0); 
			}
		}
	        		
		// time estimate
		time_remain 	= ( (this.file_size - this.bytes) / this.present_rate) / 1000.0;
		time_remain_str = time_remain.toFixed(1) + "s"; 
	        		
		// time spent 
		time_spent 	= (Date.now() - this.start_time); 
		time_spent_str 	= (time_spent / 1000.0).toFixed(1) + "s"; 
		time_msg = "time: " + time_spent_str + " :: " + time_remain_str; 
	        		
		$(this.trf_msg_cont).css('display', 'block');
		$(this.trf_msg).css('color', "#666");  	
		$(this.trf_msg).html(time_msg); 	
	}

	// Reset cursor 
	document.body.style.cursor = 'default';
};

// Adjust a progress bar 
Ctrl_Upl_Progr.prototype.display_upl_percentage = function() {
	width = this.present_upl_percentage + '%';
	$(this.id_bar).css('width', width); 
	console.log("\r\nPresent upload percentage = " + this.present_upl_percentage + "\r\n"); 
}; 

// use another specialized CtrlO for handling a special message display area on the web page 
Ctrl_Upl_Progr.prototype.display_msgs = function() {
	this.SO_Msg.show_msg(0, this.msg);
}; 

 
Explanations:
We just split the JSON response object into its components. The next article will show how we get these values on the server and send them back via Ajax. Components of the JSON response object are:

  • an indicator for potential errors detected by the PHP polling program
  • messages of different types (created during execution of the PHP polling program on the server)
  • progress information in form of a percentage value
  • a value for the transfer rate measured on the server
  • the total file size in bytes
  • the number of bytes received on the server so far
  • an end time value (date down to seconds) on the server when the file transfer was finished

We first transform both the uploaded bytes and the file size to KBytes or MBytes. The end time information is also used as a signal to stop the time loop for polling jobs on the client. This means that it will only be sent as a non blank string if our PHP polling program finds that the upload has finalized.

Please, note that we raise the number of allowed polling calls to the server when we are approaching the limit of allowed calls – if we still see any progress of the upload. Oops – what if the rate is so small that we fall below the discussed server’s limit of a 1% change during the polling time interval and progress information is not updated ? Then our monitoring would be stopped! Yes, this would be true if we did not adapt the polling period ….

Adaption of the polling time period

We just saw that it may become essential for our polling based progress monitoring to determine whether there is any progress at all. However, due to the parameter settings for the update interval of the progress information a too small polling period may lead to the false impression of zero progress over one or several polling intervals in case of slow connections.

This is a major reason for adapting the polling time interval to the transfer rate. We do this in our example after 3% of the file is loaded (assuming that our initial interval allows for such a progress during the first hundred polls. If it does not, than our polling interval really is much too small and we need to give it a higher initial value or increase the maximum initial number of allowed polls). In our simple adaption algorithm we set an ideal progress rate to 1.2% of the file size per polling interval. (To choose this a bit bigger than the limit of 1% for updates on the server is done on purpose!)

Furthermore, we only do something with our period if the polling time interval deviates more than 10% from the ideal time interval – and we never go below an interval of 1200 msec. In addition we limit changes to a maximum of 20% of the present value to avoid a jumpy behavior during the first steps of the transfer when the rate may change grossly. Thus, we try to change the polling time interval rather smoothly.

We leave it up to the kind reader to improve our simple adaption algorithm. I may say, however, that it works quite well for my aDSL and vDSL connections where reasonable rates are possible. I do not regard the lower limit of 1200 msec as a problem: If the whole file is loaded in one polling interval – hey, I am happy. Monitoring is needed for slower connections.

Note that we we deliver a parameter “0” to the callback of

setTimeout(this.get_status_by_ajax.bind(this), poll_soll, 0);

This kind of passing a parameter to a callback works in FF and Chrome. Unfortunately, it does not work in MS IE, Version <= 9. Fortunately, our method "get_status_by_ajax()" already takes care of an undefined function parameter.

Some Output

As indicated some received progress information is displayed in special DIV containers; the percentage information may be used to simulate a progress bar by a dynamical change of the width of some colored DIV.

Some other messages from the server are, however, handled by a special CtrlO for a message display and formatting area on our web page. The reader may design such an area by himself and write a related CtrlO. In our example we indicated the use of a message handling CtrlO by the statement “this.SO_Msg.show_msg(0, this.msg);”

Note that we did not discuss any handling of error messages from the server yet. We leave this to
the reader. You may use a boolean element “json_progr_result.err” of the JSON response object to indicate an error and its type – and react properly to it. We do not elaborate this here.

In this article we have shown some basic ingredients on the Javascript side for polling progress information about a file transfer from a PHP server. In the next article of this series

CSV file upload with ZIP containers, jQuery, Ajax and PHP 5.4 progress tracking – V

we shall have a look a the PHP side.