The official support of Opensuse Leap 15.1 is about to end. Time to upgrade some servers to Opensuse Leap 15.2 in my home-office. While the basic upgrade of the OS was a smooth process I stumbled across some problems and challenges with a few services. I shall cover these problems step by step in this series – and hope that my remarks and hints will help some of my readers.
A central server system with network related services and with virtualized guests
One of the two central server systems in my LAN provides DHCP-, DNS-, OpenLDAP-services plus an internal HTTP-service (based on Apache2) for development work. Its list of services in addition comprises NFS, Samba and some SVN-services for multiple purposes, among others as backup space for other systems. The host also works as a CUPS server – offering some pre-defined queues for other Linux-systems in the LAN.
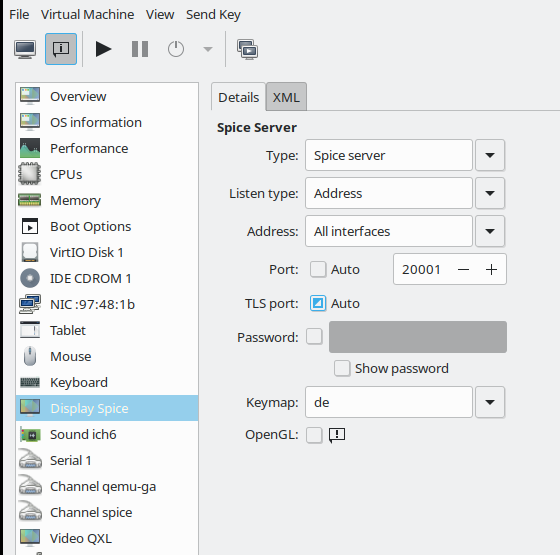
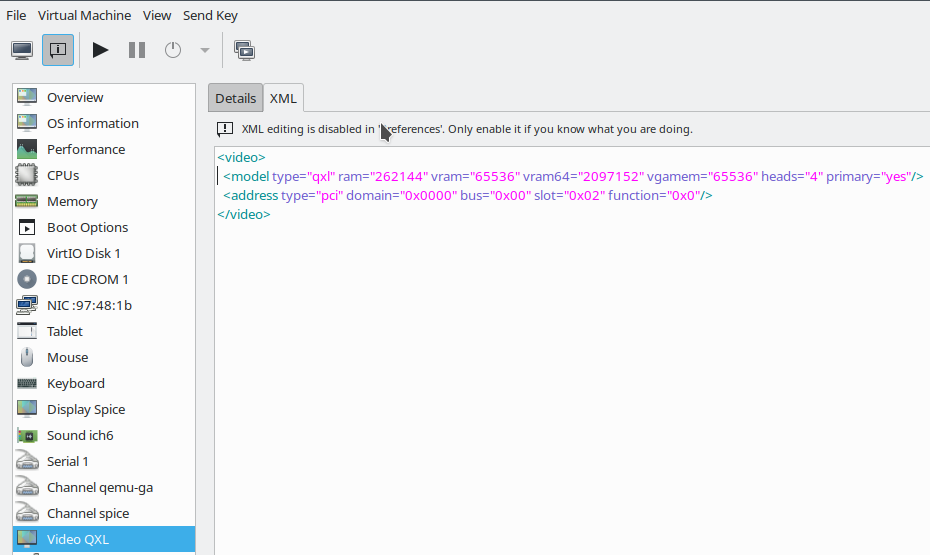
The system also serves as a KVM- and LXC-host for some virtualization guests: A KVM based LAMP/GIT-server for production data, a KVM based mail-server, a KVM based Kali-system plus some LXC-containers for databases. Some LVM volumes on this server are encrypted and all disk-space is based on Raid configurations – both with mdadm for different SSD-raids and with a 3ware controller for a standard hard disk based raid10. This server is also critical as it separates its internal virtual network structure from real LAN segments by a packet-filter. It must cover routing tasks.
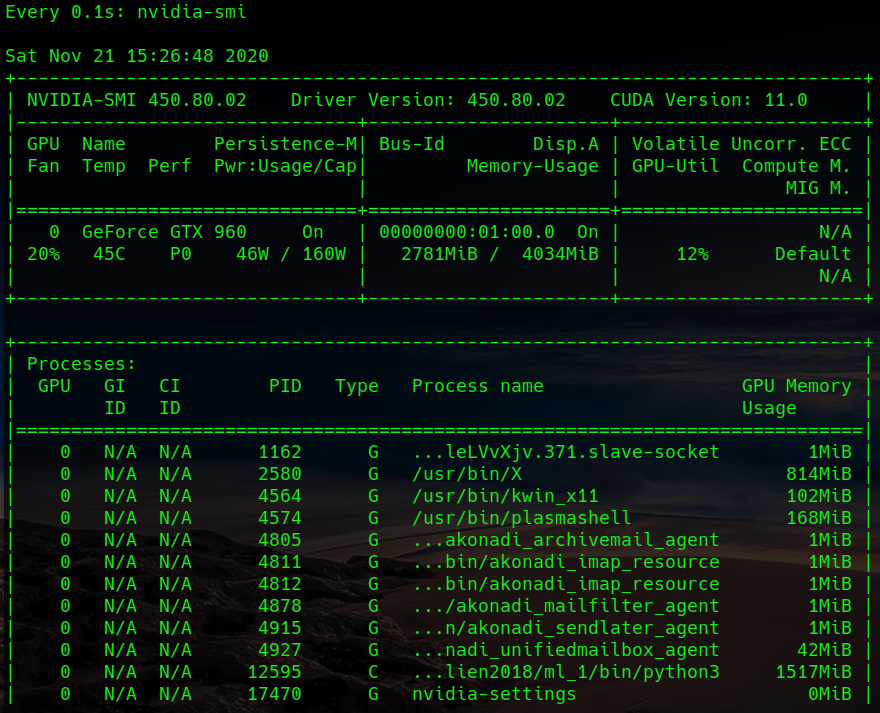
I run this Linux host with Opensuse Leap – not SLES. So, it is a good test object for the cleanliness of Opensuse’s upgrade practices. Actually, I am always a bit nervous during upgrade. Fortunately, the HW is from the time of my freelance business – and thus safe and proven to use. It contains a passively cooled Nvidia card, for which the community repositories still provides kernel modules. The 3ware drivers also have worked reasonably well over the last 4 years. So, drivers at least should not pose any problems.
To make a long story short: The basic upgrade did not cost me much headache. I outline the upgrade procedure below – and then turn to the problems I have seen in its wake.
Backup and basic upgrade procedure
It should be clear that a server as the described one requires some regular backup routine for important data. I shall not elaborate on this topic here. Regarding the backup of the “/”-partition I use an approach described in the article
Upgrade workstation from Opensuse Leap 15.1 to Leap 15.2:
I.e. I copied the whole partition to a different, external hard-disk and afterwards in addition to a free partition on the server system itself – all with the help of the “dd”-command. You may do the same with other partitions which you want to re-create quickly in case of an emergency during upgrade.
Regarding the upgrade itself I cling to the procedure described by the Linux Kamarada; see the article mentioned above. (The required work with the Opensuse repositories is much simpler for my servers than for my workstations and laptops as I use much less repositories; the only repositories aside the Update repository for the present Leap version are SUSE’s “Security” and “Network” repositories plus the Nvidia community repository. I have made good experiences with this habit over the last 10 years.)
The upgrade worked almost perfectly. Some quick checks verified that my virtualized (and not yet upgraded) virtual guest systems could be started and worked as expected. The same was true for the slapd-, smb-, the wsdd- and the dns- (=named-) service.
But, there were also exceptions which required additional work:
- Graphics Failure: The X-system did not start and the “graphical target” of systemd could not be reached directly after the system
upgrade (expected).
- Service failure: The Apache2 service did not start (unexpected).
- Service failure: The smartd-service did not start (unexpected, but probably due to an overwritten configuration file).
- Required Adjustment: The CUPS libraries had to be changed to Opensuse’s “Printing” repository to become consistent with other Linux hosts which use printer queues on the server (expected).
- Required Adjustment: The rkhunter-configuration had to be adjusted (expected).
- Required Adjustment: A specific KDE-settings had to be adjusted to allow for screen-saving functions – even for SDDM screens without started KDE-sessions (unexpected).
- Required Adjustment: “virt-viewer” access via “qemu+ssh” to some clients posed grave problems (unexpected). These problems may have existed already before, but are worth a description.
I cover the first 2 points in this article. Solving the graphics problem is a short story. The explanation and solution of the problem with the Apache service, however, requires some space. But I hope the information provided in the related text is interesting for some readers who are no experts in Opensuse’s handling of the Apache service.
Nvidia – X-Windows
You may ask: Why X11 on a server at all? Good question; well, as a semi-professional in server-administration, I think that one can do some things faster than without. Normally, I access the server remotely via ssh or “ssh -X”. But during my years with SLES and Opensuse I experienced some situations during which I was happy to be able to access the server directly on a graphical console; certainly not a popular view among profs. Anyway – the Nvidia/X-Window topic is a standard problem and easy to solve:
I just had to reinstall the required drivers from the Nvidia repository (via the CLI-based YaST), perform a “mkinitrd” afterwards and restart the system.
However, I nevertheless recommend not to boot the server system into the graphical systemd target, if not required. The relevant command to set the default target is
systemctl set-default multi-user.target
See the related link at the end of this post.
Off topic: If you prefer KDE as a graphical desktop environment do not even try to switch to Wayland on Leap 15.2. In my experience this is only a frustrating endeavor – as we still do not have Plasma 5.20 available but Plasma 5.18 (see a related link at the end).
Apache does not start due to a problem with “mod_php7” and MPM
Let us turn to something more interesting: An Apache problem with the current PHP-module and MPM-settings.
I admit, I am a bit old-fashioned. Most developers and admins, today, probably use Nginx and in addition Fast-CGI in combination with PHP. I, instead, cling to an old Apache installation for LAMP-services on the server named above. One reason is that I need some compatibility with things I did from 2013 and 2016 – aside of changes of PHP over the years.
So, whilst upgrading Opensuse my Apache 2.4 and PHP installations get upgraded, too.
When one activates the php-Apache-module by “a2enmod php” the presently installed version of the php-Apache-module gets loaded – on Leap 15.2 this is provided by mod_php7.so corresponding to PHP 7.4.6. (You can verify this with the command “php -v”). Using “a2enmod php7” would give you no different result. (Opensuse, unfortunately, does not support the parallel installation of multiple, different PHP-versions. See the critics in the conclusion-section.)
All upgrades from Leap 42.2 to 42.3, 15.0 and eventually to Leap 15.1 went well; but this time the Apache service did not start. Trying “rcapache2 start” followed by “rcapache2 status” (or equivalent systemctl status apache2.service) gave me an error message:
….
[php7:crit] [pid 16004:tid 139738320386304] Apache is running a threaded MPM, but your PHP Module is not compiled to be threadsafe. You need to recompile PHP.
Jan 26 19:15:39 MySRV start_apache2[16004]: AH00013: Pre-configuration failed
Jan 26 19:15:39 MySrv systemd[1]: apache2.service: Main process exited, code=exited, status=1/FAILURE
….
I remembered vaguely that I had experimented with MPM and prefork settings on Leap 15.1, but recompile PHP? With what options? A strange error message!
Confusion when comparing to a seemingly similar Apache2 installation on a different system
I cross-checked with a similarly configured Apache2 installation (with PHP7, but different virtual domains) on one of my my Leap 15.2 workstations; let us call it “MyWS” and the upgraded server “MySRV”. Confusingly, Apache2 started on MyWS without any complaints.
You may suspect now that I may have used different Apache2 configuration directives in “/etc/sysconfig/apache2” or the files in folder “/etc/apache2/” and sub-folders – without being aware of it. But no: I checked and eliminated even small, irrelevant differences for tests. The problem on the server MySRV remained.
When I looked at the Apache2-related processes on the workstation MyWS with “ps aux | grep https” I saw that Apache2 had been started in a pre-forked way. As I was used to …. I got multiple forked processes like
....
wwwrun    7043  0.0  0.0 236180 10488 ?        S    10:41   0:00 /usr/sbin/httpd-prefork -DSYSCONFIG -DSSL -C PidFile /var/run/httpd.pid -C Include ....
.....
wwwrun    7045  0.0  0.0 236180 10488 ?        S    10:41   0:00 /usr/sbin/httpd-prefork -DSYSCONFIG -DSSL -C PidFile /var/run/httpd.pid -C Include ...
...
The interesting thing here is the indicated program “/usr/sbin/httpd-prefork”. Note that it is NOT “usr/bin/httpd”; I shall come back to this point later. The process information was of course consistent with startup information provided by “rcapache2 status” or equivalently by “systemctl status apache2”.
It took me a while to find out what was going on and what I had to do. Whilst searching the Internet and experimenting with Apache I passed some interesting information about details of the Apache-installation on Opensuse which may be interesting for others, too.
MPM methods on Apache 2.4
The error message indicated that the whole problem had to do with MPMs – “Multi-Processing-Modules”, i.e. the ability of Apache to handle a multitude of requests concurrently. There are 3 MPM-methods and respective pre-compiled static modules or loadable DSO modules available with Apache 2.4. See e.g.:
digitalocean tutorials how-to-configure-apache-http-with-mpm-event-and-php-fpm-on-ubuntu-18-04-de,
http://httpd.apache.org /docs /current /en /mpm.html
and links therein.
I quote:
- Pre-fork: A new process is created for each incoming connection reaching the server. Each process is isolated from the others, so no memory is shared between them, even if they are performing identical calls at some point in their execution. This is a safe way to run applications linked to libraries that do not support threading—typically older applications or libraries.
- Worker: A parent process is responsible for launching a pool of child processes, some of which are listening for new incoming
connections, and others are serving the requested content. Each process is threaded (a single thread can handle one connection) so one process can handle several requests concurrently. This method of treating connections encourages better resource utilization, while still maintaining stability. This is a result of the pool of available processes, which often has free available threads ready to immediately serve new connections.
- Event: Based on worker, this MPM goes one step further by optimizing how the parent process schedules tasks to the child processes and the threads associated to those. A connection stays open for 5 seconds by default and closes if no new event happens; this is the keep-alive directive default value, which retains the thread associated to it. The Event MPM enables the process to manage threads so that some threads are free to handle new incoming connections while others are kept bound to the live connections. Allowing re-distribution of assigned tasks to threads will make for better resource utilization and performance.
In a doc at apache.org about performance scaling we furthermore read:
Httpd Configuration
The Apache 2.2 httpd is by default a pre-forking web server. When the server starts, the parent process spawns a number of child processes that do the actual work of servicing requests. But Apache httpd 2.0 introduced the concept of the Multi-Processing Module (MPM). Developers can write MPMs to suit the process- or threading- architecture of their specific operating system. Apache 2 comes with special MPMs for Windows, OS/2, Netware and BeOS. On unix-like platforms, the two most popular MPMs are Prefork and Worker. The Prefork MPM offers the same pre-forking process model that Apache 1.3 uses. The Worker MPM runs a smaller number of child processes, and spawns multiple request handling threads within each child process. In 2.4 MPMs are no longer hard-wired. They too can be exchanged via LoadModule. The default MPM in 2.4 is the event MPM.
….
The maximum number of workers, be they pre-forked child processes or threads within a process, is an indication of how many requests your server can manage concurrently. It is merely a rough estimate because the kernel can queue connection attempts for your web server. When your site becomes busy and the maximum number of workers is running, the machine doesn’t hit a hard limit beyond which clients will be denied access. However, once requests start backing up, system performance is likely to degrade.
Finally, if the httpd server in question is not executing any third-party code, via mod_php, mod_perl or similar, we recommend the use of mpm_event. This MPM is ideal for situations where httpd serves as a thin layer between clients and backend servers doing the real job, such as a proxy or cache.
…
Selecting your MPM
The prime reason for selecting a threaded MPM is that threads consume fewer system resources than processes, and it takes less effort for the system to switch between threads. This is more true for some operating systems than for others. On systems like Solaris and AIX, manipulating processes is relatively expensive in terms of system resources. On these systems, running a threaded MPM makes sense.
On Linux, the threading implementation actually uses one process for each thread. Linux processes are relatively lightweight, but it means that a threaded MPM offers less of a performance advantage than in other environments.
Running a threaded MPM can cause stability problems in some situations For instance, should a child process of a preforked MPM crash, at most one client connection is affected. However, if a threaded child crashes, all the threads in that process disappear, which means all the clients currently being served by that process will see their connection aborted. Additionally, there may be so-called “thread-safety” issues, especially with third-party libraries. In threaded applications, threads may access the same variables indiscriminately, not knowing whether a variable may have been changed by another thread.
This has been a sore point within the PHP community. The PHP processor heavily relies on third-party libraries and cannot guarantee that all of these are thread-safe. The good news is that if you are running Apache on Linux, you can run PHP in the preforked MPM without fear of losing too much performance relative to the threaded option.
Ok, what do we learn from this? php_mod is not thread-safe. But regarding performance, using the “pre-fork” MPM method is not really a bad choice on a Linux system. Obviously, this method was used on the workstation. An interesting question, which I come back to later, is whether Opensuse offers dynamically loadable or static MPM modules via its repositories.
Information about the MPM used by your installation?
One (naively) expects that the Apache2 daemon binary should be callable by “/usr/sbin/httpd” on an Opensuse system. Actually, the command “which httpd” gives you “/usr/sbin/httpd” as an answer.
On the Internet you find hints that one can check the compiled and available MPMs by either “httpd -V” and/or “httpd -l“. On the upgraded server MySRV I got:
MySRV:~ # httpd -V
Server version: Apache/2.4.43 (Linux/SUSE)
Server built:   2020-11-17 11:05:32.000000000 +0000
Server's Module Magic Number: 20120211:92
Server loaded:  APR 1.6.3, APR-UTIL 1.6.1
Compiled using: APR 1.6.3, APR-UTIL 1.6.1
Architecture:   64-bit
Server MPM:     worker
  threaded:     yes (fixed thread count)
    forked:     yes (variable process count)
Server compiled with....
 -D APR_HAS_SENDFILE
 -D APR_HAS_MMAP
....
and
MySRV:~ # httpd -l
Compiled in modules:
  core.c
  mod_so.c
  http_core.c
  worker.c
  mod_unixd.c
  mod_systemd.c
These commands seemingly worked on my server even if the Apache2-service itself could not be started (e.g. by “systemctl start apache2”). The man-pages for “httpd” say that the “-l”-option lists modules which were compiled into the server, i.e. static modules.
What did I get on the workstation?
MyWS:~ # httpd -V
Server version: Apache/2.4.43 (Linux/SUSE)
Server built:   2021-01-27 09:11:10.000000000 +0000
Server's Module Magic Number: 20120211:92
Server loaded:  APR 1.6.3, APR-UTIL 1.6.1
Compiled using: APR 1.6.3, APR-UTIL 1.6.1
Architecture:   64-bit
Server MPM:     prefork
  threaded:     no
    forked:     yes (variable process count)
and
MyWS:~ # httpd -l
Compiled in modules:
  core.c
  mod_so.c
  http_core.c
  prefork.c
  mod_unixd.c
  mod_systemd.c
Regarding the actually running processes after Apache-startup on the workstation this result is not too surprising. However, if the listed modules are static then the “httpd” binary on the server must be another one than on the workstation. Why? And how did this come about ?
Another question is: How much can we rely on the information given by e.g. “httpd -l” in the sense that this information reflects facts about the running Apache2 service? We shall see that the answer depends …
Removing the PHP-module on both installations
To analyze further I first aligned the list of modules on both systems via the corresponding setting in “/etc/sysconfig/apache2” to:
APACHE_MODULES=”actions alias auth_basic authn_file authz_host authz_groupfile authz_core authz_user autoindex cgi dir env expires include log_config mime rewrite negotiation
setenvif ssl socache_shmcb userdir reqtimeout php7 authn_core version”
and then removed the “php7” module.
(Instead of editing the file “/etc/sysconfig/apache2” directly you could also use a2enmod or a2dismod, respectively, for changing the module configuration. But I recommend to keep some commented alternatives for in the file for fast changes between repeated tests of different constellations).
In addition I used the seemingly standard Opensuse setting of
APACHE_MPM=””
in “/etc/sysconfig/apache2” for both installations.
Well, as expected no significant changes occurred on the workstation. Apache2 started successfully again (without PHP support); multiple prefork-processes were launched. On the server, however, I now got a successful start, too; “rcapache2 status” showed me a bunch of related processes afterwards:
MySRV:~ # rcapache2 status
● apache2.service - The Apache Webserver
   Loaded: loaded (/usr/lib/systemd/system/apache2.service; enabled; vendor preset: >
   Active: active (running) since Sun 2021-01-31 11:45:26 CET; 23s ago
  Process: 8555 ExecStop=/usr/sbin/start_apache2 -DSYSTEMD -DFOREGROUND -k graceful->
 Main PID: 20667 (httpd-worker)
   Status: "Processing requests..."
    Tasks: 83
   CGroup: /system.slice/apache2.service
           ├─20667 /usr/sbin/httpd-worker -DSYSCONFIG -DSSL -C PidFile /var/run/httpd.pid ....
           ├─20675 /usr/sbin/httpd-worker -DSYSCONFIG -DSSL -C PidFile /var/run/httpd.pid ....
           ├─20676 /usr/sbin/httpd-worker -DSYSCONFIG -DSSL -C PidFile /var/run/httpd.pid ....
           ├─20677 /usr/sbin/httpd-worker -DSYSCONFIG -DSSL -C PidFile /var/run/httpd.pid ....
           └─20678 /usr/sbin/httpd-worker -DSYSCONFIG -DSSL -C PidFile /var/run/httpd.pid ....

Jan 31 11:45:26 MySRV systemd[1]: Starting The Apache Webserver...
Jan 31 11:45:26 MyServ start_apache2[20667]: AH00548: NameVirtualHost has no effect and>
Jan 31 11:45:26 MySRV systemd[1]: Started The Apache Webserver.
But you see the difference?
=> The programs started were of the type “/usr/bin/http-worker” !
Looking at the startup scripts for the Apache2 service
To dig a bit deeper I looked at the startup scripts used on Opensuse for the Apache2 service. One reason to do so was a comment in Opensuse’s “/etc/sysconfig/apache2” regarding the variable APACHE_MPM:
# MPM (multi-processing module) to use.
#
# Needed to determine with which MPM apache will run, as well as
# against which header files modules will be built.
#
# If not set, the system will simply pick one of the installed MPMs.
#
# The implementation of the logic is in /usr/share/apache2/find_mpm,
# a script which can be used standalone as well if needed.
This indicates that some special Opensuse logic is used during startup. But the comment is also misleading: A script “find-mpm” can only be found in the folder “/usr/share/apache2/deprecated-scripts” on a Leap 15.1 and 15.2 systems – and the “script” itself is not used any more, as we shall see in a minute.
So, where do we find the startup-script for Apache? We do not have to look into the systemd configuration for the Apache2 service; the output of the command “rcapache2 status” already revealed it as
“/usr/sbin/start_apache2“.
In it’s script-code we find a line for the execution of a helper script:
. /usr/share/apache2/script-helpers
and later a call to a function “find_mpm”, followed by some logic for the name of a binary to be saved in the variable “apache_bin”:
#
# figure out correct apache2 binary (/usr/sbin/httpd-prefork,
# /usr/sbin/httpd-worker, etc.) and serverflags
#
find_mpm
if [ -n "$HTTPD_MPM" ]; then
r
    apache_bin="$HTTPD_SBIN_BASE-$HTTPD_MPM"
    if ! [ -x $apache_bin ]; then
        echo >&2 "$apache_bin-$APACHE_MPM is not a valid httpd binary."
        echo >&2 "Check your APACHE_MPM setting in /etc/sysconfig/apache2."
        exit 1
    fi
else
  echo >&2 "${warn}No Apache binary found. No MPM package installed? $norm"
  echo >&2 "Hint: install the apache2-prefork package, and try again."
  exit 1
fi
Obviously, we will find the function “find_mpm” in “/usr/share/apache2/script-helpers”. A look into this file shows that this really is the case. The outcome of this function influences the startup of Apache2; obviously, a different Apache variant is started for different (valid) values of the script-variable “HTTPD_MPM“:
apache_bin="$HTTPD_SBIN_BASE-$HTTPD_MPM"
($HTTPD_SBIN_BASE resolves to “/usr/sbin/httpd” – this is set at the beginning of “/usr/share/apache2/script-helpers”.)
Now, you can easily build your own test-script “mpm_test” including this function and print its output:
mpm_test-script:
#!/bin/bash

HTTPD_SBIN_BASE="/usr/sbin/httpd"
#
# loads sysconfig variables into environment
# return value in: APACHE_*
function load_sysconfig
{
  [ -n "$sysconfig_loaded" ] && return
  [ ! -f "$SYSCONFIG_FILE" ] && return

  . $SYSCONFIG_FILE

  export ${!APACHE_*} sysconfig_loaded=true
}
#
# finds prefered multiprocessing module
# return value in: HTTPD_MPM
function find_mpm
{
  # load sysconfig variables if they weren't yet;
  # this has no effect when find_mpm is not called
  # from start_apache2
  load_sysconfig

  # try to read from sysconfig's APACHE_MPM
  HTTPD_MPM="$APACHE_MPM"
  # if empty, then choose one from installed
  if [ -z "$HTTPD_MPM" ]; then
      installed_mpms=""
      for i in $HTTPD_SBIN_BASE-*; do
          test -f $i || continue
          i=$(basename $i)
          i=${i#*-}
          installed_mpms="$installed_mpms $i"
      done
      # hardcoded preference here:
      for mpm in event worker prefork; do
        if [[ $installed_mpms =~ "$mpm" ]]; then
          HTTPD_MPM=$mpm
          break
        fi
      done
  fi

  # in case no
  export HTTPD_MPM
}

# ***********************
# Action
# ***********************
find_mpm
echo $HTTPD_MPM
This script produced the following output on my server MySRV (with a running Apache2 without PHP support):
worker
On my workstation (and a running Apache2 with and without PHP support) I got:
prefork
Available and different Apache binaries
Analyzing the logic of our file, which is the same as in the beginning of the startup-script, we see that
“apache_bin” can become either “/usr/sbin/httpd-prefork” or “/usr/sbin/httpd-worker”. It depends on the value of the variable “APACHE_MPM” in “/etc/sysconfig/apache2”:
- If the variable “APACHE_MPM” is not empty its value is used.
- But if it is empty the result depends on the existence of one or multiple of the 3 files “httpd-event”, “httpd-worker” or “httpd-prefork” in the folder “/usr/sbin”.
You also see that the logic, which the guys from Opensuse implemented, chooses a MPM-specific variant of Apache2 according to the following fixed priority order:
event > worker > prefork !
The “prefork” variant has the least priority – and is obviously only chosen if neither the file “httpd-worker” nor the file “httpd-event” exist – and if “APACHE_MPM” is not set otherwise.
A quick check showed that binaries “/usr/sbin/httpd-worker”, “/usr/sbin/httpd-event” did not exist on my workstation MyWS; there, only “/usr/sbin/httpd-prefork” was available. But on the server MySRV I actually had two variants available “/usr/sbin/httpd-prefork” and “/usr/sbin/httpd-worker”.
This fact together with the “find_mpm”-logic explained the different start-up results for Apache2 on my systems MySRV and MyWS !
But not the original cause and why Apache had worked on MySRV with Leap 15.1 before ….
Differences in the package installation?!
The existence of different binaries on MyWS and the server MySRV could only be due to a package difference, which must have been there already before the upgrade to Leap 15.2. A check in my logs and also a look into the package constellation with YaST revealed that on the Leap 15.1 version of the server-system MySRV I actually had installed the RPM “apache2-worker” at some point in time! For some experiments which I had totally forgotten. But not on the workstation. So, I had caused the trouble somehow by myself – without anticipating any consequences for a coming upgrade to Leap 15.2.
But wait a second – this does not explain why I did not run into trouble with Apache on Leap 15.1. Despite the installed package “apache_worker” and an empty “APACHE_MPM” in the sysconfig file….. Why did Apache2 start on Leap 15.1 – as my old log-files show? With “httpd-prefork” processes, by the way …
I had to suspect a difference in the “find_mpm” logic – if I really had left “Apache_MPM” empty on the server. The latter was the case as I saw in my backups. And indeed – on Leap 15.1 the logic of the function “find_mpm” in “/usr/share/apache2/script-helpers” was different:
The old “find_mpm” from Leap 15.1
function find_mpm
{
  [ -n "$mpm_found" ] && return

  # load sysconfig variables if they weren't yet
  load_sysconfig

  # try to read from sysconfig's APACHE_MPM
  HTTPD_MPM=$APACHE_MPM
  # if empty, then choose one from installed
  if [ -z "$HTTPD_MPM" ]; then
      # guess
      for i in $HTTPD_SBIN_BASE-*; do
          test -f $i || continue
          i=$(basename $i)
          i=${i#*-}
          installed_mpms=(${installed_mpms[*]} $i)
      done
      if [ -z "${installed_mpms[*]}" ]; then
          HTTPD_MPM=""
          return
      elif [ ${#installed_mpms[*]} = 1 ]; then
          HTTPD_MPM=${installed_mpms[*]}
      else
          case ${installed_mpms[*]} in
              *prefork*)      HTTPD_MPM=prefork;;
              *worker*)       HTTPD_MPM=worker;;
              *event*)        HTTPD_MPM=event;;
          esac
      fi
  fi

  export HTTPD_MPM mpm_found=true
}
A test shows that the “case”-part of this function gives us an answer “prefork” on a system with both the “prefork” and the “worker” variants of Apache installed!
This makes me wonder why, for heavens sake, the Opensuse guys did not insert a section into their Leap 15.2 Release Notes telling us something about this change!
The solution to my Apache/MPM/PHP problem
After all the information gathering above the very trivial solution to my start-up problem was as that I just had to set the variable “APACHE_MPM” in “/etc/sysconfig/apache2” to
APACHE_MPM=”prefork”
when I wanted a successful start of an Apache instance with PHP support.
What do the http-* files in “/usr/sbin/” look like for multiple MPM-installations?
What happens if we install multiple MPM-variants of Apache? From some parts of the above text you have already concluded that we really must speak of “variants” as the MPM-module is compiled in statically by the Opensuse guys.
On the server MySRV with the worker-MPM active (no PHP loaded) we can see this by using the command ”
apachectl -M”. See the man pages. The result is:
MySRV: ~# apachectl -M
Loaded Modules:
 core_module (static)
 so_module (static)
 http_module (static)
 mpm_worker_module (static)
 unixd_module (static)
 systemd_module (static)
 actions_module (shared)
 alias_module (shared)
 auth_basic_module (shared)
 authn_file_module (shared)
 authz_host_module (shared)
...
...
So, we expect multiple, relatively big variants of the “http”-binary under “/usr/sbin” whenever we install the packages “apache2-worker” and “apache2-event”. Which I did for fun and step-wise on the workstation MyWS. And indeed – after the installation of the RPM “apache2-worker” we see:
MyWS:~ # la /usr/sbin/ | grep httpd
lrwxrwxrwx  1 root root           22 Jan 31 16:27 httpd -> /usr/sbin/httpd-worker
-rwxr-xr-x  1 root root       616816 Jan 27 16:17 httpd-prefork
-rwxr-xr-x  1 root root       629200 Jan 27 16:17 httpd-worker
lrwxrwxrwx  1 root root           23 Jan 30 11:02 httpd2 -> /usr/sbin/httpd-prefork
lrwxrwxrwx  1 root root           13 Jan 27 16:17 httpd2-prefork -> httpd-prefork
lrwxrwxrwx  1 root root           12 Jan 27 16:17 httpd2-worker -> httpd-worker
and after an additional installation of the “event” version of Apache2 we get:
MyWS:~ # la /usr/sbin/ | grep httpd
lrwxrwxrwx  1 root root           21 Jan 31 16:29 httpd -> /usr/sbin/httpd-event
-rwxr-xr-x  1 root root       641552 Jan 27 16:17 httpd-event
-rwxr-xr-x  1 root root       616816 Jan 27 16:17 httpd-prefork
-rwxr-xr-x  1 root root       629200 Jan 27 16:17 httpd-worker
lrwxrwxrwx  1 root root           23 Jan 30 11:02 httpd2 -> /usr/sbin/httpd-prefork
lrwxrwxrwx  1 root root           11 Jan 27 16:17 httpd2-event -> httpd-event
lrwxrwxrwx  1 root root           13 Jan 27 16:17 httpd2-prefork -> httpd-prefork
lrwxrwxrwx  1 root root           12 Jan 27 16:17 httpd2-worker -> httpd-worker
At the end of both installations a post-installation script is running, which creates the binaries, the “httpd”-link and the various “httpd2”-links.
These files/links do not change when we restart Apache2 with a different MPM-setting in “/etc/sysconfig/apache2”.
Can we trust in “httpd -l”? What about “apachectrl -M”?
From the above information we must conclude that we cannot trust the information provided by “httpd -l” or “httpd -V” to give us reliable information for a running Apache2 service on Opensuse. It only shows us, what the most modern MPM among the available ones on the system is. Something similar is to say about “httpd2 -l”; it shows us the other end of the spectrum. Only, if we have just one MPM variant of Apache2 installed all information gets identical and consistent.
If you have a running Apache2 service, a really reliable information regarding the compiled in MPM module is given by “Apachectrl -M” or indirectly by “ps aux | grep httpd”, which reveals the type of the httpd-binary variant started.
Conclusion
Apache2 is provided on Opensuse with static compiled in MPM modules. If you want to choose between different MPMs you have to install related packages; they provide different variants of the httpd-binary which you find afterwards in the directory “/usr/sbin”.
The present Leap 15.2-specific startup-logic for the Apache-service is based an Opensuse-specific script-function “find_mpm” (witin the file “/usr/share/apache2/script-helpers”). According to its logic you MUST specify the MPM-variant via setting a variable in “/etc/sysconfig/apache2” if you want to or must break the fixed preference order “even > worker > prefork”.
Opensuse changed the logic of its MPM selection in the function “find-mpm” between Leap 15.1 and Leap 15.2. This change may, unfortunately, block a successful start of an upgraded Apache2-
service with PHP-support. (A bit of concise information on this point in the Release Notes would have been helpful.)
In case you use “mod_php” for PHP support by Apache2 and thus add “php7” to the list of Apache-modules to be loaded at start-up, you MUST set the “APACHE_MPM”-variable to “prefork” – at least if you follow the standard Opensuse concepts for the Apache service. The enforced choice is reasonable as PHP itself is not thread-safe.
Criticism, Opensuse Apache/PHP deficits and alternatives
As I criticize the handling of Apache2 on Opensuse I also want to add that I miss the flexibility other distributions offer regarding the parallel installation of multiple PHP-versions and a switch between them on the Apache-server. At least with a fast-cgi implementation.
I furthermore do not understand why Opensuse restricts the PHP version in their Update repository to just one and in the PHP-specific repository to the latest 2 versions. And even for these two PHP versions a developer is forced to install two virtual Opensuse machines with different Apache/PHP constellations, if he does not want to change the installed packages all the time.
The somewhat unflexible provision of Apache in combination with PHP and the MPM-logic may make you think about alternatives. There are various situations:
- If you look beyond Apache I would recommend to setup Nginx.
- If you look at a way to combine PHP with threaded MPM variants as “worker” or “event, try an installation based on FastCGI and PHP-FPM instead of using php_mod. But consider security aspects then.
- If you look for support of multiple PHP-versions with Nginx and/or Apache install Debian or Ubuntu in a virtual machine (on a Opensuse host 🙂 ).
For those who like to experiment I have added some links in the last section of this post.
Next post
In the next post I shall cover the startup-problem of the “smartd”-service. This will be a much shorter story.
Links
Links related to the Apache MPM-topic
http://httpd.apache.org /docs /current /en /mpm.html
https://documentation.suse.com/ sles/15-SP2/ html/ SLES-all/cha-apache2.html
http://httpd.apache.org/ docs/ trunk/misc/ perf-scaling.html
Check available MPM-method on Apache
https://www.binarytides.com/check-which-mpm-multi-processing-module-apache-is-running/
Links regarding an alternative FastCGI installation with PHP-FPM
https://en.opensuse.org/ SDB:Apache_FastCGI_and_PHP-FPM_configuration
https://www.p4tchwork.de/apache-php-system-resource-usage/
https://blog.wappler.systems/opensuse-leap-15-apache-2-php-fpm-http2/
Flexible Apache and PHP installations on Debian derivatives
https://www.digitalocean.com/ community/ tutorials/ how-to-configure-apache-http-with-mpm-event-and-php-fpm-on-ubuntu-18-04-de
https://www.epidemiology.tech/apache-php7-4-wordpress-setup/
https://tecadmin.net/setup-apache-php-fpm-ubuntu-20-04/
https://www.interserver.net/ tips/kb/ change-php-version-apache-ubuntu/
Links regarding Nginx
https://techviewleo.com/install-php-on-opensuse-nginx-apache/
https://www.tecmint.com/install-lemp-nginx-php-mariadb-phpmyadmin-in-opensuse/
https://websiteforstudents.com/install-php-7-4-php-7-4-fpm-on-ubuntu-18-04-with-apache2-nginx/
HTTP 2 installation on Opensuse
https://en.opensuse.org/ SDB: Apache_HTTP_2_configuration
Set default target on Opensuse
https://forums.opensuse.org/ showthread.php/ 526792-How-to-change-default-runlevel
Plasma, Nvidia and Wayland
https://community.kde.org/ Plasma/ Wayland/ Nvidia