In my series on various methods to access a Spice console of a VM I have already covered two remote scenarios in an Intranet based on remote-viewer and SSH:
- Scenario 1: remote-viewer is run on the KVM/Qemu server and accesses the Qemu-hypervisor over a Unix socket. The user at the remote client-system opens a “ssh -X” or “ssh -XC” session to the server, starts remote-viewer there and uses the graphical output data via the client’s X-server. Audio requires a reverse SSH tunnel for Pulseaudio ( “ssh -X -R 44713:localhost:4713” ).
- Scenario 2: remote-viewer is started on the remote client-system. A Spice and VM-specific TCP-port (TCP socket) on the server is used for the transfer of video + audio data. Security can be achieved by establishing a SSH tunnel with port-forwarding and further user-related SSH-restrictions.
See
KVM/Qemu VMs with a multi-screen Spice console – V – remote access via remote-viewer, a network port and a SSH-tunnel
KVM/Qemu VMs with a multi-screen Spice console – IV – remote access via SSH, remote-viewer and a Unix socket
KVM/Qemu VMs with a multi-screen Spice console – III – local access with remote-viewer via a Unix socket
KVM/Qemu VMs with a multi-screen Spice console – II – local access with remote-viewer via a network port
KVM/Qemu VMs with a multi-screen Spice console – I – Overview over local and remote access methods
Security regarding an encrypted data transfer, user authentication and port or socket access was achieved via SSH in both scenarios, plus ACLs in case of the first scenario. A critical point in both scenarios was data compression. SSH compression (=gzip) had a palpable negative impact on the responsiveness of the VM’s desktop in the Spice windows. However, data compression offered via Spice options did not diminish the performance – at least it could not be felt.
In this article we have a look at yet another scenario for remote-viewer: Spice is this time combined with TLS encryption. However, in this post, we use TLS for data encryption, only, and not yet for client-authentication. Client authentication methods in combination with TLS and remote-viewer will be the topic of the next article.
We use the same systems as in the last articles: A KVM/Qemu server host “MySRV” with a Leap 15.2 OS on it, a test-VM “debianx” with a Kali-OS on it and a client-system “MyLAP” (a laptop with a Leap 15.2 OS). On the KVM/Qemu host our meanwhile familiar user “uvma” is used to start the VM “debianx” for us with the help of virt-manager. On the client-system “MyLAP”, instead, a user “myself” will start remote-viewer.
Schematic drawing
The following sketch shows what we want to achieve:
The
Qemu-hypervisor shall use a TLS server-key and a X509-server-certificate to encrypt all application data transferred in our Intranet between the server and the remote-viewer application on the client-system. This should include all data channels of the Spice protocol.
TLS CA, server certificates and RSA-keys
A sound TLS setup requires at least a CA, a CA-certificate, a server-certificate for the KVM/Qemu-server and a file with the private key of an asymmetric (RSA) key-pair. This brings us to the question: What tools can we use on a Leap-system to create such certificates for our private network?
On a Linux system there are, of course the OpenSSL libraries together with the so called “certtool“, a CLI-tool. You get the latter on Leap 15.2 by installing the “gnutls” RPM from the Leap15.2-Update repository. A documentation for the creation of CA, server and client TLS certificates and related key-pairs with certtool is given on the following web-pages:
https://libvirt.org/tlscerts.html
https://qemu-project.gitlab.io/qemu/system/tls.html.
Personally, I prefer a graphical tool to keep an overview about my own CAs and related server-certificates. As Opensuse never replaced their YaST CA-tool after they changed to Ruby as the programming platform for YaST we have to look elsewhere.
A very good tool which provides a lot of options is “XCA“. You find it in the package “xca” on a Leap 15.2 system. It is intuitive to use, offers a lot of options and its “help” documentation is very good – if you already know something about the differences and requirements of certificates. It offers suitable templates for CA-, server- and client-certificates. For a step-by-step description of how to create certificates see section 14 in the help functionality. Other tutorials for certificate creation with “xca” can be found in th following PDFs
http://help.mguard.com/ pdf /en / mguard8/ AppNotes/ AH EN X.509 CERT XCA 108396 en 00
http://evardsson.github.io/ s3c3/ Generating, signing and exporting keys and certificates with XCA
Another older tool, which I still use, is TinyCA. The following image shows a test example (I have no such net nor server as displayed).
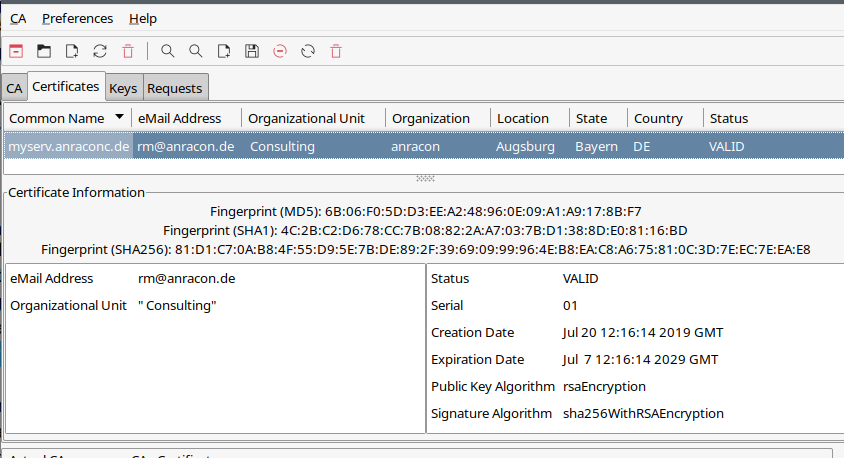
Its templates are simpler than those of “xca”; the options are also a bit more limited, but sufficient for private purposes. Opensuse provides a RPM “tinyca2” in its standard repositories. I have written some blog posts about it; see: TinyCA2 as a replacement for YaST’s CA-tools on Opensuse Leap servers with TLS/SSL – I and two later posts.
Please, be aware of the fact that you need to apply additional patches to get SHA-256 and SHA-512 capabilities. See the named post about it. You should be able with my descriptions to create a server certificate for your KVM/Qemu-host. Also see TinyCA2 as a replacement for YaST’s CA-tools on Opensuse Leap servers with TLS/SSL – II for a description into which directory the CA-certificate files should be placed on a Leap 15.x OS.
For the rest of the present article I assume
the following:
You have created a CA, a CA-certificate, a X509-compatible server-certificate and a RSA based private key for the server. You do this on whatever system you use for the administration of your CA. You have also exported the certificate data and the key into files with the “pem“-format and copied them (scp) to a save place under the control of root on your KVM/Qemu server host. In the end you should have the following files there:
- ca-cert.pem
- server-cert.pem
- server-key.pem
Note that these specific file-names are important for the later Qemu-configuration. You should rename your files accordingly or make copies with these names. Note that the server-key file contains a private key – this file must be protected against unauthorized access during all steps of the configuration process and after.
Note also that the server-certificate should be set up with the FQDN of our KVM/Qemu-server: This is “mysrv.anraconc.de” for our test situation.
You must also place a copy of the CA-cert file onto the client-system(s) from which the Spice user later connects to the KVM-server. The “CA-cert”-file must in addition be known there as coming from a trustworthy CA. See a separate section below for the required measures on an Opensuse Leap system.
If you already had a CA and had already issued certificates in the past – can we reuse them? The answer is: Yes, you could. Personally, however, I prefer to issue a special dedicated server-certificate and keys for Qemu. One of the reasons is that the Qemu process must be able to read the server-key-file and it is run for a special user “qemu” and not root. But I do not want “qemu” to be able to read other server-keys used by completely other processes as e.g. for a web- or mysql-server.
Configuration of Qemu on the KVM-host for TLS connections
You remember from previous articles of this series that remote-viewer talks directly to the Qemu-hypervisor; it does not involve any libvirt layer. It is therefore no surprise that we need to configure Qemu itself such that it uses TLS. But which is the right configuration file to take? And where do we place our certificates and keys?
On a Leap 15.2 system we normally use the libvirt machinery to create and start Qemu-based VMs and the related Qemu-processes. Then we need to tell libvirt how to start a Qemu-process with the required correct options. The config-file to take in this case is “/etc/libvirt/qemu.conf” (see the 2nd article of this series).
[If you, by the way, are interested in the qemu-options and in particular the TLS options which can be used if and when you start a qemu-process manually see the qemu documentation, e.g. here and here.]
The named “qemu.conf”-file on our Leap based KVM/Qemu-server has multiple sections regarding TLS. The first main section covers the directories used for certificate and key-files. There you also find the file-names mentioned above. Later on you find an option to change the directory for Spice related certificates. We use this option.
For the time being we set the following parameters and un-comment the related lines:
# The following tells Qemu to use TLS for the encr<yption of Spice cahnnels
spice_tls = 1

# We need to specify a directory where we place the certifactes and key to be used
spice_tls_x509_cert_dir = "/etc/pki/libvirt-spice"
That is all we need for this article. (As mentioned in a previous post: On systems with apparmor active one should also activate “security_default_confined = 1”. But this no special TLS option).
Afterwards we have to copy our certificate- and key-files to “/etc/pki/libvirt-spice/“.
Note
again: It is obligatory to use the filenames given above. A VM would not start otherwise and Qemu would complain non-existing or unusable files.
What file access rights are required?
The certificates should only include public keys, so here we could grant others the “r”-right. The situation is different with the file “server-key.pem“. It contains the server’s private key – and probably in unencrypted form if we did not protect it by password.
Therefore, we need to restrict the read rights for this file. And here we are confronted with a small glitch in the Opensuse configuration – the apparmor settings allow the privileged libvirt-user who is allowed to start virsh or virt-manager to read the files – but not “qemu”. A simple solution is
mysrv:~ # cd /etc/pki/libvirt-spice/
mysrv:/etc/pki/libvirt-spice # chmod 440 *
mysrv:/etc/pki/libvirt-spice # chown root.qemu *
mysrv:/etc/pki/libvirt-spice # la
total 20
drwxr-xr-x 2 root root 4096 Apr 11 11:44 .
drwxr-xr-x 8 root root 4096 Feb 27 15:11 ..
-r--r----- 1 root qemu 2504 Feb 27 15:14 ca-cert.pem
-r--r----- 1 root qemu 2504 Apr 11 09:49 server-cert.pem
-r--r----- 1 root qemu 3243 Apr 11 09:49 server-key.pem
mysrv:/etc/pki/libvirt-spice #
But from now on you should be careful during your experiments and check what members the group “qemu” has – on a Leap system it should only contain the user “qemu”, nobody else!
The question remains whether you need the CA-cert-file for any other purposes on the KVM server. If so, please follow the advice given in the section for using the ca-cert-file on the client-system and apply them in an analogous way on the server.
You should restart the libvirtd-daemon to activate the changed options for the start of Qemu-based VMs via virsh or virt-manager in the future.
Configuring Qemu to use TLS is NOT the same as configuring libvirt to use TLS!
Just a warning:
Readers who work totally libvirt-centered and use virt-viewer instead remote-viewer should at this point of reading become very clear about the fact that configuring Qemu for using TLS with Spice is something else than configuring libvirtd to use TLS for external connections. The Opensuse documentation at
doc.opensuse.org/ documentation/ leap/ virtualization/ html/ book-virt/ cha-libvirt-connect.html
refers to the latter. The settings to activate TLS for libvirtd and libvirt-tools use a different directory scheme and different file-names in comparison to what we did above. Also the required file access to certificates and private keys can be limited to root for pure libvitr-based tools – but not in our scenario.
Configuring the VM to use TLS with Spice
So far Qemu is prepared to support TLS on the KVM-server – if and when the use of TLS is requested. We, therefore, still have to define that TLS should be used for connections to the Spice console of our specific test-VM “debianx”.
Actually, we have to define a special network port for this purpose. In the XML-configuration file for the VM we change the Spice settings :
    <graphics type='spice' port='20001' tlsPort='20002' autoport='no' keymap='de' defaultMode='any' >
      <listen type='address' address='0.0.0.0'/>
      <image compression='auto_glz'/>
      <gl enable='no'/>
    </graphics>
    <sound model='ich6'>
      <address type='pci' domain='0x0000' bus='0x00' slot='0x04' function='0x0'/>
    </sound>
    <video>
      <model type='virtio' heads='2' primary='yes'>
        <acceleration accel3d='yes'/>
      </model>
      <address type='pci' domain='0x0000' bus='0x00' slot='0x02' function='0x0'
/>
    </video>
The first change in comparison to previous settings consists of a new attribute “tlsPort”
(Off topic: I use the same audio and video settings as before.)
Note:
The “tlsPort” – just as the the standard “port” – is specific for the VM.
For another VM you must define another “tlsPort”.
The second change is the removal of the attribute “defaultMode”. This allows us later to switch between TLS-secure and “insecure” access methods as we like. Remember that we always can make a insecure” connection (regrding a lack of TLS) secure at any time by building a SSH tunnel.
Some reader may ask why we did not set the default mode to “secure” and deleted the “port”-attribute. Well, if we were in a position in which we had tested the TLS configuration already and wanted to use TLS only in the future (and not SSH, for example) then we could make these changes, yes. But I keep the option of using a SSH-tunnel open. TLS is anyway the preferred option if the associated port is specified by the Spice client (here remote-viewer).
The reader certainly has noticed that I activated Spice image data compression. We made a good experience with it the other day.
How to deal with the CA-certificate on the Leap 15.2 client-system? Where to place it?
OpenSSL will validate the whole CA-chain when confronted with a server-certificate. It needs the CA-certificate for it. In addition it should trust the related public key – as the CA-root-certificate is self-signed. This means that we have to make the certificate of our private CA known to the client-system(s) – here MyLAP – on which we want to start a Spice client requesting a TLS encrypted connection from the KVM/Qemu-server.
Opensuse Leap systems are a bit picky about were to place the CA-certificates. To say it clearly: “/etc/ssl/certs” is the wrong place!
Any certificates unknown to Leap 15.2 will not survive a reboot there. They won’t even survive a call of the “update-ca-certificate“-program, which would make the CA-certificate known to other programs as a usable and trustworthy one. So, placing the “ca-cert.pem”-file of our private CA into “/etc/ssl/certs” will lead to severe problems: It won’t be found or won’t be accepted during the start of remote-viewer on a client-system as MyLAP.
Note:
The right place for the certificate of our private CA on a Leap-system is “/etc/pki/trust/anchors/“.
You should copy it there. By the way: You should use the name given to your CA initially – not necessarily the special file name used for Qemu on the KVM/Qmu server. In my case it is something like “anraconc-CA”, thus “anraconc-CA.pem”.
So, we perfom the following copy-process
CaSRV:~ # scp /root/.TinyCA/anraconc-CA/cacert.pem root@MyLAP:/etc/pki/trust/anchors/anraconc-CA.pem
Password:
On MyLAP we then enter
mylap:/etc/pki/trust/anchors # la
-r--r--r-- 1 root root  2540 Apr 11 11:11 anraconc-CA.pem
mylap:/etc/pki/trust/anchors # update-ca-certificates
mylap:/etc/pki/trust/anchors # la /var/lib/ca-certificates/openssl | grep anrac
lrwxrwxrwx 1 root root    15 Apr 11 12:13 610c65bd.0 -> anraconc-CA.pem
-r--r--r-- 1 root root  2540 Apr 11 12:13 anraconc-CA.pem
lrwxrwxrwx 1 root root    15 Apr 11 12:13 bfb4c341.0 -> anraconb-CA.pem
“update-ca-certificates” makes the CA-certificate system-wide. The look into “/var/lib/ca-certificates/openssl” just was a check for this.
That is all we have to do regarding certificates on the client.
Test of the TLS encrypted remote connection to the Spice console
We first open our firewalls for connection from MyLAP to port 20002 on MySRV. On our KVM/Qemu-host we then start the libvirtd-daemon again to cover all
changes to Qemu and the VM. Afterward our privileged user “uvma” starts the VM “debianx” for us on the server. This should work without any problems – there should not be any errors regarding the TLS options and TLS files.
Then we have a brief look at https://libvirt.org/uri.html and https://www.spice-space.org/spice-user-manual.html to get an idea how we have to formulate our remote-viewer parameters for TLS:
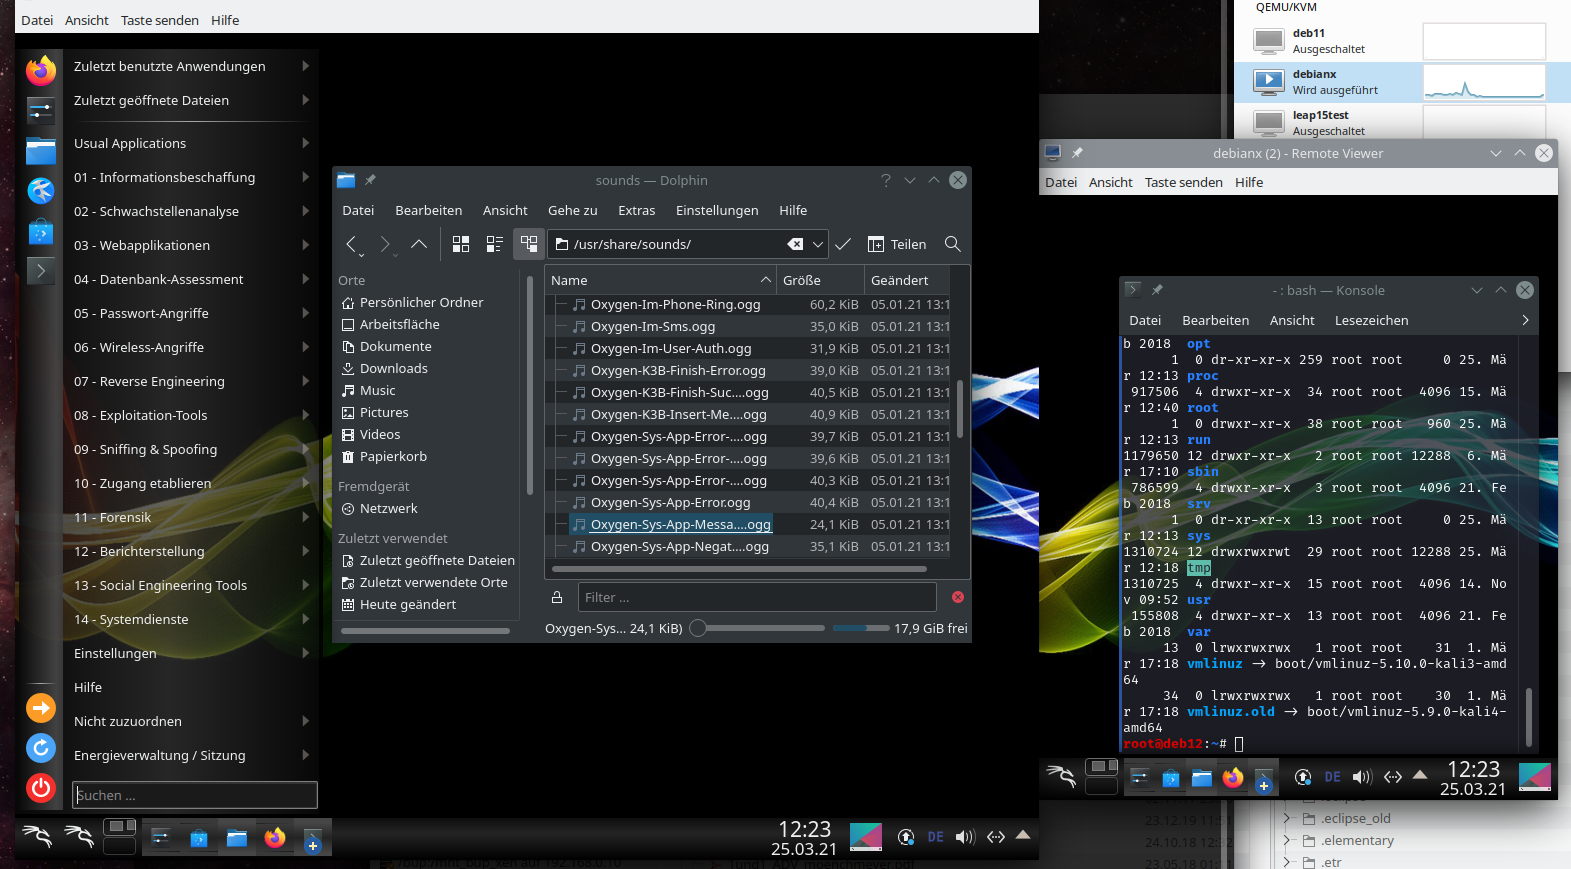
myself@mylap:~> remote-viewer spice://mysrv.anraconc.de?tls-port=20002

(remote-viewer:29853): GSpice-WARNING **: 15:29:34.201: Warning no automount-inhibiting implementation available
with results that look very similar to what we have done in the last article. I omit the proof by screenshots as we would get no new information from them.
But did you notice a major difference besides the special way of specifying the TLS-port to use ?
We have to use the FQDN of the server!
Exactly in the form it was filled as the “common name” into the server-certificate! If we just used “mysrv” this would lead to an error message of OpenSSL – despite the fact that the short name can be resolved by a DNS server.
Note also that something like “remote-viewer spice://mysrv.anraconc.de:20002” will NOT work.
The required form of the command for remote-viewer with TLS is :
remote-viewer spice://FQDN_OF_KVM_HOST?tls-port=VM_SPECIFIC_PORT_NR
You should also test that the variant
myself@mylap:~> remote-viewer --spice-ca-file=/etc/pki/trust/anchors/anraconc-CA.pem spice://mysrv.anraconc.de?tls-port=20002
works flawlessly.
Checking for encryption
A look at netstat on the server proves a connection to port 20002:
mysrv:~ # netstat -an | grep 20002
tcp        0      0 0.0.0.0:20002           0.0.0.0:*               LISTEN
tcp        0      0 192.168.2.4:20002      192.168.2.22:36650      ESTABLISHED
tcp        0      0 192.168.2.4:20002      192.168.2.22:36646      ESTABLISHED
tcp        0      0 192.168.2.4:20002      192.168.2.22:36642      ESTABLISHED
tcp        0      0 192.168.2.4:20002      192.168.2.22:36648      ESTABLISHED
tcp        0      0 192.168.2.4:20002      192.168.2.22:36658      ESTABLISHED
tcp        0      0 192.168.2.4:20002      192.168.2.22:36656      ESTABLISHED
tcp        0      0 192.168.2.4:20002      192.168.2.22:36640      ESTABLISHED
tcp        0      0 192.168.2.4:20002      192.168.2.22:36644      ESTABLISHED
tcp        0      0 192.168.2.4:20002      192.168.2.22:36652      ESTABLISHED
tcp        0      0 192.168.2.4:20002      192.168.2.22:36654      ESTABLISHED
mysrv:~ #
While this only shows that a connection to the right port is established. However, an additional look with wireshark shows you the TLS version (which it gets from protocol headers):
We see that TLS V1.3 is indeed used to encrypt the application data crossing port 20002.
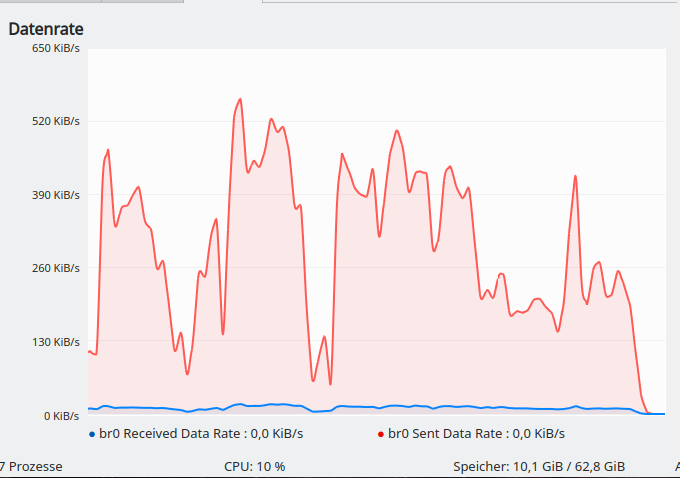
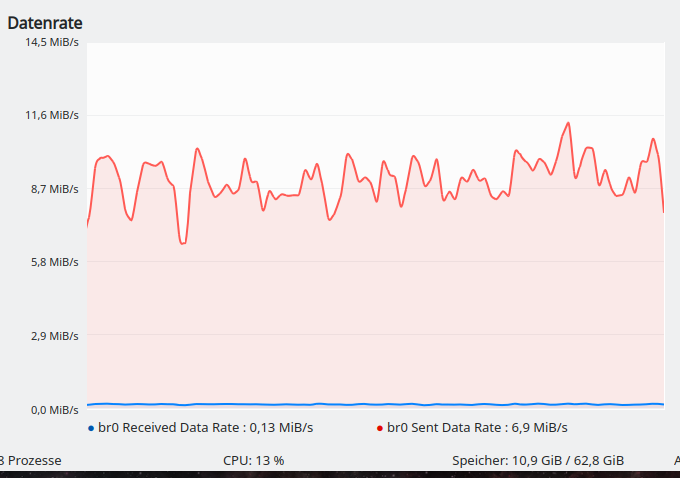
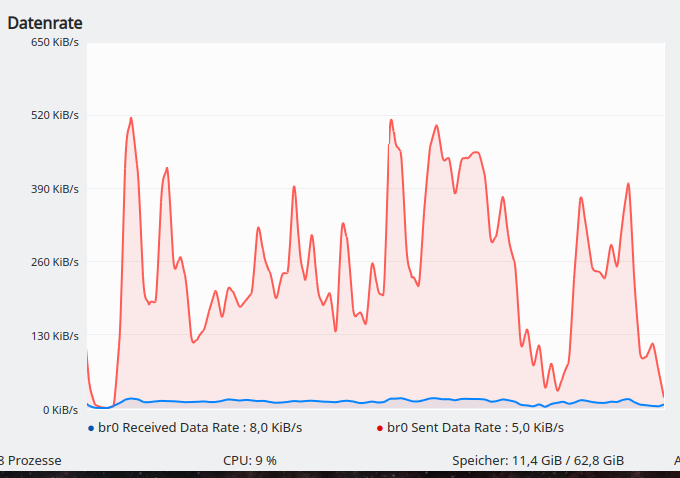
Data transfer rates and responsiveness
The data transfer rates for the present scenario overall are very similar to the ones measured for the SSH-scenarios with Spice data compression. Maybe a tiny bit higher for TLS. But there are too many impact factors to really say this. The responsiveness of the window manager and single applications are excellent – as with the SSH scenario of the last article. I leave it to the reader to test it out on his own.
Does TLS encryption to the VM work locally, too?
An interesting question is whether we can have
encryption locally on the KVM/Qemu-server, too. The answer is: Yes, but you still have to provide the FQDN of the server; the network request will nevertheless be handled over the “lo”-device. This at least enables you to test your VM settings locally. But local encryption could also be interesting in some multi-user scenarios.
Using different options for the defaultMode and the Spice data channels
Allowed values for the “defaultMode” attribute in the Spice configuration of the VM are “secure”, “insecure” and “any”. With “any” you can switch between encrypted and unencrypted access at any time by closing the Spice windows and opening them again with different settings for the remote-viewer. You should check which port is taken by looking at the output of e.g. netstat. Using “secure” will enforce TLS-encryption; if no sufficient certificates were in place the VM would not even start then.
An important feature regarding TLS is that you may define which Spice data channel should/must be encrypted. You find more information about this at https://libvirt.org/formatdomain.html#graphical-framebuffers. I quote from the documentation there:
When SPICE has both a normal and TLS secured TCP port configured, it can be desirable to restrict what channels can be run on each port. This is achieved by adding one or more
The example given in the libvirt documentation is:
<graphics type='spice' port='-1' tlsPort='-1' autoport='yes'>
  <channel name='main' mode='secure'/>
  <channel name='record' mode='insecure'/>
  <image compression='auto_glz'/>
  <streaming mode='filter'/>
  <clipboard copypaste='no'/>
  <mouse mode='client'/>
  <filetransfer enable='no'/>
  <gl enable='yes' rendernode='/dev/dri/by-path/pci-0000:00:02.0-render'/>
</graphics>
Off topic: You see that there are more options for Spice – e.g. the streaming parameter, which can be used for video-streaming. In a quiet minute the interested reader should have a look into the Spice documentation at
https://www.spice-space.org/spice-user-manual.html
and
https://qemu.readthedocs.io/en/latest/system/invocation.html
to get more information.
What about other security elements?
It is nice that we now are able to use a TLS encrypted connection for remote-viewer. But a noticeable disadvantage in comparison to the SSH-tunnel scenario of my last article is that we must keep the Spice TLS-port open and accessible on the server. In addition: Basic security measures on a server should also include some form of user authentication – and the access to the Spice console of a VM should be restricted to selected users. With the TLS-elements discussed above alone we cannot achieve this. So, you have to wait for yet another blog article.
In the meantime you can and should at least set a password for the Spice console:
<graphics type='spice' port='20001' tlsPort='20002' autoport='no' keymap='de' defaultMode='any' password='my_verysecret_pwd' >
.....
See the 2nd article of this series about it.
Conclusion
It is relatively easy to
configure a KVM/Qemu-server such that it encrypts Spice data with TLS. We tested this with a remote-viewer instance started on a client-system somewhere in our Intranet. A basic requirement is of course the creation of a private CA and certificates/keys. Tools like TinyCA or XCA help us with this.
As remote-viewer directly talks to the Qemu-emulator we had to configure libvirtd to enable dependent tools like “virsh” and “virt-manager” to start qemu-processes with the required parameters for TLS. This could be done via a few settings in the file “/etc/libvirt/qemu.conf”.
This type of qemu-configuration differs from activating TLS for a remote access to libvirt-based tools themselves. As a consequence the private server-key to be used by the Qemu process must be made readable for the “qemu”-user.
The TLS setup for remote-viewer and Spice neither allowed for user authentication on the server nor for user-specific restrictions so far. In the next article
KVM/Qemu VMs with a multi-screen Spice console – VII – remote-viewer, qemu and SASL authentication
we shall, therefore, have a look at methods for user authentication combined with TLS.
Links
Qmu, Spice und TLS
https://qemu-project.gitlab.io/qemu/system/tls.html
https://www.libvirt.org/tlscerts.html
https://ravada.readthedocs.io/en/latest/docs/spice_tls.html
Spice + defaultMode
https://libvirt.org/formatdomain.html#video-devices
OpenSSL to check for a valid TLS certificate on a network port
https://tenable.force.com/s/article/Using-OpenSSL-to-verify-certificate-information-on-a-port