I continue with my mini-series on how to (re-) build something like the S-curve of Mr. Kapoor in Blender. See :
Blender – complexity inside spherical and concave cylindrical mirrors – I – some impressions
In my last post
Blender – complexity inside spherical and concave cylindrical mirrors – II – a step towards the S-curve
I discussed how we can add a smooth transition from convex and concave curvature around the y-axis of an originally flat rectangular Blender mesh positioned in the (y,z)-plane. The rectangle had its longer side in y-direction. Starting from a flat area around the vertical middle axis (in z-direction) of the object we bent the wings to the left and right around the y-axis with systematically growing curvature, i.e. with shrinking curvature radius, in y-direction. The curvature around the y-axis left of the central z-axis got a different sign than the curvature right of the central z-axis. At the outer edges of both wings we approximated the form of a half cylinder. So curvature became a function of both x and y.
To create a really smooth surface with differentiable gradient and curvature we had to apply a modifier called “Subdivide Surface“. The trick to make this modifier work sufficiently well with only a few data points in z-direction was to keep curvature almost constant in z-direction for a given y-position along the horizontal axis. We achieved this by putting the vertices of our mesh on the central rotation-axis at the same z-(height)-values as the vertices on the circles at the outer edges. In the end we had established a smoothly varying gradient of the surface curvature around the y-axis with the y-coordinate while the partial derivative in z-direction of this curvature was close to zero for any fixed y-position.
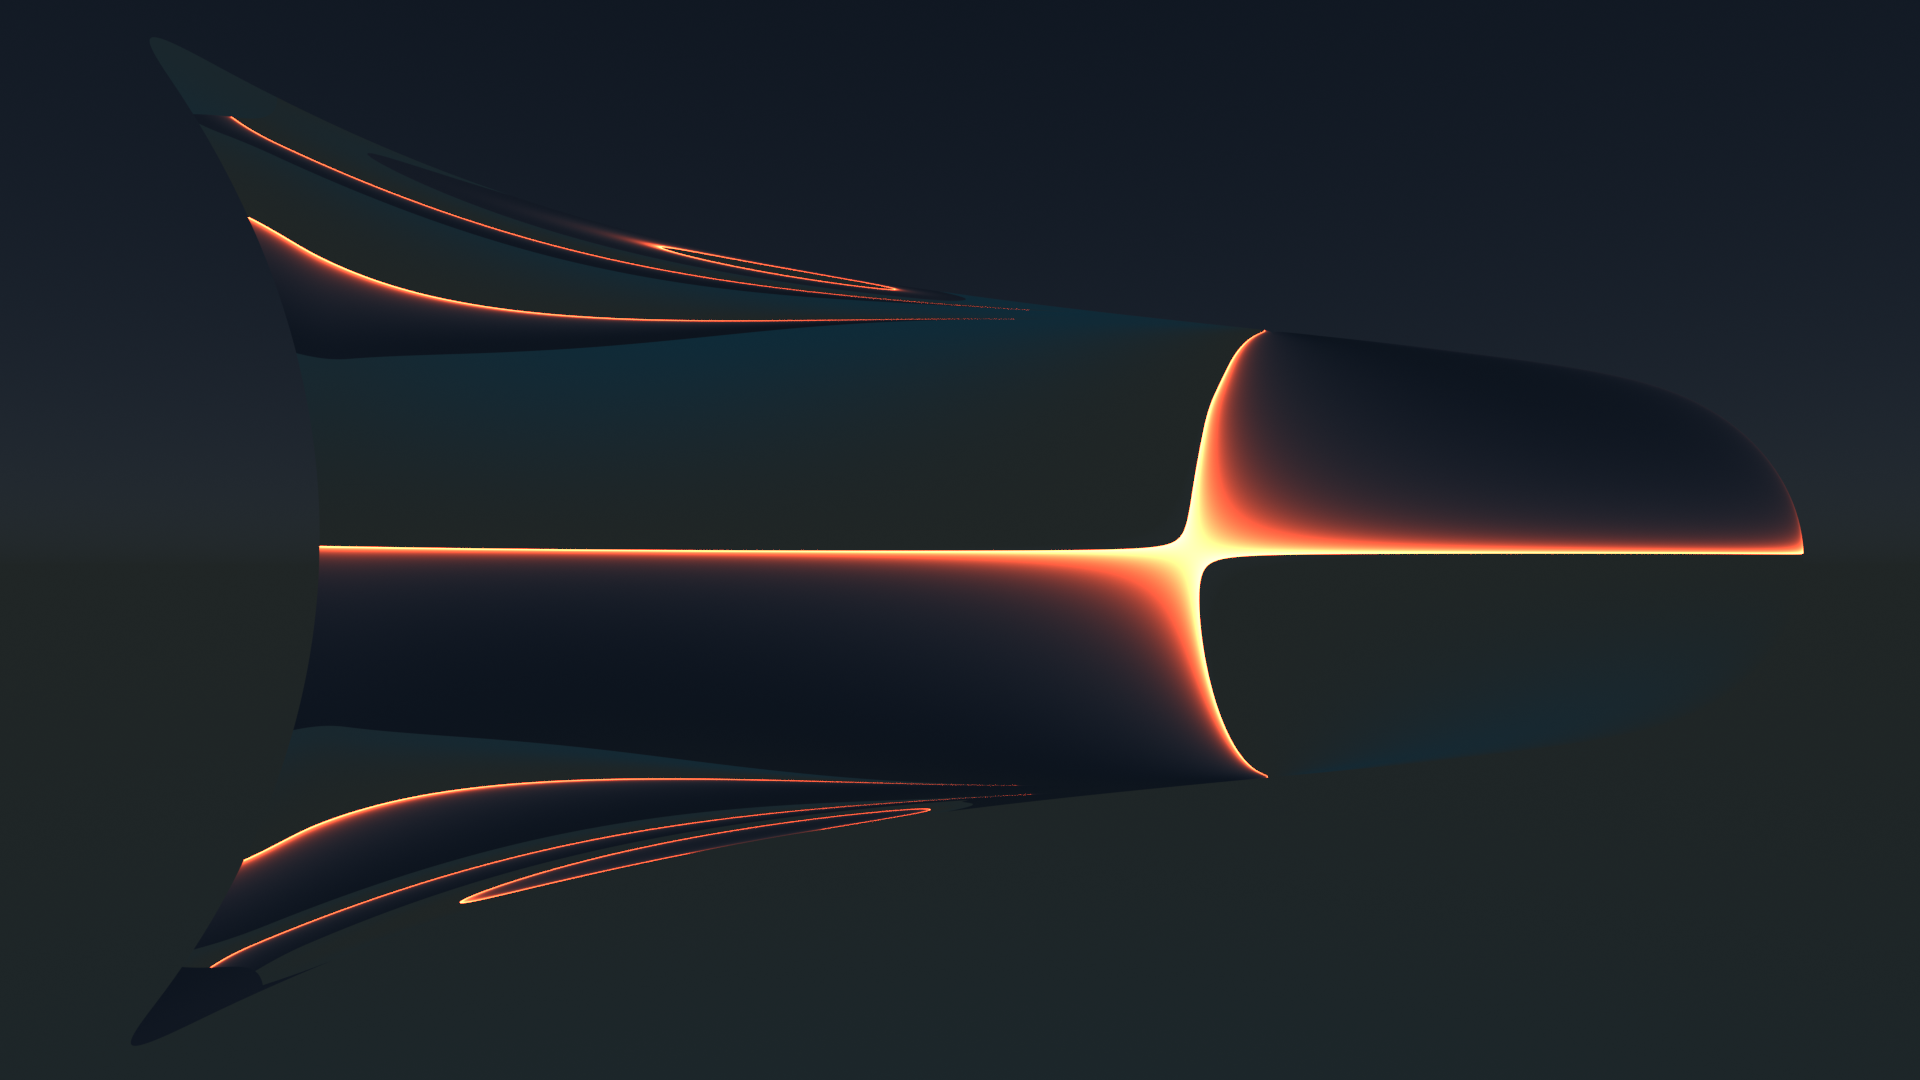
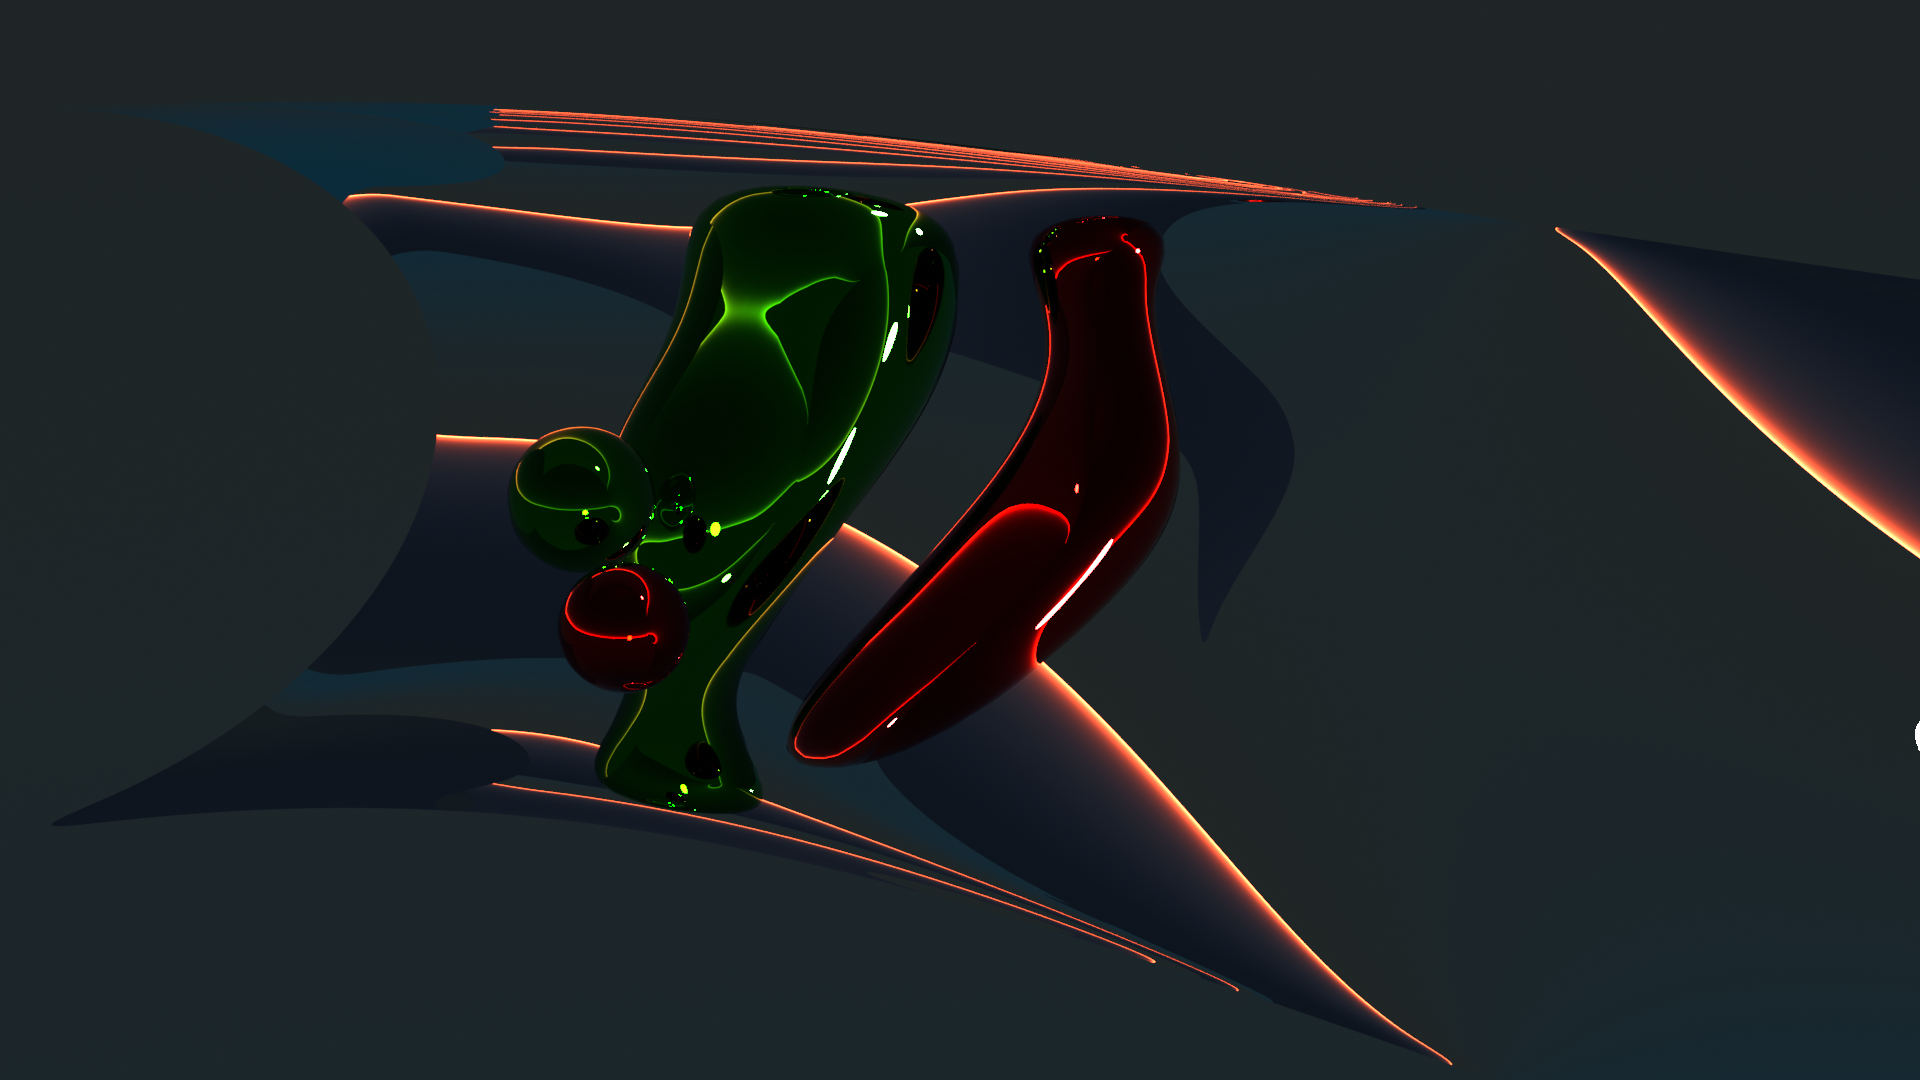
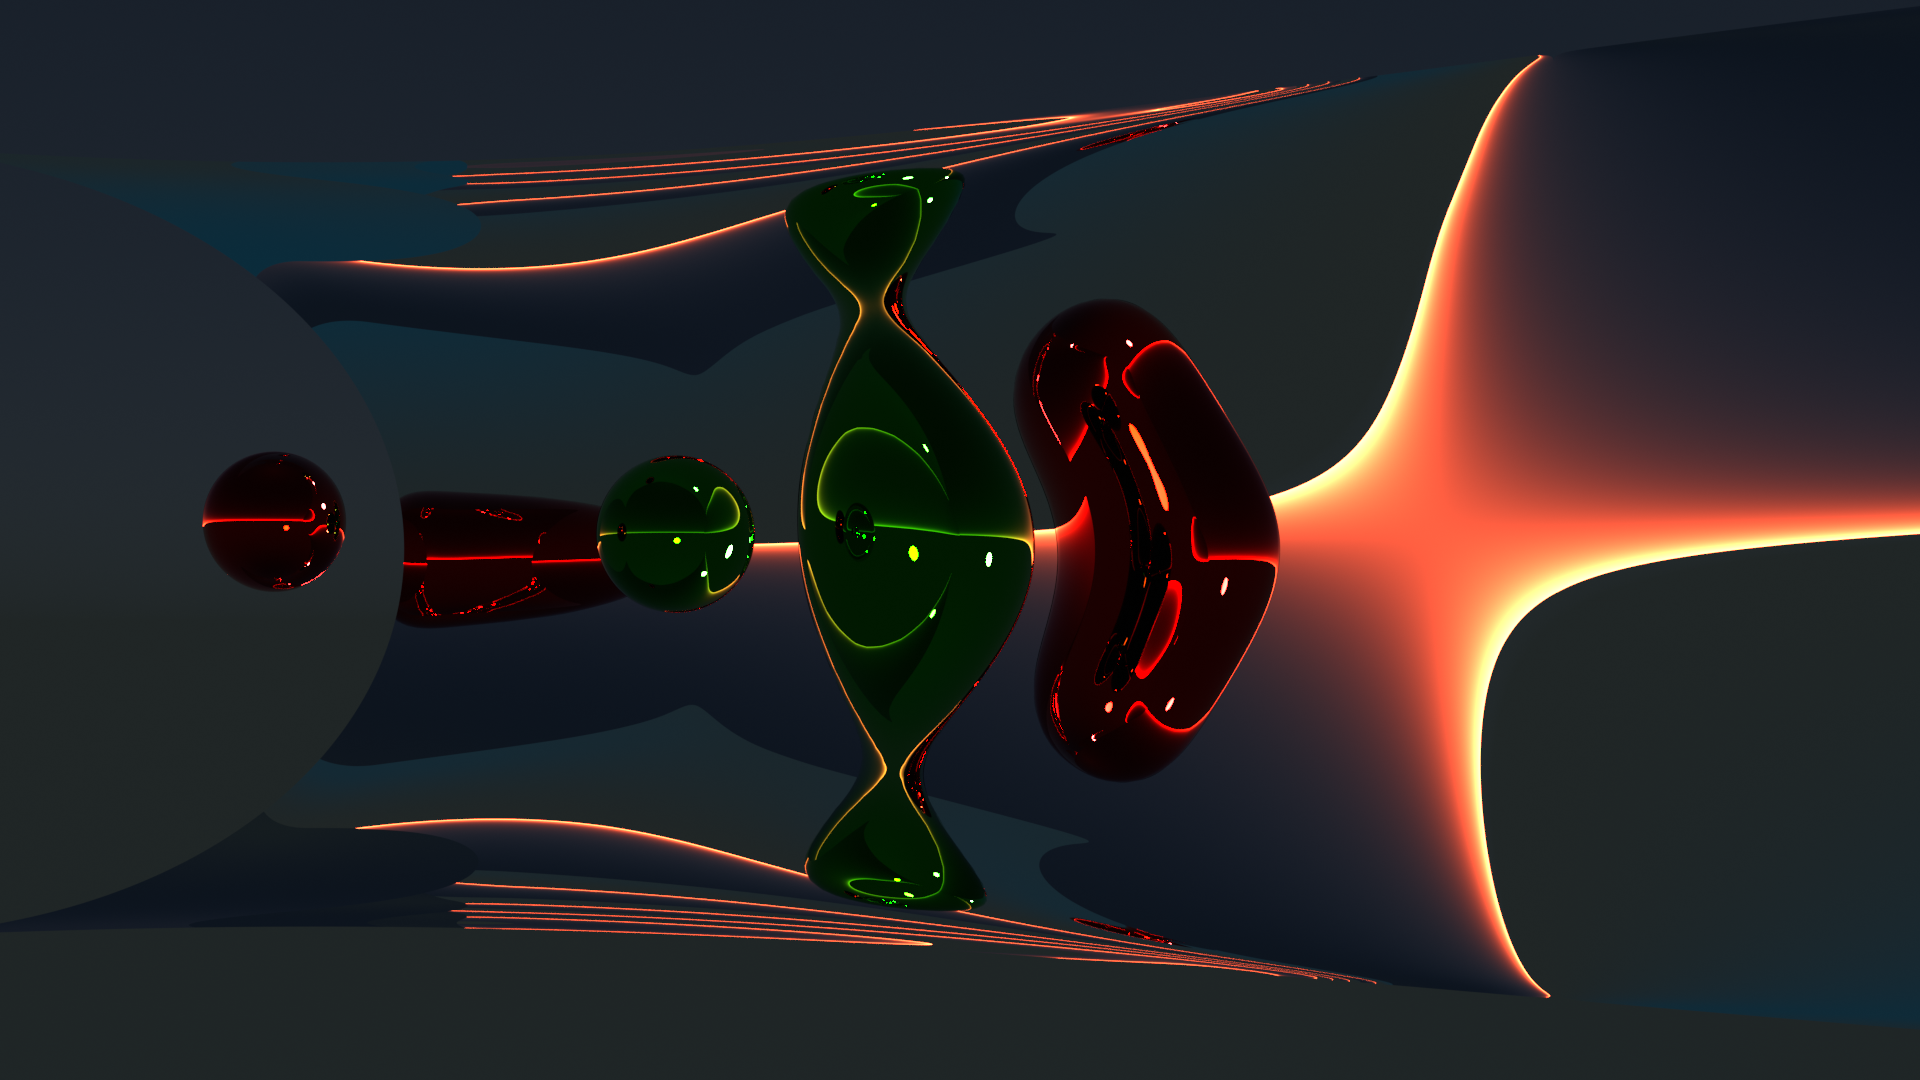
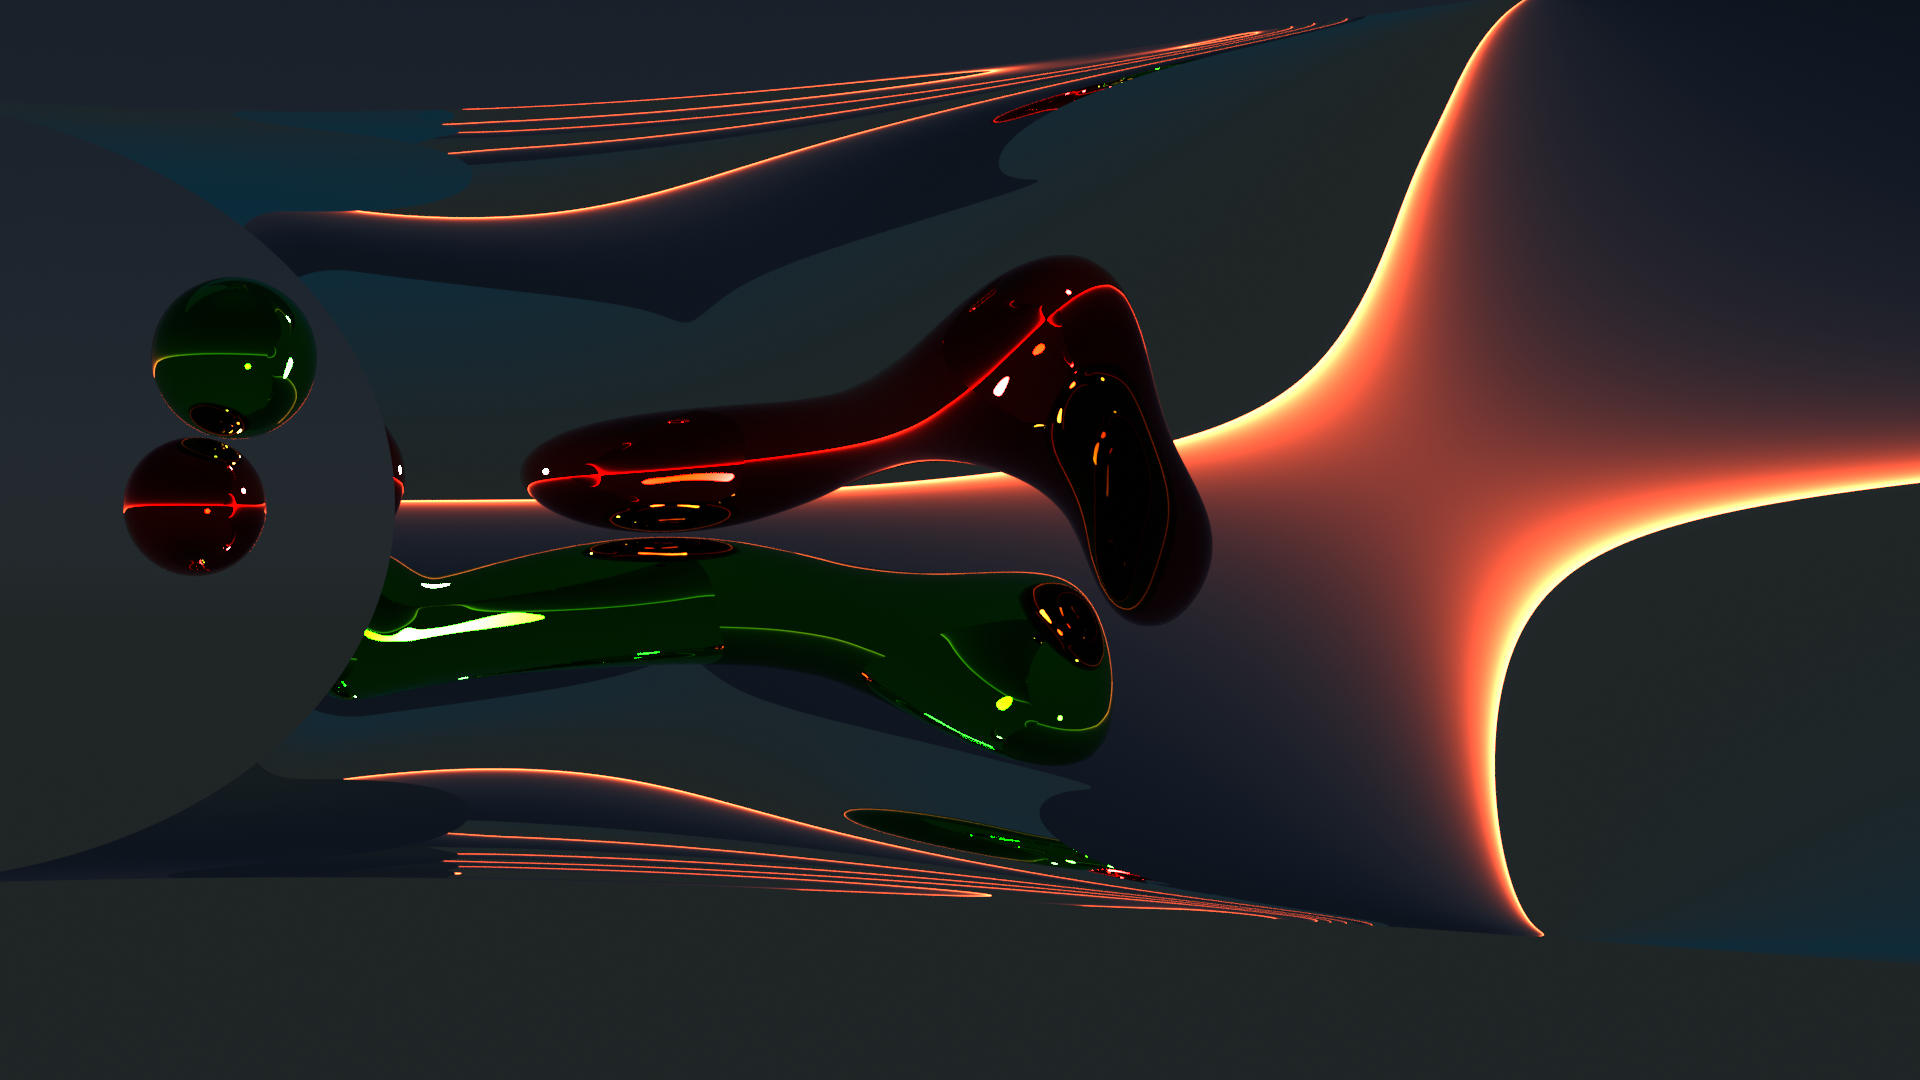
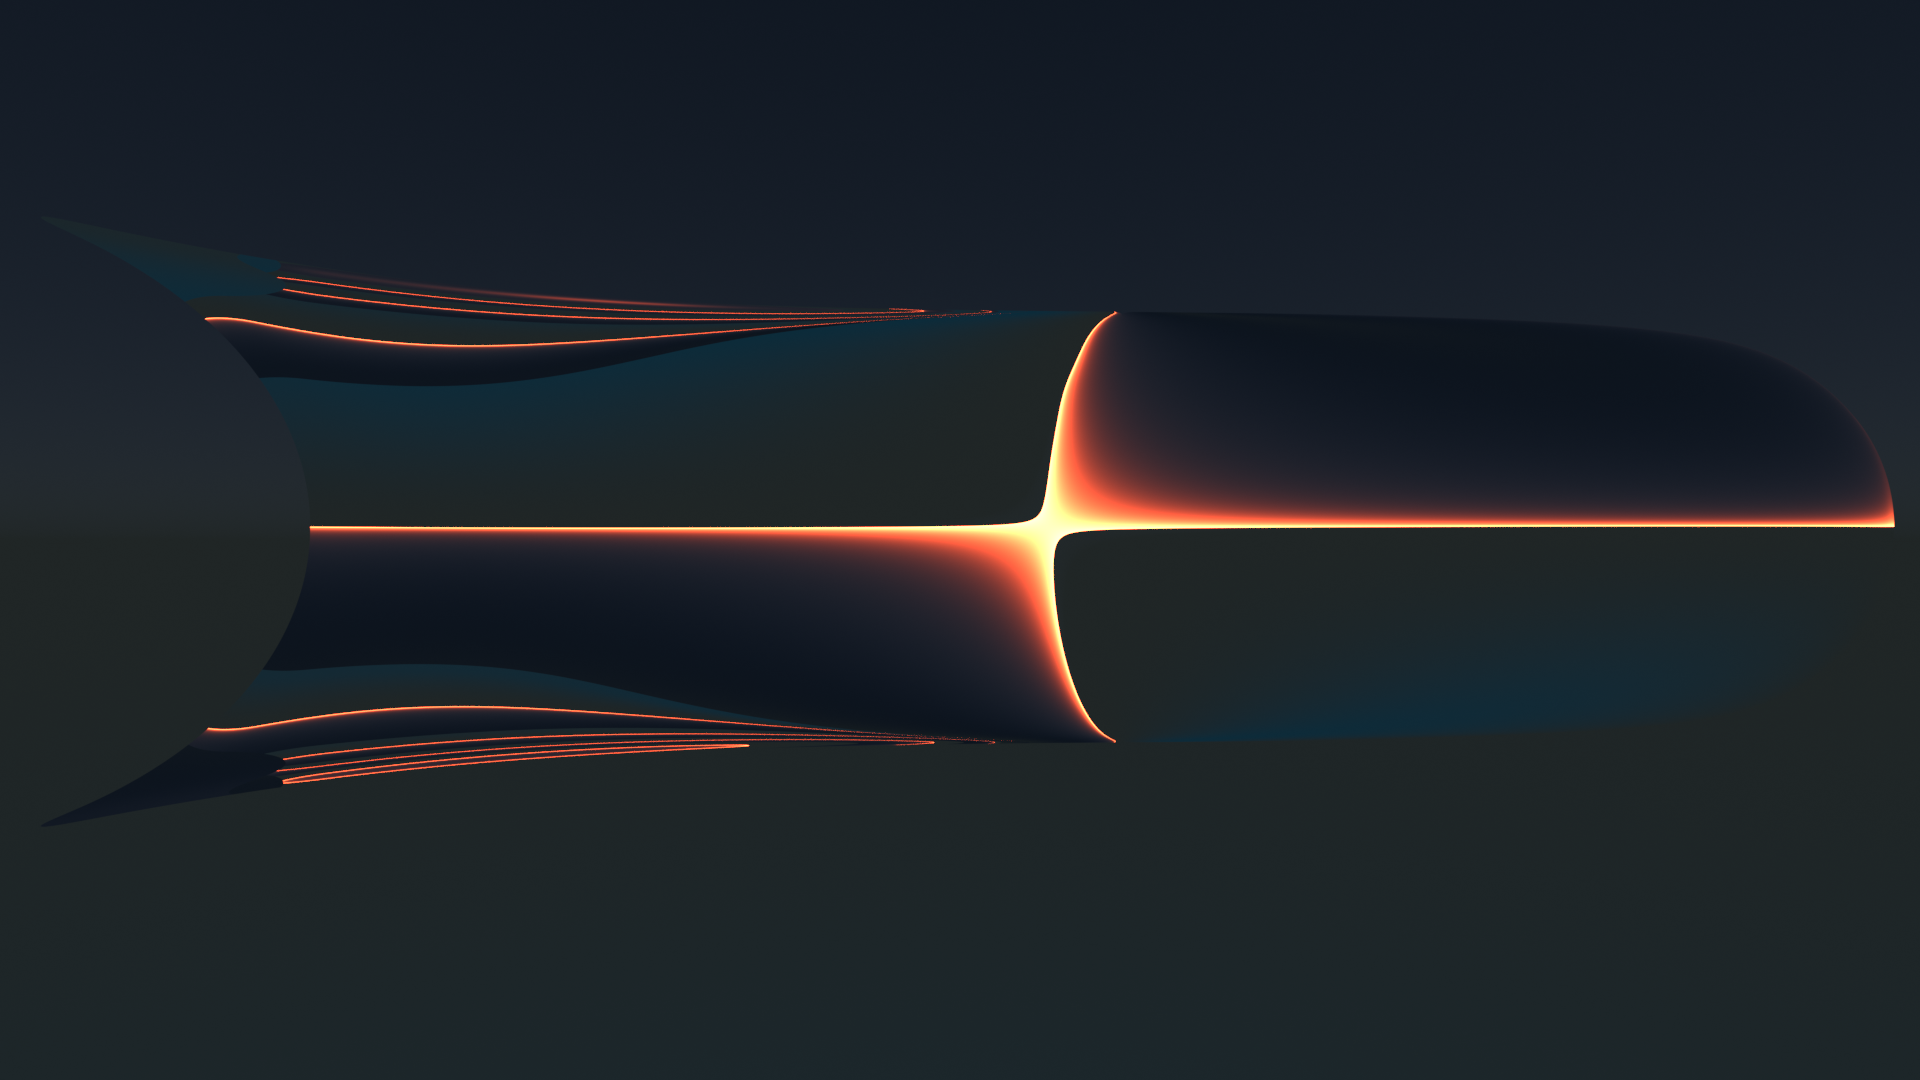
In this post I want to add an “S-curvature” of the object in y-direction. Meaning: We are now going to bend the object along a S-shaped path in the (x,y)-plane. Physically, we are adding curvature in x-direction, more or less constant around two imaginary vertical axes positioned at some distance in y-direction from the central z-axis – and with different signs of the curvature. So, we are creating a superposition of a growing curvature around the y-axis with a constant curvature around two z-axes for each of the wings left and right of the central rotational z-axis of our object. Eventually, we build something like shown below:
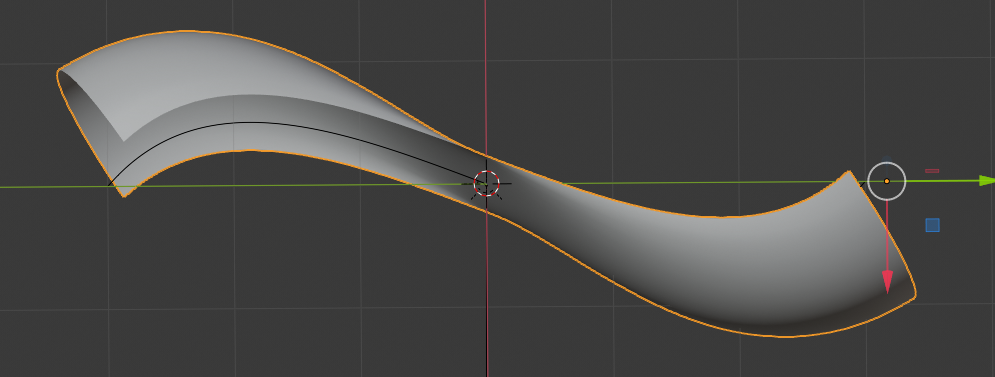
When we look at images of Mr. Kapoor’s real S-curve we see that he keeps curvature at zero both in z- and a diagonal x/y-direction at the central rotational axis – due to the “S”. The same is true for our object. But: In comparison to the real S-curve of Mr. Kapoor our object is more extreme:
The ratio of height in z-direction to length in y-direction is bigger in our case. The object is shorter in y-direction and thus relatively higher in z-direction. The curvature radii around the y-axis are significantly smaller. Our surface approximates full half circle curves at the outer edges; in contrast to the real S-curve our surface approximates a shifted cut of a cylinder.
We could, of course, adapt our S-curve in Blender a bit more to the real S-curve. However: Our more extreme bending around the y-axis at the outer left and right edges of the object allows for multiple reflections of light falling in in x-direction on the concave sides of the object. This is not the case for the real S-curve.
Steps to give the surface an S-shape
How do we get to the surfaces presented in the above figures in Blender? The following steps comprise building a suitable symmetric and very fine grained Bezier-path and the use of a curve modifier. To achieve a relatively smooth bending in x-direction we must first subdivide our original object in sufficient sections in y-direction in addition to the already existing subdivisions in z-direction.
Step 1: Sub-dividing our object in y-direction
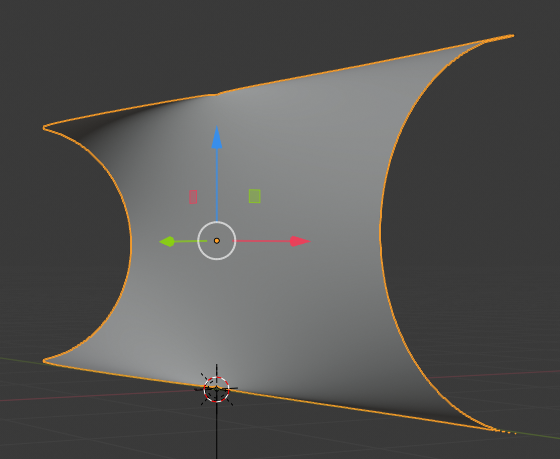
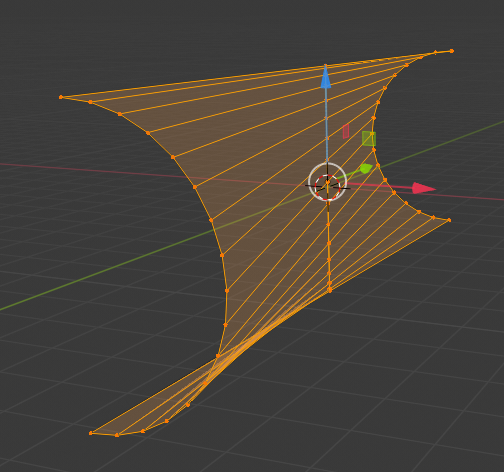
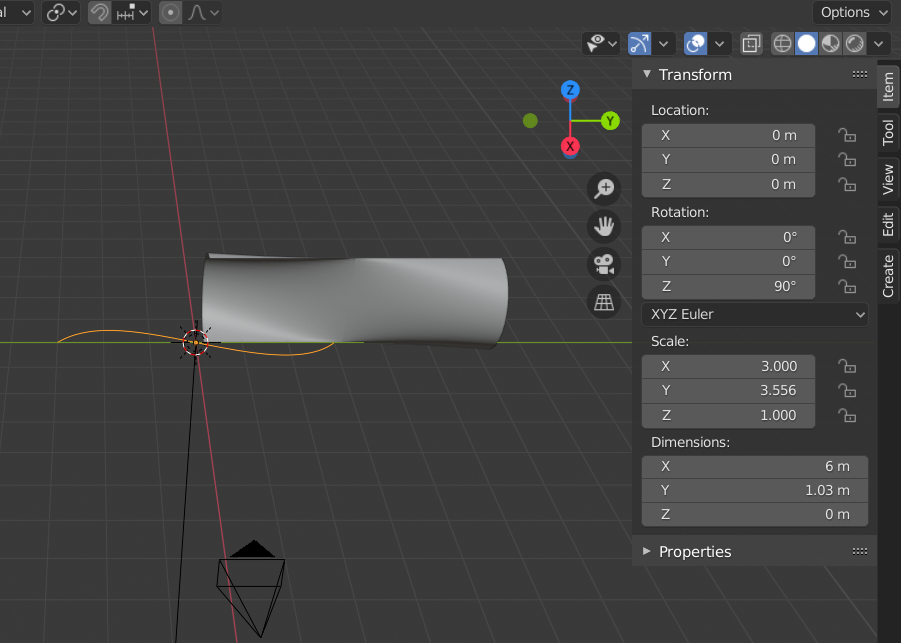
The final object mesh constructed in my last post is depicted below:
We “apply” (via menu “Object” > “apply”) any rotations we may have done so far. The object’s center should now coincide with the world center. We position the camera some distance apart in x-direction from our object, but at y=z=0. The following image shows the camera perspective.
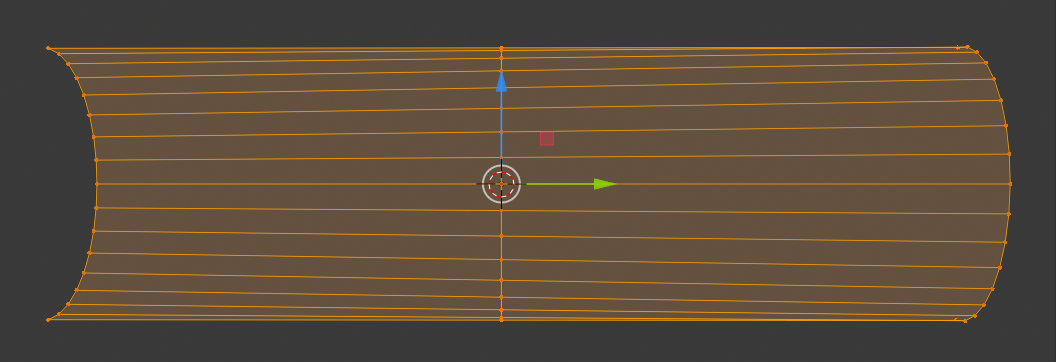
Remember that our object consists of two meshes which we have joined at the central axis. We are now going to separate each half in 32 sections in y-direction.
Go to Edit mode, position the cursor in one half and press Ctrl-R:

Turn your mouse wheel until you have created 32 subdivisions. (The number is shown at the bottom left of your view-port). Left click twice to fix the subdivision lines at their present positions; do NOT move the mouse in between the clicks.
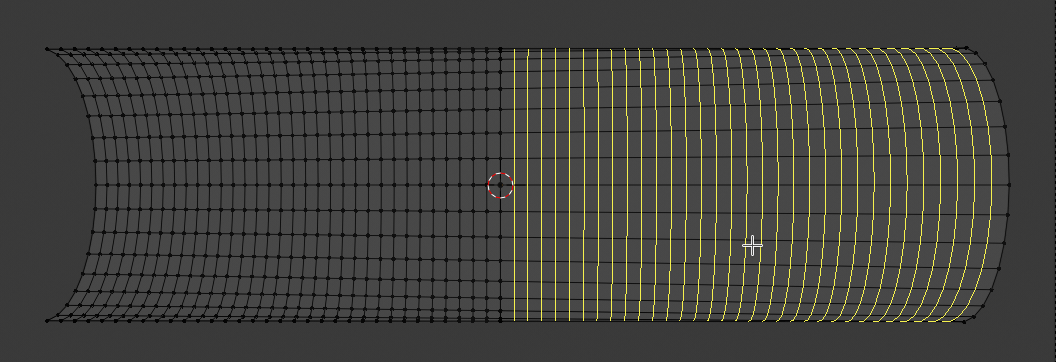
Doing this on both halves eventually gives us:
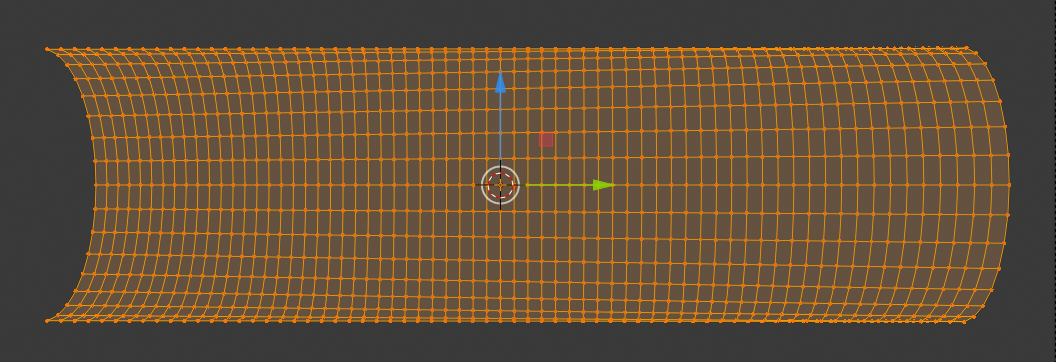
We check that y- and x-distances of the vertices have equal absolute values. We in addition check z-heights for selected vertices and compare them to the height of vertices on the outer circles.
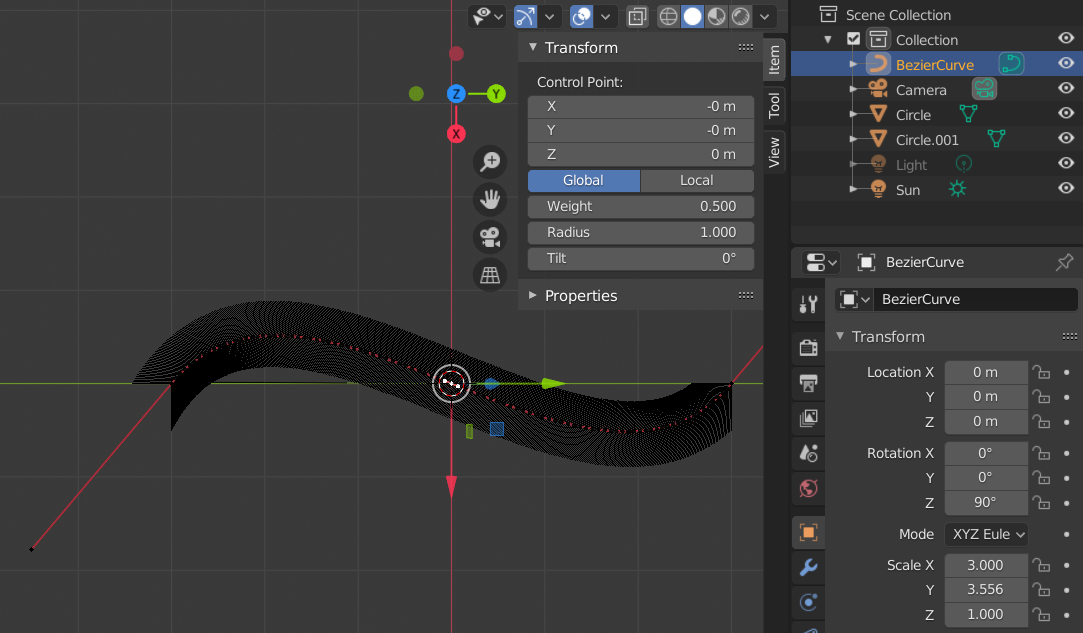
Step 2: Design a S-path
We move our object, which has dimensions of 6m in y-direction and 2m in z- and x-direction, respectively, to the left (y=-6m). Just to get some space at the world origin. We now add a Bezier curve to our scene. Its origin is located at the world center and it is stretched along the x-axis. Rotate the curve around the z-axis by 90 degree such that it stretches along the y-axis. Choose a top-view position and rotate the viewport such that the y-axis points to the right.
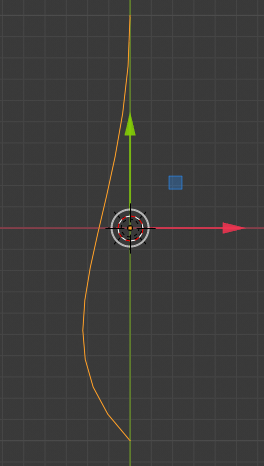
Stretch the curve to an y-dimension of 6m. Select the curve. Go to edit mode. We now rotate the rightmost and the leftmost tangent bars such that we get the following curve:
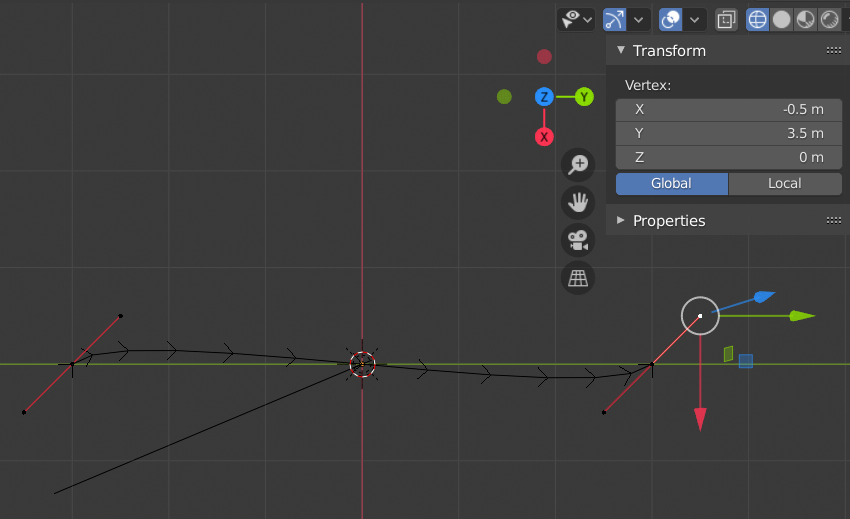
You fix the required symmetry by watching and adjusting the position information of the tangent bar\’s end vertices in the sidebar of the viewport. Note that a tangent bar has 2 associated handles and vertices. By changing vertex positions systematically to [(x=-0.5, y= -3.5), (x=0.5, y= -2.5)] and [(x=-0.5, y=2.5), (x=0.5, y=3.5)] on the left and the right side, respectively, you get a seemingly nice flat S-Curve.
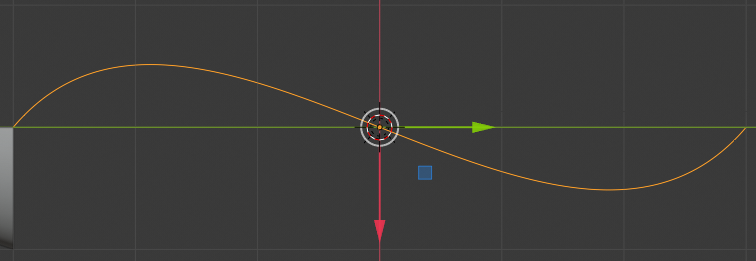
Go to object mode and change the dimension of the curve in x-direction to 2m. You then clearly see that the path is not a very smooth one, but consists of distinguished linear segments. This would be a major problem later on. In addition the curvature for the S seems to be a bit extreme. We change the x-dimension to just 1 m. Then we subdivide the curve into further segments in Edit mode. Multiple times.
And we get a smoothly curved and well dimensioned path:
Eventually, we end up with the following situation:
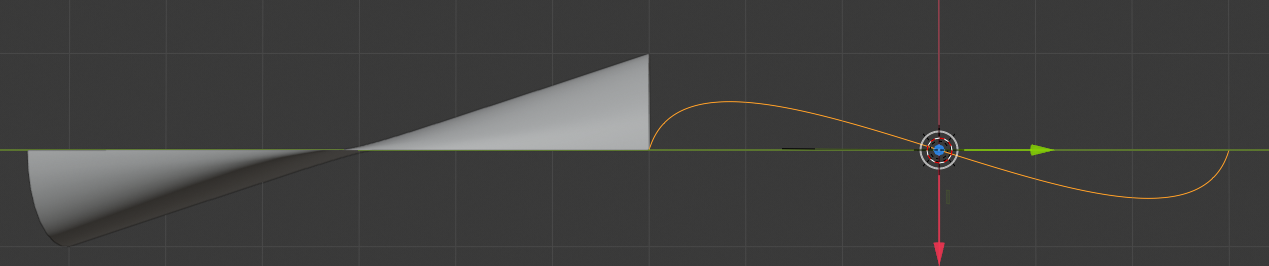
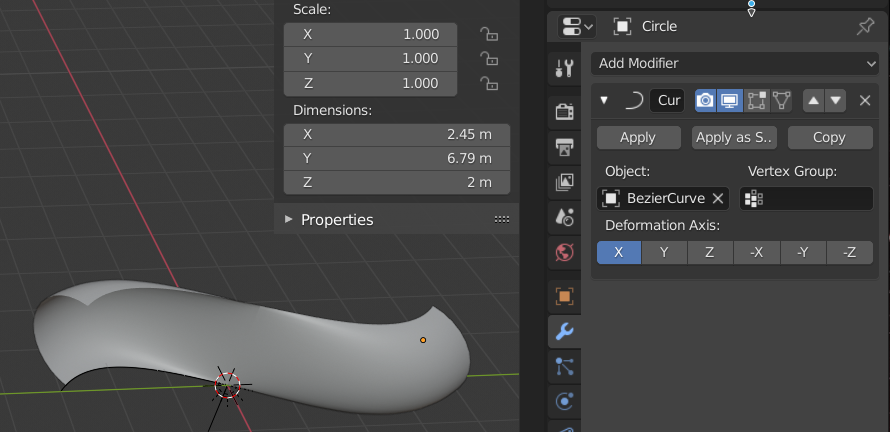
Step 3: Apply a curve modifier to our object
Now comes an important point: If you have assigned the origin of the curve to its midpoint, you should do the same with your object- see the Internet for appropriate Blender operations:
We then move our object to y=3.171m and z=1m, i.e. a bit further than rightmost end-point of the path and above the worlds central plane.
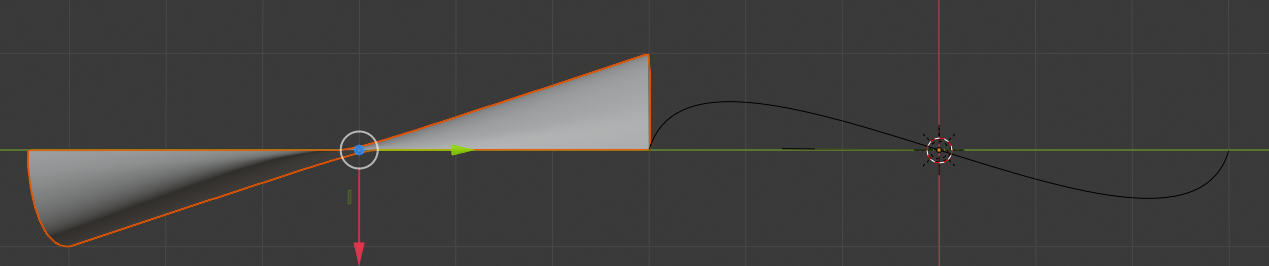
Now, we add a curve-modifier to our object, select the Bezier curve (our path) and get
We center our view and choose a top-position. We adjust the y-location of the object until its present center coincides with the world center
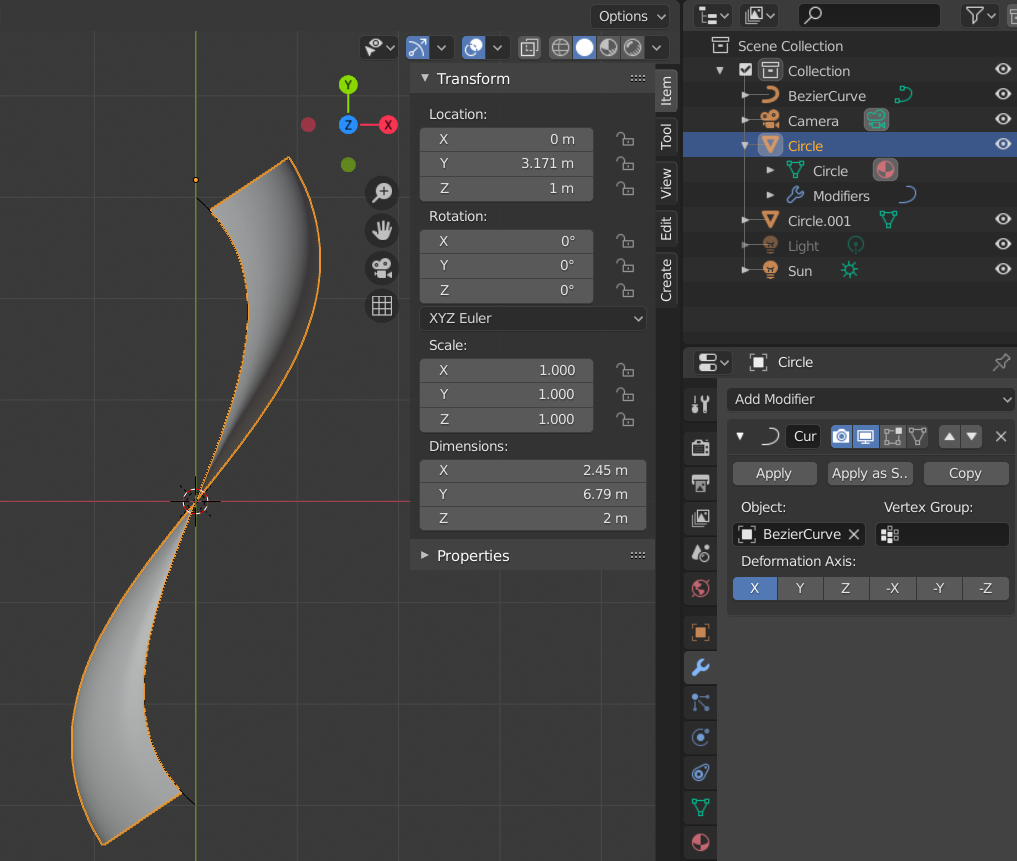
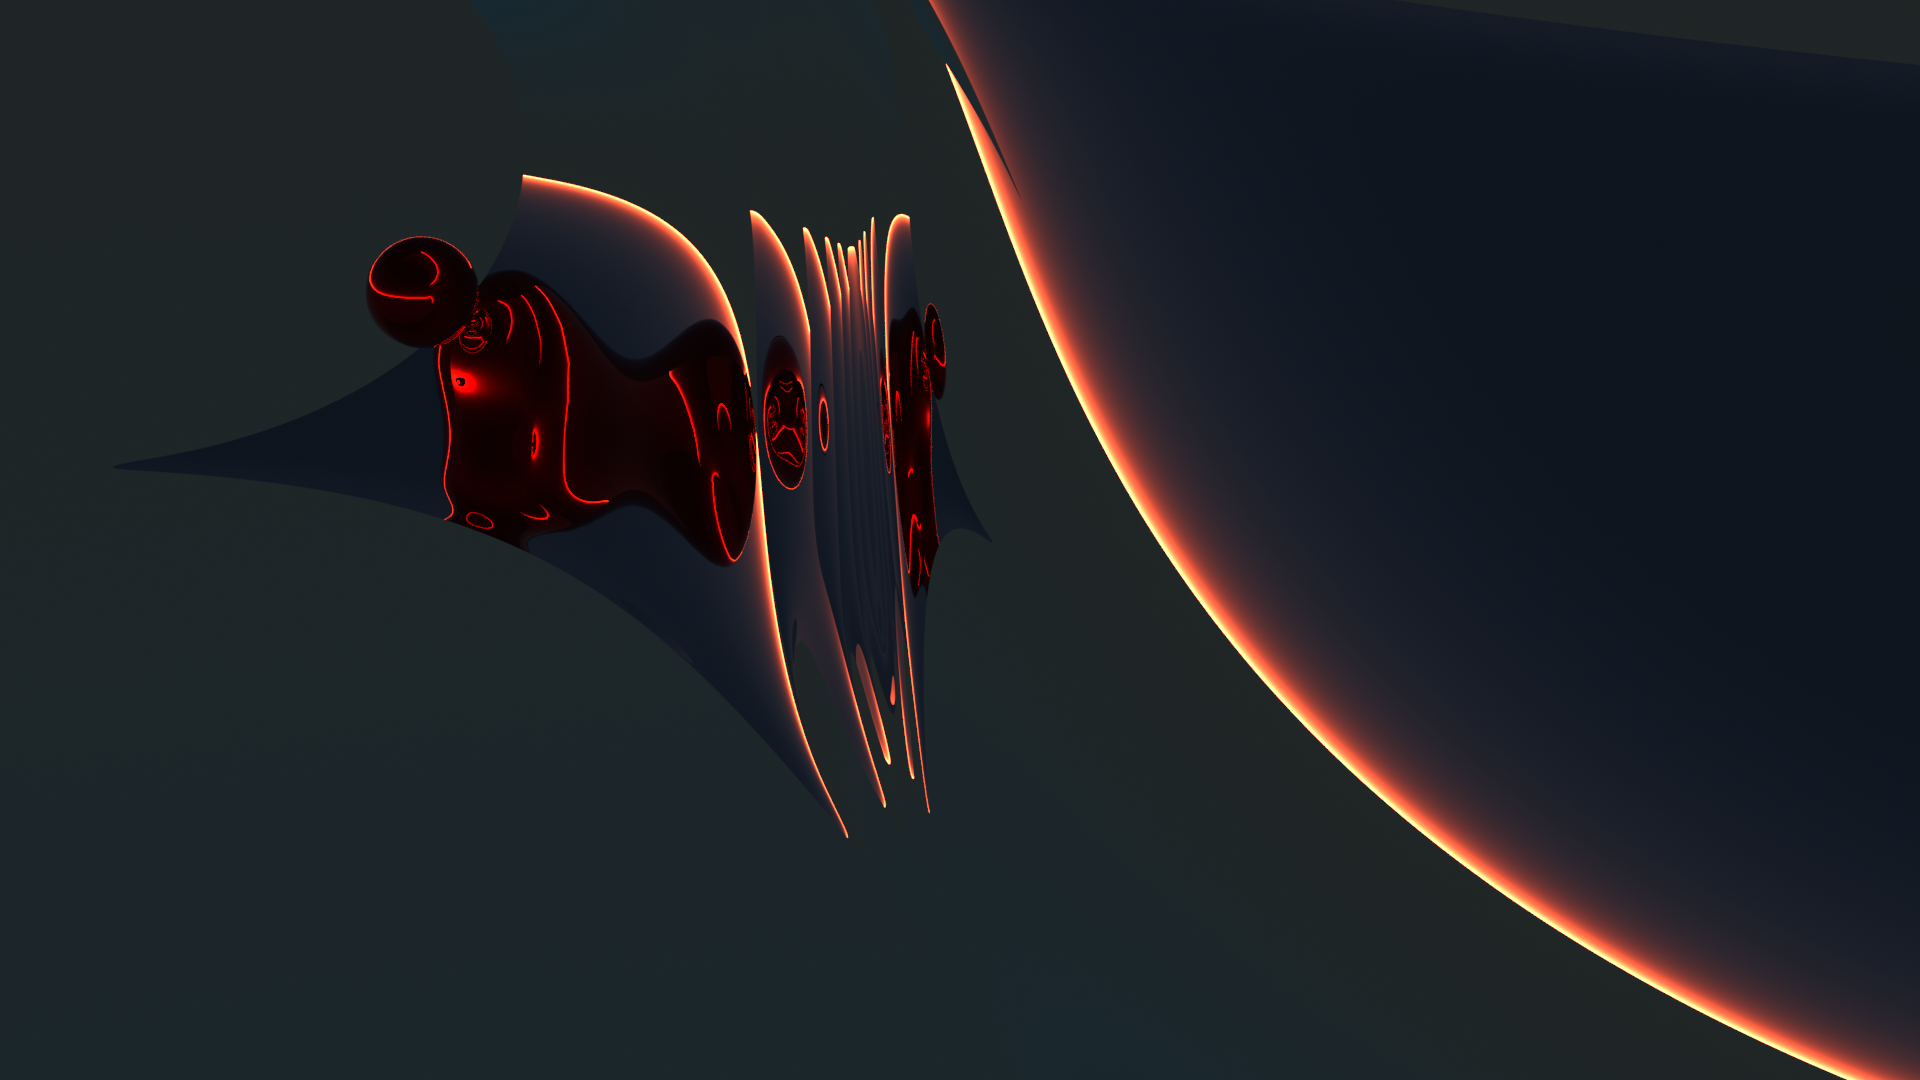
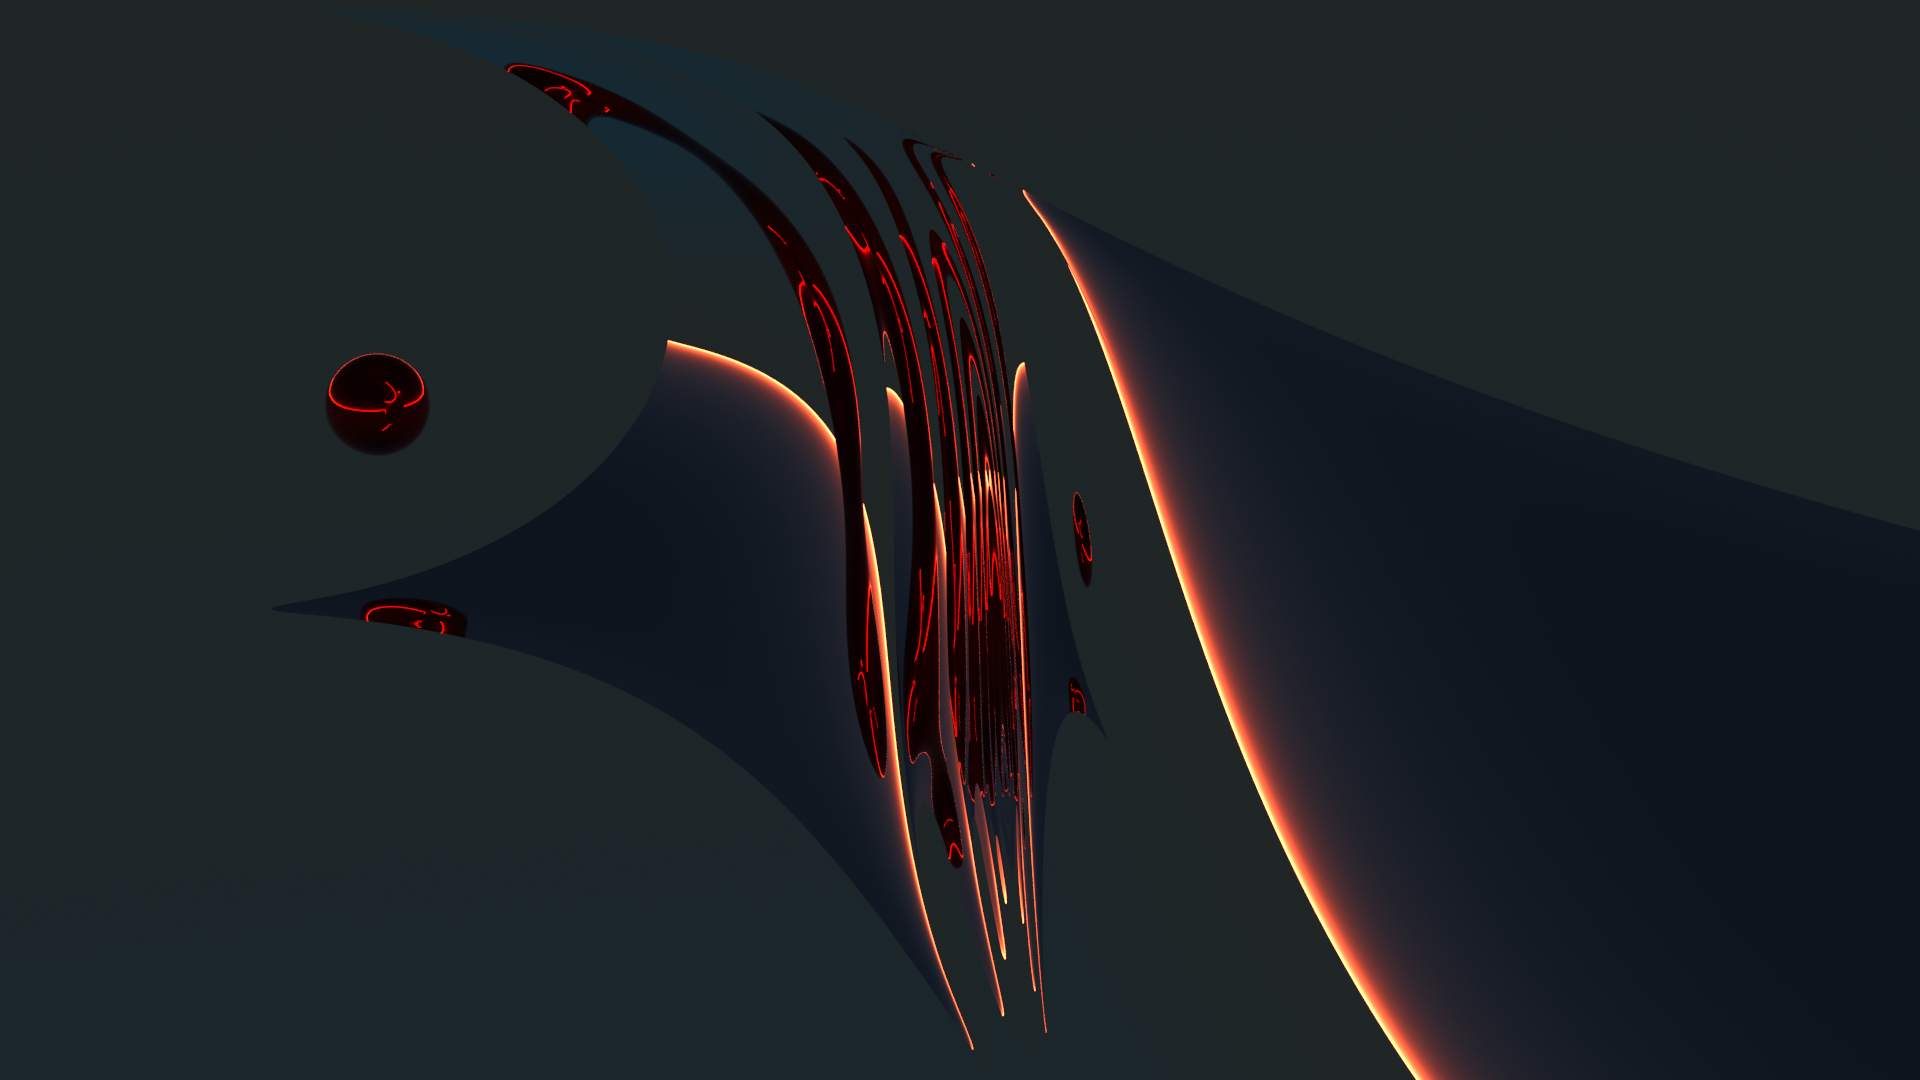
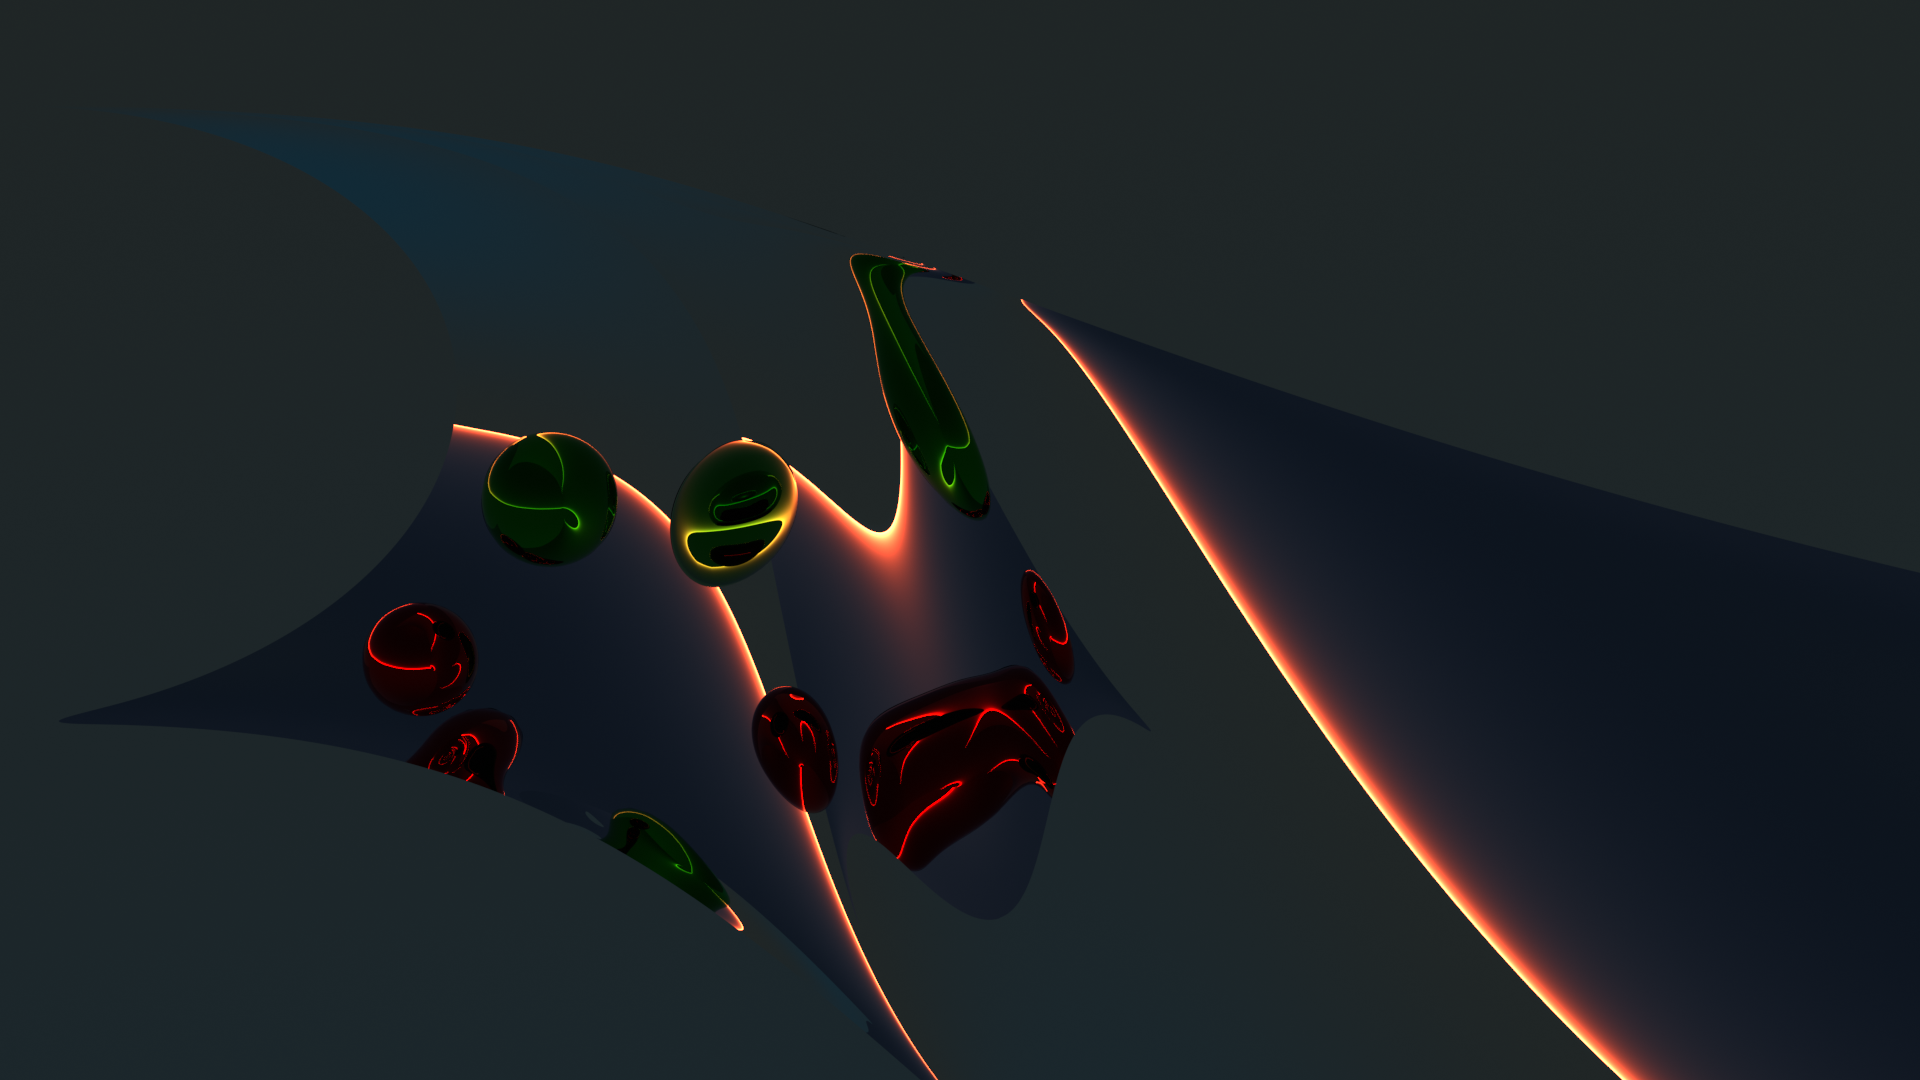
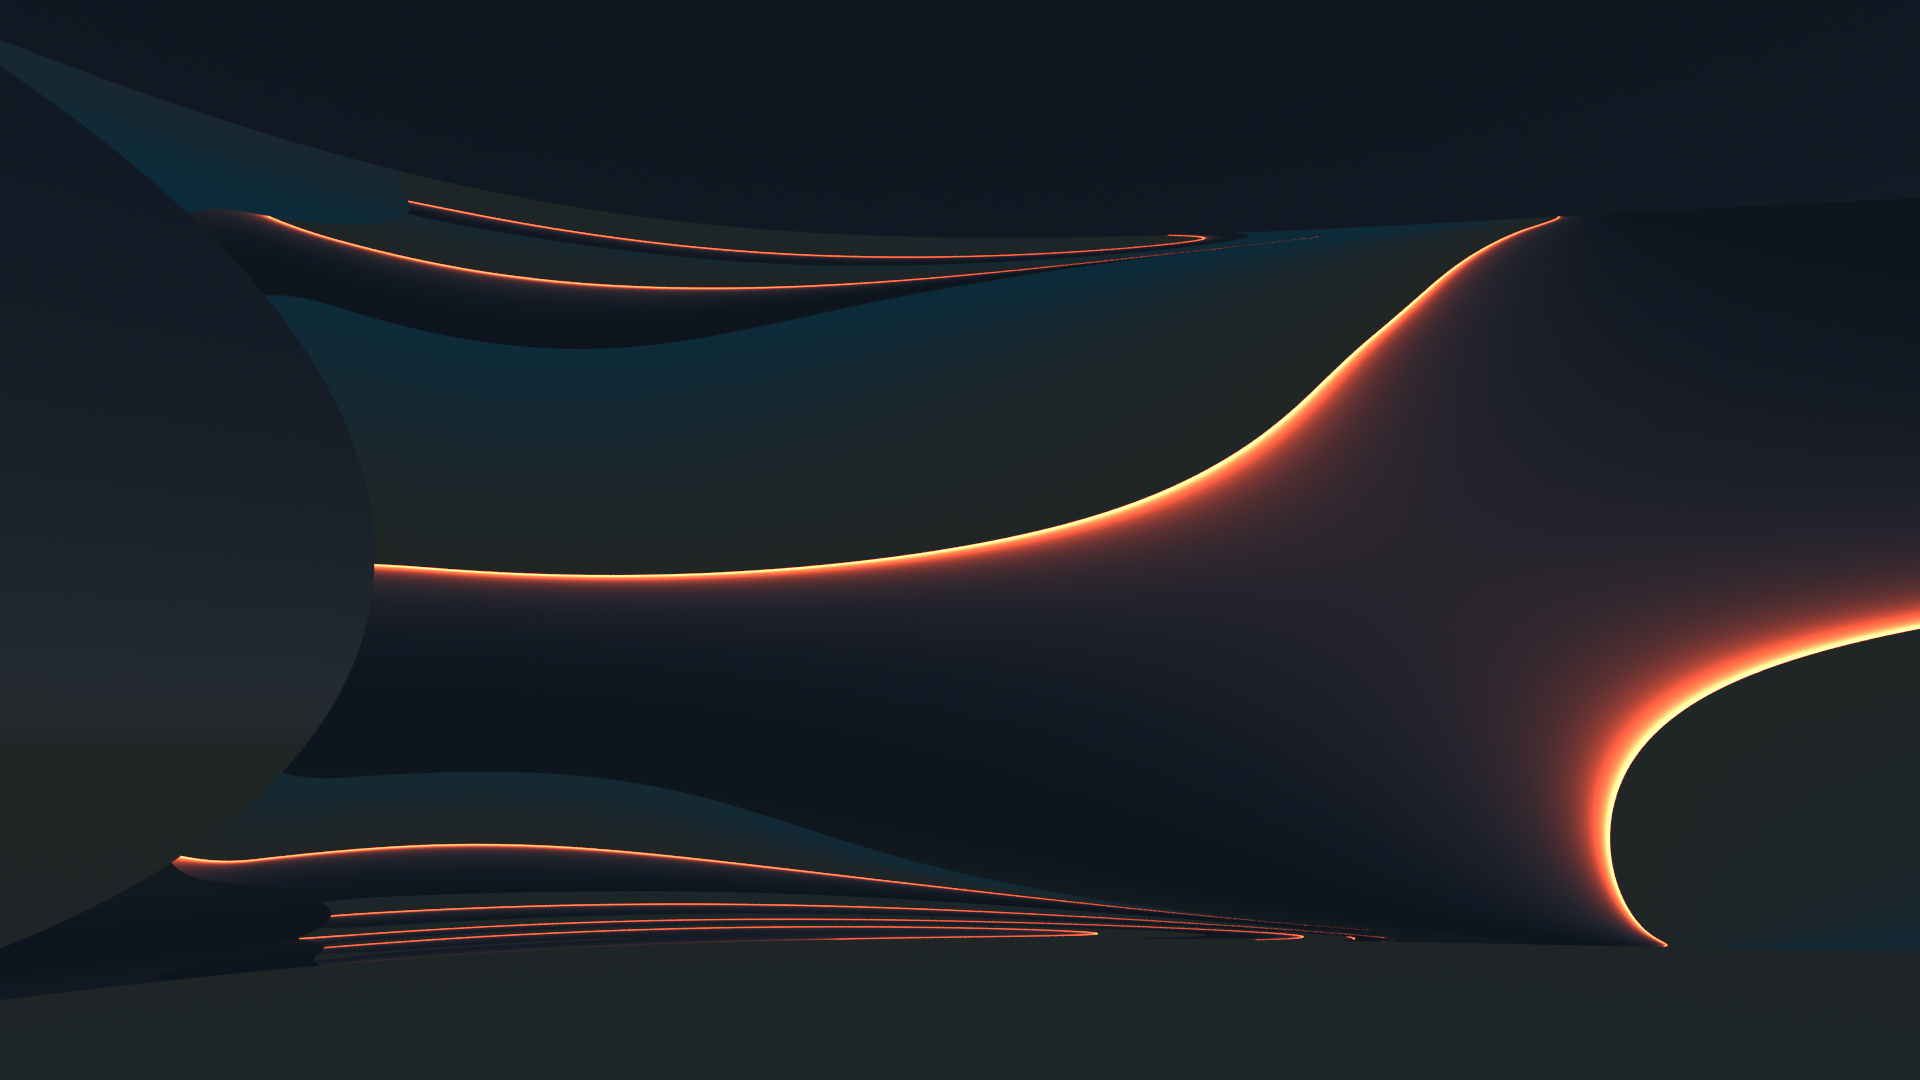
And there we have our personal S-curve – more extreme than Kapoor’s real S-cure – but this is only a question of dimension adjustments AND the right choice of how to cut the limiting circle mesh in the beginning (see the last post). Our S-curve will show multiple reflections on its concave side(s).
Apply the modifier “subdivision surface”
The rest is routine for us already. We apply the subdivision surface modifier to get a smooth surface.
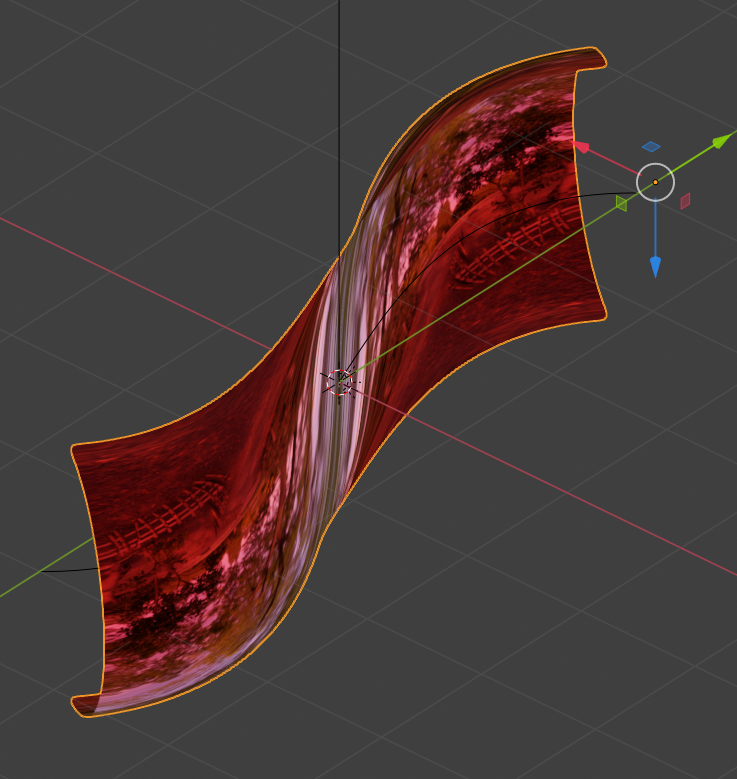
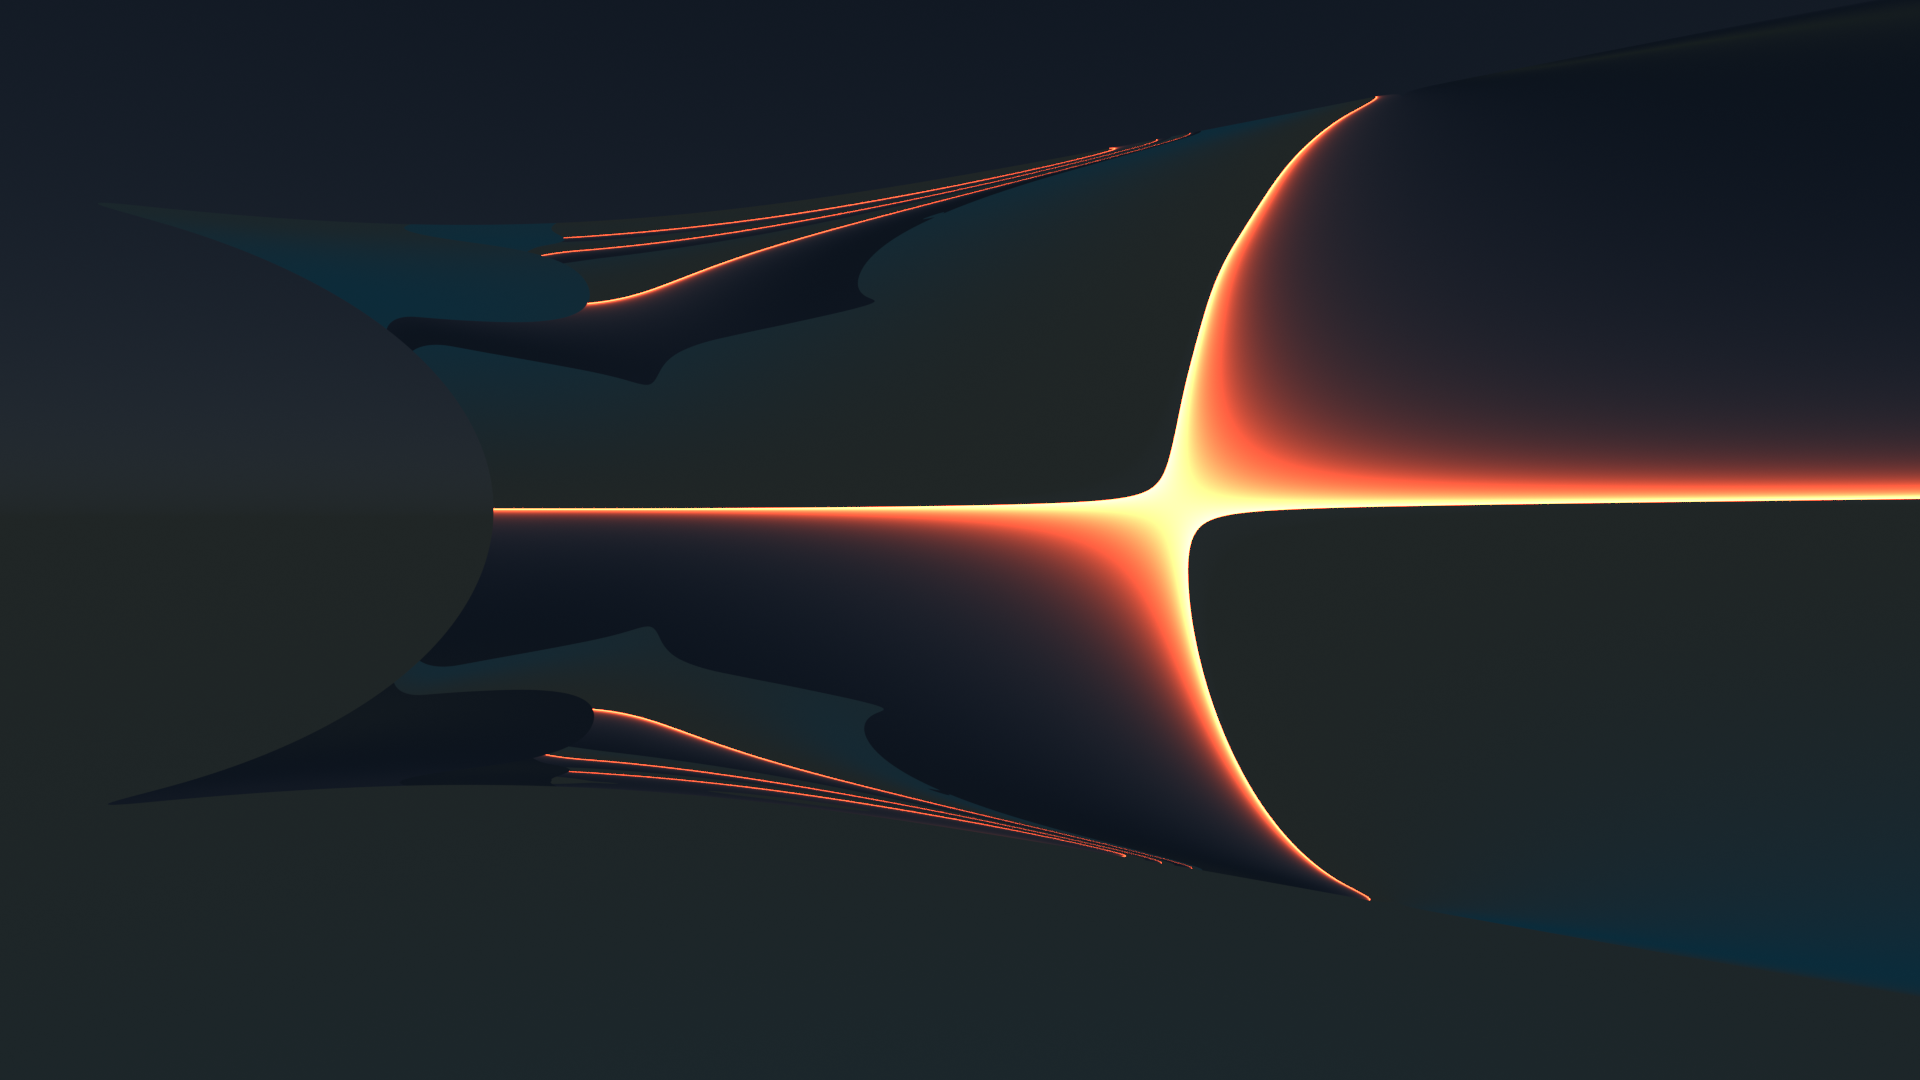
When we modify the world’s sky texture a bit with a sun just at the horizon then we get images like the following just from the horizon line and from different camera perspectives with different focal lengths (wide angle shot).

We clearly see multiple reflections in vertical direction on the left concave side of our object.


Complexity out of simple things … Real fun …
Conclusion
Rebuilding something like the S-curve of Mr. Kapoor was hard work for me who uses Blender just as a hobby tool. But it was worth the effort. In my next post,
Blender – complexity inside spherical and concave cylindrical mirrors – IV – reflective images of a Blender variant of Mr Kapoor’s S-curve
I am going to show what happens when we place objects in front of our S-curve. This will give us a first impression of what might happen with a totally concave surface as an open half sphere.
Stay tuned …