Leap 15.6 – upgrade from Leap 15.5 on laptop with Optimus architecture

The last 4 months I was primarily occupied with physics. I got a bit sloppy regarding upgrades of my Linux systems. An upgrade of an rather old laptop to Leap 15.6 was overdue. This laptop had an Optimus configuration: To display graphics one can use either the dedicated Nvidia card or a CPU-integrated Intel graphics or both via an “offload” option for certain applications.

General steps to perform the upgrade

I just list up some elementary steps for the upgrade of an Opensuse Leap system – without going into details or potential error handling:

Step 1: Make a backup of the present installation
You can, for example, create images of the partitions or LVM volumes that contain your Leap-installation and transfer them to an external disk. Details depend of course on whether and how you have distributed system files over partitions or (LVM) volumes. In the simple case of just one partition, you may simply boot a rescue system, mount an external disk to /mnt and then use the “dd”-command;

# dd status=progress if=/dev/YOUR_PARTITION of=/mnt/bup_leap155.img  bs=4M 

Step 2: Update the installed packages of the present Leap installation
Perform an update of (all) installed packages – if newer versions are available. Check that your system runs flawlessly afterwards.

Step 3: Change the addresses of repositories to use the ${releasever} variable
You can e.g. use YaST to change the release number in the definition of your repositories’ addresses to the variable ${releasever}. The name of the SLES repository may then look like “https://download.opensuse.org/update/leap/${releasever}/sle/”.

Step 4: Refresh the repositories to use information for Leap 15.6 packages
The following CLI-command (executed by root, e.g. in a root-terminal window) will refresh basic repository data to reflect available packages for Leap 15.6:

mytux:~ # zypper --releasever=15.6 refresh 

In case of problems you may have to deactivate some repositories.

Step 5: Download 15.6 packages without installing them
You can download the new packages ahead of installing them. This is done by the following command:

mytux:~ # zypper --releasever=15.5 dup --download-only --allow-vendor-change

Do not forget the option “–allow-vendor-change” for obvious reasons.

Step 6: Installation of 15.6 packages on a TTY
Change to a TTY outside your graphical environment (e.g. to TTY1 by pressing Ctrl-Alt-F1). On the command line there first shut down your graphical environment and then perform the upgrade:

mytux:~ # init 3
mytux:~ # zypper --no-refresh --releasever=15.5 dup --allow-vendor-change  

Step 7: Reboot

In my case this sequence worked without major problems. I just had to accept the elimination of some files of minor importance for which there was no direct replacement. The whole upgrade included a direct upgrade of Nvidia drivers from the Nvidia community repository

https://download.nvidia.com/opensuse/leap/${releasever}/   

First impression after reboot

The transition from Leap 15.5 to Leap 15.6 on my laptop was a smooth one. KDE Plasma is still of main version 5. The important applications for daily use like e.g. Libreoffice, Kmail, Kate, Gimp, Opera, Firefox, Chromium simply worked. Sound based applications worked as before and as expected (still based in my case on some Pulseaudio components – as the Ladspa-equalizer). Codecs and video components (basically from the Packman repository) did their service.

However, to get the Optimus architecture to work as before I had to perform a few additional steps. See below. Afterward, I could use Suse’s “prime-select” scripts to control which of the available graphics card is active after boot. A switch between the cards just requires a log out of a graphics session followed by a new login.

I have not yet tested Wayland thoroughly on the laptop. But a first impression was a relatively good one. At least for the Intel graphics card active (i915 driver) and the Nvidia card deactivated completely. A problem is still that some opened applications and desktop configurations are still not remembered on KDE Plasma between different consecutive sessions with Wayland. There may be users who can not live with this.

A transition to the StandBy mode worked perfectly with the graphics card integrated in the CPU, with and without Wayland. It also appears to work with the Nvidia card (with and without Wayland).

Reconfigure your repositories without using the Opensuse CDN service

I do not like the automatic clattering of the repositories by the CDN service. I neither like the reference to “http”-addresses instead of “https”. I want to configure my repositories and the addresses manually.

To achieve this one has to delete the CDN service as described here: https://forums.opensuse.org/t/how-to-disable-cnd-repo-in-leap15-6/181830
Before you do that keep a copy of the list of your repositories somewhere. After the deletion of the service you may have to add very important repositories manually. Elementary and important repositories are

  https://download.opensuse.org/distribution/leap/${releasever}/repo/oss/
  https://download.opensuse.org/update/leap/${releasever}/oss
  https://download.opensuse.org/update/leap/${releasever}/sle/
  https://download.opensuse.org/update/leap/${releasever}/backports/
  https://ftp.fau.de/packman/suse/openSUSE_Leap_${releasever}/
  https://download.opensuse.org/distribution/leap/${releasever}/repo/non-oss/
  https://download.opensuse.org/update/leap/${releasever}/non-oss
  https://download.opensuse.org/repositories/security/${releasever}/
  https://download.nvidia.com/opensuse/leap/${releasever}/

Check and potentially reconfigure your Python and PHP environments

Just some remarks. Leap 15.6 offers Python3.11 aside 3.6. You may want change your virtual Python environments to the 3.11 interpreter – if you have not done this before – and control your Python modules for 3.11 with “pip”. Details are beyond the limits of this post. But let me assure you – it works. PHP is now available at version 8.2 – and can e.g. be used in the Apache-server. Eclipse based PHP and PyDEV IDEs work with the named versions of PHP and Pyhon3.

Controlling the Optimus environment

In my previous Leap 15.5 installation I had used the “prime-select” command to switch between an active Intel or the dedicated Nvidia card for a graphical desktop session (in my case with KDE). This was easy and convenient. In a root terminal you just execute either

mytux:~ # prime-select intel

or

mytux:~ # prime-select nvidia

and afterward logout and login again to your graphical desktop environment, which gets started on the right graphics card

The status before the upgrade to Lap 15.6 was one that the laptop booted with the Intel graphics card active, i915 driver loaded and the Nvidia card having been switched off (via an execution of bbswitch).

After the upgrade the laptop booted into a state with the Intel card being active, i915 driver loaded and used to display graphics on the screen, but the Nvidia card also being powered on, but with no Nvidia driver loaded. This means that the Nvidia card consumes power unnecessarily.

The unusual point was that with Leap 15.5 the Nvidia card got automatically deactivated, after I had used the command “prime-select intel” and restarted a graphical session or rebooted afterward. So, what was defunct?

The first thing to note is that the packages of suse-prime are of version 0.8.14. You find respective information how to deal with these packages at Github:
https://github.com/ openSUSE/ SUSEPrime
and within the Release Notes of Leap 15.6:
https://doc.opensuse.org/ release-notes/ x86_64/ openSUSE/ Leap/15.6/
Search for “prime” there.

We find the following information in the Release Notes:

Deprecated Packages
Removed packages are not shipped as part of the distribution anymore.
The following packages were all superseded by NVIDIA SUSE Prime. Also see Section 4.1, “Removal of Bumblebee packages. bbswitch / bumblebee / bumblebee-status / primus

Removal of Bumblebee packages
Packages maintained as part of X11:Bumblebee project were succeeded by NVIDIA SUSE Prime. Bumblebee packages will no longer be part of the standard distribution. See details in the drop feature request tracker.

This means – among other things – that the RPM for “bbswitch” no longer is included in the main repository for Leap 15.6. This is, in my opinion, a mistake. Which you will understand in a minute.

How to witch off the Nvidia card when using Intel graphics only?

One reason is that the information in the Release Notes and at Github is a bit misleading:

The statement on a “super-seeded SUSE PRIME” in the Release Notes and the section on “NVIDIA power off support since 435.xxx driver …” gives you the impression that one can deactivate (= power off) the Nvidia GPU by some other means than “bbswitch”. This is not the case. See the issue “Use manual remove for PCI device instead of Bbswitch?” at Github and also the source codes there.

Furthermore the commands in the section “NVIDIA power off support since 435.xxx driver …” do not specify where the files, which have to be copied into certain directories reside after a Leap15.6 upgrade. Instead of the first and the third command you may actually have to use

test -s /etc/modprobe.d/09-nvidia-modprobe-pm-G05.conf || \
   cp /lib/modeprobe.d/09-nvidia-modprobe-pm-G05.conf /etc/modprobe.d

test -s /etc/udev/rules.d/90-nvidia-udev-pm-G05.rules || \
   cp /usr/lib/udev/rules.d/90-nvidia-udev-pm-G05.rules /etc/udev/rules.d/

The file “90-nvidia-dracut-G05.conf” should already be in /etc/dracut.conf.d.

Afterwards check the directories /etc/modprobe.d/, /etc/dracut.conf.d/ and also /etc/dracut.conf.d/ for the necessary files.

The most important step is, however, that you must install “bbswitch” if you want to deactivate the Nvidia card completely. I.e., whenever you want to use the Intel graphics only.

You need the “Bumblebee” repository to get the respective RPM. The repo’s address is:

https://download.opensuse.org/repositories/X11:/Bumblebee/15.6/   

Just install “bbswitch”. Afterward, you can use the following commands to switch the Nvidia card off, when you use the Intel graphics and when only the i915 driver module is loaded.

mytux:~ # tee /proc/acpi/bbswitch <<< OFF

But according to the commands in the shell scripts this should happen automatically when you switch between graphics cards via the command “prime-select” and a logout/login sequence from/to the graphical desktop. In my case this worked perfectly. At least with X11.

I should also say the following:

With an active Nvidia card for graphics you can use dynamic power management. You can configure it e.g. with the “nvidia-settings” application.

Offload

With an active Intel graphics for the desktop and switched on Nvidia card you can even run certain applications on the Nvidia card. To configure this you need to select the option

mytux:~ # prime-select offload

Furthermore you need to create a script “prime-run” with the following contents:

!/bin/bash
__NV_PRIME_RENDER_OFFLOAD=1 __VK_LAYER_NV_optimus=NVIDIA_only __GLX_VENDOR_LIBRARY_NAME=nvidia "$@"

Details can be found here. You must make the script executable and put it in your PATH. Afterward, you can call applications with “prime-run”, e.g. “prime-run gimp”.

mytux:~> # prime-run gimp

Have fun with Leap 15.6!


Revival of an old Terra 1541 Pro with Opensuse Leap 15.5

My wife and I use the expression “Windust” for the Windows operative system. A “dust” is a somewhat stupid person in Norwegian. I will use this expression below.

My wife has a rather old laptop (Terra 1541 Pro). I has survived Windust 7 up to the latest Windust 10. It was the only one of our laptops with a full Windows installation. We used it for communication with some customers that had Windows, only. Skype, Teams are the keywords.

During the last Windust 10 updates the laptop got slower and slower. In addition, according to MS, the laptop does not qualify for Windows 11. A neighbor of us had the same problem. What do Windust users (as our neighbor) do in such situations? They either try a full Windows (10) installation from scratch – and/or buy themselves a new laptop. It is so typical and so “dust” …

Revival with Linux?

My wife and I are retired persons. We no longer need to care about customers who depend on Windust. For the few remaining ones a small virtual installation under KVM on a workstation is sufficient for all practical purposes. So, we thought: This old laptop is a typical case for a revival cure with Linux.

A good friend of us organized a new rechargeable battery block for us and we ordered a 1 TB SSD in addition. The screen has a 1920×1080 resolution, the RAM is 16GB. Graphics is Intel based. All in all, for non-professional purposes it is a well equipped laptop. We therefore decided to finally say good bye to our last Windows installation which slowed down the laptop.

Opensuse Leap 15.5 installation

Yesterday, I installed Opensuse Leap 15.5 on the laptop. From an ISO-image on DVD. No problems occurred during the installation process.
[At least as long as I did not try to add special SW repositories with YaST2. Opensuse has build a remarkable bug into Yast2’s software(= RPM) management. More about this in another post.]

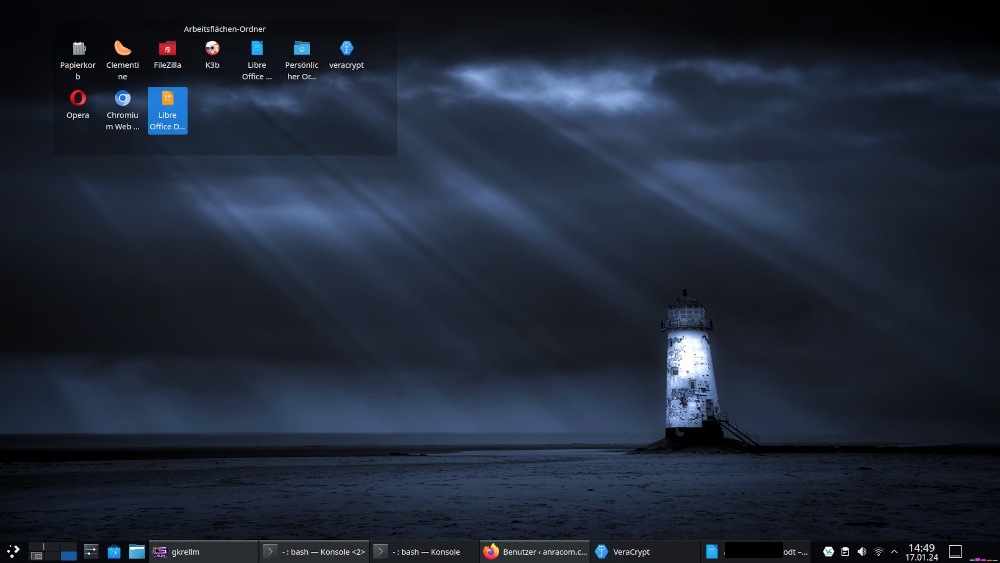
The good news is: The laptop works with Leap 15.5 and KDE like a charm. And it is now less noisy (ventilation!) than with Windows 10. All special keys for controlling screen brightness and speaker levels work. No problem to attach Kontact (with Kmail) and Thunderbird to our IMAP-server. Multimedia programs like Clementine do their work. Our standard browsers (FF, Chromium, Opera), too. Yesterday we watched the Norwegians handball team play against Slovenia during the EM in Germany via a live stream on Firefox on this laptop and on an HDMI-attached HD TV that extended the laptop screen. Automatically recognized and after answering a question, in which direction we wanted to extend, automatically activated.

After a short configuration network connections can be set up via Ethernet cable, if we want to work in our inner LAN network with Linux systems, only. These systems are configured via firewalls to trust each other partially and with respect to certain services. Internet connection happens via routing through a perimeter firewall. Alternatively my wife can directly connect to a WLAN of our router, when she just wants to access the Internet. Networkmanager, priorities for automatic connections and sensing a plugged-in network cable are used to make an adequate automatic choice of the system: If the Ethernet cable is plugged in a cable based connection is used, only. If the cable is unplugged WLAN is activated automatically. And vice versa.
A small script for avoiding double connections (LAN and WiFi) can be added to the “/etc/NetworkManager/dispatcher.d”. This is discussed in “man nmcli-examples” and at [1]. I recommend all users of Linux laptops with Network manager to study the little script:

#!/bin/bash
export LC_ALL=C

enable_disable_wifi ()
{
    result=$(nmcli dev | grep "ethernet" | grep -w "connected")
    if [ -n "$result" ]; then
        nmcli radio wifi off
    else
        nmcli radio wifi on
    fi
}

if [ "$2" = "up" ]; then
    enable_disable_wifi
fi

if [ "$2" = "down" ]; then
    enable_disable_wifi
fi

Do not forget to give the script executable rights. Works perfectly.

Do we miss any Windows SW on the old laptop?

Straight answer: No. My wife has used GIMP, Gwenview, showFoto (with ufraw) and Inkscape for image manipulations for years. GIMP and Inkscape also on Windust. We both use Libreoffice Draw for drawings and simple graphics. Libreoffice (with Writer, Calc, Impress) has been a sufficient and convenient replacement for MS Office already for many years. For creating tax reports we use LinHaBU. The little we do with Web development these days can be done with Eclipse. Linux offers a variety of FTP-tools. All in all our needs are covered and our requirements very well fulfilled.

The old laptop will get a hopefully long 2nd life with Linux at our home in Norway.

Some security considerations

One thing that may be important for professional people: You may want to have a fully encrypted system. This can, of course, be achieved with LUKS. And in contrast to an often heard argument it is not true that this requires an unencrypted and therefore insecure “/boot”-partition. I have written articles on setting up a fully encrypted Linux system with the help of LUKS on laptops in this blog.

TPM offers options to detect HW-modifications of your system. See e.g. [5]. This is certainly useful. But, as you have an old laptop with Windust, you probably have lived with many more and SW-related risks regarding your security for a long time. So, no reason to forget or replace your laptop by a new one. Most Windust users that I know do not even have a Bitlocker encryption active on their systems.

While the BitLocker encryption of Windust may require TPM 2.0 to become safe again (unsafe SHA-1 support in TPM 1.2), we can gain a high level of security regarding disk encryption on Linux with LUKS alone. One can even find some arguments why TPM (2.0) may not make fully encrypted Linux laptops more secure. Opensuse and other distributions do support TPM 2.0 and secure boot. So, the question is not whether some Linux distribution actively supports TPM, but whether we really need or want to use it. See e.g. the discussion and warnings here.

In my private opinion, the old game of Windows supporting the HW-industry and vice versa just goes into a new cycle and the noise about HW- and firmware based attacks ignores at least equally big risks regarding SW (OS and applications).

Even under security considerations I see no major reason why one should not use older laptops with a full LUKS encryption. A major difference is that we do not put secrets and keys for an automatic decryption into a TPM-chip which could have backdoors. A LUKS setup is a bit more inconvenient than Bitlocker with TPM, but with all partitions encrypted (no separate /boot-partition!) not really un-safer. The big advantage of LUKS full encryption without TPM is: No knowledge of the key passphrase, no decryption. But this is all stuff for a more detailed investigation. A fully LUKS encrypted Linux setup would in any case probably be significantly safer than an old Windust installation with Bitlocker and TPM 1.x.

If your security requirements are not top level most reasons not to use old laptops are not valid in my opinion. So, give Linux a try on your old machines before throwing them away.

Conclusion and some preliminary security considerations

Old laptops can remain a valuable resource – even if they are not fit for Windows 11 according to MS. Often enough they run very well under Linux. If you have major security requirements consider a full disk encryption with LUKS. This may not be as safe as LUKS with TPM 2.0 and a two-phase-authentication, which you would have to take care of during setup, but it may be much safer as the Windust installation you have used before.

And do not forget: TPM is no protection against attacks which use vectors against SW-vulnerabilities.

Links

[1] https://unix.stackexchange.com/ questions/ 346778/ preventing-double-connection-over-wlan0-and-usb-0-in-network-manager-gnome

[2] TPM and Arch Linux: https://wiki.archlinux.org/ title/ Trusted_Platform_Module
See also the warnings in
https://wiki.archlinux.org/ title/ User:Krin/ Secure_Boot, _full_disk_encryption, _and_TPM2_unlocking_install

[3] Bruce Schneier on TPM attacks: See https://www.schneier.com/tag/tpm/ and
https://www.schneier.com/ blog/ archives/2021/08/ defeating-microsofts-trusted-platform-module.html

[4] TPM 2.0 vulnerabilities: https://www.tomsguide.com/ news/ billions-of-pcs-and-other-devices-vulnerable-to-newly-discovered-tpm-20-flaws

[5] A positive look on TPM from Red Hat: https://next.redhat.com/ 2021/05/13/ what-can-you-do-with-a-tpm/

Blender – even on old laptops a graphics card increases rendering performance

My present experiments with Blender on my old laptop take considerable time to render- especially animations. So, I got interested in whether rendering on the laptop’s old Nvidia card, a GT 645M, would make a difference in comparison to rendering on the available 8 hyperthreaded cores of the CPU. The laptop’s CPU is an old one, too, namely an i7-3632QM. The laptop’s operative system is Opensuse Leap 15.3. The system uses Optimus technology. To switch between the Nvidia card and the Intel graphics I invoke Suse’s Prime Select application on KDE.

I got a factor of 2 up to 5.2 faster rendering on the GPU in comparison to the CPU. The difference depends on multiple factors. The number of CPU cores used is an important one.

How to activate GPU rendering in Blender?

Basically three things are required: (1) A working recent Nvidia driver (with compute components) for your graphics card. (2) A certain setting in Blender’s preferences. (3) A setting for the Cycles renderer.

Regarding the CUDA toolkit I quote from Blender’s documentation

Normally users do not need to install the CUDA toolkit as Blender comes with precompiled kernels.

With respect to required Blender settings one has to choose a CUDA capable device via the menu point “Preferences >> System”:

You may also select both the GPU and the CPU. Then rendering will be done both on the GPU and the CPU. My graphics card unfortunately only understands a low level of CUDA instructions. The Nvidia driver I used is of version 470.103.01, installed via Opensuse’s Nvidia community repository:

In addition, you must set an option for the Cycles renderer:

With all these settings I got a factor of 2 up to > 6 faster rendering on the GPU in comparison to a CPU with multiple cores.

The difference in performance, of course, depends on

  • the number of threads used on the CPU with 8 (hyperthreaded) cores available to the Linux OS
  • tiling – more precisely the “tile size” – in case of the GPU and the CPU

All other render options with the exception of “Fast G” were kept constant during the experiments.

Scene Setup

To give the Blender’s Cylces renderer something to do I set up a scene with the following elements:

  • a mountain-like landscape (via the A.N.T Landscape Add-On) with a sub-dividion of 256 to 128 – plus subdivision modifier (Catmull-Clark, render level 2, limit surface quality 3) – plus simple procedural texture with some noise and bumps
  • a plane with an “ocean” modifier (no repetition, waves + noisy bump texture for the normal to simulate waves)
  • a world with a sky texture of the Nishita type ( blue sky by much oxygen, some dust and a sun just above the horizon)

The scene looked like

The central red rectangle marks the camera perspective and the area to be rendered. With 80 samples and a resolution of 1200×600 we get:

The hardest part for the renderer is the reflection on the water (Ocean with wave and texture). Also the “landscape” requires some time. The Nishita world (i.e. the sky with the sun), however, is rendered pretty fast.

Required time for rendering on multiple CPU cores

I used 40 samples to render – no denoising, progressive multi-jitter, 0 minimum bounces.
Other settings can be found here:


The number of threads, the tile size and the use of the Fast CI approximation were varied.
The resolution was chosen to be 1200×600 px.

All data below were measured on a flatpak installation of Blender 3.1.2 on Opensuse Leap 15.3.

tile size threads Fast GI time
64 2 no 82.24
128 2 no 81.13
256 2 no 81.01
32 4 no 45.63
64 4 no 43.73
128 4 no 43.47
256 4 no 43.21
512 4 no 44.06
128 8 no 31.25
256 8 no 31.04
256 8 yes 26.52
512 8 no 31.22

A tile size of 256×256 seems to provide an optimum regarding rendering performance. In my experience this depends heavily on the scene and the chosen image resolution.

“Fast GI” gives you a slight, but noticeable improvement. The differences in the rendered picture could only be seen in relatively tiny details of my special test case. It may be different for other scenes and illumination.

Note: With 8 CPU cores activated my laptop was stressed regarding CPU temperature: It went up to 81° Celsius.

Required time for rendering on the mobile GPU

Below are the time consumption data for rendering on the mobile Nvidia GPU 645M:

tile size Fast GI time
64 no 18.3
128 no 16.47
256 no 15.56
512 no 15.41
1024 no 15.39
1200 no 15.21
1200 yes 12.80

Bigger tile sizes improve the GPU rendering performance! This may be different for rendering on a CPU, especially for small scenes. There you have to find an optimum for the tile size. Again, we see an effect of Fast GI.

Note: The temperature of the mobile graphics card never rose above 58° Celsius. I measured this whilst rendering a much bigger image of 4800×2400 px. I therefore think that the temperature stress Blender rendering exerts on the GPU is relatively smaller in comparison to the heat stress on a CPU.

Required time for rendering both on the CUDA capable mobile GPU and the CPU

As the CPU is CUDA capable one can activate CUDA based rendering on the CPU in addition to the GPU in the “preferences” settings. With 4 CPU cores this brings you down to around 11 secs, with 8 cores down to 10 secs.

tile size threads Fast GI time
64 4 no 11.01
128 8 no 10.08

Conclusion

Even on an old laptop with Optimus technology it is worthwhile to use a CUDA capable Nvidia graphics card for Cycles based rendering in Blender experiments. The rise in temperature was relatively low in my case. The gain in performance may range from a factor 2 to 5 depending on how many CPU cores you can invoke without overheating your laptop.

Ceterum censeo: The worst living fascist and war criminal today, who must be isolated, denazified and imprisoned, is the Putler.