The moons dataset and decision surface graphics in a Jupyter environment – III – Scatter-plots and LinearSVC

During this article series we use the moons dataset to acquire basic knowledge on Python based tools for machine learning [ML] – in this case for a classification task. The first article

The moons dataset and decision surface graphics in a Jupyter environment – I

provided us with some general information about the moons dataset. The second article

The moons dataset and decision surface graphics in a Jupyter environment – II – contourplots

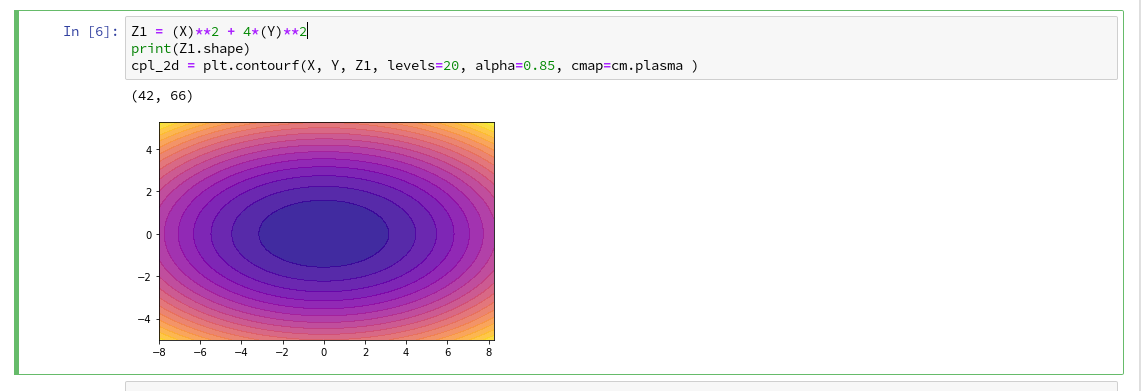
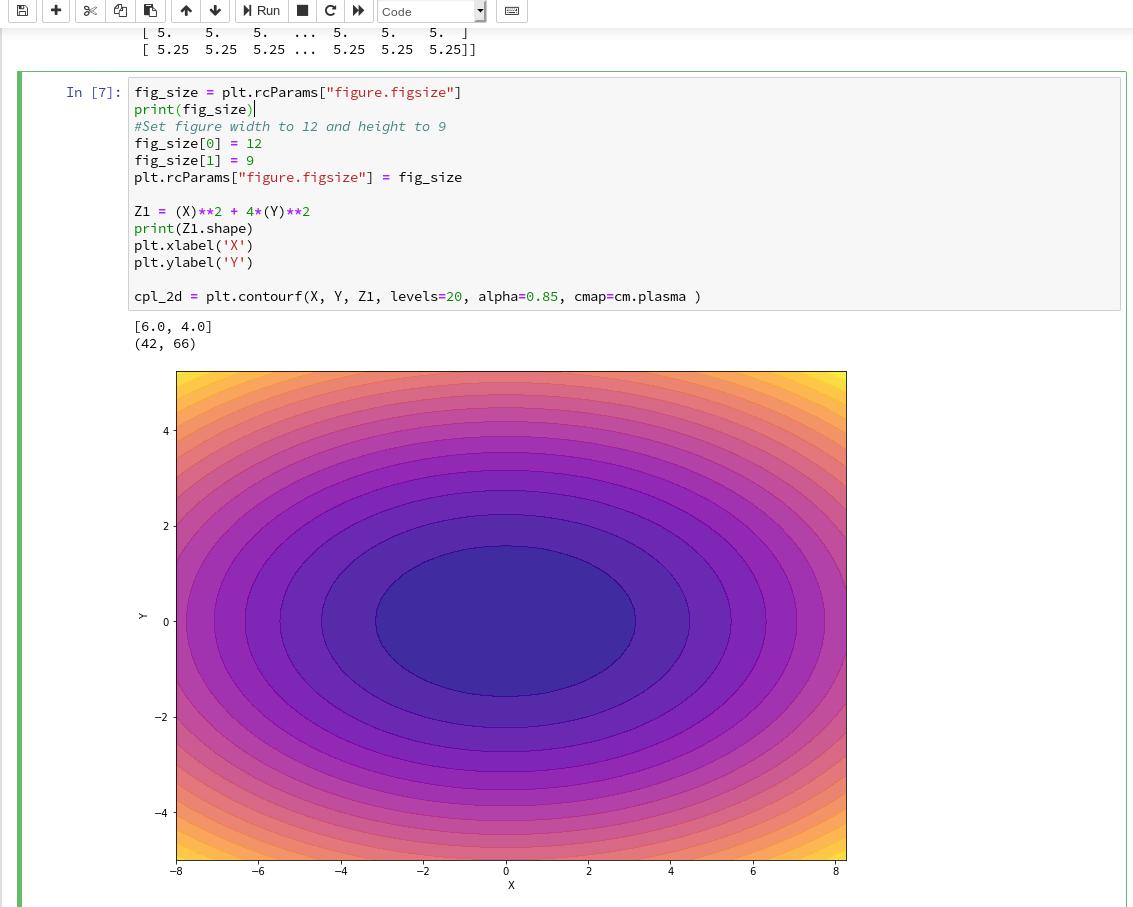
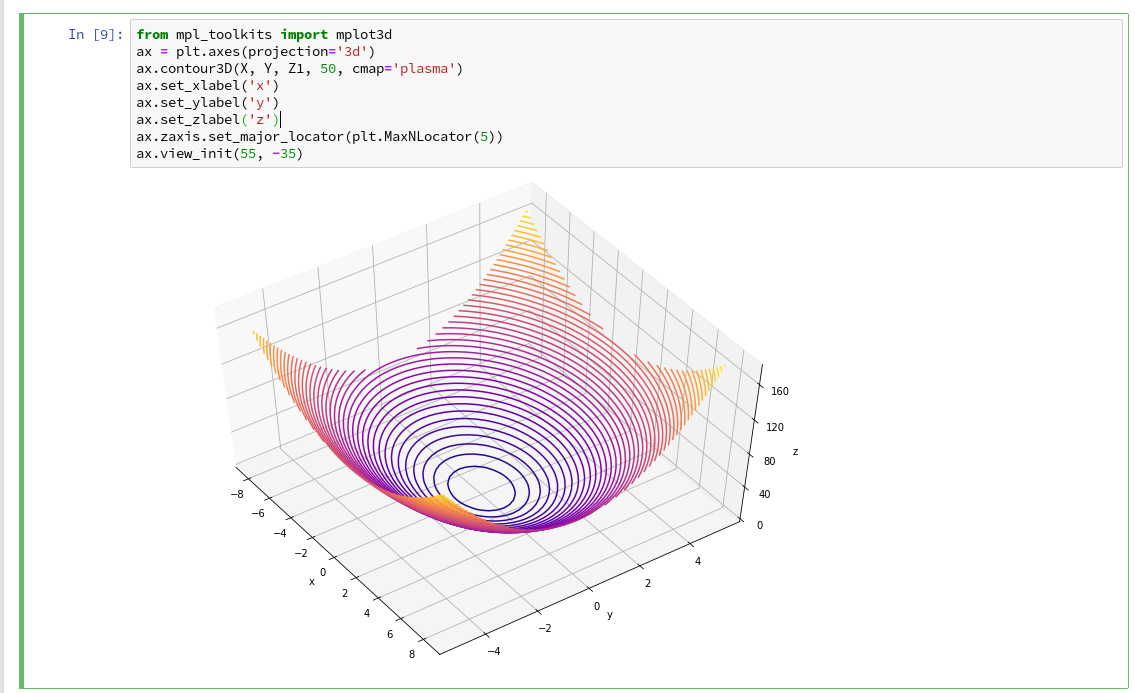
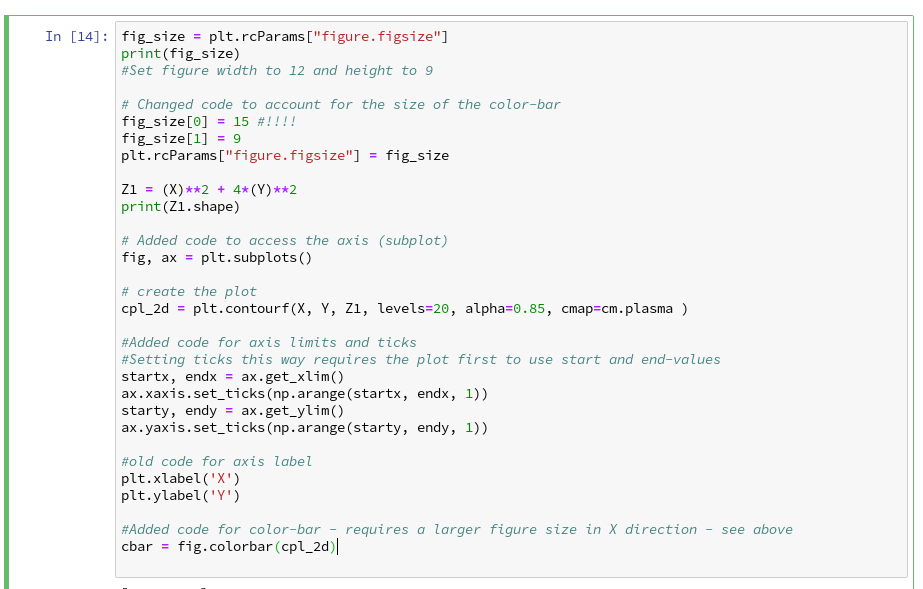
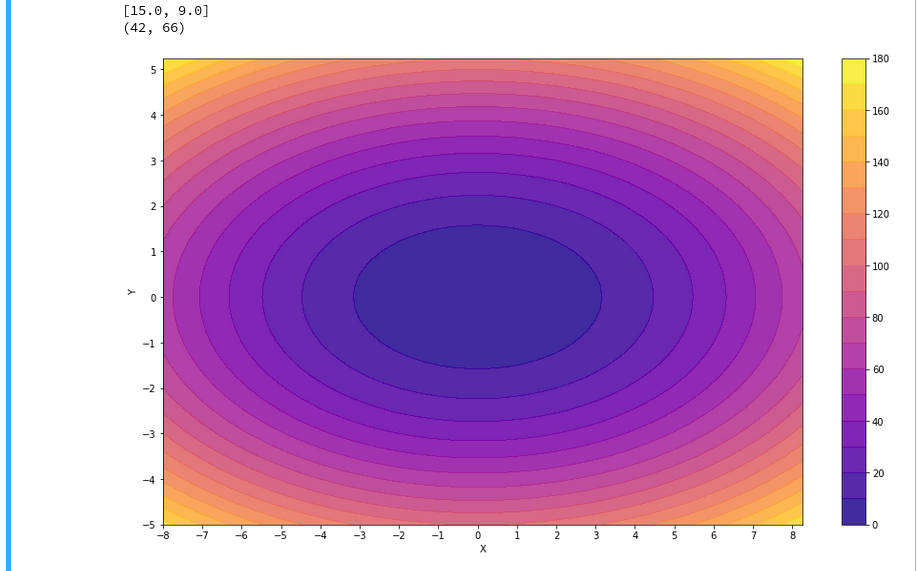
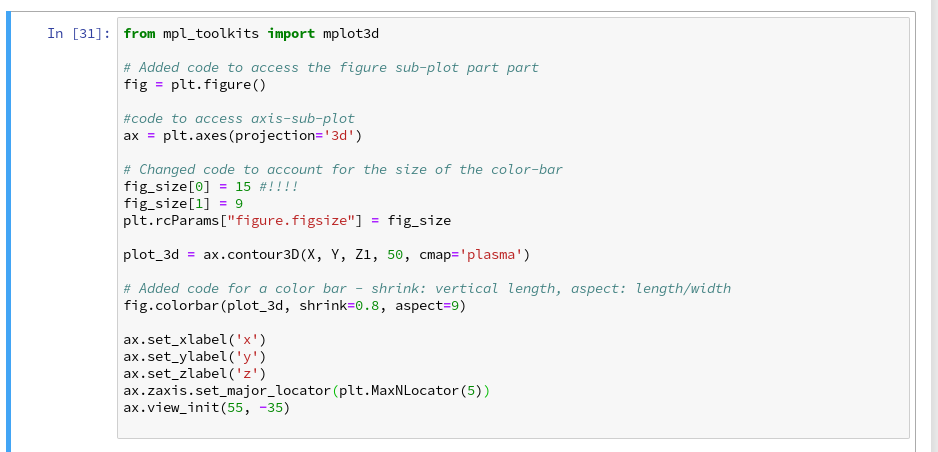
explained how to use a Jupyter notebook for performing ML-experiments. We also had a look at some functions of “matplotlib” which enabled us to create contour plots. We will need the latter to eventually visualize a decision surface between the two moon-like shaped clusters in the 2-dimensional representation space of the moons data points.

In this article we extend our plotting knowledge to the creation of a scatter-plot for visualizing data points of the moons data set. Then we will have a look at the “pipeline” feature of SciKit for a sequence of tasks, namely

  • to prepare the moons data set,
  • to analyze it
  • and to train a selected SVM-algorithm.

In this article we shall use a specific algorithm – namely LinearSVC – to predict the cluster association for some new data points.

Starting our Jupyter notebook, extending imports and loading the moons data set

At the end of the last session you certainly have found out, how to close the Jupyter notebook on a Linux system. Three steps were involved:

  1. Logout via the button at the top-right corner of the web-page
  2. Ctrl-C in your terminal window
  3. Closing the tags in the browser.

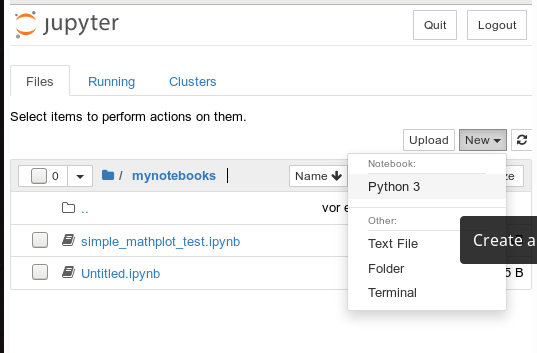
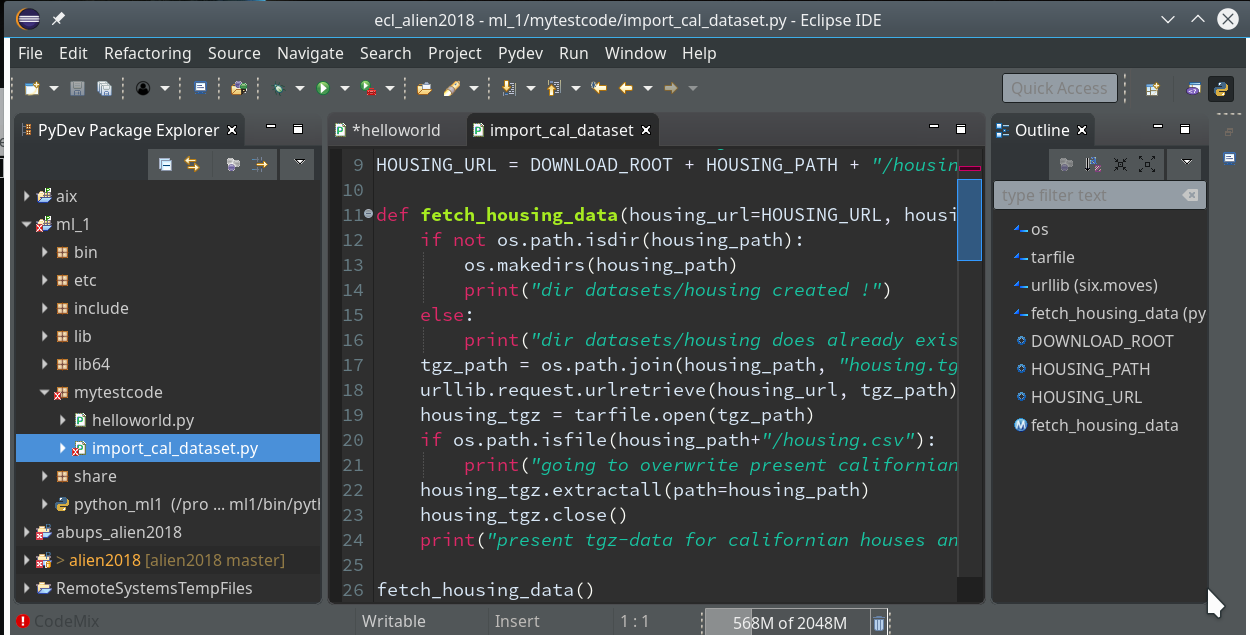
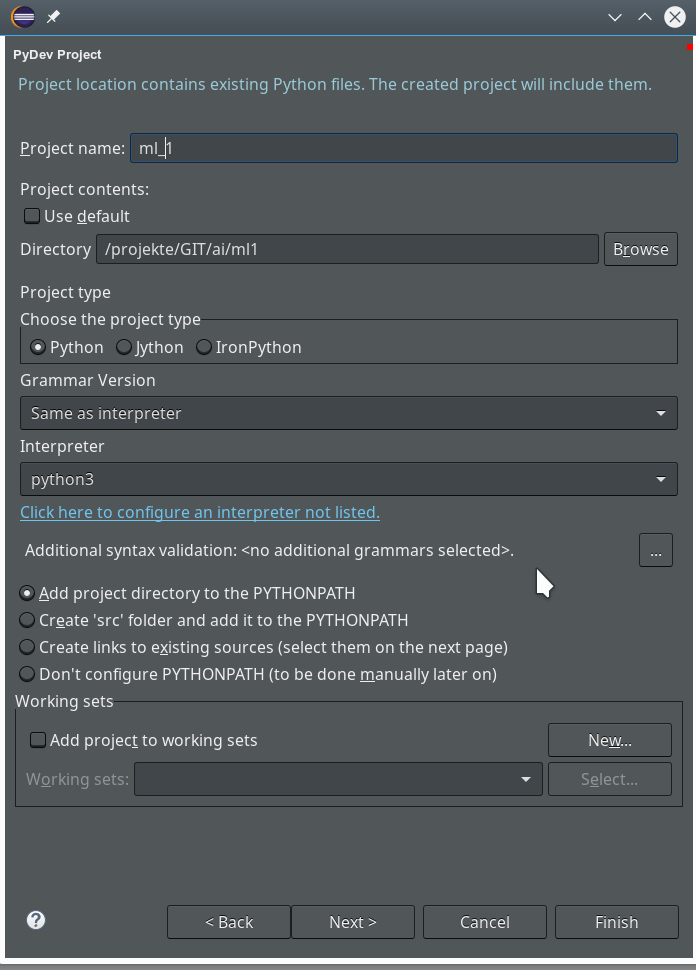
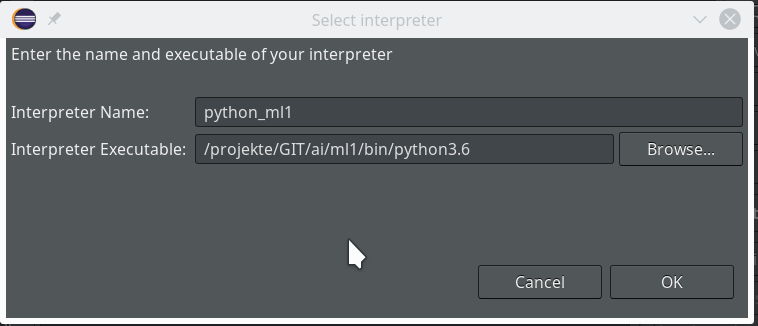
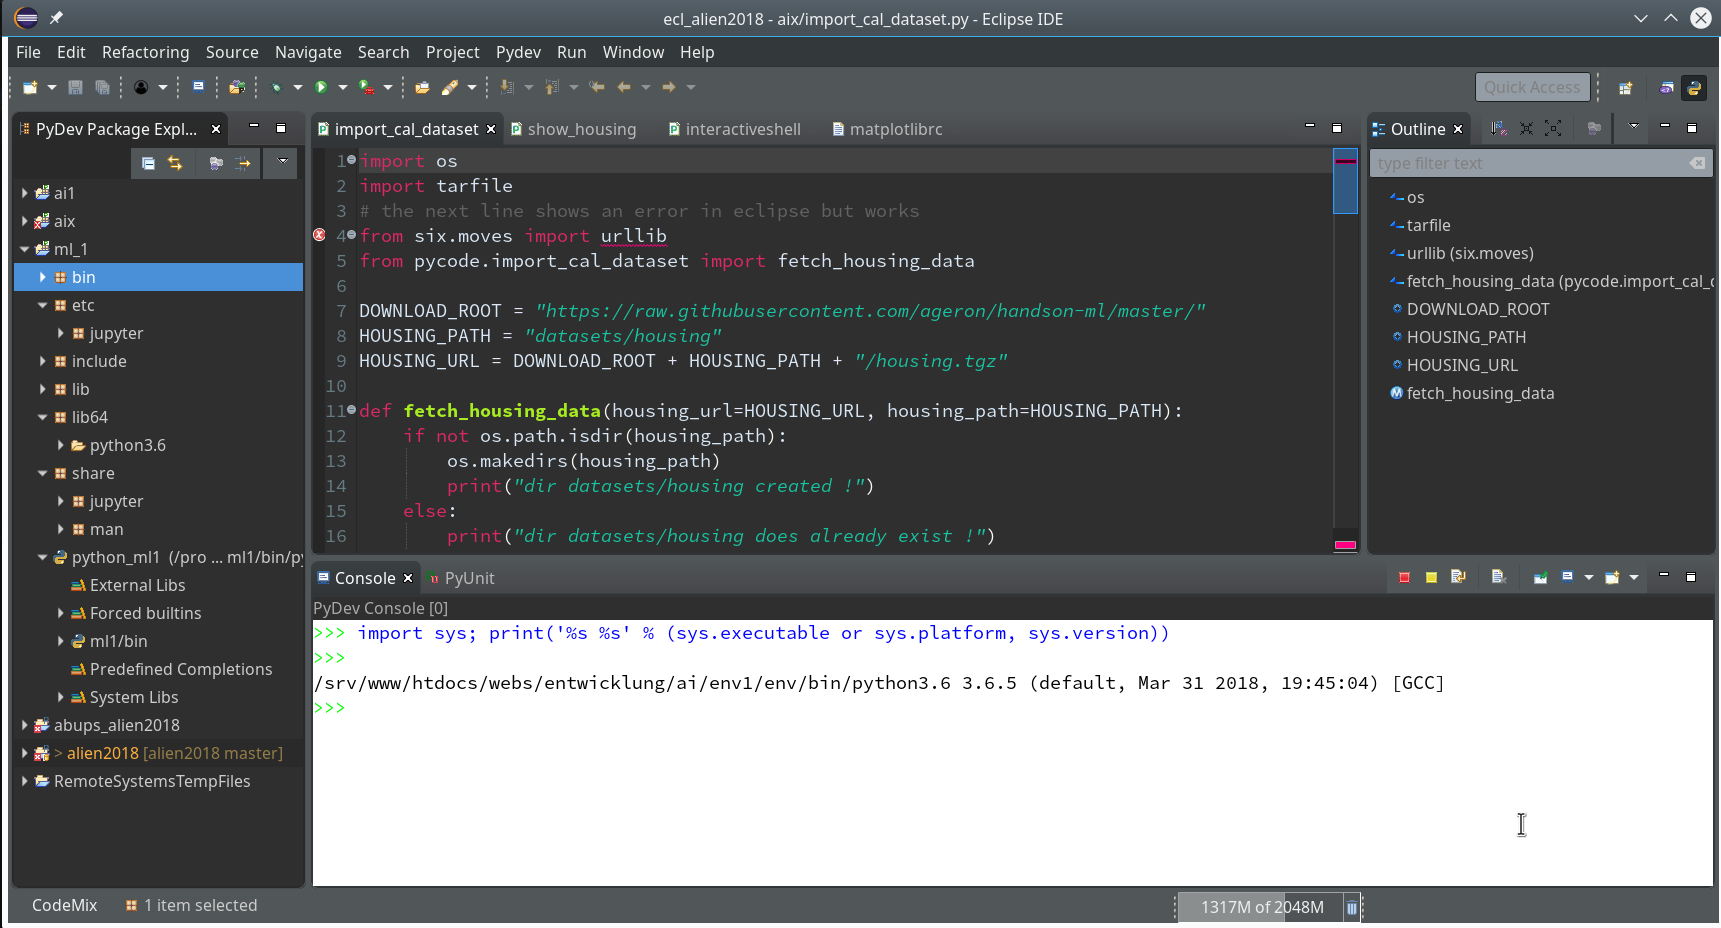
For today’s session we start the notebook again from our dedicated Python “virtualenv” by

myself@mytux:/projekte/GIT/ai/ml1> source bin/activate
(ml1) myself@mytux:/projekte/GIT/ai/ml1> cd mynotebooks/
(ml1) myself@mytux:/projekte/GIT/ai/ml1/mynotebooks> jupyter notebook

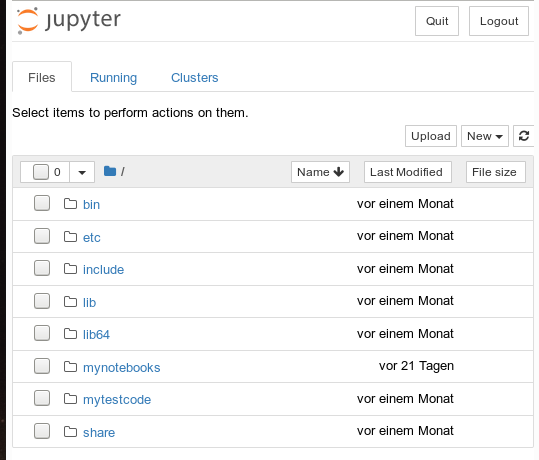
We open “moons1.ipynb” from the list of available notebooks. (Note the move to the directory mynotebooks above; the Jupyter start page lists the notebooks in its present directory, which is used as a kind of “/”-directory for navigation. If you want the whole directory structure of the virtualenv accessible, you should choose a directory level higher as a starting point.)

For the work of today’s session we need some more modules/classes from “sklearn” and “matplotlib”. If you have not yet imported some of the most important ML-packages you should do so now. Probably, you need a second terminal – as the prompt of the first one is blocked by Jupyter:

myself@mytux:/projekte/GIT/ai/ml1> source bin/activate 
(ml1) myself@mytux:/projekte/GIT/ai/ml1> pip3 install --upgrade matplotlib numpy pandas scipy scikit-learn
Collecting matplotlib
  Downloading https://files.pythonhosted.org/packages/57/4f/dd381ecf6c6ab9bcdaa8ea912e866dedc6e696756156d8ecc087e20817e2/matplotlib-3.1.1-cp36-cp36m-manylinux1_x86_64.whl (13.1MB)
.....

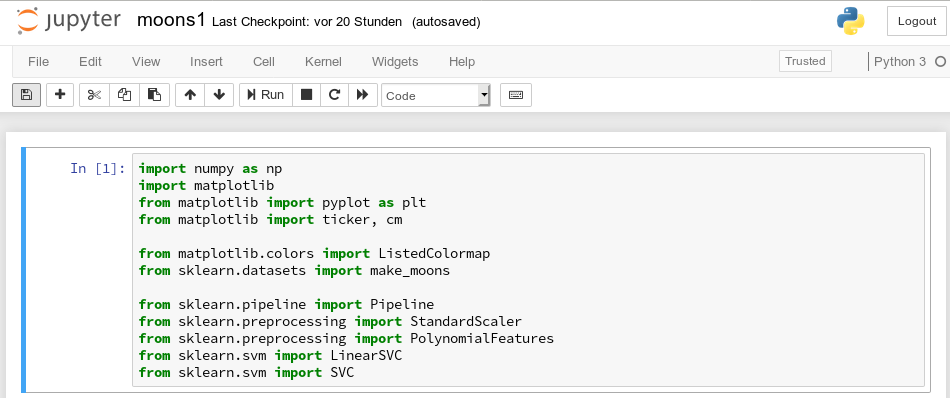
The nice people from SciKit/SkLearn have already prepared data and functionality for the setup of the moons data set; we find the relevant function in sklearn.datasets. Later on we will also need some colormap functionality for scatter-plotting. And for doing the real work (training, SVM-analysis, …) we need some special classes of sklearn.

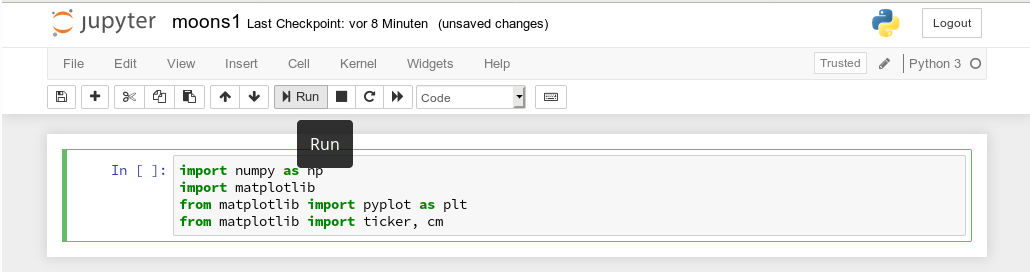
So, as a first step, we extend the import statements
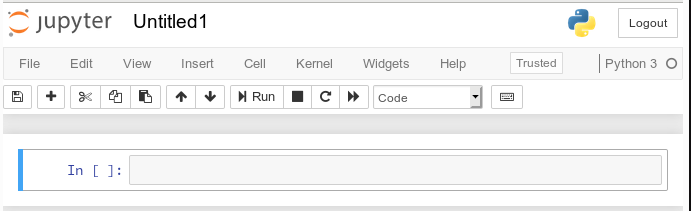
inside the first cell of our Jupyter notebook and run it:

Then we move to the end of our notebook to prepare new cells. (We can rerun already defined cell code at any time.)

We enter the following code that creates the moons data-points with some “noise”, i.e. with a spread in the coordinates around a perfect moon-like line. You see the relevant function below; for a beginning it is wise to keep the spread limited – to avoid to many overlap points of the data clusters. I added some print-statements to get an impression of the data structure.

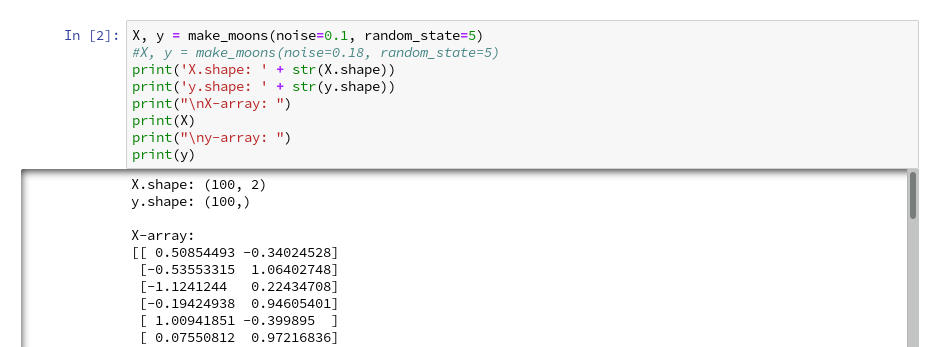
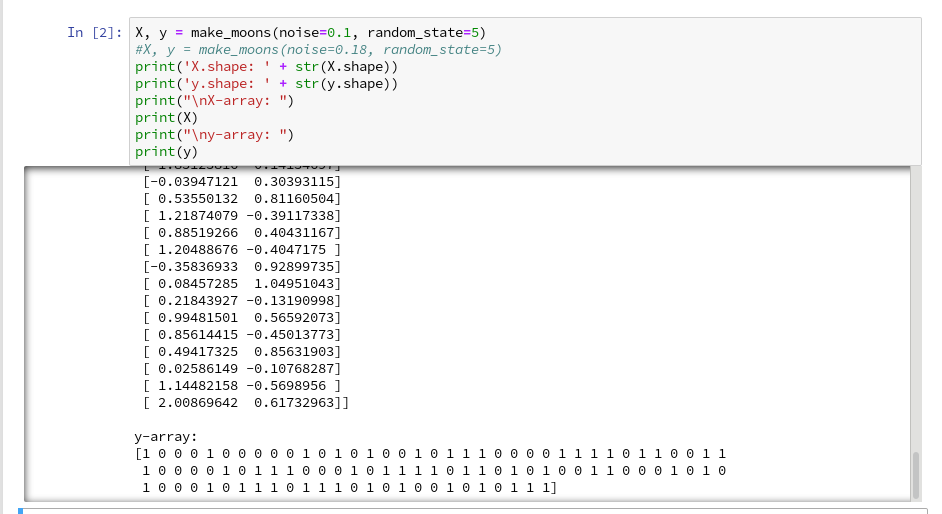
It is common use to assign an uppercase letter “X” to the input data points and a lowercase letter to the array with the classification information (per data point) – i.e. the target vector “y“.

The function “make_moons()” creates such an input array “X” of 2-dim data points and an associated target array “y” with classification information for the data points. In our case the classification is binary, only; so we get an array with “0”s or “1”s for each point.

This basic (X,y)-structure of data is very common in classification tasks of ML – at its core it represents the information reduction: “multiple features” => “member of a class”.

Scatter-plots: Plotting the raw data in 2D and 3D

We want to create a visual representation of the data points in their 2-dim feature space. We name the two elements of a data point array “x1” and “x2”.

For a 2D-plot we need some symbols or “markers” to distinguish the different data points of our 2 classes. And we need at least 2 related colors to assign to the data points.

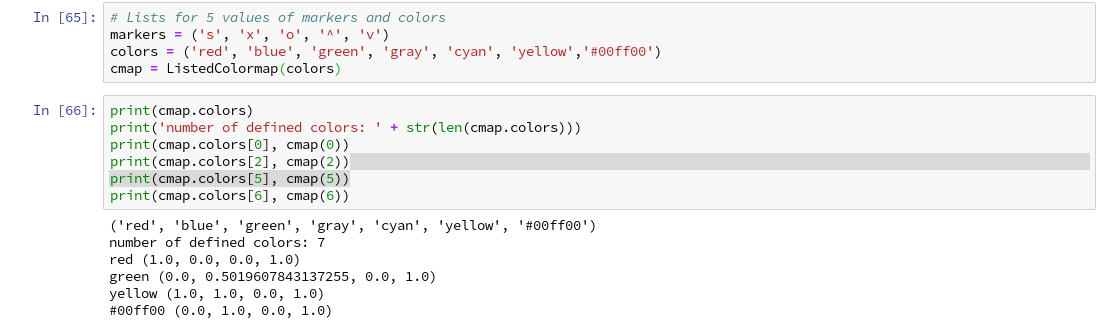
To work efficiently with colors, we create a list-like ColorMap-object from given color names (or RGB-values); see ListedColormap. We can access the RGBA-values from a ListedColormap by just creating it as a “list” with an integer index, i.e.:

colors= ('red', 'green', 'yellow')
cmap=ListedColormap(colors)
print(cmap(1)) // gives: (0.0, 0.5019607843137255, 0.0, 1.0)  

All RGBA-values are normalized between 0.0 and 1.0. The last value defines an alpha-opacity. Note that “green” in matplotlib is defined a bit strange in comparison to HTML.

Let us try it for a list (‘red’, ‘blue’, ‘green’, gray’, ‘yellow’, ‘#00ff00’):

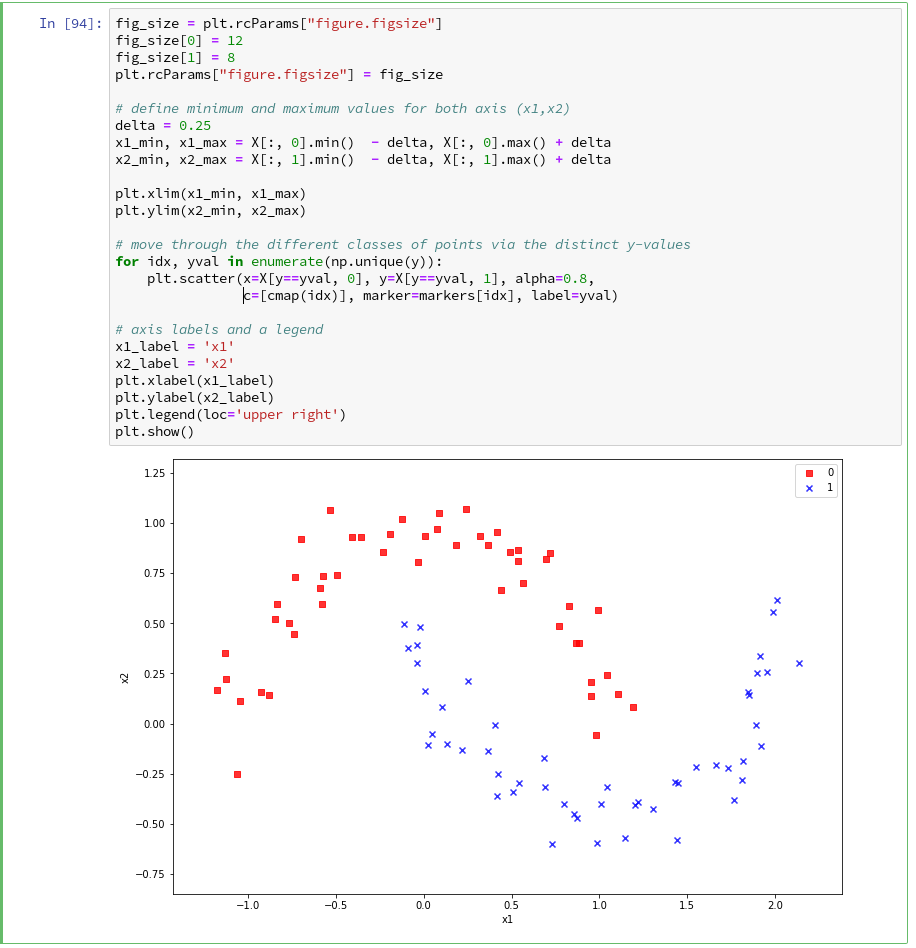
The lower and upper limits of the the two axes must be given. Note that this sets the size of the region in our representation space which we want to analyze or get predictions for later on. We shall make the region big enough to willingly cover points outside the defined clusters. It will be interesting to see how an algorithm extrapolates its knowledge learned by training on the input data to regions beyond the
training area.

For the purpose of defining the length of the axes we can use the plot functions pyplot.xlim() and pyplot.ylim().

The central function, which we shall use for plotting data points in the defined area of the (x1,x2)-plane, is “matplotlib.pyplot.scatter()“; see the documentation scatter() for parameters.

Regarding the following code, please note that we plot all points of each of the two moon like cluster in one step. Therefore, we call scatter() exactly two times with the for-loop defined below:

In the code you may stumble across the defined lists there with expressions included in the brackets. These are examples of so called Python “list comprehensions”. You find an elementary introduction here.

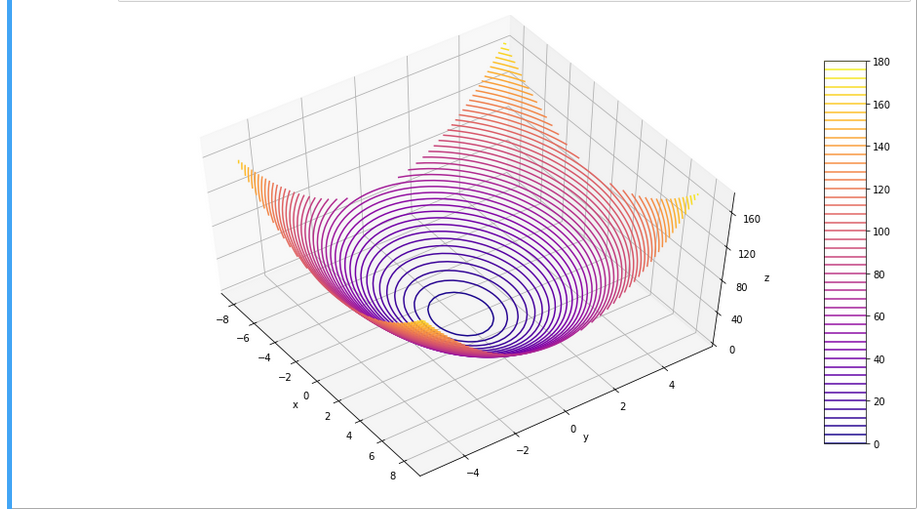
As we are have come so far, lets try a 3D-scatter-plot, too. This is not required to achieve our objectives, but it is fun and it extends our knowledge base:

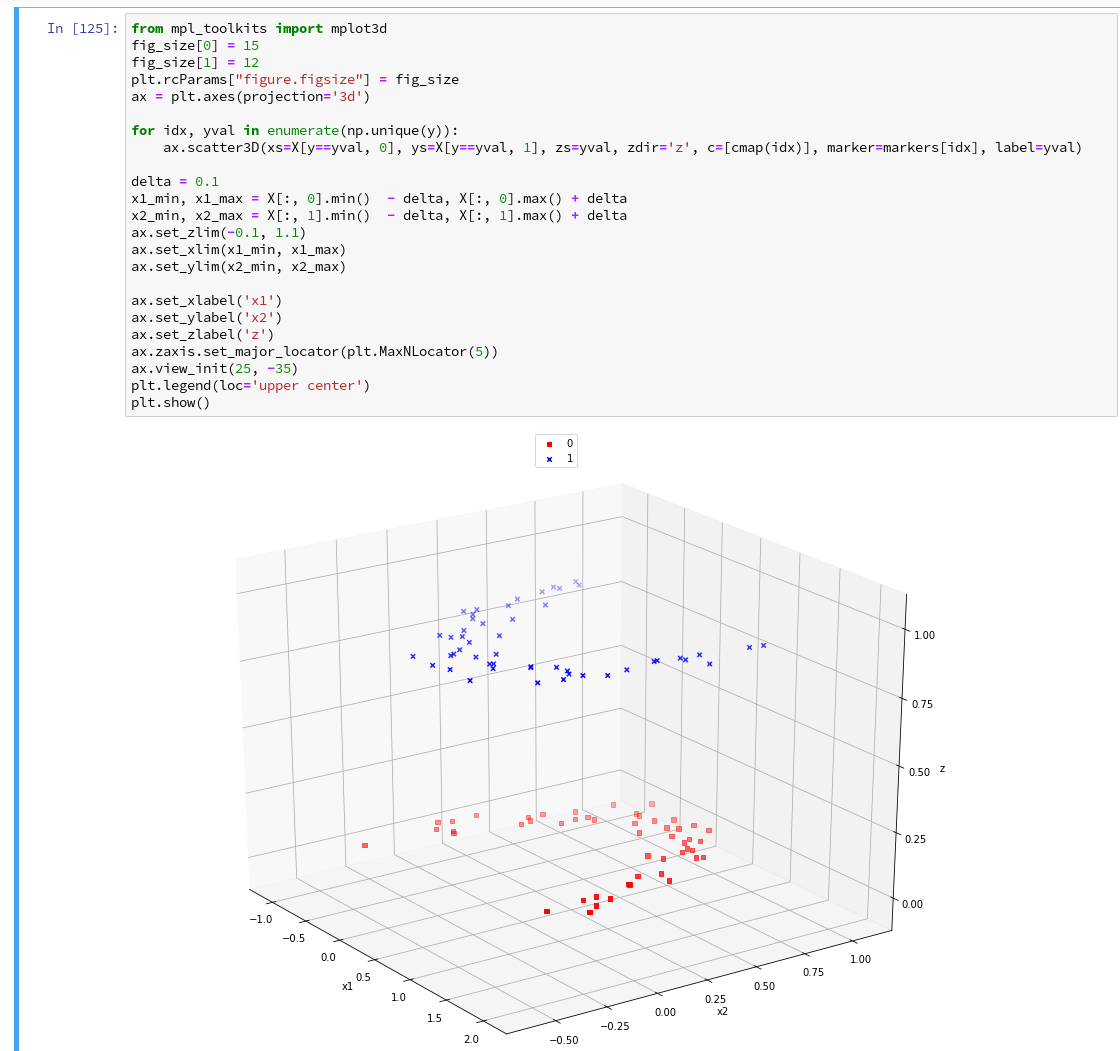
Of course all points of a class are placed on the same level (0 or 1) in z-direction. When we change the last statement to “ax.view_init(90, 0)”. We get
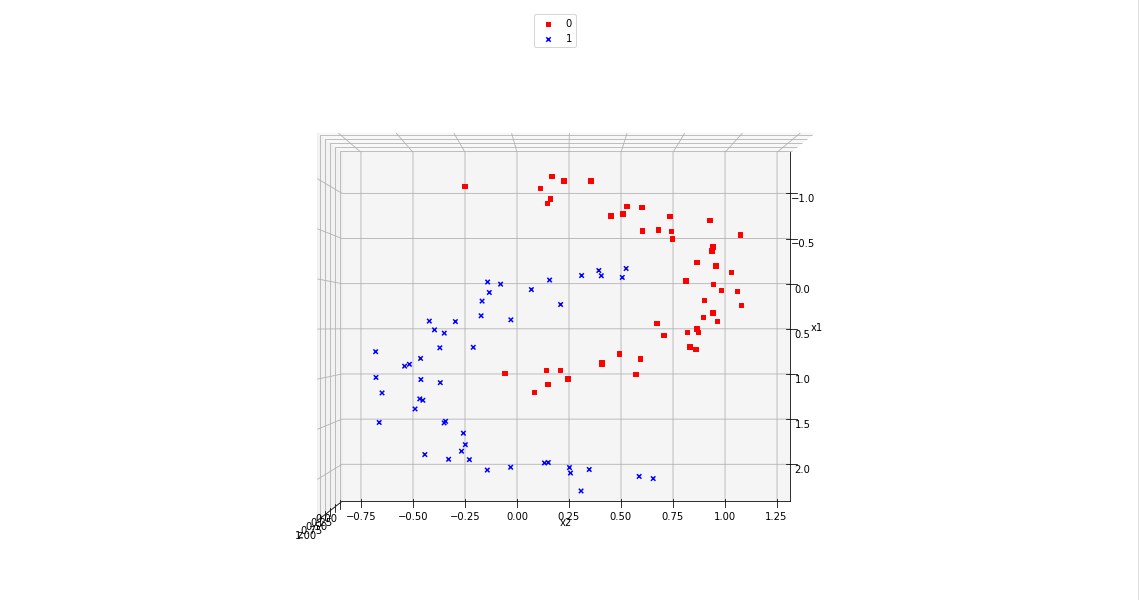
As expected 🙂 .

Analyzing the data with the help of a “pipeline” and “LinearSVC” as an SVM classificator

Sklearn provides us with a very nice tool (actually a class) named “Pipeline“:

Pipeline([]) allows us

  • to define a series of transformation operations which are successively applied to a data set
  • and to define exactly one predictor algorithm (e.g. a regression or classifier algorithm), which creates a model of the data and which is optimized later on.

Transformers and predictors are also called “estimators“.

Transformers” and “predictors” are defined by Python classes in Sklearn. All transformer classes must provide a method ” fit_transform()” which operates on the (X,y)-data; the predictor class of a class provides a method “fit()“.

The “Pipeline([])” is defined via rows of an array, each comprising a tuple with a chosen name for each step and the real class-names of the transformers/predictor. A pipeline of transformers and a predictor creates an object with a name, which also offers the method “fit()” (related to the predictor algorithm).

Thus a pipeline prepares a data set(X,y) via a chain of operational steps for training.

This sounds complicated, but is actually pretty easy to use. How does such a pipeline look like for our moons dataset? One possible answer is:

polynomial_svm_clf = Pipeline([
  ("poly_features", PolynomialFeatures(degree=3)),
  ("scaler", StandardScaler()),
  ("svm_clf", LinearSVC(C=18, loss="hinge", max_iter=3000))
])
polynomial_svm_clf.fit(X, y)

The transformers obviously are “PolynomialFeatures” and ”
StandardScaler“, the predictor is “LinearSVC” which is a special linear SVM method, trying to find a linear separation channel between the data in their representation space.

The last statement

polynomial_svm_clf.fit(X, y)

starts the training based on our pipeline – with its algorithm.

PolynomialFatures

What is “PolynomialFeatures” in the first step of our Pipeline good for? Well, looking at the moons data plotted above, it becomes quite clear that in the conventional 2-dim space for the data points in the (x1, x2)-plane there is no linear decision surface. Still, we obviously want to use a linear classification algorithm …. Isn’t this a contradiction? What can be done about the problem of non-linearity?

In the first article of this series I briefly discussed an approach where data, which are apparently not linearly separable in their original representation space, can be placed into an extended feature space. For each data point we add new “features” by defining additional variables consisting of polynomial combinations of the points basic X-coordinates. We do this up to a maximum degree, namely the order of a polynomial function – e.g. T(x1,x2) = x1**3 + a* x1**2*x2 + b*x1*x2**2 + c*x1*x2 + x2**3.

Thereby, the dimensionality of the original X(x1,x2) set is extended by multiple further dimensions. Each data point is positioned in the extended feature space by a defined transformation T.

Our hope is that we can find a linear separation (“decision”) surface in the new extended multi-dimensional feature space.

The first step of our Pipeline enhances our X by additional and artificial polynomial “features” (up to a degree of 3 in our example). We do not need to care for details – they are handled by the class “PolynomialFeatures”. The choice of a polynomial of order 3 is a bit arbitrary at the moment; we shall play around with the polynomial degree in a future article.

StandardScaler

The second step in the Pipeline is a simple one: StandardScaler.fit_transform() scales all data such that they fit into standard ranges. This helps both for e.g. linear regression- and SVM-analysis.

The predictor LinearSVC

The third step assigns a predictor – in our example a simple linear SVM-like algorithm. It is provided by the class LinearSVC (a linear soft margin classificator). See e.g
support-vector-machine-algorithm/,
LinearSVC vs SVC,
www.quora.com : What-is-the-difference-between-Linear-SVMs-and-Logistic-Regression.

The basic parameters of LinearSVC, as the number of iterations (3000) to find an optimal solution and the width “C” for the separation channel, will also be a subject of further experiments.

Analyzing the moons data and fitting the LinearSVC algorithm

Let us apply our pipeline and predict for some data points outside the X-region whether they belong to the “red” or the “blue” cluster. But, how do we predict?

We are not surprised that we find a method predict() in the documentation for our classifier algorithm; see LinearSVC.

So:

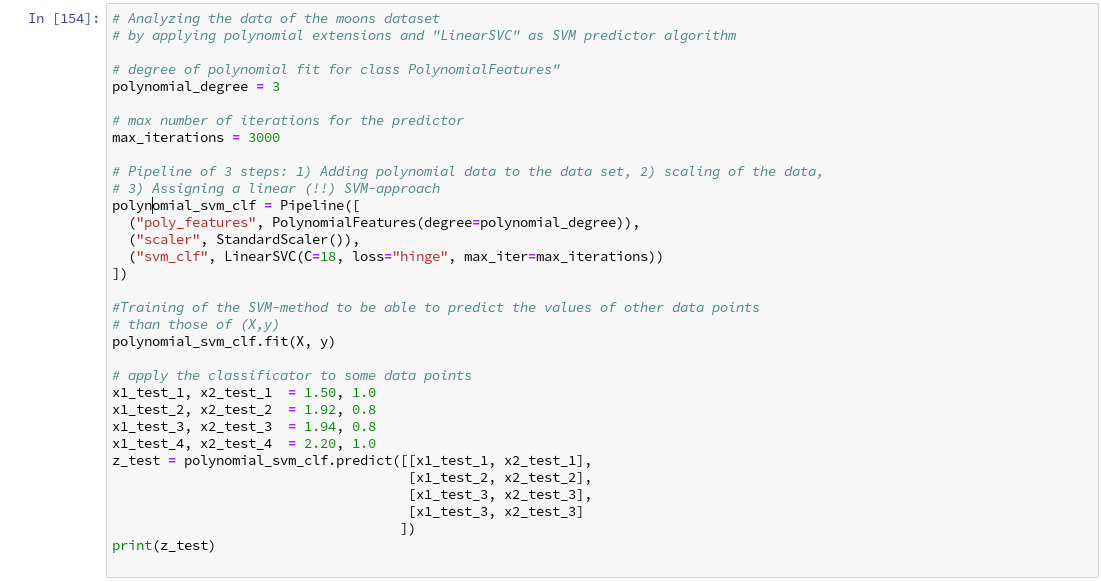
We get for the different test points

[x1=1.50, x2=1.0] => 0  
[x1=1.92, x2=0.8] 
=> 0
[x1=1.94, x2=0.8] => 1
[x1=2.20, x2=1.0] => 1               

Looking at our scatter plot above we can assume that the decision line predicted by LinearSVC moves through the right upper corner of the (x1,x2)-space.

However and of course, looking at some test data points is not enough to check the quality of our approach to find a decision surface. We absolutely need to plot the decision surface throughout the selected region of our (x1,x2)-plane.

Conclusion

But enough for today’s session. We have seen, how we can produce a scatter plot for our moons data. We have also learned a bit about Sklearn’s “pipelines”. And we have used the classes “PolynomialFeatures” and “LinearSVC” to try to separate our two data clusters.

By now, we have gathered so much knowledge that we should be able to use our predictor to create a contour plot – with just 2 contour areas in our representation space. We just have to apply the function contourf() discussed in the second article of this series to our data:

If we cover the (x1,x2)-plane densely and associate the predicted values of 0 or 1 with colors we should clearly see the contour line, i.e. the decision surface, separating the two areas in our contour plot. And hopefully all data points of our original (X,y) set fall into the right region. This is the topic of the next article

The moons dataset and decision surface graphics in a Jupyter environment – IV – plotting the decision surface

Stay tuned.

Links

Understanding Support Vector Machine algorithm from examples (along with code) by Sunil Ray
Stackoverflow – What is exactly sklearn-pipeline?
LinearSVC

The moons dataset and decision surface graphics in a Jupyter environment – II – contourplots

I proceed with my present article series on the “moons dataset” as an example for classification tasks in the field of “machine learning” [ML]. My objective is to gather basic knowledge on Python related tools for performing related experiments. In my last blog article

The moons dataset and decision surface graphics in an Jupyter environment – I

In the case of the “moons dataset” we can apply and train support vector machines [SVM] algorithms for solving the classification task: The trained algorithm will predict to which of the 2 clusters a new data point probably belongs. The basic task for this kind of information reduction is to find a (curved) decision surface between the data clusters in the n-dimensional representation space of the data points during the training of the algorithm.

As the moons feature space is only 2-dimensional the decision surface would be a curved line. Of course, we would like to add this line to the 2D-plot of the moons clusters shown in the last article.

The challenge of plotting data points and decision surfaces for our moon clusters

  1. is sufficiently simple for a Python- and AI/ML-beginner as me,
  2. is a good opportunity to learn how to work with a Jupyter notebook,
  3. gives us a reason to become acquainted with some basic plotting functions of matplotlib,
  4. an access to some general functions of SciKit – and some specific ones for SVM-problems.

Much to learn from one little example. Points 2 and 3 are the objectives of this article.

Contour plots !

But what kind of plots should we be interested in? We need to separate areas of a 2-dimensional parameter space (x1,x2) for which we get different (integer) target or y-values, i.e. to distinguish between a set of distinct classes to which data points may belong – in our case either to a class “0” of the first moon like cluster and a class “1” for data points around the second cluster.

In applied mathematics there is a very similar problem: For a given function z(x1,x2) we want to visualize regions in the (x1,x2)-plane for which the z-values cover a range between 2 selected distinct z-values, so called contour areas. Such contour areas are separated by contour lines. Think of height lines in a map of a mountain region. So, there is an close relation between a contour line and a decision surface – at least in a two dimensional setup. We need contour plots!

Let us see how we start a Jupyter environment and how we produce nice 2D- and even 3D-contour-plots.

Starting a Jupyter notebook from a virtual Python environment on our Linux machine

I discussed the setup of a virtual Python environment (“virtualenv”) already in the article Eclipse, PyDev, virtualenv and graphical output of matplotlib on KDE – I of this blog. I refer to the example and the related paths there. The “virtualenv” has a name of “ml1” and is located at “/projekte/GIT/ai/ml1”.

In the named article I had also shown how to install the Jupyter package with the help of “pip3” within this environment. You can verify the Jupyter installation by having a look into the directory “/projekte/GIT/ai/ml1/bin” – you should see some files “ipython3” and “jupyter” there. I had also prepared a directory
“/projekte/GIT/ai/ml1/mynotebooks”
to save some experimental notebooks there.

How do we start a Jupyter notebook? This is simple – we just use a
terminal window and enter:

myself@mytux:/projekte/GIT/ai/ml1> source bin/activate 
(ml1) myself@mytux:/projekte/GIT/ai/ml1> jupyter notebook 
[I 16:16:27.734 NotebookApp] Writing notebook server cookie secret to /run/user/1004/jupyter/notebook_cookie_secret
[I 16:16:29.040 NotebookApp] Serving notebooks from local directory: /projekte/GIT/ai/ml1
[I 16:16:29.040 NotebookApp] The Jupyter Notebook is running at:
[I 16:16:29.040 NotebookApp] http://localhost:8888/?token=942e6f5e75b0d014659aea047b1811d1992ca77e4d8cc714
[I 16:16:29.040 NotebookApp] Use Control-C to stop this server and shut down all kernels (twice to skip confirmation).
[C 16:16:29.054 NotebookApp] 
    
    To access the notebook, open this file in a browser:
        file:///run/user/1004/jupyter/nbserver-19809-open.html
    Or copy and paste one of these URLs:
        http://localhost:8888/?token=942e6f5e75b0d014659aea047b1811d1992ca77e4d8cc714

We see that a local http-server is started and that a http-request is issued. In the background on my KDE desktop a new tag in my standard browser “Firefox” is opened for this request:

Note that a standard port 8888 is used; this port should not be used by other services on your machine.

On the displayed web page we can move to the “mynotebooks” directory. We open a new notebook there by clicking on the “New”-button on the right side of the browser window:

We choose Python3 as the relevant interpreter and get a new browser window:

We give the notebook a title by clicking on “File >> Save as …” before start using the provided input “cell” for coding

I name it “moons1” in the next input form and check afterward in a terminal that the file “/projekte/GIT/ai/ml1mynotebooks/moons1.ipynb” really has been created; you see this also in the address bar of the browser – see below.

Lets do some plotting within a notebook

Most of the icons regarding the notebook screen are self explanatory. The interesting and pretty nice thing about a Jupyter notebook is that the multiple lines of Python code can be filled into cells. All lines can be executed in a row by first choosing a cell via clicking on a it and then clicking on the “Run” button.

As a first exercise I want to do some plotting with “matplotlib” (which I also installed together with the numpy package in a previous article). We start by importing the required modules:

A new cell for input opens automatically (it is clever to separate cells for imports and for real code). Let us produce a most simple plot there:

No effort in comparison to what we had to do to prepare an Eclipse environment for plotting (see Eclipse, PyDev, virtualenv and graphical output of matplotlib on KDE – II). Calling plot routines simply works – no special configuration is required. Jupyter and the browser do all the work for us. We save our present 2 cells by clicking on the “Save“-icon.

How do we plot contour lines or contour areas?

Later on we need to plot a separation line in a 2-dimensional parameter space between 2 clustered sets of data. This task is very similar to plotting a contour line. As this is a common task in math we expect matplotlib to provide some functionality for us. Our ultimate goal is to wrap this plotting functionality into a function or class which also accepts an SVM based ML-method of SciKit to prepare and evaluate the basic data first. But let us proceed step by step.

Some research on the Internet shows: The keys to contour plotting with matplotlib are the functions “contour()” and “contourf()” (matplotlib.pyplot.contourf):

contour(f)([X, Y,] Z, [levels], **kwargs)

“contour()” plots lines, only, whilst “contourf()” fills the area between the lines with some color.

Both functions accept data sets in the form of X,Y-coordinates and Z-values (e.g. defined by some function Z=f(X,Y)) at the respective points.

X and Y can be provided as 1-dim arrays; Z-values, however, must be given by a 2-dim array, such that len(X) == M is the number of columns in Z and len(Y) == N is the number of rows in Z. We cover the X,Y-plane with Z-values from bottom to top (Y, lines) and from the left to the right (X, columns).

Somewhat counter-intuitively, X and Y can also be provided as 2-dim arrays – with the same dimensionality as Z.
There is a nice function “meshgrid” (of packet numpy) which allows for the creation of e.g. a mesh of two 2-dimensional X- and separately Y-matrices. See for further information (numpy.meshgrid). Both arrays then have a (N,M)-layout (shape); as the degree of information of one coordinate is basically 1-dimensional, we do expect repeated values of either coordinate in the X-/Y-meshgrid-matrices.

The function “shape” gives us an output in the form of (N lines, M columns) for a 2-dim array. Lets apply all this and create a rectangle shaped (X,Y)-plane:

The basic numpy-function “arange()” turns a range between two limiting values into an array of equally spaced values. We see that meshgrid() actually produces two 2-dim arrays of the same “shape”.

For test purposes let us use a function

Z1=-0.5* (X)**2 + 4*(Y)**2.

For this function we expect elliptical contours with the longer axis in X-direction. The “contourf()”-documentation shows that we can use the parameters “levels“, “cmap” and “alpha” to set the number of contour levels (= number of contour lines -1), a so called colormap, and the opacity of the area
coloring, respectively.

You find predefined colormaps and their names at this address: matplotlib colormaps. If you add an “_r” to the colormap-name you just reverse the color sequence.

We combine all ingredients now to create a 2D-plot (with the “plasma” colormap):

Our first reasonable contour-plot within a Jupyter notebook! We got the expected elliptic curves! Time for a coffee ….

Changing the plot size

A question that may come to your mind at this stage is: How can we change the size of the plot?

Well, this can be achieved by defining some basic parameters for plotting. You need to do this in advance of any of your specific plots. One also wants to add some labels for all axis. We, therefore, extend the code in our cell a bit by the following statements and click again on “Run”:

You see that “fig_size = plt.rcParams[“figure.figsize”]” provides you with some kind of array- or object like information on the size of plots. You can change this by assigning new values to this object. “figure” is an instance of a container class for all plot elements. “plt.xlabel” and “plt.ylabel” offer a simple option to add some text to an axis of the plot.

What about a 3D-representation …

As we are here – isn’t our function for Z1 not a good example to get a 3D-representation of our data? As 3D-plots are helpful in other contexts of ML, lets have a quick side look at this. You find some useful information at the following addresses:
PythonDataScienceHandbook and mplot3d-tutorial

I used the given information in form of the following code:

You see that we can refer to a special 3D-plot-object as the output of plt.axes(projection=’3d’). The properties of such an object can be manipulated by a variety of methods. You also see that I manipulated the number of ticks on the z-axis to 5 by using a function “set_major_locator(plt.MaxNLocator(5)“. I leave it to the reader to dive deeper into manipulation options for a plot axis.

Addendum – 07.07.2019: Adding a colorbar

A reader asked me to show how one can set ticks and add a color-bar to the plots. I give an example code below:

The result is:

For the 3D-plots we get:

Conclusion

Enough for today. We have seen that it is relatively simple to create nice contour and even 3D-plots in a Jupyter notebook environment. This new knowledge provides us with a good basis for a further approach to our objective of plotting a decision surface for the moons dataset. In the next article

The moons dataset and decision surface graphics in a Jupyter environment – III – scatter-plots and LinearSVC

we first import the moons data set into our Jupyter notebook. Then we shall create a so called “scatter plot” for all data points. Furthermore we shall train a specific SVM algorithm (LinearSVC) on the dataset.

Links

https://codeyarns.com/2014/10/27/how-to-change-size-of-matplotlib-plot/
matplotlib.pyplot.contourf
https://stackoverflow.com/questions/12608788/changing-the-tick-frequency-on-x-or-y-axis-in-matplotlib


Eclipse, PyDev, virtualenv and graphical output of matplotlib on KDE – II

Developing and organizing efficient code after preliminary experiments in machine learning [ML] requires an IDE. This mini-series of articles deals with the setup of a Python environment which supports Eclipse – and Jupyter notebooks. A key ingredient is “virtualenv”: it defines an encapsulated environment for a particular python interpreter together with a specific collection of library packages. In the last article

Eclipse, PyDev, virtualenv and graphical output of matplotlib on KDE – I

we prepared such a virtual Python3 environment “ml1” at a path “/projekte/ai/ml1” and installed some of the basic ML packages there with the help of the “pip3”-mechanism. Within Eclipse we implemented the PyDev plugin. During the setup of a “Python project” we could refer to our “ml1“-environment by defining paths to the Python interpreter and library packages located there.

Changes of the PYTHONPATH from Eclipse/PyDev

To integrate our future own Python modules into interactive experiments we need to add the paths to our own Python file directories into the PYTHONPATH variable. We expect that this should be possible from within Eclipse – and indeed it is on the project level.

In the left Eclipse view of the “PyDev explorer” we add an example directory “mytestcode”; we do this by a right-click on “ml1″ >> New >> folder” and giving the new folder a name in the eventual popup

As soon as the new folder appears we right-click on the root folder of our project “ml_1” in the PyDeev package explorer; in the appearing window we click on “Properties” and get:

There, we choose “PyDev – PYTHONPATH”. By clicking on the button “Add source folder” we can add a folder, e.g. “mytestcode”.

From now on we can import modules in any interactive Python command environment from this directory.

Python console in Eclipse

To perform experiments within an IDE as Eclipse we need some interface to interactively run Python commands and programs. A basic interface for this purpose is a “console”. PyDev, of course, offers a special Python console. How to start it?

If you have chosen a Python perspective within Eclipse you may already see a view area with a console. We start, however, from a perspective where no console view is open, yet:

To add the console view area we use the menu point “Window >> Show View >> Console”.

This gives us:

n

We got a “Debug console” – not exactly, what we want right now. So, let us open a new console view:

Again a debug console – but we change this now to a PyDev console:

At last, we get a popup where we can choose between a number of defined Python interpreters for command execution. You should at least see 2 items here: A reference to the Linux-system’s Python installation’s interpreter plus a reference to the interpreter configuration of the virtual Python environment, which we had set up in the last article. We had given it the name “python_ml1”.

We chose it; in my case this results in the following view:

Ok, we have a Python prompt (>>>) – but a bunch of error messages, too… The error messages indicate that something to access the graphical environment is missing; PyDEV’s console actually has recognized that it needs an Qt5-based interface to the desktop.

The reason for this is that I had done some customization of the “PyDev” console beforehand; when you look at the choices of “Window >> Preferences” you may find something like this:

here, the setting for “Enable GUI event-loop integration” is interesting: I had chosen the option “PyQt5(qt5)” from the combobox. To me this seemed to be a natural choice on a Qt5-based KDE Linux desktop. Remember, I had the Qt5 python modules installed on my Linux system … Well, error messages nevertheless …

Does the console work at all? Can we use “matplotlib”?

We briefly test whether the Python console works at all:

Yes! And:

We actually do get a reasonable output from “matplotlib”! However, this is NOT based on a “Qt5”-backend, but “TkAgg” (which we can see by the graphical layout of buttons). Where does this come from? And why the complaint of our console about “Qt5”?

Let us try another option from the Combobox : Tkinter(tk).

And then starting yet another console:

Hey, no error messages! This is again a strong indication that some things are missing.

Enable Qt5!

A natural guess is that we need PyQt5 within our virtual environment. Have a look at the Interpreters by choosing
“Window >> Prefrences>> PyDev >> Interpreters >> Python Interpreter”.

There we find no path to the system’s directory for “site-packages”; only the path to thw “ml1”-environments site-package directory is included in the PYTHONPATH. Now, we use “pip” from within Eclipse. This can be done by choosing our “python_ml1” in the upper area and then clicking on “Packages”:

No PyQt5 there – but a button “Install/Uninstall with pip”; we confidently use it:

We terminate all our consoles, we reset the “Interactive console settings” for the GUI event loop integration” (see above) to “PyQt5” and start again a new console for our environment’s “python_ml1” interpreter:

Good! No error messages any more; and:

Yeah, that’s what we want!

Other matplotlib-settings

You should also be aware of the fact that the backend for “matplotlib” may also be defined in a specific configuration file of your environment. In my case we find the relevant file at “/projekte/GIT/ml_1/lib64/python3.6/site-packages/matplotlib/mpl-data/matplotlibrc“.

There you find a commented entry

# backend: :Agg” ,

which you could un-comment and set to a default of “Qt5Agg”. But this is only seldomly required:

Reading the information text in matplotlibrc, we see that Qt5Agg was
automatically chosen as the first working backend of a list of possible backends: MacOSX Qt5Agg Qt4Agg Gtk3Agg TkAgg WxAgg Agg.

By the way this together with the information at https://askubuntu.com/questions/1045720/what-is-a-good-default-backend-for-matplotlibexplains explains why TkAgg worked.

Console colors and command history

Via “Window >&gt: Preferences >> PyDev >> Interactive Console” we can adjust the console colors. I use the following settings to get a dark background:

Command history: The PyDev console, of course, also allows for scrolling through commands but the arrow-up/down-keys. The number of commands can be set via the option “Maximum number of lines to store in global history …”.

Conclusion

A basic Eclipse/PyDev environment which supports a “virtual Python environment (virtualenv) and graphical output in Qt5 quality is set up quickly. We can use it as a tool to collect, rectify and optimize code of experimental Jupyter sessions in Python source files.

In the next article

Eclipse, PyDev, virtualenv and graphical output of matplotlib on KDE – III

we shall have a brief look at debugging local Python code in PyDev.

Eclipse, PyDev, virtualenv and graphical output of matplotlib on KDE – I

When you enter the field of machine learning [ML] and Artificial Intelligence [AI] there is no way around Python. And whilst studying books like “A. Geron’s Machine Learning with SciKit-Learn & TensorFlow” [1] or F. Chollet’s “Deep learning with Python and Keras” [2] one understands quickly: You do not learn by reading, but by doing experiments.

For me this meant to both improve my basic Python knowledge and to set up a reasonable working environment on my Linux workstation (with Opensuse Leap Linux and KDE). The named books recommend using “Jupyter notebooks” – and I must say, Jupyter environments are fun to use. However, as soon as I started with more complex program variations I began missing an IDE. I think that in the end Python code must be organized in a more systematic way than during experiments with Jupyter notebooks. A Jupyter notebook serves one purpose, a Python IDE a supplemental one.

A natural choice for an IDE based on opensource tools is Eclipse with PyDev. After a basic setup I stumbled across two problems:

  • For projects a so called “virtual” Python environment is useful, which encapsulates a defined mix of Python and library versions. How to use “virtualenv” within PyDev and its Python specific console?
  • Quite often the results of ML/AI-experiments need to be represented in a graphical way. Browser based “Jupyter notebooks” make the use of graphics easy by using browser capabilities. But how to use Python’s matplotlib in my Opensuse/KDE/Eclipse environment?

In this article I address the steps to setup Eclipse/PyDev in such a way that both points are covered. I do this for an Opensuse Leap system, but a transfer to other Linux distributions should be simple. The group of readers I address is either ML-interested folks for whom Eclipse is a new environment or people as me who know Eclipse but not the PyDev plugin. People who already work with PyDev will probably not learn anything new.

Step 1: Install Eclipse

A basic Eclipse installation is a straightforward business on most Linux distributions ( see e.g.: https://simopr.wordpress.com/2016/05/26/install-eclipse-ide-on-opensuse-leap-42/). I will, therefore, not cover this topic in detail here. You first need to install a Java Runtime environment (on Opensuse via the RPM java-10-openjdk), if not yet provided by your distribution. A current version of Eclipse can be downloaded from the site
https://www.eclipse.org/downloads/packages/.
(Actually, I used my already installed Eclipse photon version 4.9.0 of September 2018 – which works pretty well for me. But the present 2019 RC3 candidate of Eclipse should work as well.)

To my knowledge there is no special Eclipse package for Python developers; as a PHP-developer I choose the package for PHP-developers for a basic Eclipse installation and install the required Python PyDev packages afterwards.

You download your chosen tar.gz-file from the Eclipse site named above, save it and then expand its contents into a suitable directory of your Linux system (in my case into “/projects/eclipse”). Then you can directly start the executable “eclipse”-file there – e.g. in a terminal.

Then you need to define your path for a “workspace” for your Python projects. Note that the workspace is not necessarily identical with a root directory for all your project files; a workspace instead gathers information on your configuration settings for Eclipse and defined projects. The project files themselves, however, can be located in a very different place – e.g. in a directory defined for your local GIT platform – in my case below “/projects/GIT/…”.

Eventually, you get a full fledged Eclipse IDE interface, which you
can customize (see “Window >> “Preferences”). This is beyond the scope of this article; I give however some hints regarding color. You can e.g. customize editor and console colors for specific programming languages within Eclipse.

However, regarding certain application control elements you may nevertheless run into trouble regarding the definition of colors; one reason is that on a Qt5-based KDE desktop the end result may depend both on Eclipse settings and also on desktop design schemes for GTK2/GTK3 applications as Eclipse. This type of dependency requires experiments. So, what exactly do I use?

Within Eclipse itself I use the “Dark Theme” – to avoid an eye sore whilst programming.

Regarding my KDE desktop I use a standard Breeze Desktop Scheme with Elegance-Design and the Standard Color Theme (with the activation flag for non-Qt-applications set). KDE application design elements, however, are taken from the Adwaita-Scheme. For GTK2 applications on KDE I prefer the Clearlooks-design, for GTK3 applications – as Eclipse (> 4.9.0) – again Adwaita. This combination gives me a sufficient foreground/background-contrast for control elements like checkboxes, radio buttons, …

A last convenience point: In a graphical desktop environment as KDE you will of course add some icon to your desktop (in my case with a reference to the file “projects/eclipse/eclipse”) to reduce the starting process to a click.

Step 2: Basic Python packages on the system level

I assume that you have already installed Python in your Linux-(Opensuse)-system. In my environment I use the Python 3.6 RPM-packages from the standard repositories for Opensuse Leap 15.0:
https://download.opensuse.org/distribution/ leap/15.0/repo/oss/
https://download.opensuse.org/update/ leap/15.0/oss/.

The number of available Python library packages is quite big; what libraries you should install depends on your programming objectives. You need at least the basic “python3” package. Another “must”, in my opinion, is the package “python3-pip“; it enables us to perform specific package installations for our “virtual Python environment” later on.

As a basic ingredient for graphics you may also install suitable libraries for your Linux desktop environment. In my case this is KDE – so I installed the packages “python3-qt5″, python-qt5-utils” and also “python3-qt5-devel” to be on the safe side. However, as we shall see we may need Qt5-packages within a project environment, too. That is where Python’s internal “pip” mechanism enters the game.

Below we shall perform the installation of the “virtualenv” package to demonstarte the usage of “pip” or “pip3” in a Python3-environment. As a first step I provide myself (i.e. user “myself”) with a current version of “pip3”:

myself@mytux:~> pip3 --version
pip 19.1.0 from /home/myself/.local/lib/python3.6/site-packages/pip (python 3.6)
myself@mytux:~> pip3 install --user --
upgrade pip
Collecting pip
  Downloading https://files.pythonhosted.org/packages/5c/e0/be401c003291b56efc55aeba6a80ab790d3d4cece2778288d65323009420/pip-19.1.1-py2.py3-none-any.whl (1.4MB)
     |████████████████████████████████| 1.4MB 1.0MB/s 
Installing collected packages: pip
  Found existing installation: pip 19.1                                                                                                                                                 
    Uninstalling pip-19.1:                                                                                                                                                              
      Successfully uninstalled pip-19.1                                                                                                                                                 
Successfully installed pip-19.1.1                                                                                                                                                       
myself@mytux:~> pip3 --version
pip 19.1.1 from /home/myself/.local/lib/python3.6/site-packages/pip (python 3.6)

You see that the parameter “–user” already lead to a personal configuration of basic Python packages (within my home-directory). But we shall specify a project specific environment in the fourth step.

Step3: Working directory for our ML-project

We now define a base directory “ai” for future experiments.

myself@mytux:~> export AI_PATH ="/projekte/GIT/ai/"
myself@mytux:~> mkdir -p $AI_PATH

A sub-directory “ml1” shall provide the environment for a bunch of initial basic ML-experiments and related Python code files, libraries, Jupyter notebooks, etc.. We create this “ml1” directory as a base for a “virtual” Python environment.

Step 4: Prepare a virtual Python environment via virtualenv and working directories

Python installations allow for the definition of a so called “virtual environment” for projects via the “virtualenv” add-on. Among other things “virtualenv” lets you define a project specific configuration with Python and library versions in a consistent reproducible state. This in turn gives you a base for the “configuration management” of complex endeavors; therefore, I strongly recommend to make use of this feature – also in combination with PyDev: .

myself@mytux:~> pip3 install --user --upgrade virtualenv
Collecting virtualenv
  Downloading https://files.pythonhosted.org/packages/ca/ee/8375c01412abe6ff462ec80970e6bb1c4308724d4366d7519627c98691ab/virtualenv-16.6.0-py2.py3-none-any.whl (2.0MB)
     |████████████████████████████████| 2.0MB 1.6MB/s 
Installing collected packages: virtualenv
  Found existing installation: virtualenv 16.5.0
    Uninstalling virtualenv-16.5.0:
      Successfully uninstalled virtualenv-16.5.0
Successfully installed virtualenv-16.6.0
myself@mytux:~> virtualenv --version
16.6.0
myself@mytux:~>

Now we can use “virtualenv” to setup the virtual Python environment for “ml1” in our “ai”-directory:

myself@mytux:~> cd /projekte/GIT/ai/
myself@mytux:/projekte/GIT/ai> virtualenv ml1
Using base prefix '/usr'
  No LICENSE.txt / LICENSE found in source
New python executable in /projekte/GIT/ai/ml1/bin/python3
Also creating executable in /projekte/GIT/ai/ml1/bin/python
Installing setuptools, pip, wheel...
done.
myself@mytux:/projekte/GIT/ai> la ml1
insgesamt 20
drwxr-xr-x 5 myself users 4096 25. Mai 15:05 .
drwxr-xr-x 3 myself users 4096 25. Mai 15:05 ..
drwxr-xr-x 2 myself users 4096 25. Mai 15:05 bin
drwxr-xr-x 2 myself users 4096 25. Mai 15:05 include
drwxr-xr-x 3 myself users 4096 25. Mai 15:05 lib
lrwxrwxrwx 1 myself users    3 25. Mai 15:05 lib64 -> lib
myself@mytux:/projekte/GIT/ai> la ml1/bin
insgesamt 72
drwxr-xr-x 2 myself users  4096 25. Mai 15:05 .
ndrwxr-xr-x 5 myself users  4096 25. Mai 15:05 ..
-rw-r--r-- 1 myself users  2096 25. Mai 15:05 activate
-rw-r--r-- 1 myself users  1428 25. Mai 15:05 activate.csh
-rw-r--r-- 1 myself users  3052 25. Mai 15:05 activate.fish
-rw-r--r-- 1 myself users  1804 25. Mai 15:05 activate.ps1
-rw-r--r-- 1 myself users  1512 25. Mai 15:05 activate_this.py
-rw-r--r-- 1 myself users  1150 25. Mai 15:05 activate.xsh
-rwxr-xr-x 1 myself users   249 25. Mai 15:05 easy_install
-rwxr-xr-x 1 myself users   249 25. Mai 15:05 easy_install-3.6
-rwxr-xr-x 1 myself users   231 25. Mai 15:05 pip
-rwxr-xr-x 1 myself users   231 25. Mai 15:05 pip3
-rwxr-xr-x 1 myself users   231 25. Mai 15:05 pip3.6
lrwxrwxrwx 1 myself users     7 25. Mai 15:05 python -> python3
-rwxr-xr-x 1 myself users 10456 25. Mai 15:05 python3
lrwxrwxrwx 1 myself users     7 25. Mai 15:05 python3.6 -> python3
-rwxr-xr-x 1 myself users  2338 25. Mai 15:05 python-config
-rwxr-xr-x 1 myself users   227 25. Mai 15:05 wheel
myself@mytux:/projekte/GIT/ai> 

You see that a whole directory structure was established – with Python3 executables copied from our basic system installation. We can fully use this Python environment already on the command line (of a terminal window). However, we need to activate it so that its files and libs are really used:

myself@mytux:/projekte/GIT/ai/ml1> source bin/activate  
(ml1) myself@mytux:/projekte/GIT/ai/ml1> python3 
Python 3.6.5 (default, Mar 31 2018, 19:45:04) [GCC] on linux
Type "help", "copyright", "credits" or "license" for more information.
>>> print("Hello World!")
Hello World!
>>> quit()
(ml1) myself@mytux:/projekte/GIT/ai/ml1> pip3 install --upgrade jupyter                                                                                                                      
Collecting jupyter                                                                                                                                                                      
  Using cached https://files.pythonhosted.org/packages/83/df/0f5dd132200728a86190397e1ea87cd76244e42d39ec5e88efd25b2abd7e/jupyter-1.0.0-py2.py3-none-any.whl                            
Collecting notebook (from jupyter)
...
..Successfully built pyrsistent
Installing collected packages: Send2Trash, ipython-genutils, decorator, six, traitlets, jupyter-core, MarkupSafe, jinja2, pyzmq, python-dateutil, tornado, jupyter-client, backcall, pickleshare, wcwidth, prompt-toolkit, ptyprocess, pexpect, pygments, parso, jedi, ipython, ipykernel, prometheus-client, pyrsistent, attrs, jsonschema, nbformat, terminado, entrypoints, mistune, webencodings, bleach, testpath, defusedxml, pandocfilters, nbconvert, notebook, jupyter-console, widgetsnbextension, ipywidgets, qtconsole, jupyter
Successfully installed MarkupSafe-1.1.1 Send2Trash-1.5.0 attrs-19.1.0 backcall-0.1.0 bleach-3.1.0 decorator-4.4.0 defusedxml-0.6.0 entrypoints-0.3 ipykernel-5.1.1 ipython-7.5.0 ipython-genutils-0.2.0 ipywidgets-7.4.2 jedi-0.13.3 jinja2-2.10.1 jsonschema-3.0.1 jupyter-1.0.0 jupyter-client-5.2.4 jupyter-console-6.0.0 jupyter-core-4.4.0 mistune-0.8.4 nbconvert-5.5.0 nbformat-4.4.0 notebook-5.7.8 pandocfilters-1.4.2 parso-0.4.0 pexpect-4.7.0 pickleshare-0.7.5 prometheus-client-0.6.0 prompt-toolkit-2.0.9 ptyprocess-0.6.0 pygments-2.4.1 pyrsistent-0.15.2 python-dateutil-2.8.0 pyzmq-18.0.1 qtconsole-4.5.0 six-1.12.0 terminado-0.8.2 testpath-0.4.2 tornado-6.0.2 traitlets-4.3.2 wcwidth-0.1.7 webencodings-0.5.1 widgetsnbextension-3.4.2
(ml1) myself@mytux:/projekte/GIT/ai/ml1/include> cd ../bin
(ml1) myself@mytux:/projekte/GIT/ai/ml1/bin> la
insgesamt 152
drwxr-xr-x 2 myself users  4096 26. Mai 14:22 .
drwxr-xr-x 7 myself users  4096 26. Mai 14:22 ..
-rw-r--r-- 1 myself users  2096 25. Mai 15:05 activate
-rw-r--r-- 1 myself users  1428 25. Mai 15:05 activate.csh
-rw-r--r-- 1 myself users  3052 25. Mai 15:05 activate.fish
n-rw-r--r-- 1 myself users  1804 25. Mai 15:05 activate.ps1
-rw-r--r-- 1 myself users  1512 25. Mai 15:05 activate_this.py
-rw-r--r-- 1 myself users  1150 25. Mai 15:05 activate.xsh
-rwxr-xr-x 1 myself users   249 25. Mai 15:05 easy_install
-rwxr-xr-x 1 myself users   249 25. Mai 15:05 easy_install-3.6
-rwxr-xr-x 1 myself users   250 26. Mai 14:22 iptest
-rwxr-xr-x 1 myself users   250 26. Mai 14:22 iptest3
-rwxr-xr-x 1 myself users   243 26. Mai 14:22 ipython
-rwxr-xr-x 1 myself users   243 26. Mai 14:22 ipython3
-rwxr-xr-x 1 myself users   232 26. Mai 14:22 jsonschema
-rwxr-xr-x 1 myself users   238 26. Mai 14:22 jupyter
-rwxr-xr-x 1 myself users   252 26. Mai 14:22 jupyter-bundlerextension
-rwxr-xr-x 1 myself users   237 26. Mai 14:22 jupyter-console
-rwxr-xr-x 1 myself users   242 26. Mai 14:22 jupyter-kernel
-rwxr-xr-x 1 myself users   280 26. Mai 14:22 jupyter-kernelspec
-rwxr-xr-x 1 myself users   238 26. Mai 14:22 jupyter-migrate
-rwxr-xr-x 1 myself users   240 26. Mai 14:22 jupyter-nbconvert
-rwxr-xr-x 1 myself users   239 26. Mai 14:22 jupyter-nbextension
-rwxr-xr-x 1 myself users   238 26. Mai 14:22 jupyter-notebook
-rwxr-xr-x 1 myself users   240 26. Mai 14:22 jupyter-qtconsole
-rwxr-xr-x 1 myself users   259 26. Mai 14:22 jupyter-run
-rwxr-xr-x 1 myself users   243 26. Mai 14:22 jupyter-serverextension
-rwxr-xr-x 1 myself users   243 26. Mai 14:22 jupyter-troubleshoot
-rwxr-xr-x 1 myself users   271 26. Mai 14:22 jupyter-trust
-rwxr-xr-x 1 myself users   231 25. Mai 15:05 pip
-rwxr-xr-x 1 myself users   231 25. Mai 15:05 pip3
-rwxr-xr-x 1 myself users   231 25. Mai 15:05 pip3.6
-rwxr-xr-x 1 myself users   234 26. Mai 14:22 pygmentize
lrwxrwxrwx 1 myself users     7 25. Mai 15:05 python -> python3
-rwxr-xr-x 1 myself users 10456 25. Mai 15:05 python3
lrwxrwxrwx 1 myself users     7 25. Mai 15:05 python3.6 -> python3
-rwxr-xr-x 1 myself users  2338 25. Mai 15:05 python-config
-rwxr-xr-x 1 myself users   227 25. Mai 15:05 wheel

Looking into the lib-directory is also informative. I leave this to the user.

(ml1) myself@mytux:/projekte/GIT/ai/ml1/bin> cd ../lib/python3.6/site-package
(ml1) myself@mytux:/projekte/GIT/ai/ml1/lib/python3.6/site-packages> la

Step 5: Install some important libraries for ML studies

As we are occupied with installing packages, let us get some more packages typically required to do experiments for AI/ML:

(ml1) myself@mytux:/projekte/GIT/ai/ml1> pip3 install --upgrade matplotlib numpy pandas scipy scikit-learn
....

Step 6: Install PyDev for Eclipse

The previous steps were all on the level of the Linux-system and/or for a special Python environment for me as a user. But Eclipse does not know anything about Python, yet. We need a special Python environment within Eclipse with suitable editors, project and test environments, configuration options and so on for our Python based machine learning projects.

You find the necessary PyDev plugins for Eclipse at the site http://pydev.sf.net/updates/.

The easiest way to install PyDev is: Add this site to the update configuration of Eclipse – via the menu point “Help >> Install new software”. Click the “Add”-Button there. In the popup you provide a name for the site and its URL. Then you choose this site “to work with” and click on the relevant plugin “PyDev for Eclipse”. If you are a fan of Mylyn you also load the respective package.

Step 7: Change to a PyDev perspective within Eclipse

After having installed the PyDev packages we can start Eclipse and change
the layout by choosing a Python specific “perspective“.

We start with the menu point
“Window >> Perspective >> Open Perspective >> Other …”

Then we choose “PyDev” and end up with the a layout of Eclipse similar to the following (you may have some other position arrangements of the sub-windows):

On the left side you see some projects, which I had set up already. (As I integrate some of my Python experiments with PHP-programs the reader may detect some PHP-projects, too …). In the lower right part of the IDE we see a console view for interactive python commands. I come back to this point below.

Step 8: Add a Python project in Eclipse for our virtual environment ml1

We now create a new project which shall be related to our directory “/projekte/GIT/ai/ml1”. A right mouse click into the leftmost area gives us:

On the next popup we choose a “PyDev”-project type.

On the third screen we first enter our path “/projekte/GIT/ai/ml1” – with this setting we see all the modules and libraries loaded for our virtual environment in Eclipse, too.

The important interpreter setting – it decides on the usage of our virtualenv
Really interesting is the field for the choice of an “Interpreter“. Here we get the option to refer to our “virtual environment”. When we click on the blue link we can configure an interpreter and related path settings. On the opening popup window we enter the path to the interpreter of our ml1-environment, i.e. to “/projekte/GIT/ai/ml1/bin/python3.6“.

We go on and get

Important: We do not delete the references to the systems libraries here!

We move on and come back to our project definition window – we now
choose the interpreter “python_ml1” which we defined a minute ago.

On the next screen we do not yet have any other projects to be referenced.

So we finish and get our first Python3 project:

Enough for today. In the second article

Eclipse, PyDev, virtualenv and graphical output of matplotlib on KDE – II

of this series we shall use a Python-console within Eclipse for interactive coding and the display of results. We shall see that we need additional settings to get matplotlib to work.

Stay tuned …

Links

https://www.caktusgroup.com/blog/2011/08/31/getting-started-using-python-eclipse/