Upgrading Win 7 to Win 10 guests on Opensuse/Linux based VMware hosts – I – some experiences

As my readers know I am not a fan of MS or any “Windows N” operating system – whatever the version number N. But some of you may be facing the same situation as me:

A customer or an employer enforces the use of MS products – as e.g. MS Office, clients for MS Exchange, Skype for Business, Sharepoint, components for effort booking and so on. For the fulfillment of most of your customer’s demands you can use browser based interfaces or Linux clients.

However, something that regularly leads to problems is the heavy use of MS Office programs or graphics tools in their latest versions. Despite other claims: A friction-less back and forth between Libreoffice and MS Office is still a dream. Crossover Office is nice – but the latest MS Office versions are often not yet covered when you need them. Another very reasonable field of using MS Windows guests on Linux is, by the way, training for pen-testing and security measures.

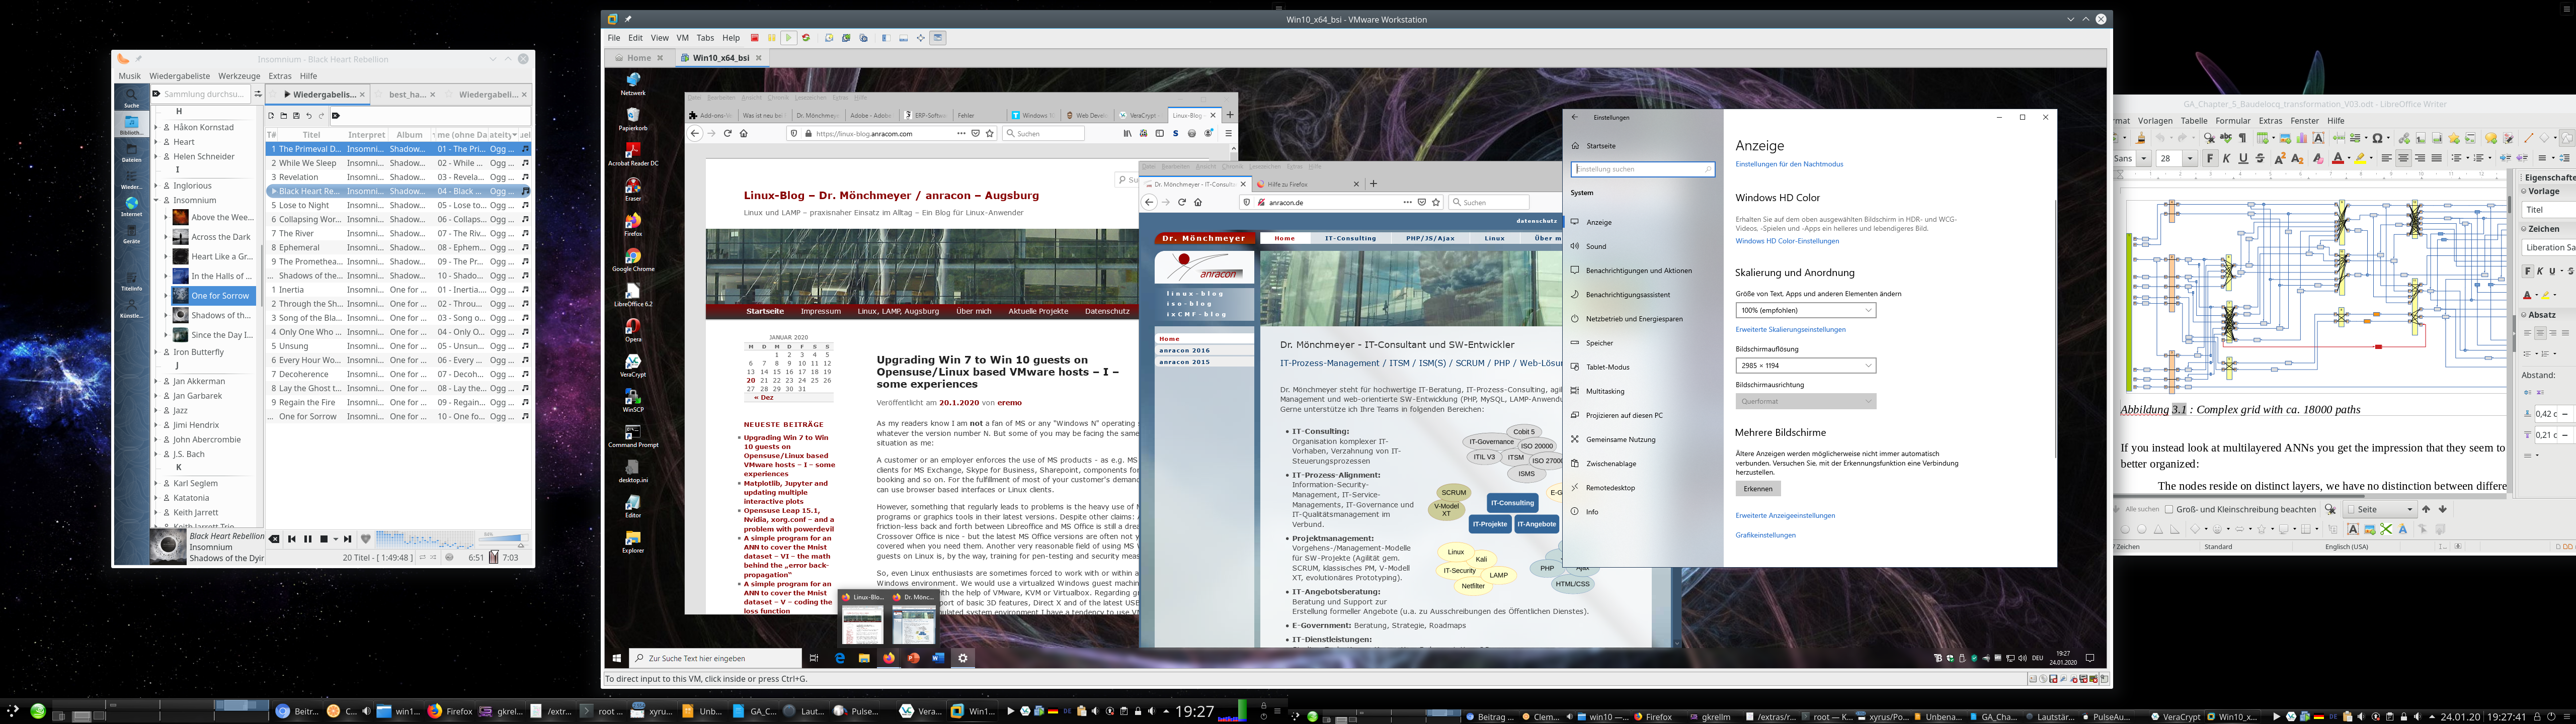
So, even Linux enthusiasts are sometimes forced to work with or within a native Windows environment. We would use a virtualized Windows guest machine then – on a Linux host with the help of VMware, KVM or Virtualbox. Regarding graphical performance, support of basic 3D features, Direct X and of the latest USB-versions in the emulated system environment I have a tendency to use VMware Workstation, despite its high price. Get me right: I practically never use VMware to virtualize Linux systems – for this purpose I use LXC containers or KVM. But for “Win 7” or “Win 10” VMware seemed to be a good choice – so far.

Upgrade to Win 10

During the last days of orchestrated panic regarding the transition from Windows 7 to Windows 10 I eventually gave in and upgraded some of my VMware-virtualized Windows 7 systems to Windows 10. More because of having some free time to get into this process than because assuming a sudden drop in security. (As if we ever trusted in the security of Windows system … I come back to security and privacy aspects in a second article.) However, on a perspective of some weeks or months the transition from Win 7 to Win 10 is probably unavoidable – if you cannot isolate your Windows machine completely from the Internet and/or from other external servers which bring a potential attack risk with them. The latter may even hold for servers of your clients.

I was a bit skeptical about the outcome of the upgrade procedure and the effort it would require on my side. A good friend of mine, who sells and administers Windows system professionally, had told me that he had experienced a whole variety of different problems – depending on the Win 7 setup, the amount and character of application SW installed, hardware drivers and the validity of licenses.

Well, my Windows 7 Pro clients were equipped with rather elementary SW: MS Office in different versions, MS Project, Lexware, Adobe Creative suite in an old version, some mind mapping SW, Adobe Reader, Anti malware SW. The “hardware” of the virtual machines is standard, partially emulated by VMware with appropriate drivers. So, no need to be especially nervous.

To be on the safe side I also ordered a VMware WS Pro upgrade to version 15.X. (I own WS 12.5.9 and WS 14 licenses.) Reason: I had read that only the WS 15.5 Pro supports the latest Win 10 versions fully. Well reading without thinking may lead to a waste of resources – see below.

Another rumor you often hear is that Windows 10 requires rather new hardware and is quite resource-demanding. MS itself recommends to buy a new PC or laptop on its web-sites – of course often followed by advertisement for MS notebook models on the very same web page. Yeah, money makes the world turn around. Well, regarding resources for my Windows guest systems I was/am rather restrictive:

Virtual machines for MS Win never get a lot of RAM from me – a maximum of 4 GB at most. This is enough for office purposes. (All really resource craving
things I do on Linux 🙂 ). Neither do my virtualized Win systems get a lot of disk space – typically < 60 GB. I mostly use vmdk-files to provide virtual hard disks – without full space allocation at startup, but dynamically added 4GB extents. vdmk files allow for an easy movement of virtual machines and simple backup procedures. And I usually give my virtual Win machines a maximum of 2 processor cores. So, these limitations contributed a bit to my skepticism. In addition I have 3D support on for my Win 7 guests in the virtual machine setup.

Meanwhile, I have successfully performed multiple upgrades on a rather old Linux host with an i7 950 CPU and newer hosts with I7 6700 K and modern i9 9900 processors. The operative system on all hosts run Opensuse Leap 15.1; I did not find the time to test my Debian hosts, yet.

I had some nice and some annoying experiences. I also found some aspects which you should take care of ahead of the Win 7 to Win 10 upgrade.

Make a backup!

As always with critical operations: Make a backup first! This is quite easy with a VMware virtual machine based on “vmdk”-files: Just copy the machines directory with all its files to some Linux formatted backup medium and keep up all the access rights during copying (=> cp -dpRv). In case of partition based virtual machines – make a copy of the partition with “dd”.

If you should need to restore the virtual machine in its old state again and to copy your backup files to their old places: VMware will notice this and will ask you whether you moved or copied the guest. Then answer “moved” (!) – which appears a bit paradox. But otherwise there is a very high probability that trouble with your Windows license will follow. VMware interprets a “copy”-operation as a duplication of a virtual machine and puts a related information somewhere (?) which Windows evaluates. Windows will almost certainly ask for a reactivation of your installation in case that your Win license was/is an individual one – as e.g. an OEM license.

Good news and potentially bad news regarding the upgrade to Win 10

The good news is:

  • Provided that you have valid licences for your Win 7 and for all SW components installed and provided that there is enough real and virtual disk space available, the Win 7 to Win 10 upgrade works smoothly. However, it takes a considerable amount of time.
  • I did not experience any performance problems after the upgrades – not even regarding transparency effects and other gimmicks in comparison to Windows 7. VMware’s 3D support for Win works – in WS 15 even for DirectX 10.

The requirement for time depends partially on the bandwidth of your Internet connection and partially on the performance of your disk access as well as your CPU and the available RAM. In my case I had to invest around 1 hr – in those cases when everything went straight through.

The potentially bad news comprises the following points:

  • The upgrade requires a considerable amount of free space on your virtual machine’s hard disk, which will be used temporarily. So, you should carefully check the available disk space – inside the virtual machine and – a bit surprising – also on the Linux filesystem keeping the vmdk-files. I ran into problems with limited space for multiple upgrades on both sides; see below. Whether you will experience something similar depends on your safety margin policies with respect to disk space in the guest and on the host.
  • A really annoying
    aspect of the upgrade had to do with VMware’s development and market strategy. From advertisement you may conclude that it would be best to use VMware WS 14 or 15 to handle Windows 10. However, on older Intel based systems you should absolutely check whether the CPU is compatible with VMware WS 14 and 15. Check it, before you think upgrading a Vmware WS 12 license to anything higher. On my Intel i7 950 neither WS 14 nor WS 15 did work at all. Even if you get these WS versions working by a trick (see below) they perform badly.
  • Then there is a certain privacy aspect. As said, the upgrade takes a lot of time during which you are connected to the Internet and to Microsoft servers. This is only partially due to the fact that Win 10 SW has to be downloaded during the upgrade process; there are more phases of information exchange. It is also quite understandable that MS has to analyze and check your system on a full scale. But do we know what Big Brother [BB] MS is doing during this time and what information/data they transfer to their own systems? No, we do not. So, if you have any sensitive data files on your system – how to protect them? You cannot isolate your Windows 10 during the upgrade. And even worse: Later on you will be more or less forced to perform updates within certain periods. So, how to keep sensitive data inaccessible for BB during the upgrade and beyond?

I address the first two aspects below. The last point of privacy is an interesting but complicated one. I shall discuss it in a separate article.

Which VMware workstation version should I use?

Do not get misguided by reports or advertisement on the Internet that certain MS Win 10 require the latest version of VMware Workstation! WS 12 Pro was the first version which supported Win 10 in late 2015. Now VMware 15.X has arrived. And yes, there are articles that claim incompatibility of VMware WS 12, WS 14 and early subversions of WS 15 with some of the latest Win 10 builds and updates. See the following links and discussions therein:
https://communities.vmware.com/thread/608589
https://www.borncity.com/blog/2019/10/03/windows-10-update-kb4522015-breaks-vmware-workstation/
https://www.askwoody.com/forums/topic/vmware-12-and-newer-incompatible-with-windows-10-1903/

But read carefully: The statements on incompatibility refer mostly (if not only) to using a MS Win 10 system as a host for VMware! But we guys are using Linux systems as hosts.

Therefore the good message is:

Windows 10 as a VMware guest is already supported by VM WS 12.5.9 Pro, which runs also on older CPUs. For all practical purposes and 2D graphics a Win 10 guest installation works quite well on a Linux host with VMware 12.5.9.

At least, I have not yet noticed anything wrong on my hosts with Opensuse Leap 15.1 and VMware WS 12.5.9 PRO for a Win 10 guests. (Neither did I see problems with WS 14 or WS 15 on those hosts where I could use these versions).

The compatibility of WS 12.5 with Win 10 guest on Linux is more important than you may think if your host has an older CPU. If you really want to spend money and use WS 14 or WS 15 please note:

WS 14 Pro and WS 15 Pro require that your CPU provides Intel VT-x virtualization technology and EPT abilities.

So, the potentially bad message for you as the still proud owner of an older but capable CPU is:

The present VMware WS versions 14 and 15 which support Win 10 fully (as guest and host system) may not be compatible with your CPU!

Check
compatibility twice BEFORE you intend to upgrade VMware Workstation ahead of a “Win7 to Win 10”-upgrade. It would be a major waste of money if your CPU is not supported. And as stated: Win 12.5 does a good job with Win 10 guests.

VMware has deserved a lot of criticism with their decision to ignore older processors with WS Pro versions > 14. See
https://communities.vmware.com/thread/572931
https://vinfrastructure.it/2018/07/vmware-workstation-pro-14-issues-with-old-cpu/
https://www.heise.de/newsticker/meldung/VMware-Workstation-14-braucht-juengere-Prozessoren-3847372.html
For me this is a good reason to try a bit harder with KVM for the virtualization of Windows – and drop VMware wherever possible.

There is a small trick, though, to get WS 14 Pro running on an i7 950 and other older processors: In the file “/etc/vmware/config” you can add the setting

monitor.allowLegacyCPU = “true”

See https://communities.vmware.com/thread/572804.

But: I have tested this and found that a Win 7 start takes around 3 minutes! You really have to be very patient… This is crazy – and for me unacceptable. After you once are logged in, performance of Win 7 seems to be OK – maybe a bit sluggish. Still I cannot bear the waiting at boot time. So, I went back to WS 12 Pro on the machine with an i7 950.

Another problem for you may be that the installation of WS 12.5.9 on both Opensuse Leap 15.0 and 15.1 requires some special settings and tricks which I have written about in this blog. See:
Upgrade auf Opensuse Leap 15.0 – Probleme mit Nvidia-Treiber aus dem Repository und mit VMware WS 12.5.9
Upgrade Laptop to Opensuse 42.3, Probleme mit Bumblebee und VMware WS 12.5, Workarounds
The first article is relevant also for Opensuse 15.1.

Use the Windows Upgrade site and the Media Creation Tool page to save money

If you have a valid Win 7 license for all of your virtualized Win 7 installations it is not required to spend money on a new Win 10 license. Microsoft’s offer for a cost free upgrade to Win 10 still works. See e.g.:
https://www.cnet.com/how-to/windows-10-dont-wait-on-free-upgrade-because-windows-7-officially-done/
https://www.techbook.de/apps/kostenloses-update-windows-10
Follow the steps there – as I have done successfully myself.

Problems with disk space within the VMware Windows 7 guest during upgrade

My first Win7 to Win10 upgrade trial ran into trouble twice. The first problem occurred during the upgrade process and within the virtual machine:
I got a warning from the upgrade program at its start that I should free at least some 8.5 GByte.

Not so funny – as said, I am a bit picky about resources. The virtual guest machine had only a 60 GB C-disk. Fortunately, there were a lot of temporary files which could be deleted. Actually Gigabytes and partially years old – makes you wonder why Win 7 kept those files piled up. I also could move a bunch of data files to a D-disk. And I deinstalled some programs. All in all – it just worked out. The upgrade itself afterwards went friction-free and without

So one
message is:

Ensure that you have around 15 GB free on your virtual C-disk.

It is better to solve the problems with freeing C-disk space inside Win 7 without pressure – meaning: ahead of the upgrade to Win 10. If you run into the described problem it may be better to abort the Win 10 upgrade. I have tested this – and the Win 7 system was restored – apparently in good health. I got a strange message during reboot that the system was prepared for first use – but after everything was as before.

On another system I got a warning during the upgrade, when the “search for updates” began, that I should clear some 10 GByte of temporarily required disk space or attach an external drive (USB) to be used for temporary operations. The latter went OK in this case. But be careful the USB disk must be kept attached to the virtual machine over some reboots. Do not touch it until the upgrade has finalized.

So, a second message is:

Be prepared to have some external device with some free 20 GB ready if you have a complex installation with a lot of application SW and/or a complex virtual HW configuration.

I advise you to check your external USB drive, USB stick or whatever you use for filesystem errors before attaching it. And have your VMware window active whilst attaching the device! VMware will then warn you that the Linux host may claim access to the device and you just have to click the buttons in the dialog boxes to give the VMware guest full control instead of the host OS.

If you now should think about a general enlargement of the virtual disk(s) of your existing Win 7 installation please take into account the following:

On the one hand side an enlargement is of course possible and relatively easy to handle if you use vdmk files for disk virtualization and have free space on the Linux partition which hosts the vmdks. VMware supports the resizing process in the disk section of the virtual machine “settings”. On Win 7 you afterward can use the Win admin tools to extend the NTFS filesystem to the full extent of the newly configured disk.

But, on the other side, please, consider that Windows may react allergic to a change of the main C-disk and request a new activation due to major hardware changes. 🙁

This is one of the points why we do not like Windows ….
So, how you solve a potential free disk problem depends a bit on what you think is the bigger problem – reactivation or freeing disk space by deletions, movement of files or deinstallations.

Addendum: Also check old restore points Win 7 may have created over time! After a successful upgrade to Win 10 I stumbled across an option to release all restore information for old installations (in this case for Win 7 and its kept restore points). This will give you again many Gigabytes if you had not deleted “restore point” data for a long time in your Win 7. In my case I gained remarkable 17 GB! => Should have deleted some old restore points data already before the upgrade.

Problems with disk space on the Linux host

The second problem with disk space occurred after or during some upgrades to Win 10: I ran out of space in the Linux filesystem containing the vmdk files of my virtual machine. In one case the upgrade simply stopped. In another case the problem occurred a while after the upgrade – without me actually doing much on the new Win 10 installation. VMware suddenly issued a warning regarding the Linux file system and paused the virtual machine. I was first a bit surprised as I had not experienced this lack of space during normal usage of the previous Win 7 installation.

The explanation was simple: As said, I had set up the virtual disk such that the required space was not allocated at once, but as required. Due to the upgrade the VMware had created all 4GB-extends
to provide the full disk space the guest needed. In addition I had activated “Autoprotect Snapshots” on VMware (3 per day) – the first automatically created snapshot after the upgrade required a lot of additional space on the Linux file system – due to heavy changes on the hard disk.

My virtualized machines most often reside on specific (encrypted) LVM-based Linux partitions. And there it just got tight – when VMware stopped the virtual machine only 3.5 GB were left free. Not funny: You cannot kill snapshots on a paused virtual guest – the guest must be running or be shut down. And if you want to enlarge a Linux partition – which is possible if there is (neighboring) space free on your hard disk – then the filesystem should best be unmounted. Well, you can enlarge a GPT-partition with the ext4-filesystem in operation (e.g. with YaST) – but it gives you an uncomfortable feeling.

In my case I decided to brutally power down the virtual machines. In one case where this problem occurred I could at least eliminate one snapshot. I could start the virtual machine then again and let Windows check the NTFS filesystems for errors. Then I shut down the virtual machine again, deleted another snapshot and used the tools of VMware to defragment and compact the virtual disks. This gave me a considerable amount of free GBs. Good!
Afterwards I additionally reduced the number of protection snapshots – if this still seemed to be necessary.

On another system with a more important Win 7/10 installation I really extended the Linux partition and its ext4 filesystem by 20 GB – I had some spare space, fortunately – and then followed the steps just described.

So, there is a whole spectrum of options to regain disk space after the upgrade. See also:
thebackroomtech.com : reduce-size-virtual-machine-disk-vmware-workstation/

My third message is:

Ensure a reasonable amount of free space in the Linux filesystem – for required extents and snapshots!
After the backup of your old Win 7 installation, eliminate all VMware snapshots which you do not absolutely need – in the snapshot manager from the left to the right. Also use the VMware tools to defragment and compact your virtual disks ahead of the upgrade.

By the way: I hope that it is clear that snapshots do NOT replace backups. You should make a backup of your successfully upgraded Win 10 installation after you have tested the functionality of your applications and before you start working seriously with your new Win 10. You do not want to go through the upgrade procedure again ..

Addendum: Circumvent the enforcement of Windows 10 updates after your upgrade

Updates on Windows 7 have often lead to trouble in the past – and as an administrator you were happy to have some control over the download and installation points for updates in time. After reading a bit, I got the impression that the situation has not changed much: There have occurred some major problems related to updates of Win 10 since 2016. Yet, Windows 10 enforces updates more rigidly than Win 7.

I, therefore, generally recommend the following:

Delay or stop automatic updates on Win 10. Then use VMware’s snapshot mechanism before manual updates to be able to turn back to a running Win 10 guest version. In this order.

The first point is not so easy as it may seem – there are no basic and directly accessible options to only get informed about available updates as on Win 7. Win 10 enforces updates if you have enabled “Windows Update”; there is no “inform only” or “download only”. You have to either disable updates totally or to delay them. The latter only works for a maximum period of 35 days. How to deactivate updates completely is described here:

https://www.easeus.com/todo-backup-resource/how-to-stop-windows-10-from-automatically-update.html
https://www.t-online.de/digital/software/id_77429674/windows-10-automatische-updates-deaktivieren-so-geht-s.html

There is also a description on “Upgrade” values for a related registry entry:
www.deskmodder.de/wiki/index.php/Automatische-Updates-deaktivieren-oder-auf-manuell-setzen-Windows-10#Windows_10_1607.2C-1703-Pro-Updates-auf-manuell-setzen-oder-deaktivieren

I am not sure whether this works on Win 10 Pro build 1909 – we shall see.

Conclusion

Win 7 and Win 10 can be run on VMware WS Pro versions 12.5 up to 15.5 on Linux hosts. Before you upgrade VMware WS check for compatibility with your CPU! An upgrade of a Win 7 Pro installation on a VMware virtual machine to Win 10 Pro basically works smoothly – but you should take care of providing enough disk space within the virtual machine and also on the host’s filesystem containing the vdmk-files for the virtual disks.

It is not necessary to change the quality of the virtualized hardware configuration. Win 10 appears to be running with at least the same performance as the old Win 7 on a given virtual machine.

In the next article I will discuss some privacy aspects during the upgrade and after. The main question there will be: What can we do to prevent the transfer of sensitive data files from a Win 10 installation?


Opensuse Leap 15.1, Nvidia, xorg.conf – and a problem with powerdevil

Today, I found the origin of a small problem, which drove me nuts the last months. Some time after an upgrade from Opensuse Leap 15.0 to Leap 15.1 I found that I could no longer bring up the power management functionality in “systemsettings5” of KDE. So, configuring time intervals for switching my monitors into an energy saving mode was no longer possible. In addition, bringing the whole system down into stand-by or hibernation did not work either.

KDE gave me error messages like:

Power management configuration module could not be loaded.
The Power Management Service appears not to be running.
This can be solved by starting or scheduling it inside “Startup and Shutdown”

Unfortunately, no “power management service” was available in the list of the KDE backgroud services …. So, the message did not help at all.

KDE plasma controls power management via a module called “powerdevil”. Powerdevil requires a running daemon named “uppower”. So, as a next step, I checked the list of running processes for the upower. Result: The daemon was running healthily, and systemd’s journactl showed me a message about its the successful start, too. “journalctl”, however, gave me some strange messages regarding powerdevil:

2019-12-25T10:43:20.598118+01:00 mytux org_kde_powerdevil[7147]: The X11 connection broke: Unsupported extension used (code 2)
2019-12-25T10:43:56.793629+01:00 mytux systemsettings5[7461]: powerdevil: ("LowBattery", "Battery", "AC") ()
2019-12-25T10:43:56.793813+01:00 mytux systemsettings5[7461]: powerdevil: "Bildschirm-Energieverwaltung"  has a runtime requirement
2019-12-25T10:43:56.794221+01:00 mytux systemsettings5[7461]: powerdevil: There was a problem in contacting DBus!! Assuming the action is ok.

These messages came user-independent and also for freshly created users. So, the problem had nothing to do with any of the settings in KDE’s configuration files below “~/.config/”. Searching on the Internet showed that others were having similar problems, but none of the offered suggestions helped. Time to dig a bit deeper at other places …

The monitors on my workstation are handled by a Nvidia graphics card. I use the file “/etc/X11/xorg.conf” to inform the card (independently of “XrandR”) about a certain TwinView or Xinerama screen configuration during early start-up phases. To avoid confusion with mouse movement I of course do this in a way consistent with KDE’s later settings for a combined screen across different monitors – which you can configure via
“systemsettings5 => Hardware => “Display and Monitors”.
As far as I know, KDE5 uses XrandR to perform the configuration of the Plasma display.

Now, sometimes I switch to the Nvidia installation mechanism for the latest driver or for testing a beta-driver from the NVidia web-site. Afterwards, I return to the native Opensuse driver installation via the Nvidia community repository. In my experience this seldom leads to changes in the file “/etc/X11/xorg.conf”. But it may happen …

Today, I therefore checked the contents of the “xorg.conf” file. There I found – to my surprise – a statement in the “monitor“-section for one of my monitors which disabled DPMS:

Option “DPMS” “false”

Section "Monitor"
    Identifier     "Monitor0"
    VendorName     "Unknown"
    ModelName      "DELL U2515H"
    HorizSync       30.0 - 113.0
    VertRefresh     56.0 - 86.0
    Option         "DPMS" "false"

I cannot recall how and why the entry for DPMS deactivation appeared in one of the monitor sections. All my monitors support DPMS. …??? …

Anyway: Commenting the line out

Section "Monitor"
    Identifier     "Monitor0"
    
VendorName     "Unknown"
    ModelName      "DELL U2515H"
    HorizSync       30.0 - 113.0
    VertRefresh     56.0 - 86.0
#    Option         "DPMS" "true"

or setting the option to “true” enabled the interface to powerdevil again in “systemsettings5” of KDE5.

Obviously, in its present state powerdevil requires an active DPMS on all monitors used.

I hope this finding will help others. Note that in some installations there may exit a Nvidia configuration file in the directory “/etc/X11/xorg.conf.d” instead of a central “/etc/X11/xorg.conf”. You should check all relevant files for a statement which deactivates DPMS for any of the monitors you use in a X11 based KDE5 plasma session.

Unfortunately, I do not know whether a similar problem can arise with Wayland and how it could be solved then.

Leap15.0/15.1 – use update-alternatives to change the displaymanager

I recently upgraded one of my main desktop systems to Opensuse Leap 15.1. After the upgrade I got some difficulties with the Nvidia driver and sddm. I suspected sddm to be the reason – so I wanted to change the “displaymanager” for a test. I was used to doing this by changing a respective entry in the file “/etc/sysconfig/displaymanager”. But this had no effect!

The reason for this failure was something I missed already at the time when I upgraded from Leap 42.3 to Leap 15.0:

SuSE uses the “update-alternatives” mechanism since Leap 15.0. You easily get information from SuSE web-sites how to use this mechanism. See e.g.
https://en.opensuse.org/SDB:Change_Display_Manager

However, I wanted to get some background-information about update-alternatives, e.g. about which files or directories are used to keep related information. So, here are some links which may help others, too:
https://linux.die.net/man/8/update-alternatives
http://manpages.ubuntu.com/manpages/trusty/de/man8/update-alternatives.8.html
https://debiananwenderhandbuch.de/update-alternatives.html
https://en.opensuse.org/openSUSE: Packaging Multiple Version guidelines
https://wiki.ubuntuusers.de/Alternativen-System/

In short: update-alternatives provides the possibility to easily define and switch between different programs for the same (or a very similar) purpose on a Linux system. It works via symlinks, which are defined in the directory “/etc/alternatives”.

As expected you can use “update-alternatives” on the command line. However, on an Opensuse-Leap-system yast and yast2 can be enhanced by a package “yast2-alternatives”. After installation you find a respective entry below the main point “miscellaneous” of the yast2 menu. This allows for quick changes between already defined alternatives – e.g. for the desktop session, the displaymanager, java, ftp and others.

TinyCA2 as a replacement for YaST’s CA-tools on Opensuse Leap servers with TLS/SSL – III

I proceed with my article series on using TinyCA2 instead of YaST’s CA-admin tools, whic are simply missing since Opensuse Leap 15.0. Which I regard as a shame by the way …

In the first article

TinyCA2 as a replacement for YaST’s CA-tools on Opensuse Leap servers with TLS/SSL – I

I briefly introduced the user interface of TinyCA2. We used it to create a new CA and a server certificate.

In the second article

TinyCA2 as a replacement for YaST’s CA-tools on Opensuse Leap servers with TLS/SSL – II

we found out where to place the new CA’s root certificate on an Opensuse Leap system to make it available system wide and permanently. We also used the newly created server certificate for the server “myserv.anraconc.de” for all services on this server – and placed the necessary files into “/etc/ssl/servercerts”.

We then discussed the reconfiguration of an Apache2-, an OpenLDAP- and the SSSD-service as examples of how to adapt to the CA and certificate changes. All the required operations on “myserv” were local copy and file editing operations – as “myserv” was the server for administering our new CA, too.

In this third article we, however, look at a second independent server “mymail.anraconc.de” for IMAP/SMTP-services. This server needs its own TLS/SSL-server-certificate. In lack of other tools we shall use scp to deploy the necessary files. I shall further discuss how to reconfigure “cyrus” and “postfix”. Note that these services do not only offer their own TLS/SSL connections to their clients; at the same time they themselves will work as LDAP-clients, i.e. as clients for the OpenLDAP service on server “myserv”. Therefore we must adapt the SSSD-service on “mymail”, too.

Placing a TinyCA2 server certificate on a mail server with cyrus, saslautd and postfix

Our first step is to use TinyCA2 on our server “myserv” to create a second server certificate for the server “mymail” with the common name “mymail.anraconc.de”. This is done exactly as described in my first article for server “myserv”. We export the related certificate and the key files to “/etc/certs” on “myserv” and limit access to the private key file. We export the key file with its password – and strip it off afterwards:

myserv:/etc/certs # openssl rsa -in /etc/certs/mymail-anraconc-key.pem -out /etc/certs/mymail-anraconc-key_new.pem
Enter pass phrase for /etc/certs/mymail-anraconc-key.pem:
writing RSA key
myserv:/etc/certs # cp /etc/certs/mymail-anraconc-key_new.pem /etc/certs/mymail-anraconc-key.pem

Now, we look for some export/import mechanism for deploying “server certificates” from our sytem with the CA administration tool TinyCA2 to other systems. Unfortunately, TinyCA2 does not offer such a client/server feature for certificate deployment within a network. We are forced to transfer our certificates manually 🙁 .

I assume that we have a ssh-connection form our sever “myserv” to our mail-server “mymail”.

myserv:/etc # scp /etc/certs/mymail-anraconc-cert.pem root@mymail:/etc/certs
Password: 
mymail-anraconc-cert.pem                   100% 2147     1.5MB/s   00:00    
myserv:/etc # scp /etc/certs/mymail-anraconc-key.pem root@mymail:/etc/certs
Password: 
mymail-anraconc-key.pem                    100% 1679     1.4MB/s   00:00    
myserv:/etc # scp /etc/certs/anraconc-CA.pem root@mymail:/etc/certs
Password: 
anraconc-CA.pem                           100% 2504     1.7MB/s   00:00    
myserv:/etc # 

Note that I transferred the CA certificate, too.

On “mymail”:

mymail:~ # cp /etc/certs/anraconc-CA.pem /etc/pki/trust/anchors/
mymail:~ # cp -r /etc/ssl/servercerts/ /etc/ssl/servercerts.orig
mymail:~ # cp /etc/certs/mymail-anraconc-cert.pem /etc/ssl/servercerts/servercert.pem
mymail:~ # cp /etc/certs/mymail-anraconc-key.pem /etc/ssl/servercerts/serverkey.pem
mymail:~ # chmod 600 /etc/ssl/servercerts/serverkey.pem 
mymail:~ # 

If you read my second article of this series these steps need no further explanation.

Reconfiguring sssd, cyrus and postfix for the new SSL/TLS certificates

First, the sssd-service configuration in the file “/etc/sssd/sssd.conf” has to be updated on mymail:

.....
[pam]
[domain/default]
ldap_uri = ldap://myserv.anraconc.de
ldap_search_base = dc=anraconc,dc=de
ldap_schema = rfc2307bis
id_provider = ldap
ldap_user_uuid = entryuuid
ldap_group_uuid = entryuuid
ldap_id_use_start_tls = False
enumerate = True
cache_credentials = False
ldap_tls_cacertdir = /etc/ssl/certs
ldap_tls_cacert = /etc/ssl/certs/anraconc-CA.pem
chpass_provider = ldap
auth_provider = ldap
...
....

Note that the ldap_uri is the same (!) as on “myserv”! See the last article!

We then change “/etc/ldap.conf” – this enables any clients :

uri     ldap://myserv.anraconc.de
base    dc=anraconc,dc=de
nss_map_attribute       uniqueMember member
ssl     start_tls
tls_cacertdir   /etc/ssl/certs
tls_cacertfile  /etc/ssl/certs/anraconc-CA.pem              
pam_password    exop
pam_filter      objectClass=posixAccount
...

Afterwards we change the file “/etc/imapd.conf” – which is a central piece for a working cyrus-based IMAP-server:

....
# LMTP
# ****
lmtp_overquota_perm_failure: no
lmtp_downcase_rcpt: yes

# SASL
# ****
allowplaintext: yes
sasl_pwcheck_method: saslauthd
sasl_mech_list: PLAIN LOGIN

# TLS
# ****
tls_key_file: /etc/ssl/servercerts/serverkey.pem
tls_cert_file: /etc/ssl/servercerts/servercert.pem
tls_ca_file: /etc/ssl/certs/anraconc-CA.pem
...
...

You see that we saslauthd as an intermediate link of imap to authenticate (cyrus) users via LDAP (on another server).

Important Note:
The system users “mail” and “cyrus” must get read access to “/etc/ssl/servercerts/serverkey.pem” in case we use exactly one server-wide server certificate/key for all services. Otherwise TLS connections (starttls) cannot be provided for the imap/cyrus-service.

One solution for this problem is to use ACL-settings analogously to what we have done above for user “ldap” on the server “myserv”. See my last article …

For SMTP we also need to change “/etc/postfix/main.cf“:

...
....
 Client for the local SMTP-Server
#---------------------------------

# Changed by admin according to local sasl politics
#----------------------------------------------------
smtpd_sasl_auth_enable = yes
smtpd_sasl_security_options = noanonymous
smtpd_sasl_type = cyrus
# Postfix > 2.3
smtpd_sasl_path = smtpd
broken_sasl_auth_clients = yes


# Local SMTP server as a client for Relay servers 
#------------------------------------------------
# Inserted by admin - 06.01.2017
#-----------------------------------

smtp_sasl_auth_enable = yes
smtp_sasl_password_maps = hash:/etc/postfix/sasl_passwd
smtp_sasl_security_options = noanonymous
...
....
############################################################
# TLS stuff
############################################################
relay_clientcerts =
#tls_random_source = dev:/dev/urandom

smtp_use_tls = yes
#smtp_tls_loglevel = 0
#smtp_enforce_tls = no
smtp_tls_policy_maps = hash:/etc/postfix/tls_policy
smtp_tls_CApath = /etc/ssl/certs/
smtp_tls_
CAfile = /etc/ssl/certs/anraconc-CA.pem

smtp_tls_session_cache_database =

smtpd_use_tls = yes
smtpd_tls_auth_only = yes
smtpd_tls_loglevel = 2
smtpd_tls_CAfile = /etc/ssl/certs/anraconc-CA.pem
smtpd_tls_cert_file = /etc/ssl/servercerts/servercert.pem
smtpd_tls_key_file = /etc/ssl/servercerts/serverkey.pem
smtpd_tls_ask_ccert = no
smtpd_tls_received_header = yes

...
...

You saw again that I use saslauth for authentication. But, actually there is nothing to be changed in the saslauthd configuration in comparison to a previously working solution.

Finally, we restart all our services:

mymail:/etc/sasl2 # systemctl restart sssd.service
mymail:/etc/sasl2 # systemctl restart cyrus.service
mymail:/etc/sasl2 # systemctl restart postfix.service
mymail:/etc/sasl2 # systemctl restart saslauthd.service 

This should work flawlessly, if we have done everything correctly.

Testing with Kmail and other mail clients from client systems

Before you can start testing with email-clients you need to transfer the new CA’s certificate to your client system’s directory “/etc/pki/trust/anchors/”. Do not forget to import “anraconc-CA.pem” on all other clients that build up TLS or SSL connections to your reconfigured servers, too. And put the CA certificate into “/etc/pki/trust/anchors/” – if your clients are Opensuse Leap 15.x systems.

If you need any direct LDAP client services form your client system to the LDAP service on “myserv” you should take care of the necessary changes in the local “/etc/ldap.conf” and the “/etc/sssd/sssd.conf” !

Otherwise you should have a look at Kmail’s or your email’s IMAP account configuration:

Note that you should give the name of the mail server in its FQDN-form to avoid messages on certificates not fitting the server. And:

Clicking on the button “Automatisch erkennen” (or whatever the button is named in English …”Automatic detection ?) should offer you STARTTLS now. If you get any messages about “no connection could be enabled” your configuration of the mail server still has deficits – either in offering TLS/SSL encryption or in its role as a client to the OpenLDAP server. You would have to analyze status and log information of all involved servers then.

You have to do similar things on other email-clients. I was lucky – things started to operate smoothly again on my mail clients.

Conclusion

It really is a problem that the SuSE people did not replace the YaST module for the administration of TLS/SSL CAs and server certificates by a Ruby counterpart with the start of Leap 15.0. Especially as Opensuse works as a basic platform for SLES 🙁 . Also SuSE previously often used a policy to allow for server wide certificates – i.e. one certificate for all services on a server instance. The deployment of such certificates issued by a central CA was supported by an export/import mechanism of YaST, which took care of password-protected keys by stripping of password and setting the right read access rights on the destination servers.

If you want to use TinyCA2 as a CA administration tool you are confronted with a series of challenges – among others the question of access rights of system users to certificate’s key files. In addition you have to place the CA’s root certificate at a proper location on Opensuse Leap systems (/etc/pki/trust/anchors) to
make it permanently available.

TinyCA2 – which I had a look at – is relatively old. The last Gitub change appeared in 2015. Nevertheless it does its job to create a CA, sub-CAs and server certificates (as well as client certificates) – and to revoke them if required. It also offers a simple local export mechanism for certifictaes and keys into standard file formats – as pem. However, this is it.

You need a patch to include SHA256 or SHA512 – which is a must these days. There are some flaws with the simple GUI, but these you can work around related problems – if you know about them. And: TinyCA2 will not help you to deploy the certificates/keys on your server or client systems. Not even a simple import mechanism for a server wide “server certificate plus key” issued by the CA is offered on target servers. So, if you do not want to invest time into your own deployment scripts you may come to the conclusion that TinyCA2 is not suited well for large networks with many servers. In my case I fount it applicable for a dozen servers – but not more. Too much handwork ….

If you consider to use TinyCA2 as a replacement for YaST’s CA administration tools most of your work will be to deploy the TLS/SSL certificates/keys onto your server systems and to reconfigure all services to use these certificates for TLS, StartTLS and SSL connections.

On Opensuse systems the deployment of the CA root certificate within the bunch of permanently trusted CA certificates requires some knowledge about the relevant directory to make the CA certificate available in a central directory as “/etc/ssl/certs” – which may be used by legacy applications. The access rights to a server certificates key file may pose some special problems – you may have to test which system user associated with your services requires read rights.

There are actually several ways how to handle the read access topic for the private certificate keys. I have shown how to use ACLs for this purpose. My recommendation, however, is to use separate certificates and related keys for all services – even if they reside on the same server and despite consequences for your network and DNS configuration due to unique FQGNs and common names. You never know what can happen to a service specific user during attacks. If one certificate/key gets corrupted the others may still survive. Actually, this could be a reason for encapsulating services even more in form of LXC containers. But this is a different story …

Good luck with Opensuse and TinyCA2 !


TinyCA2 as a replacement for YaST’s CA-tools on Opensuse Leap servers with TLS/SSL – II

In my last article on TinyCA2

TinyCA2 as a replacement for YaST’s CA-tools on Opensuse Leap servers with TLS/SSL – I

I discussed how to open an new CA and how to create a server certificate (plus private key) with SHA256 as the preferred hashing algorithm. We saw that TinyCA2 offers an option to export the certificate’s private key with or without password. I also gave an “openssl” command for stripping a key off its password later on – even if it was exported with a password in the beginning.

We have followed a policy of using a server wide TLS/SSL-certificate for all TLS/SSL-based services run on a server – in our case on a server “myserv.anraconc.de”. Therefore we have copied the certificate’s pem file and the key’s pem file to the directory “/etc/ssl/servercerts” with file names “servercert.pem” and “serverkey.pem”.

In addition we naively copied the CA certificate as file “anraconc-CA.pem” into the central directory “/etc/ssl/certs” which contains (links to) all trusted certificates on an Opensuse system.

If the private key was exported with a password we have a problem with automated system and service starts: As the private key of a server certificate must in some cases also by system users starting and running services we would be asked to provide a password interactively, whenever the service is started – e.g. during system startup. To avoid such a situation we need a private key without password – hence we have to deal carefully with read access rights. Actually, we need to find out which services – not started or run by root – need the access right for its special system user. For the time being we took away all read rights for “others” from the server key for the system “myserv”.

In this second article I discuss the changes to be made to the configuration of two services – Apache2 and OpenLDAP on server “myserv”. After a test we shall detect that Opensuse rebuilds the contents of “/etc/ssl/certs” during a reboot – and references of our services to the CA’s certificate will fail. I shall show where to save our CA certificate to make it permanently available.

Re-configuring a local Apache service for the new CA and the changed server certificate

As I had used a server wide certificate on “myserv” already at times when YaST’s CA-administration was still available, I expected that the required changes to the service configuration would be limited to providing the path to the new CA certificate. The example of the Apache service proved that this really was true.

In my case I use virtual domains with my Apache server for Intranet sites. The configuration of the SSL-setup then is to be found in either a central file as “/etc/apache2/ssl-global.conf” or in “/etc/apache2/vhosts.d/vhost-ssl.conf” for individual domains. I used the latter file. I shall only show the most simple case here – with just a main standard domain associated on an Opensuse system with the directory “/srv/www/htdocs”. Other domains would get the same SSL settings (if you do not plan to issue different certificates for each intranet domain):

<VirtualHost *:443>

        #  General setup for the virtual host
        DocumentRoot "/srv/www/htdocs/"
        ServerName myserv
        #ServerAdmin webmaster@example.com
        ErrorLog /var/log/apache2/error_log
        TransferLog /var/log/apache2/access_log

        #   SSL Engine Switch:
        #   Enable/Disable SSL for this virtual host.
        SSLEngine on

        #   SSL Cipher Suite:
        #   List the ciphers that the client is permitted to negotiate.
        #   See the mod_ssl documentation for a complete list.
        SSLCipherSuite ALL:!
ADH:!EXPORT56:RC4+RSA:+HIGH:+MEDIUM:+LOW:+SSLv2:+EXP:+eNULL

        #   Server Certificate:
        #   Point SSLCertificateFile at a PEM encoded certificate.  If
        #   the certificate is encrypted, then you will be prompted for a
        #   pass phrase.  
        SSLCertificateFile /etc/ssl/servercerts/servercert.pem

        #   Server Private Key:
        #   If the key is not combined with the certificate, use this
        #   directive to point at the key file.  
        SSLCertificateKeyFile /etc/ssl/servercerts/serverkey.pem

        #   Server Certificate Chain:
        #   Point SSLCertificateChainFile at a file containing the
        #   concatenation of PEM encoded CA certificates which form the
        #   certificate chain for the server certificate. 
        SSLCertificateChainFile /etc/ssl/certs/anraconc-CA.pem
        #
        # NOTE: here you should later on use the Common Name of your CA certificate !
        # See below ! 
.....
......

Note that I referred to the CA certificate at “/etc/ssl/certs” in the CA chain setting. The server certificate and key files are referred to already by the standard paths “/etc/ssl/servercerts/servercert.pem” and “/etc/ssl/servercerts/serverkey.pem”.

With this changed configuration file we restart our Apache service:

myserv:/etc/apache2/vhosts.d # vi vhost-ssl.conf
myserv:/etc/apache2/vhosts.d # systemctl restart apache2.service
myserv:/etc/apache2/vhosts.d # systemctl status apache2.service
● apache2.service - The Apache Webserver
   Loaded: loaded (/usr/lib/systemd/system/apache2.service; enabled; vendor preset: disabled)
   Active: active (running) since Sat 2019-07-20 15:37:29 CEST; 11s ago
  Process: 20435 ExecStop=/usr/sbin/start_apache2 -DSYSTEMD -DFOREGROUND -k graceful-stop (code=exited, status=0/SUCCESS)
 Main PID: 20443 (httpd-prefork)
   Status: "Total requests: 0; Current requests/sec: 0; Current traffic:   0 B/sec"
    Tasks: 6
   CGroup: /system.slice/apache2.service
           ├─20443 /usr/sbin/httpd-prefork -DSYSCONFIG -DSSL -C PidFile /var/run/httpd.pid -C Include /etc/apache2/sysconfig.d//loadmodule.conf -C Include /etc/a>
           ├─20449 /usr/sbin/httpd-prefork -DSYSCONFIG -DSSL -C PidFile /var/run/httpd.pid -C Include /etc/apache2/sysconfig.d//loadmodule.conf -C Include /etc/a>
           ├─20450 /usr/sbin/httpd-prefork -DSYSCONFIG -DSSL -C PidFile /var/run/httpd.pid -C Include /etc/apache2/sysconfig.d//loadmodule.conf -C Include /etc/a>
           ├─20451 /usr/sbin/httpd-prefork -DSYSCONFIG -DSSL -C PidFile /var/run/httpd.pid -C Include /etc/apache2/sysconfig.d//loadmodule.conf -C Include /etc/a>
           ├─20452 /usr/sbin/httpd-prefork -DSYSCONFIG -DSSL -C PidFile /var/run/httpd.pid -C Include /etc/apache2/sysconfig.d//loadmodule.conf -C Include /etc/a>
           └─20453 /usr/sbin/httpd-prefork -DSYSCONFIG -DSSL -C PidFile /var/run/httpd.pid -C Include /etc/apache2/sysconfig.d//loadmodule.conf -C Include /etc/a>

Jul 20 15:37:29 myserv systemd[1]: Starting The Apache Webserver...
Jul 20 15:37:29 myserv start_apache2[20443]: [Sat Jul 20 15:37:29.522427 2019] [so:warn] [pid 20443] AH01574: module authn_core_module is already loaded, skipping
Jul 20 15:37:29 myserv systemd[1]: Started The Apache Webserver.

Obviously, only root needs to read “/etc/ssl/servercerts/serverkey.pem” for starting the service – although multiple “httpd-prefork” processes later on are run by the system user “wwwrun”. However, the first one is run by root.

Note:
If you get any trouble here, please have a look into the Apache log files (in my case in “/var/log/apache2/error.log”). If you see something there like

[Sat Jul 20 14:56:15.132380 2019] [ssl:emerg] [pid 13320] AH02561: Failed to configure certificate myserv:443:0, check /etc/ssl/servercerts/servercert.pem
[Sat Jul 20 14:56:15.
132404 2019] [ssl:emerg] [pid 13320] SSL Library Error: error:140AB18E:SSL routines:SSL_CTX_use_certificate:ca md too weak
AH00016: Configuration Failed
[Sat Jul 20 15:00:53.251242 2019] [ssl:emerg] [pid 14285] AH02561: Failed to configure certificate myserv:443:0, check /etc/ssl/servercerts/servercert.pem
[Sat Jul 20 15:00:53.251268 2019] [ssl:emerg] [pid 14285] SSL Library Error: error:140AB18E:SSL routines:SSL_CTX_use_certificate:ca md too weak
AH00016: Configuration Failed

then you are confronted with a point I mentioned in my first article. The error message criticizes that the “md”-hashing algorithm is too weak. But didn’t we use SHA256?

Well, you meant to do so – because it my have been shown as the option chosen by default for the “Digest”. And you did not change this setting. However, if you did not click the radio button explicitly after some other value you may not have gotten what you saw. Without your explicit interaction with the radio buttons the default is “md”. So, it is important for all certificates to explicitly choose a different value first and then click on the right radio button for a digest again. The same is true for the setting of the key length and other options.

For other services than Apache2 you would basically proceed in an analogous way. So far – so good. Unfortunately, our approach is still not good enough!

How to make a CA certificate pem file system wide and permanently available on Opensuse Leap 15.x?

One of the most frustrating things that may happen to you is that you think everything you changed works now and then – after a system restart – you find a mess of non-starting or working services again. Well, this is exactly what happens if you just place a CA’s certificate (pem) file into the location “/etc/ssl/certs”. Just try a reboot; you will find that the file /etc/ssl/certs/anraconc-CA.pem” does not start any more afterwards – with severe consequences for the services referring to it.

“/etc/ssl/certs” is in so far a reasonable central directory as legacy applications may read it for CA certificates. So, one would use it also for our TLS/SSL-dependent server services. Especially, because you may really find it as a default in some configuration files.

The location “/etc/ssl/certs” actually is a link to “/var/lib/ca-certificates/pem” which will not help much as the contents of this directory is refreshed after each system restart, too. I was too lazy to analyze this in detail. However, you find some information in the scripts under “/usr/lib/ca-certificates/update.d/“.

Another substantial piece of information is provided by the the answer to a related question at “Stack Exchange” : how-do-i-install-a-system-wide-ssl-certificate-on-opensuse.

Here, as well as in one of the “update.d”-files, the directory “/etc/pki/trust/anchors” is mentioned as a suitable place to save CA certificate files by the admin for system wide usage. So, we may think that it is enough to copy our CA pem file into the directory “/etc/pki/trust/anchors/“.

Before you get frustrated again: The “trust”-program which among other things refreshes “/etc/ssl/certs” is intelligent:
It extracts the “Common Name” from the certificate and uses it to name the pem-file which it writes at system start into “/etc/ssl/certs”.

So, here are the rules if all your SSL-based services shall be configured to read your trusted CA certificate at “/etc/ssl/certs”:

  1. Place your CA’s certificate file (as exported from TinyCA2) into “/etc/pki/trust/anchors” (and if you have sub-CAs also their certificate files!)
  2. Then refer to the file “/etc/ssl/certs/CAs_COMMON_NAME.pem” – where CAs_COMMON_NAM is the common name you used when you set up your CA. Do not use any other name you may originally have given your exported CA certificate (pem) files.

In our case we need the file name “anraconc-CA.pem”. So, this is already consistent with the name which we chose at export time in the first article. However, this happened by chance, only. We could have chosen quite a different name for the pem-file. (Well, I knew about the pitfall 🙂 )

If you had given your file a name like “myCA-cacert.pem”, you would experience some trouble after having placed it into “/etc/pki/trust/anchors” and referred to it in CA chain configuration settings for any service by “/etc/ssl/certs/myCA-cacert.pem”. Despite the files name “myCA-cacert.pem” it would in our case appear in “/etc/ssl/certs” with the name “anraconc-CA.pem”. It took me a little while to figure this out !

SSL-reconfiguration for OpenLDAP and missing rights for the system user “ldap”

After we have made our CA certificate permanent, we proceed to the reconfiguration of the OpenLDAP service. This is a bit more complicated due to two reasons: There are potentially more configuration files to take care of and there may appear a problem with read rights. In addition you have to think of the “sssd.service” for providing encrypted connections to clients for authentication services – here for LDAP-clients.

The first point depends a bit on your specific configuration. There may be a file “/etc/ldap.conf” (controlling local LDAP-clients). In my case I had to change the entry for “tls_cacertfile“:

bind_policy soft
uri ldap://myserv.anraconc.de
base dc=anraconc,dc=de
nss_map_attribute uniqueMember member
ssl start_tls
pam_password exop
pam_filter objectClass=posixAccount
tls_cacertdir /etc/ssl/certs
tls_cacertfile /etc/ssl/certs/anraconc-CA.pem
....
...

However, your main configuration will probably reside in “/etc/openldap/”. There is also a “/etc/openldap/ldap.conf“, which we need to modify:

tls_cacert      /etc/ssl/certs/anraconc-CA.pem

Then we have in addition the central file “slapd.conf” which must get proper TLS/SSL entries :

...
TLSCACertificateFile /etc/ssl/certs/anraconc-CA.pem
TLSCertificateFile /etc/ssl/servercerts/servercert.pem
TLSCertificateKeyFile /etc/ssl/servercerts/serverkey.pem
...

Hint: On Opensuse systems the file “/etc/sysconfig/openldap” should also contain a line:

...
OPENLDAP_START_LDAP="yes"
...
## Type:           yesno
## Default:        no
## ServiceRestart: ldap
# If set to "yes" the "ldap over ssl" feature of slapd will be enabled. Don't
# forget to add the "TLSCertificateFile" and "TLSCertificateKeyFile" options 
# to the /etc/openldap/slapd.conf (man slapd.conf).
# Note: Don't confuse this with "START_TLS", the preferred method for 
#       making encrypted LDAP connections, which is enabled as soon as You
#       specify "TLSCertificateFile" and "TLSCertificateKeyFile" in your config
#       file
#
OPENLDAP_START_LDAPS="yes"
...

But setting the right value for “TLSCACertificateFile” in “/etc/openldap/ldap.conf” is not enough:

The SSL settings also play a decisive role in the file “cn=config.ldif” (in “/etc/openldap/slapd.d/”) as the core of modern LDAP services is configured by ldif-files.

Warning:
When editing the file “cn= config.ldif” file you have to be extremely careful. Make a backup first! One normally should not edit this file directly!. But as our LDAP service is not running any more we are brave and use

myserv:/etc/openldap/slapd.d # vi cn\=config.ldif

Note the escaping backslash. Then you edit the following entries

...
olcTLSCACertificateFile: /etc/ssl/certs/anraconc-CA.pem
olcTLSCertificateFile: /etc/ssl/servercerts/servercert.pem
olcTLSCertificateKeyFile: /etc/ssl/servercerts/serverkey.pem
....

This may afterwards lead to some warnings in log files regarding the checksum for this file. You could correct this later on by using “ldapmodify” to reedit the entries again on the then (hopefully) running LDAP-server.

Unfortunately, a service restart leads to trouble:

myserv:/etc/openldap/slapd.d # rcslapd restart
Job for slapd.service failed because the control process exited with error code.
See "systemctl  status slapd.service" and "journalctl  -xe" for details.

myserv:/etc/openldap/slapd.d # rcslapd status
● slapd.service - OpenLDAP Server Daemon
   Loaded: loaded (/usr/lib/systemd/system/slapd.service; enabled; vendor preset: disabled)
   Active: failed (Result: exit-code) since Sat 2019-07-20 16:45:37 CEST; 45s ago
  Process: 13254 ExecStart=/usr/lib/openldap/start (code=exited, status=1/FAILURE)
 Main PID: 11608 (code=exited, status=0/SUCCESS)

Jul 20 16:45:37 myserv slapd[13254]: main: TLS init def ctx failed: -1
Jul 20 16:45:37 myserv slapd[13254]: slapd stopped.
Jul 20 16:45:37 myserv slapd[13254]: connections_destroy: nothing to destroy.
Jul 20 16:45:37 myserv start[13254]: Starting ldap-server
Jul 20 16:45:37 myserv systemd[1]: slapd.service: Control process exited, code=exited status=1
Jul 20 16:45:37 myserv systemd[1]: Failed to start OpenLDAP Server Daemon.
Jul 20 16:45:37 myserv systemd[1]: slapd.service: Unit entered failed state.
Jul 20 16:45:37 myserv systemd[1]: slapd.service: Failed with result 'exit-code'.

You see the message in the middle? main: TLS init def ctx failed: -1

Now, you could google. It will not help much! It took me some time to find out that I simply had a rights problem! I saw this when comparing the old contents of /etc/ssl/servercerts” from a backup with the new one:

myserv:/etc/ssl # la servercerts.orig
total 16
drwxr-xr-x  2 root root 4096 May 30  2013 .
drwxr-xr-x  7 root root 4096 Jul 20 15:03 ..
-rw-r--r--  1 root root 2155 Jul 10  2017 servercert.pem
-rw-------+ 1 root root 3272 Jul 10  2017 serverkey.pem
myserv:/etc/ssl # la servercerts
total 16
drwxr-xr-x 2 root root 4096 Jul 20 16:40 .
drwxr-xr-x 7 root root 4096 Jul 20 15:03 ..
-rw-r--r-- 1 root root 2492 Jul 20 15:19 servercert.pem
-rw------- 1 root root 3243 Jul 20 15:22 serverkey.pem

You see the tiny difference? The “+” – sign in the original rights?
Oops! ACL-settings? What for?

myserv:/etc/ssl # getfacl servercerts.orig/serverkey.pem 
# file: servercerts.orig/serverkey.pem
# owner: root
# group: root
user::rw-
user:ldap:r--
group::r--
mask::r--
other::---

OK! lets try this for the user “ldap” in the new setup:

 
myserv:/etc/ssl # setfacl -m u:ldap:r servercerts/serverkey.pem 
myserv:/etc/ssl # setfacl -m g::- servercerts/serverkey.pem
myserv:/etc/ssl # getfacl servercerts/serverkey.pem 
# file: servercerts/serverkey.pem
# owner: root
# group: root
user::rw-
user:ldap:r--
group::---
group:root:---
mask::r--
other::---

myserv:/etc/ssl # systemctl restart slapd.service
myserv:/etc/ssl # systemctl status slapd.service
● slapd.service - OpenLDAP Server Daemon
   Loaded: loaded (/usr/lib/systemd/system/slapd.service; enabled; vendor preset: disabled)
   Active: active (running) since Sat 2019-07-20 17:00:21 CEST; 5s ago
  Process: 15869 ExecStart=/usr/lib/openldap/start (code=exited, status=0/SUCCESS)
 Main PID: 15889 (slapd)
    Tasks: 3 (limit: 4915)
   CGroup: /system.slice/slapd.service
           └─15889 /usr/sbin/slapd -h ldap:/// ldaps:/// 
ldapi:/// -F /etc/openldap/slapd.d -u ldap -g ldap -o slp=off

Jul 20 17:00:21 myserv systemd[1]: Stopped OpenLDAP Server Daemon.
Jul 20 17:00:21 myserv systemd[1]: Starting OpenLDAP Server Daemon...
Jul 20 17:00:21 myserv slapd[15869]: @(#) $OpenLDAP: slapd 2.4.46 $
                                          opensuse-buildservice@opensuse.org
Jul 20 17:00:21 myserv slapd[15869]: ldif_read_file: checksum error on "/etc/openldap/slapd.d/cn=config.ldif"
Jul 20 17:00:21 myserv slapd[15869]: ldif_read_file: checksum error on "/etc/openldap/slapd.d/cn=config/olcDatabase={0}config.ldif"
Jul 20 17:00:21 myserv slapd[15889]: slapd starting
Jul 20 17:00:21 myserv start[15869]: Starting ldap-server
Jul 20 17:00:21 myserv systemd[1]: Started OpenLDAP Server Daemon.
myserv:/etc/ssl # 

Obviously, the user “ldap” needs read rights on the (private) key of the server certificate!
Note that the user which runs the slapd.service may have a different name on your system – e.g. “openldap”.

One can dispute whether ACLs is a reasonable way to handle this problem. Of course you could try and do something else. For other services I found in backups for older SuSE installations a special group “tls” which contained root and system users which needed read rights. This group was then assigned to “/etc/ssl/servercerts/serverkey.pem”.

E.g. in case you are concerned about any of these solutions you could create a separate special certificate for the LDAP service and place the key in a special directory with read access rights for the file limited to root and the user “ldap”. Of course, in this case, the service’s configuration files must be adjusted for all TLS/SSL relevant data. However, before you follow such an approach of different certificates for services on one and the same server, think a bit about side consequences. As the FQDN of the server has to be identical to the certificate’s common name you would have to issue certificates for different common names of your various server services.
This in turn makes your network and DNS configuration more complicated – you either need to associate one IP with multiple FQDNs or provide multiple IPs for one and the same server. To avoid such trouble I would rather combine this with a container approach for each separate service.

Adjusting the configuration of the SSSD-service

Having a running LDAP service does not mean that external clients can access it. On modern systems the exchange of auth-information between clients and server services is often handled by the “sssd”-service. This is true in my case, too. Therefore, a running slapd will not be sufficient if we use the LDAP-service for authentication from some clients in the network. We need to adjust the sssd-configuration, too. The relevant file is “/etc/sssd/sssd.conf” :

...
[sssd]
config_file_version = 2
services = nss,pam
domains = default
# SSSD will not start if you do not configure any domains.
# Add new domain configurations as [domain/<NAME>] sections, and
[nss]
filter_groups = root
filter_users = root
[pam]
# Section created by YaST
[domain/default]
ldap_uri = ldap://myserv.anraconc.de
ldap_search_base = dc=anraconc,dc=de
ldap_schema = rfc2307bis
id_provider = ldap
ldap_user_uuid = entryuuid
ldap_group_uuid = entryuuid
;ldap_id_use_start_tls = True
ldap_id_use_start_tls = False
enumerate = True
chpass_provider = ldap
auth_provider = ldap
cache_credentials = False

ldap_tls_cacertdir = /etc/ssl/certs
ldap_tls_cacert = /etc/ssl/certs/anraconc-CA.pem
....
...

Again, the most important settings are done in the last 2 lines displayed.
The setting for start_tls is up to you. If you use “start_tls” then the OpenLDAP configuration must provide the necessary entries.

Note: You have to provide similar sssd-settings on external LDAP-client-systems! One such client could be an email/imap-server – we shall have a look at its configuration in the next article.

On “myserv” we restart the “sssd.service”:

myserv:/etc/ssl # vi /etc/sssd/sssd.conf
myserv:/etc/ssl # rcsssd restart
myserv:/etc/ssl # systemctl status sssd.service 
● sssd.service - System Security Services Daemon
   Loaded: loaded (/usr/lib/systemd/system/sssd.service; enabled; vendor preset: disabled)
   Active: active (running) since Sat 2019-07-20 17:29:11 CEST; 18s ago
 Main PID: 20021 (sssd)
    Tasks: 4 (limit: 4915)
   CGroup: /system.slice/sssd.service
           ├─20021 /usr/sbin/sssd -i --logger=files
           ├─20022 /usr/lib/sssd/sssd_be --domain default --uid 0 --gid 0 --logger=files
           ├─20023 /usr/lib/sssd/sssd_nss --uid 0 --gid 0 --logger=files
           └─20024 /usr/lib/sssd/sssd_pam --uid 0 --gid 0 --logger=files

Jul 20 17:29:10 myserv systemd[1]: Starting System Security Services Daemon...
Jul 20 17:29:10 myserv sssd[20021]: Starting up
Jul 20 17:29:11 myserv sssd[be[20022]: Starting up
Jul 20 17:29:11 myserv sssd[20024]: Starting up
Jul 20 17:29:11 myserv sssd[20023]: Starting up
Jul 20 17:29:11 myserv systemd[1]: Started System Security Services Daemon.

Conclusion

We can use TinyCA2 to replace the missing YaST-feature for an effective administration both of CAs and server certificates. The major work has to be done in adjusting the configuration of the services. But after the method for installing a CA certificate server wide and permanently became clear the service configuration became reduced to a more or less dumb editing job. This job could be delegated to a script; but be careful to check the specific names of the relevant SSL/TLS entries for each service!

A special challenge came with the LDAP service; the related system user must get read rights to the used server certificate’s private key!

In the next and final article of this series

TinyCA2 as a replacement for YaST’s CA-tools on Opensuse Leap servers with TLS/SSL – III

we shall have a look at the reconfiguration of a cyrus and posfix service on a different server “mymail”, which would then be a client for the LDAP service on “myserv” (for the authentication of IMAP/SMTP-users).

Links

Server wide and permanent installation of a trusted CA’s certificate
stackexchange.com: how-do-i-install-a-system-wide-ssl-certificate-on-opensuse