KVM/Qemu VMs with a multi-screen Spice console – I – Overview over local and remote access methods

KVM/Qemu based virtual machines [VMs] are a nice and comfortable part of my life with Linux. I use them both as dedicated entities for various services on a server host and as experimental test or work environments on my Linux workstation. Whereas the access to server VMs was dominated by SSH connections and CLI interaction so far, working with VMs on my PC was and is is characterized by graphical user-interfaces.

In the latter case we speak of desktop-virtualization: Connections to the virtual guests are set up locally via sockets (or via a network port over device “lo”) on the very same PC or workstation which also serves as KVM host. Supported by a client/server model for graphics, KVM/Qemu provides multiple capable methods for the local display of the graphical output of a VM. And by graphical output I mean a desktop environment as KDE, XFCE or Gnome.

For KVM/Qemu the combination of the so called

  • Spice display” and the Spice protocol
  • with drivers for potent virtual video devices (as QXL or Virtio)

offers a very convenient solution for the presentation of a VM’s graphical desktop with high performance – which, in my experience, is considerably faster than most VNC variants.

In addition:
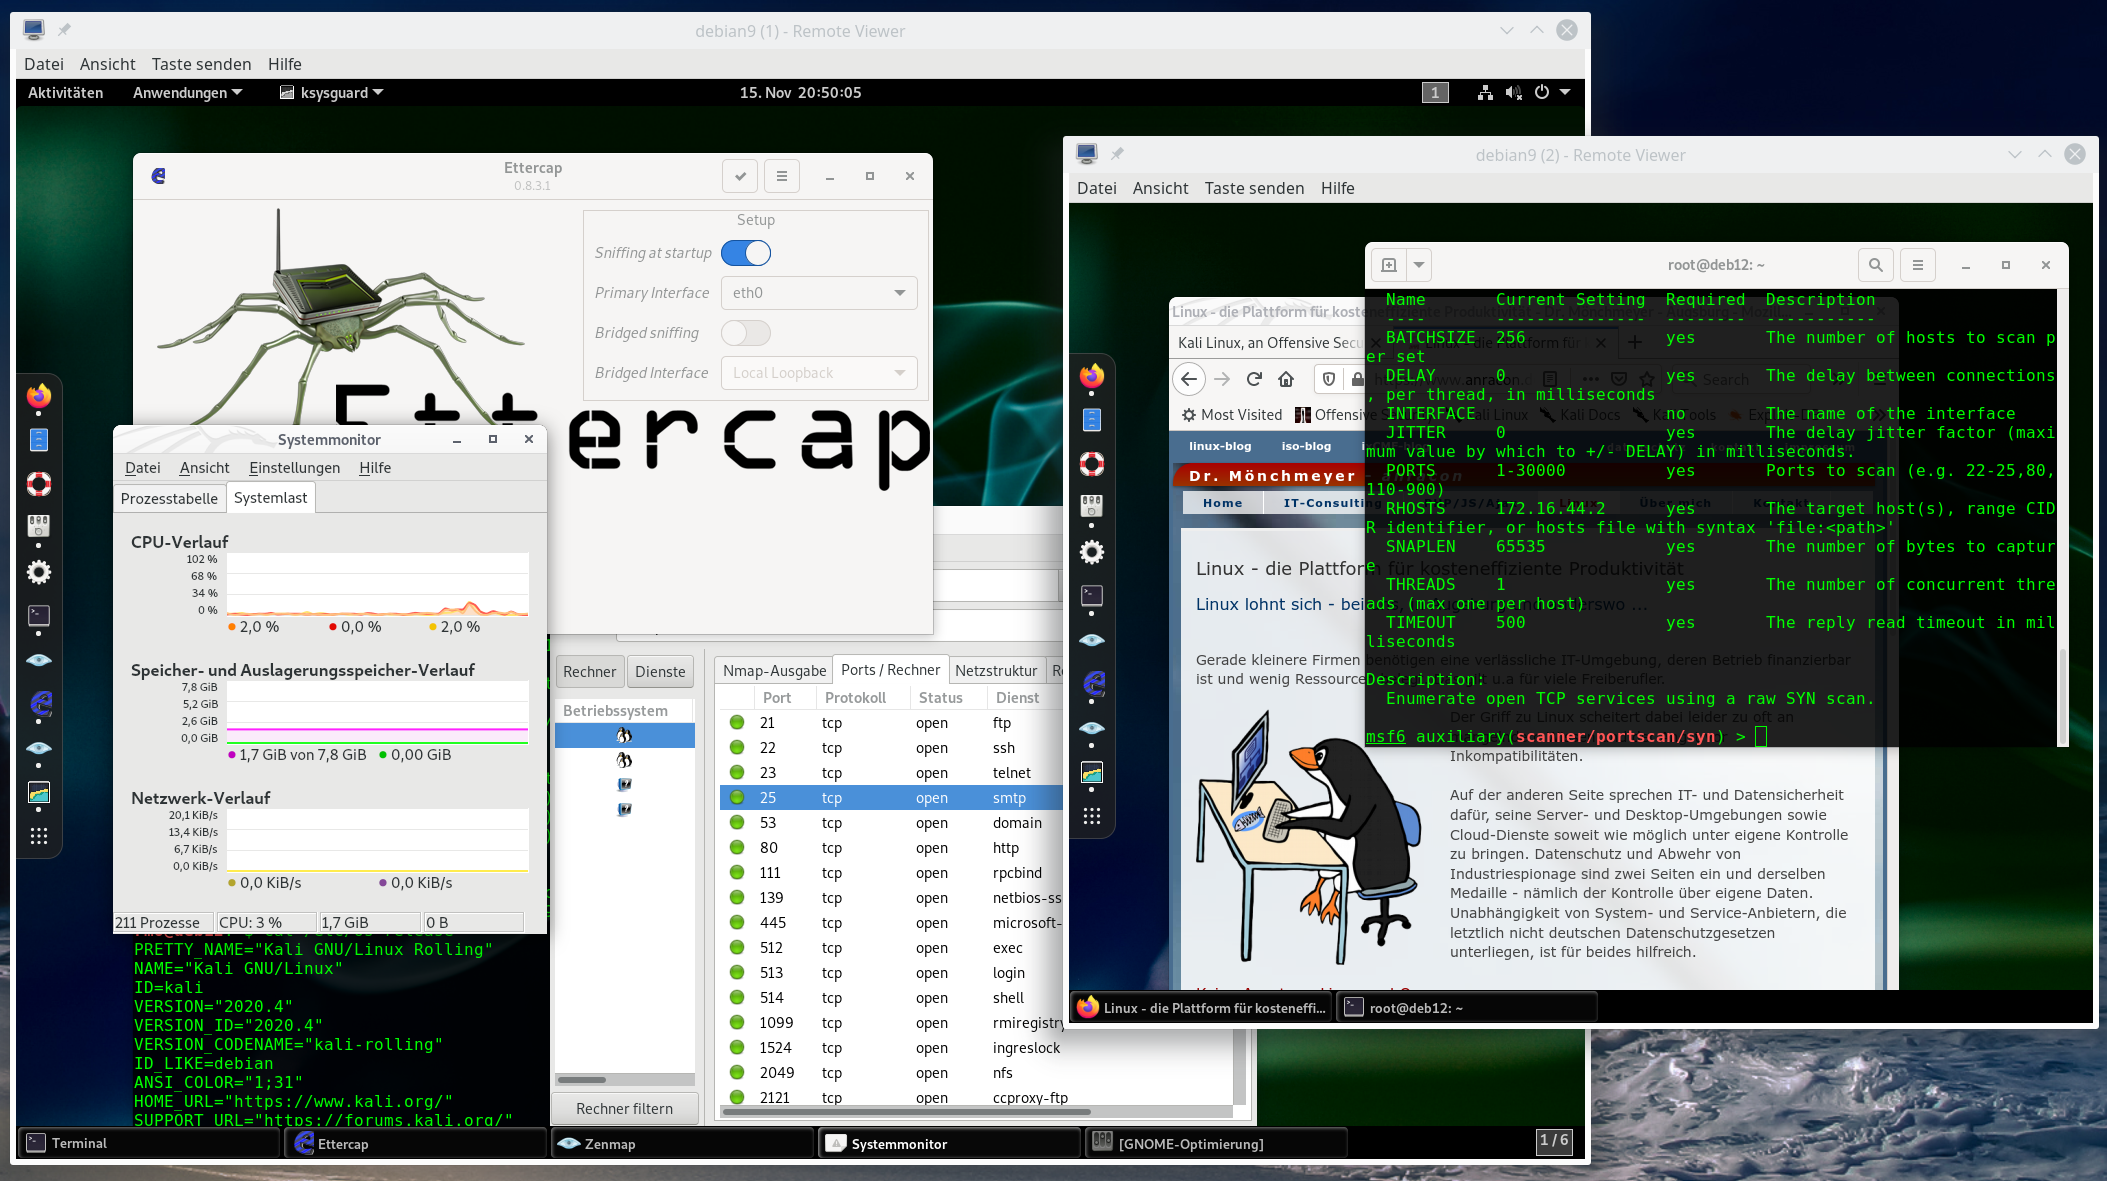
With the help of certain Spice clients one can access a local VM via a desktop display which extents over up to four “screens“. All of these “screens” are displayed within scalable windows of your preferred basic desktop environment on your Linux machine – e.g. KDE, LXDE. This means that you can graphically work with a full fletched KDE desktop of the VM displayed in multiple windows within a KDE or Gnome environment on your local KVM/Qemu host (e.g your Linux workstation).

Can we get this comfort also with remote connections over a LAN? With encryption tunnels? The answer is yes – and related Qemu and Libvirt configurations are the main topics of this article series.

Why do I write about these subjects, at all? Recently, I needed to work with a KVM/Qemu guest remotely on an Opensuse Leap 15.2 server. I wanted to use a SSH tunneled connection with password authentication for a special graphical Spice client, namely “virt-viewer“. Being a bit naive, I ran into some major trouble. This in turn forced me to look closer at different possibilities for remote connections to KVM/Qemu based VM. Unfortunately, I found Opensuse’s documentation on Spice sparse – to say the best. But Spice gets especially interesting and somewhat complex with remote access methods, encryption and authorization.

In this article series I discuss some of the multiple configuration options I have experimented with. I restrict myself to Spice based solutions with the clients “virt-viewer“, “remote-viewer” and also “virt-manager“. In combination with SSH, TLS. I hope my experiences help other Opensuse Leap users to set up convenient remote solutions.

After giving some documentation links, I start with an overview over some selected remote access scenarios which are available. They are the most important ones and are all based on network ports. But, in the coming posts I will cover local access scenarios based on Unix sockets, too. And their combination with SSH.

Limitations

Unfortunately, I have to reduce expectations of readers who are out for “multi-user remote desktop solutions”. This is not what the present Spice solutions with the named clients will offer you. See below.

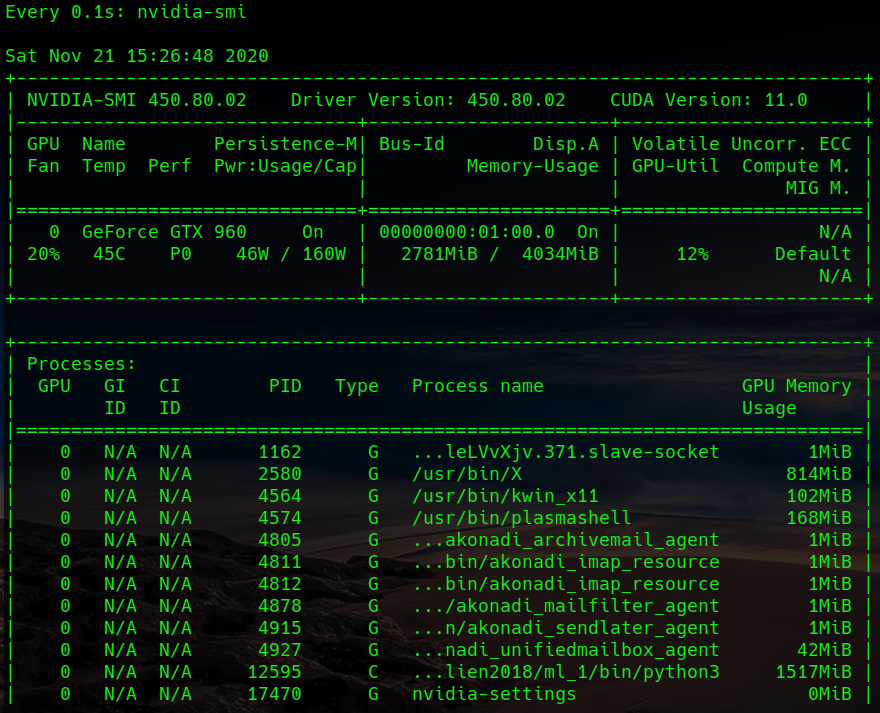
A topic which I will not address in the forthcoming articles is the setup of a local VM with OpenGL acceleration on the graphics device of the KVM host. With Nvidia cards and drivers this is
unfortunately a mess – and it is Nvidia’s fault, in my opinion. Very similar, by the way, to Nvidia’s EGL-based solution attempt for Wayland. All of this because of their own OpenGL handling and their declined support for GBM. So, let us not go there to avoid frustration …

Basic preparations of a KVM/Qemu VM: Documentation and guides?

I assume that you are already familiar with the basic set up and configuration of a KVM/Qemu based virtual machine – e.g. with virsh or virt-manager. If not, you will find valuable hints for Opensuse Leap systems in SuSE’s “Virtualization Guide

However, as said above, Opensuse’s documentation on virtualization does not give you much information about Spice. We only get a glimpse of it at the sections on “virsh” and “Qemu“. The information is rather spurious there; one doesn’t get a broader context. You may get a better understanding by reading introductory pages on the site “https://www.spice-space.org/“, especially the user manual
https://www.spice-space.org/spice-user-manual.html.
Regarding special configuration settings of a VM, see https://libvirt.org/formatdomain.html.

Spice with multiple screens requires a non default configuration of the VM’s QXL device

For a basic Spice setup there is not too much to do; “just” choose Spice for the display-settings of your VM and configure the VM’s QXL graphics device. Such a device corresponds to something like a virtual graphics card. Well, it sounds easy, but when I tried it myself, I had to experiment. To help others a bit: I have already discussed in depth how we can configure a KVM/Qemu guest and its QXL device such that it supports multiple scalable high-resolution screens for Spice clients. See the following articles:

KVM/qemu mit QXL – hohe Auflösungen und virtuelle Monitore im Gastsystem definieren und nutzen – I
KVM/qemu mit QXL – hohe Auflösungen und virtuelle Monitore im Gastsystem definieren und nutzen – II
KVM/qemu mit QXL – hohe Auflösungen und virtuelle Monitore im Gastsystem definieren und nutzen – III
KVM/qemu mit QXL – hohe Auflösungen und virtuelle Monitore im Gastsystem definieren und nutzen – IV

These posts were written in German; but with a little bit of goodwill one can understand the configuration settings and related commands.

An alternative today is to use a “virtio” video device in the VM’s configuration. I shall come back to this point in a later article.

What I did not cover in my previous posts on Spice was the broader spectrum of access options to a KVM/Qemu-based VM with libvirt/Space clients – both regarding local and remote connections. I only discussed how to use the “remote-viewer” client locally – despite the fact that its name already indicates something else. What I also disregarded in my articles in 2017 is the fact that
there are various (remote) access methods – direct ones and some through a libvirt-layer on the KVM-host. As always with Linux there are multiple ways to achieve your objectives :-).

However, when we use Spice instead of VNC we speak about a “one person” or a “one seat” solution.

Spice and libvirt => multiple methods to access exactly one graphical console of a KVM/Qemu based VM

What you should be aware of when you think of using Spice for a graphical access to a KVM/Qemu VM is the following:

1. The Spice protocol and the Spice display for KVM/QEMU based VMs do NOT provide a multi-user service for graphical remote terminals or remote desktop displays – at least not in their default configuration.

According to what I have read, anything in this direction still seems to be experimental. Instead:

2. We access a data stream describing the graphical contents of one or multiple screens of a console which is virtually “attached” to the VM.

Let us call this device a multi-screen Spice console of the VM.

The Spice console solution is fully integrated into the QEMU-emulator. The console screen data and related sound can, however, also be displayed and played on a remote Linux system. And here we face a point which makes the user’s life both convenient and complex at the same time :

3. The Spice console of a VM can be accessed by various protocols or protocol combinations. The Spice console is fully integrated with Qemu and directly accessible there via a (network) socket, but it is in addition accessible via libvirt components. This leads to a variety of connectivity options.

These aspects can be underestimated: Remote access for multiple screen requires sufficient band-width of the network. The second point excludes the application of Spice for multi-user scenarios. The third point opens up a range of local and remote access possibilities – some are more complicated to configure, some are more secure than others. Some options are deactivated in a default libvirt installation (not only on Opensuse Leap systems).

The most important connection options for standard libvirt/spice clients are summarized in the following schematic drawing.

The Spice console of a KVM/Qemu VM

The graphics shows a Linux KVM host at its center. KVM supports the VM emulator QEMU in the Linux kernel – thus making QEMU fast. Two virtual machines VM1 and VM2 are shown. VM1’s configuration includes a Spice (console) display – e.g. set up according to the following excerpt of a configuration example for a VM (done with virt-manager):

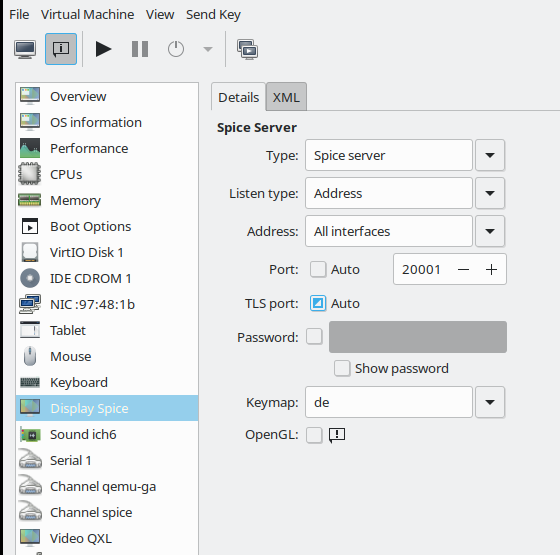
Note that the configuration item is called “display” in virt-manager (and “graphics” in the XML-configuration of a VM). I think that in the case of Spice “Console” would have been a better name. I should also warn you that the displayed configuration may lead to security risks – if not accompanied by protective measures.

Note also that “virt-manager” does not allow for a detailed QXL-configuration required for multiple screens on the displayed dialog. But you can edit the XML-files of the VM for this purpose via the second tab (or an editor;
you find the XML-files for VMs in the directory “/etc/libvirt/qemu” on Opensuse Leap systems):

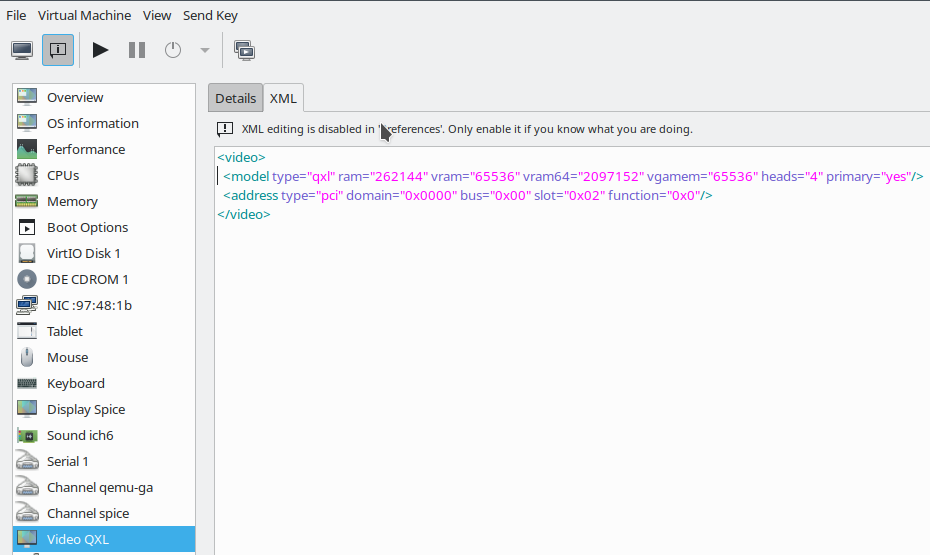
The QXL configuration displayed here is an example – you may choose other parameters. (Or test out a “virtio” device; see a later article).

“One seat” console
In the lower right part of the first sketch above I have tried to express that a graphical Spice console corresponds to a “one console with one seat” situation. The console is only available for exactly one (authorized) user at a time. Note:

Any user having sufficient access rights may any time claim the console and throw you off the seat in front of the graphical console screen, if you do not secure the access to the console by a password (or other measures)!

We did not do this in the configuration example above; see the empty field for the password. I quote from the documentation:

“Spice does not support multiple connections to the same QEMU instance by default. So anybody who will connect to the same host and port can simply take over your session. You can solve this problem by using ticketing.” (see: https://www.spice-space.org/spice-user-manual.html)

“Ticketing” means setting a password to access the VMs console screen; but still anyone knowing the password could claim the console – a password is no real solution for a multi-user situation. To say it clearly:

If your objective is to establish something like a multi-user graphical access to a KVM/QEMU-based virtual machine with a full desktop display for each user (i.e. a “remote desktop solution”), then think about something like a headless graphical server configuration of the KVM guest. On a Linux VM, you can achieve this by either implementing a X2GO server, a commercial NoMachine server, a VNC server-variant or even XRDP. Some of these solutions can easily be combined with SSH.
And do not forget: In a LAN with sufficient bandwidth “ssh -X” may already serve most practical purposes.

But in many cases a local or remote “one seat situation” with a full graphical desktop may be sufficient. Now, let us look at the other parts of the drawing.

Different access options to the Spice console of a KVM/Qemu-based VM

There is a multitude of options to connect to the Spice console (https://www.spice-space.org/spice-for-newbies.html). We shall describe them briefly in this first article. In forthcoming articles we shall have a closer look at each of them.

Option 1: Simple connection with “remote-viewer” via a Spice (network) port

The Qemu-emulator is able to handle requests over the Spice protocol on its own, i.e. without the invocation of special libvirt-support. The Spice solution offers connections to the console either on the basis of a pure Unix socket (local solution) or a network port (remote solution).

A network oriented solution, which can be realized with the Spice client “remote-viewer” is depicted on the left side of our central sketch:

You access the Spice console of a specific VM directly via a specific network port. Spice ports have to be configured independently for each of the VMs. I.e., if you have 2 VMs whose Spice consoles you want to access independently then you need to define two different ports for the Spice consoles. Actually, you won’t be able to start a VM which has the same port associated with its Spice console as another already running VM.

nProperties of a remote-viewer connection over a network port:

  • Default port? The standard Spice port is 5900 (which is also the port used by VNC). In the example displayed above I instead used port 20001. (Do not forget to open your firewalls for your chosen ports!)
  • Security by encryption? The connection to the port is not secured by any encryption. However, it is possible to define an additional specific TLS-secured port. We shall cover spice + TLS protocol combinations in another article.
  • User authentication on the KVM server host? Can optionally be achieved via SASL.
  • Preferred Spice client? The Spice client which uses the Spice protocol directly and without libvirt is “remote-viewer“.
  • Works locally and/or remotely? Both.

Some additional hints:

In some old articles or posts on the Internet you may find descriptions of “virt-viewer” together with URIs like “spice://host:5900”. This does not work any more – at least on my systems.

By setting proper attributes to the VM, we can in addition enforce that it only accepts secured connections. For those who are eager to experiment already: Where do we learn something about such machine specific settings in XML-format? The answer is:
https://libvirt.org/formatdomain.html

Option 2: Connection with “virt-viewer” or “virt-manager” via libvirtd and a defined TCP port

Besides “remote-viewer” there is another Spice client called “virt-viewer“. This client is of special use when you work on a KVM host with multiple VMs. What some admins do not know is that it can be used via a simple socket with a specific TCP-port. You do not need SSH or TLS, if you can disregard security. This corresponds pretty much to what we got with remote-viewer and a Spice port. The difference is that we access the socket via the mediation of libvirtd components:

virt-viewer requires URIs which specify the target hypervisor for the libvirtd daemon – in our case “qemu”. Such URIs differ from URIs used for remote-viewer as they always contain a two fold protocol definition.

We shall apply such URIs in a later article. In addition this access method requires a special (non-default) configuration of the libvirt-daemon. Among other things, you, of course, have to define the port. The ability to listen to an insecure TCP port is normally deactivated in the libvirtd configuration; we have to activate it manually. This is something we shall have a closer look at.

Unencrypted access to the Spice console via a special libvirtd port may be a useful solution for KVM guests sitting in a secured physical LAN-segment or behind a virtual bridge/firewall in a virtualized LAN-segment of the KVM host.

Properties of a virt-viewer connection via a TCP port

  • Default port? 16509.
  • Security by encryption? The connection to the port is not secured by any encryption. However, we have other options for virt-viewer to connect to the VM via SSH or TLS secured connections. See below.
  • Preferred Spice client?: virt-viewer (You cannot provide a valid URI to remote-viewer this way). However, this connection option also works with “virt-manager” (and its included graphical access to the Spice console).
  • User authentication? Can be achieved via SASL.
  • Works
    locally and/or remotely?
    Both.

on the KVM host.
Note that the access to libvirtd must be allowed for the user invoking the connection! This can be configured on Opensuse Leap systems by some policy and/or libvirtd settings.

Option 3: Connection with “virt-viewer” or “virt-manager” via SSH and libvirtd

A very convenient method to get a secure connection with Linux is to use SSH encryption. Therefore, we are not astonished to find that “virt-viewer” can be combined with SSH. This connection method also requires a special URI-format. And again: access to libvirtd must be allowed for the user using this type of connection.

Properties of a virt-viewer connection via a SHH port:

  • Default port? 22 or otherwise the defined SSH-port on your system.
  • Security by encryption? SSH.
  • Preferred Spice client?: virt-viewer (You cannot provide a valid URI to remote-viewer this way). However, this connection option also works with “virt-manager” (and its included graphical access to the Spice console).
  • User authentication? Via SSH (preferably public-key authentication)
  • Works locally and/or remotely? Both.

Both options 2 and 3 work with virt-manager, too. However, virt-manager does not provide you with a multi-screen access to the Spice console.

Note that a combination of SSH and remote-viewer is also possible; but then you would open a “SSH -X” connection first and run remote-viewer on the KVM/Qemu host and not on the network client system. I will present such a solution in a later article, too.

Conclusion

The Spice console of KVM/Qemu offers access to a graphical desktop of a virtual machine guest. Spice clients as “remote-viewer”, “virt-viewer” and “virt-manager” can be used locally and remotely. The first two clients offer multiple screens – but all clients provide a one seat solution, only. This may, however, be sufficient for many use cases. There is a variety of local and remote access methods. Connections can be secured by TLS or SSH encryption.

In the next article

KVM/Qemu VMs with a multi-screen Spice console – II – local access with remote-viewer via a network port

I shall have a closer look at a local connection from the “remote-viewer” client to the Spice console of a VM.

Links

Spice console and Spice protocol
https://linuxhint.com/ configure_ spice_server_ debian_10/
https://www.spice-space.org/ spice-user-manual.html
https://www.spice-space.org/ spice-for-newbies.html

Activate spice
https://www.linux-kvm.org/page/SPICE
https://linux-blog.anracom.com/2017/08/15/kvmqemu-mit-qxl-hohe-aufloesungen-und-virtuelle-monitore-im-gastsystem-definieren-und-nutzen-iv/
https://octetz.com/docs/2020/2020-05-06-linux-hypervisor-setup/

Nvidia 🙁
https://www.phoronix.com/scan.php?page=news_item&px=XDC2016-Device-Memory-API

Further
articles in this series

KVM/Qemu VMs with a multi-screen Spice console – VIII – VM and user specific restrictions for remote-viewer connections – iptables and sudo
KVM/Qemu VMs with a multi-screen Spice console – VII – remote-viewer, qemu and SASL authentication
KVM/Qemu VMs with a multi-screen Spice console – VI – remote access with remote-viewer and TLS encryption
KVM/Qemu VMs with a multi-screen Spice console – V – remote access via remote-viewer, a network port and a SSH-tunnel
KVM/Qemu VMs with a multi-screen Spice console – IV – remote access via SSH, remote-viewer and a Unix socket
KVM/Qemu VMs with a multi-screen Spice console – III – local access with remote-viewer via a Unix socket
KVM/Qemu VMs with a multi-screen Spice console – II – local access with remote-viewer via a network port

Upgrade workstation from Opensuse Leap 15.1 to Leap 15.2

Two weeks ago I upgraded my main Linux-Workstation from Leap 15.1 to Leap 15.2. Some first impressions:

  • Leap 15.2 with KDE/X11 works relatively well. Some minor setting-options for the Plasma desktop have changed.
  • KDE/Wayland with Nvidia cards does not work – unusable for production.
  • No problems with QEMU based KVM- and LXC-container virtualization – my old Debian and Kali guest systems worked as expected on the Leap 15.2-host. No problems with multi-screen configurations of the guests with remote-viewer either.
  • Unexpected high power consumption of the Nvidia card – it has increased by about 5% to 8%. I am not sure whether this is a KDE or a driver problem.
  • The usual suspects for problems during the upgrade are the Nvidia drivers, Pulseaudio, VMware and this time – to my big surprise – CUPS.
  • You may have to change/reset some KDE config and rc-files in your home-directory – especially for the plasma desktop itself.
  • Chromium showed some glitches.

I shortly describe the upgrade process and some obstacles I had to overcome.

Basic upgrade process

I always prepare for a quick restoration of my running system configuration (here: Leap 15.1). Ahead of any upgrade activity, I therefore create a backup of my Leap 15.1 “/”-filesystem on an external drive and in addition create another copy in a target partition on one of my bootable disks. I use the “dd“-command for both purposes. As all productive application and development data as mails, project documents, PHP- and Python modules are on independent partitions or on network locations anyway, the risk of running into major problems afterwards is relatively small. In addition I comment certain critical entries in the “/etc/fstab” out.
In case of a major disaster a recovery can be achieved very quickly by just re-copying the copy of the Leap 15.1 partition back to its original place.

Regarding the backup of the “/”-filesystem to an external disk you have the choice between creating a copy of a partition and creating a (zipped) file. See e.g.:
https://www.poftut.com/linux-dd-command-backup-examples/
https://linoxide.com/linux-command/linux-dd-command-create-1gb-file/
I just made simple partition copies. Regarding the blocksize “bs” option of “dd” I am very generous with SSDs; I use a size like bs=1M or bs=4M to get a reasonable performance. When copying around 100 GB you probably do not want to wait for an hour :-). E.g.:

dd if=/dev/sdg1 of=/dev/sdh5 bs=4M status=progress

Warning 1:

If you copy your partition with “/”-filesystem into another partition, then the target partition must at least have the size of the original one. Really take care of this point! I always try to achieve the exact same size with a partition tool (gparted or YaST partitioner).

Warning 2:

Do not forget to change the UUID of the partition’s copy if the target partition resides on an internal disk; you should never have two filesystems with the same UUID on a system! But write down the original UUID at a safe place. Use “uuidgen
” and the “tune2fs -U” commands to change the copied filesystem’s UUID, afterwards.

See: how-to-change-filesystem-uuid-2-same-uuid

And: In case of an emergency restoration, i.e. after having copied the backup filesystem into its old position, you, of course, have to change the UUID back to the old one.

Why are these UUID-precautions required?
Because of your boot-loader – probably Grub2. Depending on its configuration (and some other system settings) it will probably have created entries in the “/boot/grub2/grub.cfg” which refer to the UUIDs of the bootable partitions. And if such a UUID-reference cannot be resolved in a unique way you may in the best case boot a system you did not want to boot, but you may also experience worse conflicts. Now, you may ask:

What is the copy on the same or another internal hard disk good for anyway?
I create the copy on my main SSD (or another internal disk) not only for restoration purposes, but also for the purpose of transforming it into a fully bootable filesystem at its new position later on – i.e. after the upgrade. I shall return this point in an extra section below.

Upgrade process

After the backup procedures I followed the guideline of the Brasilian Linux Kamarada for the upgrade; see
https://kamarada.github.io/en/2020/09/01/linux-kamarada-and-opensuse-leap-how-to-upgrade-from-151-to-152

Their way of upgrading Opnesuse systems is straight-forward and well-tested. I also liked their recent inclusion of the “releasever“-variable …

I tend to use multiple repositories besides the standard upgrade repository of Opensuse. Therefore, I had to delete quite an amount of repositories following the Kamarada recipe. If you are in the same position, you should make a screenshot of the repository-configuration in YaST to be able to reconfigure them after the upgrade. During the upgrade zypper may recognize many packages for which it has to change the repository. It is a bit of an ordeal to answer to all of the related questions, but I recommend to follow the questions with focused concentration: The order of offered alternatives may change!

Hint: Take care of sufficient filesystem-space! The download of new packages requires extra space during the upgrade period – and usually also the total size of used disk space after an upgrade typically tends to grow somewhat. Therefore: Have at least 20GB available on your “/”-filesystem. (LVM is your friend – if you use(d) it …).

After the upgrade you have to reboot (init 6). If your graphics card is from Nvidia you probably will find yourself on some console terminal and not at a desktop-manager-login (e.g. sddm or gdm3) at the end of the boot process. We must install the (new) Nvidia drivers afterwards.

Nvidia re-setup

There are at least two ways of installing Nvidia-drivers on an Opensuse-system: 1) Directly, i.e. by a manual installation with the help of of the downloaded driver installation scripts. 2) With the help of YaST and the Nvidia community repository. I have used the latter option during the last 2 years. Either way you probably prohibited loading the Opensource Nouveau driver already at some point in the past – e.g. by blacklisting the related kernel module in some of the files in “/etc/modprobe.d”. If not – it is time to do so now.

When you rebooted after the Leap 15.2 upgrade the old Nvidia modules did not work as they were not compiled for the new kernel which was installed during the upgrade. So, from the console login, which you hopefully have reached, you need to invoke YaST in ASCII-mode, activate the
Nvidia community repository and reinstall the proprietary Nvidia drivers from there. In my case the packages

nvidia-computeG05, nvidia-gfxG05-kmp-default, nvidia-glG05, x11-video-nvidiaG05

A compilation is done automatically during this update.
Hint: I also suggest to issue “mkinitrd” immediately after the driver installation to be on the safe side regarding the “initramfs”-phase of the boot-process.
This worked pretty well in may case. After a reboot I got to my SDDM-login screen afterwards. My standard X11-based graphical KDE Plasma desktop started smoothly afterwards. I also tested the functionality of my Cuda installation for Keras and Tensorflow2 – worked perfectly.

Increased idle power consumption of the graphics card on a running KDE plasma desktop (Version 5.18)
A unwelcome surprise regarding Nvidia was the following: When watching the power consumption of my graphics card with

watch -n0.1 nvidia-smi

I saw a rise in the average consumption.
An average value of the GPU load (with “Force Composition Pipeline” activated on all my 3 screens) now had a value of 15%; on my old Leap 15.1 it was below 10%. All with having set the Powermizer mode to “Adaptive” (via (nvidia-settings). I fiddled a bit around with some Nvidia settings – but found no real solution, yet. When I changed a desktop theme (with the help of “systemsettings5”) I observed a drop of power consumption to 11% – but after some movement of windows across my 3 screens it settles again at 15% – quite independent of style and desktop settings. At least with an OpenGL-compositor activated (systemsettings5 >> “screen … >> compositor”. Choosing “Xrender” leads to a drop of GPU-consumption to 9%.

What brought me down a bit to 12% with an activated OpenGL-compositor (OpenGL2 or OpenGL3.1) was to deactivate keeping window-previews:

I did not experience any real disadvantages by doing so. On Leap 15.1 the average consumption with a driver a bit older was still lower by 4% to 5%. We talk about 2 Watt here, but still I do not like such unexpected changes. I do not know whose fault this is – KDE’s or Nvidia’s. We shall see what happens with the next driver version ….

Reconfigure KDE settings

The screen order on my Plasma 5.18 desktop was OK. No screen-tearing (see: Opensuse, KDE Plasma, X11, Nvidia – stop video and screen tearing); my old “xorg.conf“-settings were respected and active.

However, when trying to change design- and plasma-style-settings via “systemsettings5” a click on the “plasma-style”-icon led to a window crash and a Plasma error. This is usually a sign that something is wrong with the KDE configuration files:

Because the KDE setting- and configuration files in the home-directory survive the upgrade untouched some may not be compatible with the new KDE version.

I do not know about an easy way to find out which of the files are to be recreated. My standard way is to make a copy of the “~/.config-directory (with a new suitable name), delete the original directory, wait until it is automatically created again (with new default settings). We
make a copy of this new default-“.config” version (with a unique name), too, and then copy the original version into its standard place again. In the end we have 3 “.config”- directories with different names – one in place with the user’s original settings, one with the new default settings and one with the original settings as “.config”.
Then I overwrite files in the “.config”-file with the new default files, at least those for which I suspect some problems – starting with the plasma-specific “plasma…..rc”-files, then the “systemsettingrc”, then “kwinrc”. Thus, the problems with “plasma-style”-settings could be resolved quickly.

I also got some problems with a standard activation of the OpenGL-compositor at the start of the plasma desktop. A change of the respective settings in the “kwinrc”-file helped – especially “Enabled=True”:

[Compositing]
AnimationSpeed[$d]
Backend=OpenGL
Enabled=true
GLCore=true
GLPreferBufferSwap=a
GLTextureFilter=1
HiddenPreviews=4
OpenGLIsUnsafe=false
WindowsBlockCompositing=false
XRenderSmoothScale=false

Pulseaudio [PA]

A major frustration came up when I tried to start Clementine and listen to some songs – all my PA-settings were gone with the exception of the PA-LADSPA-equalizer. This had partially to do with changes in the Phonon-settings – now to be found under “systemsettings5 >> Audio“. I had to turn off my onboard HD sound card, activate my mainly used Xonar D2X explicitly and also deactivate an existing XFI-Card, too.

The dialog for setting the KDE/Phonon “standard device” have changed once again :-(. You cannot choose priorities for different sources (audio, video, …) any longer. Simplification? I hate this new KDE politics of taking more and more configuration options away from the standard user. I had to make the equalizer the “standard device” in the new dialog to direct all streams (from browsers and players) through this device.

Compare this to the settings in Leap 15.1; see KDE, Pulseaudio and Browsers – make the LADSPA equalizer the default sink.
In addition: We cannot play test sounds for the various sinks any more. This does no longer work in “YaST Audio” either … I do not call such things progress.

With PA activated “pavucontrol” serves as my primary mixer. It worked more or less as expected though some functionality has been removed there, too. E.g. the ability to remove some input channels completely. Another stupid thing which happens now regarding the default channel for volume adjustment via kmix is now that you may choose “Simultaneous output ….” – but volume controls will affect the Xonar channels, too – at least as long as no device uses the equalizer ….

It took some fiddling until I got back most of my old functionality and sound quality. I found again that its worth to reduce the Clementine input in pavucontrol down to 80% to avoid some oversteering and sound-distortion. Do not forget to set the default channel for sound control with kmix to “Simultaneous output …” for your multi-channel soundcard!

One can in addition install and activate the XFCE-mixer, which basically is a graphical frontend to an alsa mixer. This allows additional shifts of the different channels against each other – performed after pulseaudio’s own mixer settings, namely those of “pavucontrol”.

A major problem with sound and the onboard card:
For some reason a switch from the graphical terminal to a console terminal (by “Ctrl Alt F3”) automatically
activates an Nvidia HDMI stereo device on my system now. It comes up again even if I explicitly deactivated it in the KDE or PA audio settings. I have no solution for this, yet. It affects, however, at least a running Chromium (see below) – and leads to a restart of desktop effects when I return to the graphical session. I get a corresponding explicit message from Plasma ….

VMware – a yearly game of money …

VMware Workstation 15.5 Pro does not work on a Leap 15.2 host without special prerequisites. See e.g.:
https://forums.opensuse.org/showthread.php/540779-vmware-worksation-pro-15-5-not-failed
https://www.opensuse-forum.de/thread/63542-vmware-workstation-pro-leap-15-2b/?pageNo=1
https://communities.vmware.com/t5/VMware-Workstation-Pro/Can-t-compile-wmware-workstation-15-5-on-leap-15-2/m-p/2286237

However, WS Pro 16.0 does. I upgraded to this version. My Win 10 guests felt a bit more sluggish than with WS 15.5. But this may also have to do with a subsequent Upgrade of Win 10 to the 2004 version.

By the way: Note that VMware wants you to pay extra maintenance support, if you order it from SW resellers – at least here in Germany. The cheapest choice was to order it directly from the VMware shop. Do we like such anti-competition monopoly and customer control measures? No, we do not like it => time to get Windows 10 guests running on KVM machines … and to forget VMware for the future. See:
https://getlabsdone.com/10-easy-steps-to-install-windows-10-on-linux-kvm/#Customizing-the-Hardware-for-Windows-10

Hint: Be a bit reluctant with changing the HW compatibility of your VMware virtual machine for two reasons: You may want the virtual image to continue running in your old 15.1 implementation, too – until you feel that Leap 15.2 is stable enough. Second reason: Changing too much of HW settings may lead to a reactivation of your Windows license key.

CUPS bug – reconfigure printers – use the CUPS packages from the printing repository

I have two printers in my network. They can be addressed both by a local configuration and via a cups server in the net, which offers a variety of queues.
The reconfiguration of the local settings were a piece of cake with YaST. The updated HP-drivers simply worked.
However, printing from my system via a CUPS server in the net and its queues did not work any more. In contrast to all previous upgrades of at least the last 4 years :-(.
It took me a while to find out that this is due to a major bug in the present CUPS version delivered by the standard Update repository of Opensuse. Use the CUPS version > 2.3.0 from the “Printing repository“.
Then your server based queues will work again!

Chromium: Problems with HW acceleration / sound from Chromium does not get upmixed on a multichannel sound card

I had some problems with Chromium. Maybe I had them already before, but I noticed them now:
I had to refrain from HW-acceleration: Whenever I changed to one of the console terminals (e.g. Ctrl-Alt-F2) and returned to the graphical terminal the Chromium user interface got totally destroyed. Not funny when you were editing a blog :-(.
In addition: Chromium sound does not get upmixed completely – the probable reason is that Chromium supports real 7.1 channel sound these days. So, stereo may remain stereo or only gets upmixed by some special soundcard setting to 4.0, 6.0 – but not by PA. Despite such
settings on my Xonar card, I had some disturbing experiences: When changing to a console terminal and back to the graphical one, the upmixing changed from 4.0 to 2.0 …. :-(. When I rebooted afterwards, the 4.0 upmixing was there again. The whole effect probably was due to an automatic activation of some onboard/oncard Nvidia HDMI sound channels during the switch to the console terminals.

Firefox sound, however, which sends a pure stereo signal to the system as, gets properly upmixed by PA to 7.1 sound and this remains stable during switches between console and graphical terminals. So, for the time being, I do not use chromium for TV streaming any longer. Maybe the Chromium developers should have a talk with the PA developer …. It seems to be a difficult problem to me – you would have to analyze that only stereo sound is coming despite a 8 channel signal. A simple workaround would be that we get a switch in the chromium browser which allows to set its operation from multichannel to stereo, only.

For those who like to experiment with “pactl” commands (like “pactl list sinks” as standard user) I would like to draw your attention to work others ave done regarding PA and upmixing:
https://gist.github.com/dex4er/8646669
https://bbs.archlinux.de/viewtopic.php?id=16093

It should be possible to write two scripts one activating a certain upmixing with pactl commands and one deactivating it again. But my time is so limited that I haven’t tried it myself, yet.

KDE Plasma, Nvidia and Wayland do not work

As with Leap 15.1, KDE and Wayland lead to a direct crash on my workstation with Nividia graphics. The system freezes. You have to enforce a reset of your PC and start a reboot. However, on a laptop with a i915 Intel driver for a CPU integrated graphics Wayland works. So, we have a clear Nvidia topic here.

After the upgrade: Make the copy of our original partition of Leap 15.1 a bootable one

If you had copied your original Leap 15.1 partition into another partition on your hard disk you may want to make it a bootable fully functional system offered as an entry in the Grub2 menu. This requires some additional efforts.

Firstly, you have to change all references to the modified UUID in the internal boot-relevant files of the moved filesystem – i.e. in the “/etc/fstab”  AND  in the “/boot/grub2/grub.cfgthere on the Leap 15.1-partition. For this purpose you must mount the copied Leap 15.1 partition on your running Leap 15.2 system and edit the entries in both files of the mounted Leap 15.1 filesystem very carefully with respect to the changed UUID (see the sections on backups above). Take care that you do not change the files on the running Leap 15.2 system. And, please, make copies of both files before you change them! You may need the original contents.

Instead ofchnaging entries in the “/boot/grub2/grub.cfg” of the Leap 15.1 copy you can also rename the “/boot/grub2/grub.conf” on the Leap 15.1 partition to something like “grub.conf_orig” (you want to keep the contents!). This gives the grub “os-prober” on you Leap 15.2 installation a chance to create correct entries regarding the address of the partition.

Then we remove the “/boot/grub2/grub.cfg” in the Leap 15.2 installation and run “grub2-mkconfig -o /boot/grub2/grub.cfg” again to give the os-prober there a chance to create valid entries. Please, cou check these entries first before you install the grub loader from your running Leap 15.2 again! If you find correct UUID or other references to the partition the you can reinstall the bootloader. I always do this with YaST. Afterwards you should be able to boot both your new Leap 15.2 and your old 15.1 installation a respective entries in the Grub2 menu. Thus we have our old Leap 15.1
installation available for comparisons.

Conclusion

An upgrade of a Linux workstation from Opensuse Leap 15.1 to Leap 15.2 brought no major problems with it. One remarkable exception is a bug in the CUPS package – for which you find a solution in form of a newer package in another Suse repository. The fact that Wayland does not work with KDE on Nvidia graphics came not unexpected – although I think its a shame for Nvidia. The same could be said about the increased power consumption of the Nvidia card.

Have fun with Leap 15.2.

Long boot time of Kali Linux after swap partition changes – swap settings for the initramfs

Recently, I reactivated an old KVM-based installation of Kali Linux from 2018. So, some hurdles to upgrade the Kali distribution to version 2020.4 had to be overcome. Actually, it was a mess. I had to solve multiple circle like problems with package dependencies (Python3, Ruby, special packages in the Discovery section, …). Sometimes I had to delete packages explicitly. The new Kali minimum installation and its enhancement via meta-packages contributed to the problems. In the end I also reinstalled a the Gnome desktop environment – supplemented by a few KDE applications. Now, my Kali was fully functional again. However, the remaining disk space had shrunk …

Resizing the qcow2-file for the virtual disk of the virtual machine for Kali Linux

During all the back and forth with installing meta-packages I came close to exhausting virtual disk space, before I could clean up and remove packages again (with “apt-get autoclean” and “apt-get autoremove”). The virtual hard disk was a qcow2-file in my case. For further experiments I had to expand its capacity. This could easily be done by

qemu-img resize PATH_TO_qcow2_FILE +NG

where I had to chose a suitable “N” (20). The extended file must, of course, still fit into its filesystem on the KVM host!

Extending and rearranging partitions within the Kali system

The more difficult part in my case was the rearrangement of the two partitions ( one for the “/”-fs and one for swap) on the virtual disk for my Kali guest system. I did this within the running Kali system. Bad habit; such operations are dangerous, of course, but I trusted in the abilities of gparted. An extension of a mounted “ext4”-formatted partition is in my experience no major problem as long as there is enough free space behind its current location …. But, I recommend, of course, to make a backups of your virtual machine, before you start with any potentially dangerous operations regarding the file-systems of your Linux machines.

As my old Kali installation unfortunately did not have a LVM-layout and the disk partition table was of the old MS-DOS type, I actually had to move a blocking swap partition which was located directly after the “/”-partition. Meaning: I had to delete and later recreate it at a different position. Of course, after having disabled the swap in the running Kali guest :-). The partition keeping the “/”-filesystem (ext4) could then be extended without any problems on the running system. The new swap partition afterwards got its place behind the “/”-partition. According to “gparted” everything was OK after the partition changes: Then I rebooted…

The problem: A boot time of almost 30 secs …

The next restart took about 28 secs! But the machine came up in the end – which is almost a wonder, after I understood the cause of the problem. A standard boot-process until login normally required about 4 secs, only, before my filesystem changes. A major discrepancy and a clear indications of a major problem! Looking at the “dmesg”-output I got the impression that the delay had to do with operations occurring at the very beginning of the boot process. So, I checked the “/etc/fstab”. And got a first glimpse of the cause: The entries there referred to the UUIDs of the partitions! Not unexpectedly – this is the standard these days for almost all major distributions.

So, stupid me: Of course, the UUID of the swap partition had changed during the mentioned operations! I adapted it to the new value (which I got from gparted). I also checked whether there was
any reference to the swap-partition in the Grub command line (check “/etc/default/grub” for a “resume”-parameter!) To be on the safe side I also checked the result of “update-grub” in the file “/boot/grub/grub.cfg”). I did not find any references there. So, I gladly restarted my Kali system. However, the problem had not disappeared … .

Solution: The initramfs-configuration includes an explicit setting for the swap-partition!

Now, at this point there were not many options left. I started suspecting that the initramfs had a wrong entry. Now, where do we find options regarding the swap for the initramfs on a Debian based systems? A bit of duckduckgoing pointed me to the file

/etc/initramfs-tools/conf.d/resume

And there I did find an entry like

RESUME=UUID=d222524c-5add-2fcf-82dd-4d1b7e528d0c

OK – I changed it to the new value. Then I used

update-initramfs -u

to update the initramfs. And, guess what: The problem disappeared! I got my 4 secs of boot time again.

Conclusion

Never forget to check the UUID-settings for partitions after major changes of the filesystem-layout on your disks. Do the necessary checks not only on real host systems, but also on virtualized systems. Check both the “/etc/fstab” AND the Grub2-configuration AND the initramfs-configuration for possible references to changed or moved partitions.

Off topic – but related: When copying the contents of a partition with “dd” into another partition on your hard disk, e.g. for a backup, you should also care about the fact that you have two partitions with the same UUID afterwards. This may lead to major problems for any active Grub2. Always change the UUID of the copied partition with tune2fs before any reboots. If the copied partition was a bootable one, you also take care of its “/etc/fstab”-entries and initramfs settings, if you want it to be bootable in its new place.

General warning: Whenever you move/copy partitions, write down and save the original UUIDs – you may need them in case of trouble.


Opensuse Leap, KVM/QEMU-guests, KMS – problems with QXL/Spice after upgrade to Leap 15

Many services in my LAN are provided by virtual KVM/QEMU-guests of a dedicated KVM-server-host. More special services are provided by local KVM-guests on Workstations. All my virtualized systems get normally equipped with a qxl/spice-combination to provide a graphical interface – which can be used on the KVM-host or by remote spice clients. A direct graphical access via a spice client is required only seldomly (besides ssh connections) – but in some cases or situations it is useful, if not mandatory.

Recently, I upgraded both the central KVM-Server, its guests and also guests on workstations from Opensuse Leap 42.3 to Leap 15.0. Unfortunately, after the upgrade no graphical access was possible any longer to my guest-systems via spice-clients (as virt-viewer or the graphical spice-console of virt-manager).

After some tests I found out that this was due to missing KMS on the guest systems – present qxl-modules, however, do require KMS. But, if you update/install from an ISO image “KMS” may not be compatible with the graphical SuSE installer. And due to previous configurations “nomodeset” may be a kernel parameter used in the installation before the upgrade. Here is the story …

The problem: Unreadable, freezing interfaces on spice-clients

Normally, I upgrade by a 5-step sequence: 1) Update all packets, 2) reduce repositories to the Update- and OSS-repository, 3) switch to the repositories of the new distribution, 4) “zypper dup –download-only”, 5) “zypper –no-refresh dup” (see e.g. how-to-upgrade-from-opensuse-leap-422-to-423/).

The KVM server-host itself gave me no major problem during its upgrade. Also the KVM-guests – with their server-services – seemed to work well. Most often, I access the KVM-guest-systems via ssh to perform regular administration tasks. So, I did not even notice for a while that something was wrong with the qxl/spice-configuration. But when I used “virt-manager” in an “ssh -X” session from my workstation to the KVM-server and tried to open the graphical console for a guest there, I got an unreadable virtual screen, which froze instantly and did no longer react to any input – special commands sent via “virt-manager” to switch to a non-graphical console terminal were ignored. The same happened with “virt-viewer” and/or when I executed virt-manager directly on the graphical screen of the KVM-server.

Independent test with a new installation of a “Leap 15”-guest-system

To find out more I tested a new installation of Leap 15 on my Leap 15 workstation as a KVM-server. I chose a guest system configuration with standard equipment – among other things qxl/spice-components. The installation was started via the “virt-installer” component of virt-manager. I used an ISO-image of the Leap 15 installation image.

First thing I stumbled across was that I had to use a “No KMS” for the text console setting on the first screen of the Opensuse installer (see the options for the graphical setup there; F3-key). Otherwise the installer froze during the first “udev” checks. I knew this effect already from installations on some physical systems. Note that the choice of “No KMS” leads to an kernel parameter entry “nomodeset” in the command line for the kernel call in the Grub2 configuration (see the file /etc/default/grub).

Such a full new installation lead into a void. SuSE’s graphical installer itself worked perfectly with high resolution. However, after a restart of the freshly installed guest-system the switch to the graphical screen lead to a flickering virtual screen and the graphical display of the SDDM login manager never appeared.

Still and luckily, it was possible to login as root and execute a “init 3” command – which brought me to a working, non-flickering ASCII console interface (TTY1).

I had experienced this
type of behavior before, too, on some real physical systems. I recommend Leap users to be prepared: activate ssh-services during installation and open the firewall for ssh-ports! The SuSE-installer allows for such settings on its summary screen for the installation configuration. This gives you a chance to switch to a working text console (init 3) from a remote SSH-command line – if the graphical console does not allow for any input.

Tests 2: Upgrade to latest KVM / QEMU / libvirt – versions of the “Virtualization” repository

An installation of the cutting edge versions of KVM/QEMU and spice sever and client software did not change anything – neither on my dedicated KVM-server-system and its upgraded guests nor on my workstation with the fresh Leap 15 test-guest.

Repair of the older upgraded guest-systems

The emulated “hardware” of my older (upgraded) guest-systems, which stem from an OS 13.2 era, is a bit different from the equipment of the newest test guest. On these older systems I still had the choice to use a cirrus, vga or vmwvga graphics. Interestingly, these drivers do not provide the performance of qxl – but they worked at least with the virtual spice client displays.

One central question was whether the QXL driver – more precisely the corresponding kernel module “qxl” – was loaded at all. Answer for the guests on the central KVM-server: No, it was not.

So, on the first guest I simply tried “modprobe qxl” – and hey – the module loaded. An “init 5” then gave me the aspired graphical screen.

Later I checked that actually no “nomodeset” parameter was set in these guests. So, something went “wrong” with the system’s startup-configuration during the upgrade procedure. I have no real clue why – as the qxl-module was loaded without problems on the previous Leap 42.3 installations.

For Opensuse Leap the wrapper-script “mkinitrd” transfers a running configuration with its loaded kernel modules via “dracut” into a suitable and permanent initramfs/initrd- and systemd-startup configuration. So, issue “mkinitrd” after a successful test of a qxl/spice-interface.

Repair of the freshly installed Leap 15 guest-system

On the freshly installed Leap 15 guest client on my workstation things were slightly different: The qxl-module did not load there. A “modinfo qxl” shows you parameters you can apply. The right thing to do there was to try

modprobe qxl modeset=1

This worked! Then I eliminated the “nomodeset”-parameter from the “GRUB_CMDLINE_LINUX_DEFAULT”-entry in the file “/etc/default/grub” and started “mkinitrd” to get a stable permanent startup-configuration (via dracut) which booted the guest into graphical mode afterwards.

Adjustment of the TTYs and KDE

As soon as you have a reasonable configuration, you may want to adjust the screen dimensions of the text consoles tty1 to tty6, the sddm-login-screen and the KDE or Gnome screen. These are topics for separate articles. See, however, previous articles in this blog on KVM guests for some hints.

For the text console TTYs try reasonable settings for the following entries in the “/etc/default/grub” – below e.g. for a resolution of “1680×1050”:

GRUB_CMDLINE_LINUX_DEFAULT=” …. OTHER PARAMETERS …… video=1680×1050″
GRUB_GFXMODE=”1680×1050″
GRUB_GFXPAYLOAD=keep

(see https://www.suse.com/de-de/support/kb/doc/?id=7017979)

Do not forget to execute “mkinitrd” again afterwards!

For KDE adjustments a user can use the command “systemsettings5” and then specify screen resolutions in the dialog for “display and monitors”.

Conclusion

The graphical installer of Opensuse, but also upgrade-procedures on working virtual KVM/QEMU guests with qxl/spice can lead to situations where KMS is or
must be deactivated both for physical and virtual systems. As a consequence the “qxl-module” may not be loadable automatically afterwards. This can lead to failures during the start of a graphical qxl/spice-interface for local and remote spice-clients.

The remedy is to remove any “nomodeset”-parameter which may be a part of the entry for “GRUB_CMDLINE_LINUX_DEFAULT” in the file “/etc/default/grub”.

For tests of the qxl-driver try loading the qxl-module with “modprobe qxl modeset=1”. After a successful start of a graphical interface use the command “mkinitrd” (whilst the qxl-module is loaded!) to establish a permanent configuration which loads “qxl” during system start.

KVM: fsck direkt auf dem KVM-Host zu Gast-Filesystemen in LUKS-verschlüsselten LVM-Volumes – Unterschiede zwischen Raw Devices und qcow2-Image-Files

Ich betreibe bestimmte Linux-Systeme als KVM-Gäste mit verschlüsseltem Plattenunterbau. Die Partitionen des KVM-Hosts selbst sind zwar auch verschlüsselt; in diesem Artikel betrachte ich aber verschlüsselte virtuelle Disks für KVM-Gastsysteme. Ich nutze hierfür auf dem KVM-Host definierte LVM-Volumes, die mit dm-crypt/LUKS verschlüsselt wurden.

Dabei setze ich regelmäßig zwei Varianten ein:

  • Variante 1: Ein oder mehrere verschlüsselte LVM-Volumes werden dem Gastsystem (in entschlüsseltem Zustand) als “Raw-Devices” zur Verfügung gestellt. Das Gastsystem erstellt dort seine Partitionen (oder im Einzelfall auch eigene LVM-Volumes) mit je einem Linux-Filesystem.
  • Variante 2: Verschlüsselte LVM-Volumes des Hosts enthalten qcow2-Container-Dateien, die vom KVM-Gast als virtuelle Disks genutzt werden. Im qcow2-Container legt der Gast dann eigene LVM-Volumes mit einem Linux-Filesystem an.

Für regelmäßige fsck-Checks der Filesysteme im KVM-Gast kann man einerseits dadurch sorgen, dass man entsprechende Einstellungen für das Gast-Filesystem selbst vornimmt. So kann man mit “tune2fs” den sog. “maximum mount count” auf eine hinreichend kleine Anzahl von Mounts stellen. Das empfiehlt sich vor allem beim root-Filesystem des Gastes: Das darf ja bei der Durchführung von fsck nicht gemountet sein – dies erfordert ansonsten Kunstgriffe, wenn man im bootenden KVM-Gast vor dem Mounten des root-Filesystems fsck erzwingen will.

Manchmal möchte man im Rahmen automatisierter Maintenance-Verfahren aber auch direkt vom KVM-Host aus Filesystem-Checks mit fsck für die Filesystem der KVM-Gäste durchführen. Natürlich ohne das Gastsystem hochzufahren. Wie macht man das im Fall der genannten zwei Varianten?

fsck in Variante 1 – LVM-Volume als verschlüsseltes Raw-Device des Gastes

Variante 1 weist folgende Schichtung bzgl. der physikalischen und virtuellen Disks auf:

  • Physikalische Plattenpartitionen für Raid   >>  
  • Raid 10   >>  
  • LVM   >>  
  • LVM-Groups und LVM-Volumes, die der Host nutzen kann   >>  
  • dm-crypt/LUKS-Verschlüsselung eines (oder mehrerer) von LVM-Volumes, die den Gästen as Raw-Devices bereitgestellt werden.   >>  
  • KVM/QEMU- und Gastsystem mit Zugriff auf das Raw-Volume als virtuelle Platte   >>  
  • Partitionen (oder LVM-Volumes) im Gastsystem   >>  
  • ext4-Filesysteme im Gastsystem

Hier führt der Weg über die Anwendung von “cryptsetup” und z.B. das Tool “kpartx” (das man natürlich installiert haben muss). Wir führen alle Operation natürlich nur dann durch, wenn das KVM-Gastsystem selbst nicht läuft. Wir müssen vermeiden, dass auf die Partitionen des Gastes von mehreren Betriebssystemen aus (Host und Gast) gleichzeitig schreibend zugegriffen wird.

Ich gehe in unserem Beispiel mal davon aus, dass die Entschlüsselung des betreffenden LVM-Volumes für den Gast auf dem KVM-Host noch nicht vorgenommen wurde. Dieses Volume liege in einer logischen Volume Group “lvg2” und habe die Bezeichnung “lvhd0”.

Das Kommando “la” ist in folgendem Beispiel ein Alias für ‘ls -la’; alle Kommandos werden direkt auf dem Host ausgeführt. Das jeweilige KVM-Gastsystem ist nicht hochgefahren. Unter dem Verzeichnis “/dev/mapper” finden wir dann bei aktivierten Volume-Groups auf dem KVM-Host etwa
folgenden Eintrag vor;

mytux:~ # la /dev/mapper
total 0
drwxr-xr-x  2 root root     340 Aug  4 09:46 .
drwxr-xr-x 22 root root    9720 Aug  4 09:50 ..
crw-------  1 root root 10, 236 Aug  4 09:41 control
... 
lrwxrwxrwx  1 root root       8 Aug  4 09:46 lvg2-lvhd0 -> ../dm-11
...                                                                    

Zunächst müssen wir dieses Volume entschlüsseln:

mytux:~ # cryptsetup open /dev/mapper/lvg2-lvhd0  cr_hd0
Enter passphrase for /dev/mapper/lvg2-lvhd0: 

mytux:~ # la /dev/mapper
total 0
drwxr-xr-x  2 root root     340 Aug  4 09:46 .
drwxr-xr-x 22 root root    9720 Aug  4 09:50 ..
crw-------  1 root root 10, 236 Aug  4 09:41 control
lrwxrwxrwx  1 root root       8 Aug  4 09:46 cr_hd0 -> ../dm-16
...
lrwxrwxrwx  1 root root       8 Aug  4 09:46 lvg2-lvhd0 -> ../dm-11
...                                                                    

Ok. Der Befehl “qemu-img” informiert uns darüber, dass wir es tatsächlich mit einem Raw-Device (von 100GB Größe) zu tun haben:

 
mytux:~ # qemu-img info /dev/mapper/cr_hd0
image: /dev/mapper/cr_hd0
file format: raw
virtual size: 100G (107372085248 bytes)
disk size: 0

Infos zur Partitionierung des “Raw Devices”
In unserem Beispiel befinden sich auf dem entschlüsselten LVM-Volume des Hosts zwei Partitionen des Gastes: eine swap-Partition und eine Partition mit einem ext4-Filesystem. Es gibt mehrere Tools, mit denen man die Partitionsstruktur unterhalb eines Raw-Devices für einen KVM-Gast auf dem Host selbst untersuchen kann:
“fdisk”, “parted”, “virt-filesystems” und eben auch “kpartx”:

 
mytux:~ # fdisk -l /dev/mapper/cr_hd0
Disk /dev/mapper/cr_imap: 100 GiB, 107372085248 bytes, 209711104 sectors
Units: sectors of 1 * 512 = 512 bytes
Sector size (logical/physical): 512 bytes / 512 bytes
I/O size (minimum/optimal): 512 bytes / 512 bytes
Disklabel type: dos
Disk identifier: 0x00041fe1

Device                    Boot   Start       End   Sectors  Size Id Type
/dev/mapper/cr_hd0-part1         2048   3067903   3065856  1.5G 82 Linux swap / Solaris
/dev/mapper/cr_hd0-part2 *    3067904 167772159 164704256 78.6G 83 Linux

mytux:~ # parted /dev/mapper/cr_hd0 unit s print
Model: Linux device-mapper (crypt) (dm)
Disk /dev/mapper/cr_hd0: 209711104s
Sector size (logical/physical): 512B/512B
Partition Table: msdos
Disk Flags: 

Number  Start     End         Size        Type     File system     Flags
 1      2048s     3067903s    3065856s    primary  linux-swap(v1)  type=82
 2      3067904s  167772159s  164704256s  primary  ext4            boot, type=83
 
mytux:~ # virt-filesystems -a /dev/mapper/cr_hd0 --extra
/dev/sda1
/dev/sda2
mytux:~ # virt-filesystems -a /dev/mapper/cr_hd0 --extra -l
Name       Type        VFS   Label  Size         Parent
/dev/sda1  filesystem  swap  -      1569718272   -
/dev/sda2  filesystem  ext4  -      84328579072  -
 
mytux:~ # kpartx -l /dev/mapper/cr_hd0 
cr_hd01 : 0 3065856 /dev/mapper/cr_hd0 2048
cr_hd02 : 0 164704256 /dev/mapper/cr_hd0 3067904

Hinweis:

kpartx liefert Infos zur Partionierung (samt Offests) auch für Disk-Image-Files im “Raw”-Format. kpartx funktioniert jedoch nicht für Disk-Image-Files im qcow2-Format!

Mit Ausnahme von “virt-filesystems” stellen uns alle oben vorgestellten Tools auch Offset-Informationen zur Verfügung:
Die Angaben 2048(s) und 3067904(s) entsprechen Offset-Adressen der Partitionen; wir müssen die Zahl der Sektoren allerdings noch mit der Anzahl der Bytes (512) multiplizieren: also z.B. 2048 * 512 ist der Offset für die erste (swap-) Partition.

Man könnte zur Partitionsbestimmmung auch “guestfish” und die zu guestfish gehörigen Sub-Kommandos run und list-filesystems oder aber auch das Tool “qemu-nbd” heranziehen. “qemu-nbd” diskutiere ich gleich im Detail anhand der Variante 2.

Partitionen des Raw-LVM-Volumes (= Raw-Device für das KVM-Gastsytem )ansprechen
“kpartx -a” liefert uns für Devices im Raw-Format eine einfache Möglichkeit, die darin liegenden Partitionen anzusprechen.

mytux:~ # kpartx -a /dev/mapper/cr_hd0
mytux:~ # la /dev/mapper
total 0
drwxr-xr-x  2 root root     420 Aug  6 14:36 .
drwxr-xr-x 22 root root    9740 Aug  6 14:36 ..
crw-------  1 root root 10, 236 Aug  6 08:26 control
lrwxrwxrwx  1 root root       8 Aug  6 14:32 cr_hd0 -> ../dm-16
lrwxrwxrwx  1 root root       8 Aug  6 14:36 cr_hd01 -> ../dm-17
lrwxrwxrwx  1 root root       8 Aug  6 14:36 cr_hd02 -> ../dm-18
lrwxrwxrwx  1 root root       8 Aug  6 14:36 cr_hd0_part1 -> ../dm-17
lrwxrwxrwx  1 root root       8 Aug  6 14:36 cr_hd0_part2 -> ../dm-18
....
lrwxrwxrwx  1 root root       7 Aug  6 08:55 lvg2-lvhd0 -> ../dm-11
...
mytux:~ # 

Man beachte die unterschiedliche Bezeichnung, die auf das gleiche Device verlinken. Wir wissen bereits, dass die zweite Partition ein ext4-Filesystem des KVM-Gastes enthält. Also

mytux:~ # fsck -f /dev/mapper/cr_hd02
fsck from util-linux 2.29.2
e2fsck 1.42.11 (09-Jul-2014)
Pass 1: Checking inodes, blocks, and sizes
Pass 2: Checking directory structure
Pass 3: Checking directory connectivity
Pass 4: Checking reference counts
Pass 5: Checking group summary information
/dev/mapper/cr_hd02: 1016912/5152768 files (0.1% non-contiguous), 6724050/20588032 blocks
mytux:~ # 

Anschließend können wir das Mapping durch “kpartx -d” wieder rückgängig machen:

mytux:~ # kpartx -d /dev/mapper/cr_hd0
mytux:~ # la /dev/mapper
total 0
drwxr-xr-x  2 root root     340 Aug  6 14:45 .
drwxr-xr-x 22 root root    9700 Aug  6 14:45 ..
crw-------  1 root root 10, 236 Aug  6 08:26 control
lrwxrwxrwx  1 root root       8 Aug  6 14:32 cr_hd0 -> ../dm-16
...
lrwxrwxrwx  1 root root       7 Aug  6 08:55 lvg2-lvhd0 -> ../dm-11 
mytux:~ # 

Was tun, wenn das Gastsystem auch selbst LVM nutzt?
In unserem Fall lag im Gastsystem selbst keine LVM-Struktur vor. Hätten wir das gehabt, hätten wir noch zwei weitere Schritte vornehmen müssen – nämlich “vgscan”, “vgchange -ay”. Erst danach hätten wir “fsck” ausführen können. Wir werden dies weiter unten bei der Diskussion der Variante 2 sehen.

Arbeit über Loop-Devices
Der Vollständigkeit halber zeige ich kurz noch, wie man Partitionen von KVM-RAW-Devices über ihre Offsets auch als Loop-Devices ansprechen kann. Die zweite Partition hat in unserem Beispiel einen Offset von 3067904 * 512 = 1570766848 Bytes.

Also:

mytux:~ # losetup -r -o 1570766848  /dev/loop3 /dev/mapper/cr_hd0
mytux:~ # fsck -f /dev/loop3
fsck from util-linux 2.29.2
e2fsck 1.42.11 (09-Jul-2014)
fsck.ext4: Operation not permitted while trying to open /dev/loop3
You must have r/w access to the filesystem or be root
mytux:~ # losetup -d  /dev/loop3 
mytux:~ # losetup  -o 1570766848  /dev/loop3 /dev/mapper/cr_hd0  
mytux:~ # fsck -f /dev/loop3     
fsck from util-linux 2.29.2
e2fsck 1.42.11 (09-Jul-2014)
Pass 1: Checking inodes, blocks, and sizes
Pass 2: Checking directory structure
Pass 3: Checking directory connectivity
Pass 4: Checking 
reference counts
Pass 5: Checking group summary information
/dev/loop3: 1016912/5152768 files (0.1% non-contiguous), 6724050/20588032 blocks
mytux:~ # 
mytux:~ # tune2fs -l /dev/loop3
tune2fs 1.42.11 (09-Jul-2014)
Filesystem volume name:   <none>
Last mounted on:          /
Filesystem UUID:          4388dd4b-ac1a-5c9c-b8d6-88e53b12bd2d
Filesystem magic number:  0xEF53
Filesystem revision #:    1 (dynamic)
Filesystem features:      has_journal ext_attr resize_inode dir_index filetype extent flex_bg sparse_super large_file huge_file uninit_bg dir_nlink extra_isize
Filesystem flags:         signed_directory_hash 
Default mount options:    user_xattr acl
Filesystem state:         clean
Errors behavior:          Continue
Filesystem OS type:       Linux
Inode count:              5152768
Block count:              20588032
Reserved block count:     267644
Free blocks:              13863982
Free inodes:              4135856
First block:              0
Block size:               4096
Fragment size:            4096
Reserved GDT blocks:      1019
Blocks per group:         32768
Fragments per group:      32768
Inodes per group:         8192
Inode blocks per group:   512
Flex block group size:    16
Filesystem created:       Mon Jan  6 15:44:37 2014
Last mount time:          Mon Aug  6 08:56:27 2018
Last write time:          Mon Aug  6 15:01:58 2018
Mount count:              0
Maximum mount count:      2
Last checked:             Mon Aug  6 15:01:58 2018
Check interval:           172800 (2 days)
Next check after:         Wed Aug  8 15:01:58 2018
Lifetime writes:          2270 GB
Reserved blocks uid:      0 (user root)
Reserved blocks gid:      0 (group root)
First inode:              11
Inode size:               256
Required extra isize:     28
Desired extra isize:      28
Journal inode:            8
Default directory hash:   half_md4
Directory Hash Seed:      ce2daf83-bc25-44d5-fcdf-b35afd5c8f2b
Journal backup:           inode blocks
mytux:~ # 
mytux:~ # losetup -d  /dev/loop3

Der Leser sieht, dass ich in der letzten Befehlssequenz anfänglich aus lauter guter Gewohnheit das Device nur im read-only modus als Loop-Device angelegt hatte. Erst nach einer Korrektur läuft dann fsck. Natürlich kann man dann z.B. auch tune2fs auf das Loop-Device anwenden. Über Loop-Devices geht es also auch. Man muss dann halt nur die Offsets wissen!

fsck in Variante 2 – verschlüsseltes LVM-Volume mit Disk-Image-File im “qcow2”-Format

In diesem Szenario liegt eine wirklich komplexe Schichtung vor:

KVM-Host -> LVM-Volume-Group -> Luks-verschlüsseltes LVM-Volume -> qcow2-Image-File -> Partitions- und LVM-Struktur des KVM-Gastsystems -> Volumegroup mit LVM-Volume des Gastes -> ext4-Filesystem

In diesem Szenario wirken sich vor allem zwei bedeutsame Unterschiede zur Variante 1 aus:

  • Unser Disk-Image-File (eine Art Container-File; “os43.qcow2”) hat kein Raw-Format – daran scheitert u.a. “kpartx -a”.
  • In dem Container-File befindet sich eine Partition, mittels derer das Gastsystem eine LVM-Logical-Volume-Group “lvg1” samt einem Logical Volume “lvroot” angelegt hat.

Zum ersten Problem:
Es ist hier zu bedenken, dass wir das zu prüfende Filesystem ja nicht auf dem Host mounten wollen. Das einzige mir bekannte Programm, das uns den Inhalt (also die Partitionen) des qcow2-Files samt Offsets bedarfsgerecht zur Verfügung stellt, ist <strong>qemu-nbd</strong>. Bedarfsgerecht heißt hier, dass Physical Volumes (Partitione) des Gastes anschließend auf dem KVM-Host in Form von Loop-Devices weiter genutzt werden können. Das ermöglicht es uns dann, die LVM Volume-Group und die LVM-Volumes innerhalb des qcow2-Files anzusprechen und “fsck -f” auszuführen.

Hinweis:

Es gibt zwar eine Möglichkeit eine Standardvariante von fsck innerhalb des Kommandos “guestfish” aus der libguestfs-Suite anzuwenden (s.u.); “fsck -f” geht damit aber nicht.

Zum zweiten Problem:
Neben der Aufdröselung der Partitionsstruktur (samt Offsets) im qcow2-File mit seinem komplexen Format, müssen geeignete Tools auf dem Host auch noch die interne LVM-Struktur erkennen und zu aktivieren. Wir werden hierfür das Gespann “vgscan und “vgchange” einsetzen.

Entschlüsselung und Mounten des LVM-Volumes des Hosts
Alle nachfolgenden Kommandos werden wieder direkt auf dem KVM-Host ausgeführt. Zunächst müssen wir wie in Variante 1 das passende LVM-Volume des KVM-Hosts entschlüsseln. Wir müssen das dekryptierte Device anschließend aber auch noch an geeigneter Stelle des Hosts mounten, um das dort enthaltene Disk-Image-File ansprechen zu können:

mxtux:~ # cryptsetup open /dev/mapper/volssd10-kvmos  cr_kvmos
Enter passphrase for /dev/mapper/volssd10-kvmos:
mxtux:~ # 
mxtux:~ # la /dev/mapper
total 0
drwxr-xr-x  2 root root     420 Aug  6 11:52 .
drwxr-xr-x 27 root root   12300 Aug  6 11:52 ..
crw-------  1 root root 10, 236 Aug  6 08:49 control
lrwxrwxrwx  1 root root       8 Aug  6 11:48 cr_kvmos -> ../dm-16
...
lrwxrwxrwx  1 root root       7 Aug  6 11:48 volssd10-kvmos -> ../dm-6
...  
mxtux:~ # 
mount /dev/mapper/cr_kvmos /kvm/os                                                                  
mxtux:~ # 

Informationen zum Partitionsaufbau innerhalb des qcow2-Image-Files:
Während kpartx keine ausreichenden Informationen liefert, ermöglicht uns das Kommando “virt-filesystems” aus der libguestfs-Suite (bei Bedarf installieren!) einen Einblick in die Unterteilung des qcow2-Image-Files “os43.qcow2”:

mytux:~ # virt-filesystems  -a  /kvm/os/os43.qcow2 --extra -l 
Name              Type        VFS   Label  Size        Parent
/dev/sda1         filesystem  swap  -      2153775104  -
/dev/lvg1/lvroot  filesystem  ext4  -      8589934592  -

Netterweise erkennt “virt-filesystems” sogar die LVM-Volume-Group “lvg1” und das Volume “lvroot” ! Wir könnten dieses logische Volume des Gastes nun sogar mittels des Kommandos “guestmount” (ebenfalls Teil der libguestfs) auf dem Host mounten und mit den Inhalten arbeiten:

mytux:~ # guestmount -a /kvm/os/os43.qcow2 -m /dev/lvg1/lvroot --ro /mnt2
mytux:~ # la /mnt2
total 136
drwxr-xr-x  23 root root   4096 Jun  7 18:27 .
drwxr-xr-x  40 root root   4096 Jul 25 18:55 ..
drwxr-xr-x   2 root root   4096 May 14 19:20 bin
drwxr-xr-x   3 root root   4096 May 14 19:22 boot
drwxr-xr-x   2 root root   4096 May 14 17:09 dev
drwxr-xr-x 128 root root  12288 Aug  4 11:41 etc
drwxr-xr-x   3 rmu  users  4096 May 28 17:43 extras
drwxr-xr-x   4 root root   4096 May 15 20:29 home
drwxr-xr-x  12 root root   4096 May 14 19:20 lib
drwxr-xr-x   7 root root  12288 May 14 19:21 lib64
drwx------   2 root root  16384 May 14 17:09 lost+found
drwxr-xr-x   2 root root   4096 May 10  2017 mnt
drwxr-xr-x   2 root root   4096 May 10  2017 opt
drwxr-xr-x   2 root root   4096 May 14 17:09 proc
drwx------   9 root root   4096 Jun 12 21:52 root
drwxr-xr-x   2 root root   4096 May 14 17:09 run
drwxr-xr-x   2 root root  12288 May 14 21:12 sbin
drwxr-xr-x   2 root root   4096 May 10  2017 selinux
drwxr-xr-x   5 root root   4096 May 14 17:12 srv
drwxr-xr-x   2 root root   4096 May 14 17:09 sys
drwxrwxrwt  26 root root  12288 Aug  4 11:41 tmp
drwxr-xr-x  13 root root   4096 May 14 17:10 usr
drwxr-xr-x  12 root root   4096 May 14 17:24 var
mytux:~ # umount /mnt2

Leider bringt uns das hinsichtlich des angestrebten “fsck” aber gar nichts.

Einsatz von “qemu-nbd”
Im Gegensatz zu RAW-Devices oder Raw-Image-Files kommen wir an dieser Stelle nicht um den Einsatz von des qemu-eigenen Kommandos “qemu-nbd” herum. Also:

mxtux:~ # modprobe nbd max_part=8
mxtux:~ # qemu-nbd --connect=/dev/nbd0 /kvm/os/os43.qcow2 
mxtux:~ # la /dev/ | grep nbd0
brw-rw----   1 root disk       43,   0 Aug  6 16:22 nbd0
brw-rw----   1 root disk       43,   1 Aug  6 16:22 nbd0p1
brw-rw----   1 root disk       43,   2 Aug  6 16:22 nbd0p2

Was verbirgt sich hinter diesen neuen Devices dahinter?

mxtux:~ # fdisk -l /dev/nbd0
Disk /dev/nbd0: 15 GiB, 16106127360 bytes, 31457280 sectors
Units: sectors of 1 * 512 = 512 bytes
Sector size (logical/physical): 512 bytes / 512 bytes
I/O size (minimum/optimal): 512 bytes / 512 bytes
Disklabel type: dos
Disk identifier: 0x000392a8

Device      Boot   Start      End  Sectors Size Id Type
/dev/nbd0p1         2048  4208639  4206592   2G 82 Linux swap / Solaris
/dev/nbd0p2 *    4208640 31457279 27248640  13G 8e Linux LVM

Aha, fdisk erkennt, dass die zweite Partition LVM nutzt. Wie kommen wir nun weiter? “kpartx” führt uns nicht zum Ziel, da LVM Volume Groups erst aktiviert werden müssen. Hierzu sind zwei Schritte nötig

  • Schritt 1: Wir müssen uns das LVM-Device des qcow2-Files auf dem Host zugänglich machen – als Loop-Device. Dazu berechnen wir dessen Offset ( = 4208640 * 512 = 2154823680)
  • Schritt 2: Wir müssen wir auf dem KVM-Host das Kommando “vgscan” ausführen und danach die gewünschten Volume Group mit “vgchange” aktivieren

Also:

mxtux:~ # vgscan
  Reading all physical volumes.  This may take a while...
  Found volume group "volssd10" using metadata type lvm2
  Found volume group "lvgssd5" using metadata type lvm2
  Found volume group "lvg2" using metadata type lvm2
  Found volume group "lvg10f2" using metadata type lvm2
  Found volume group "volgrp1" using metadata type lvm2

mxtux:~ # losetup -o 2154823680 /dev/loop5 /dev/nbd0

mxtux:~ # vgscan
  Reading all physical volumes.  This may take a while...
  Found volume group "lvg1" using metadata type lvm2
  Found volume group "volssd10" using metadata type lvm2
  Found volume group "lvgssd5" using metadata type lvm2
  Found volume group "lvg2" using metadata type lvm2
  Found volume group "lvg10f2" using metadata type lvm2
  Found volume group "volgrp1" using metadata type lvm2
mxtux:~ # 

Aha, vgscan erkennt eine neue Volume-Group “lvg1”. Wir sehen hier übrigens, dass es sich lohnt, die Bezeichnungen von Groups auf dem Host und den Gastsystemen unterschiedlich und global eindeutig zu wählen – etwas, das ich hier zu meiner Schande versäumt habe. Nun müssen wir die Volume Group noch aktivieren:

mxtux:~ # vgchange -ay lvg1
  1 logical volume(s) in volume group "lvg1" now active
mxtux:~ #
mxtux:~ # la /dev/mapper
total 0
drwxr-xr-x  2 root root     460 Aug  6 16:44 .
drwxr-xr-x 28 root root   12880 Aug  6 16:44 ..
crw-------  1 root root 10, 236 Aug  6 08:49 control
lrwxrwxrwx  1 root root       8 Aug  6 11:48 cr_kvmos -> ../dm-16
...
lrwxrwxrwx  1 root root       8 Aug  6 16:44 lvg1-lvroot -> ../dm-19
...
lrwxrwxrwx  1 root root       8 Aug  6 16:33 nbd0p2p1 -> ../dm-18
...

mxtux:~ # fdisk -l /dev/mapper/lvg1-lvroot
Disk /dev/mapper/lvg1-lvroot: 8 GiB, 8589934592 bytes, 16777216 sectors
Units: sectors of 1 * 512 = 512 bytes
Sector size (logical/physical): 512 bytes / 512 bytes
I/O size (minimum/optimal): 512 bytes / 512 bytes

mxtux:~ # 
virt-filesystems -a /dev/nbd0 --extra --parts --blkdevs --filesystems -l --lvs
Name             Type       VFS  Label MBR Size        Parent
/dev/sda1        filesystem swap -     -   2153775104  -
/dev/lvg1/lvroot filesystem ext4 -     -   8589934592  -
/dev/lvg1/lvroot lv         -    -     -   8589934592  /dev/lvg1
/dev/sda1        partition  -    -     82  2153775104  /dev/sda
/dev/sda2        partition  -    -     8e  13951303680 /dev/sda
/dev/sda         device     -    -     -   16106127360 -

Nun können wir den Filesystem-Check des LVM-Volume des KVM-Gasts, das sich m qcow2-File befindet, auf dem KVM-Host ausführen. Und danach alle Kommandos wieder rückgängig machen:

mxtux:~ # fsck -f /dev/mapper/lvg1-lvroot
fsck from util-linux 2.29.2
e2fsck 1.42.11 (09-Jul-2014)
Pass 1: Checking inodes, blocks, and sizes
Pass 2: Checking directory structure
Pass 3: Checking directory connectivity
Pass 4: Checking reference counts
Pass 5: Checking group summary information
/dev/mapper/lvg1-lvroot: 245825/524288 files (0.1% non-contiguous), 1707336/2097152 blocks
mxtux:~ # 
mxtux:~ #  vgchange -an lvg1
  0 logical volume(s) in volume group "lvg1" now active
rux:~ # la /dev/mapper
total 0
drwxr-xr-x  2 root root     440 Aug  6 17:09 .
drwxr-xr-x 27 root root   12840 Aug  6 17:09 ..
crw-------  1 root root 10, 236 Aug  6 08:49 control
lrwxrwxrwx  1 root root       8 Aug  6 11:48 cr_kvmos -> ../dm-16
...
lrwxrwxrwx  1 root root       8 Aug  6 16:33 nbd0p2p1 -> ../dm-18
..
mxtux:~ # losetup -d /dev/loop5 
mxtux:~ # qemu-nbd -d /dev/nbd0 
/dev/nbd0 disconnected
mxtux:~ # rmmod nbd
mxtux:~ # 

Ich bitte zu beachten, dass wir in diesem Fall trotz der bereits sehr komplexen Schichtung immer noch einen Vorteil hatten: Es gab nur genau ein virtuelles LVM-Physical-Volume des Gast-Systems, nämlich die zweite Partition innerhalb des qcow2-Files. Ferner gabe es nur eine Volume-Group. Bei mehreren “Volume Groups”, die sich über unetrschiedliche “Physical Volumes” aus verschiedenen virtuellen Partitionen des Gastes erstreckten, hätten wir alle zugehörigen virtuellen Partitionen auf dem Host als Loop-Devices bereitstellen müssen. Das ist uns im Beipiel erspart geblieben.

fsck in einer dritten Variante – verschlüsseltes LVM-Volume mit einem RAW Image File

Nach all dem Zirkus mit qcow2 stellt sich die Frage: Warum verwendet man nicht gleich Image-Files im Raw-Format? Das ist ein gute Frage; ich werde die Antwort aber auf einen anderen Artikel verschieben. Genannt sei nur der Vorteil des langsam auf die Maximalgröße wachsenden Platzbedarfs im Falle qcow2. Für Disk-Image-Files im Raw-Format spricht aber die Performance. Dennoch ein lapidarer Hinweise zum Einsatz von “fsck” für Partitionen in Raw-Container-Files:

Dieser Fall kann im Kern fast genauso behandelt werden kann, wie oben unter Variante 1 beschrieben. Wer so etwas testen will, kann ja mal ein qcow2-File in ein Raw-Format-File mittels des Kommandos “qemu-img convert” umwandeln (s. die entsprechende man -Seite).

Fazit und eine Alternative

“fsck” mit zugehörigen Optionen für Filesysteme anzuwenden, die sich in verschlüsselten LVM-Volumes eines KVM-Hosts befinden, ist relativ einfach, wenn das LVM-Volume dem KVM-Gast entweder direkt als Raw-Device zur Verfügung gestellt wird oder aber über ein Disk-Image-File im RAW-Format, das sich auf dem Volume befindet. Befinden sich dann unter dem Raw-Device nur gewöhnliche Partitionen kann man sich das Leben mit “kpartx” bequem machen.

Deutlich schwieriger wird die Sache aber mit qcow2-Imag-Files und/oder virtuellen Partitionen von Image-Files, die auf dem Gastsystem in dortigen LVM-Volume-Groups eingesetzt werden. Im Falle von qcow2-Files muss man zunächst zwingend das Kernel-Modul “nbd” und den “qemu-nbd”-Befehl einsetzen.
LVM-Groups innerhalb vom Image-Disk-Files verlangen ferner die Bereitstellung aller entsprechenden zugehörigen virtuellen “Physical Volumes” (virtuelle Partitionen) als Loop-Devices auf dem KVM-Host. Danach sind die Befehle “vgscan” und “vgchange” anzuwenden, um schließlich unter “/dev/mapper” das logische Volume des Gastes mit seinem Filesystem zu erhalten. Erst dann kann man hierauf “fsck” anwenden. Das ist schon komplex, aber man hat am Ende die volle Kontrolle über fsck.

Wem das alles zu schwierig ist, der kann alternativ mal eine einfache Standardvariante des fsck-Befehls unter “guestfish” für Filesysteme von KVM-Gästen ausprobieren. Funktioniert für Raw-Devices und qcow2-Files!