In these times of Corona, home-office and of increased Internet usage some of us Linux guys may experience an old phenomenon: screen and video tearing. In my case it happened with an Nvidia card and with X11 (Wayland does not yet work on my Opensuse Leap 15.1 – I am too lazy to investigate why). I have ignored the tearing already for some months – but now it really annoyed me. I saw tearing already some years ago; at that point in time activating triple buffering helped. But not these days …
Where did I see the tearing?
I observed tearing effects
- when moving “wobbling windows” (one of KDE’s desktop effects) across the screen – strangely enough when moving them slowly,
- when watching TV and video streams in browsers (independent of FF, Opera or Chromium) – mostly when major parts of the video changed quickly.
Not much, not always – but enough to find it annoying. So, I invested some time – and got rid of it.
Driver and contents of the xorg.conf file
Driver: Latest Nvidia driver from Opensuse’s NVidia Repository: nvidia-glG05, x11-video-nvidiaG05.
I have three screens attached to my NVidia card (GTX 960); two of them are of the same type, but one has a lower resolution than the others. The screens are configured to work together as a super wide screen via the Xinerama setting in the xorg configuration file. Below, you find the contents of the file “/etc/X11/xorg.conf” with details about the screen configuration and modes.
xorg.conf
# nvidia-settings: X configuration file generated by nvidia-settings
# nvidia-settings:  version 450.80.02


Section "ServerLayout"
    Identifier     "Layout0"
    Screen      0  "Screen0" 0 0
    InputDevice    "Keyboard0" "CoreKeyboard"
    InputDevice    "Mouse0" "CorePointer"
    Option         "Xinerama" "0"
EndSection

Section "Files"
EndSection

Section "InputDevice"

    # generated from data in "/etc/sysconfig/mouse"
    Identifier     "Mouse0"
    Driver         "mouse"
    Option         "Protocol" "IMPS/2"
    Option         "Device" "/dev/input/mice"
    Option         "Emulate3Buttons" "yes"
    Option         "ZAxisMapping" "4 5"
EndSection

Section "InputDevice"

    # generated from default
    Identifier     "Keyboard0"
    Driver         "kbd"
EndSection

Section "Monitor"

    # HorizSync source: edid, VertRefresh source: edid
    Identifier     "Monitor0"
    VendorName     "Unknown"
    ModelName      "DELL U2515H"
    HorizSync       30.0 - 113.0
    VertRefresh     56.0 - 86.0
    Option         "DPMS"
EndSection

Section "Device"
    Identifier     "Device0"
    Driver         "nvidia"
    VendorName     "NVIDIA Corporation"
    BoardName      "GeForce GTX 960"
EndSection

Section "Screen"

    Identifier     "Screen0"
    Device         "Device0"
    Monitor        "Monitor0"
    DefaultDepth    24
    Option         "Stereo" "0"
    Option         "nvidiaXineramaInfoOrder" "DFP-2"
    Option         "ForceFullCompositionPipeline"  "on"
#    Option         "ForceCompositionPipeline"  "on"
    Option         "metamodes" "DP-4: nvidia-auto-select +0+0, DP-0: nvidia-auto-select +2560+0, DVI-I-1: nvidia-auto-select +5120+0; DP-4: nvidia-auto-select +2560+0, DP-0: nvidia-auto-select +0+0, DVI-I-1: nvidia-auto-select +5120+0; DP-4: nvidia-auto-select +2560+0, DP-0: nvidia-auto-select +0+0, DVI-I-1: 1920x1080 +5120+0; DP-4: nvidia-auto-select +2560+0, DP-0: nvidia-auto-select +0+0, DVI-I-1: 1680x1050 +5120+0; DP-4: nvidia-auto-select
+2560+0, DP-0: nvidia-auto-select +0+0, DVI-I-1: 1600x1200 +5120+0; DP-4: nvidia-auto-select +2560+0, DP-0: nvidia-auto-select +0+0, DVI-I-1: 1440x900 +5120+0; DP-4: nvidia-auto-select +2560+0, DP-0: nvidia-auto-select +0+0, DVI-I-1: 1280x1024 +5120+0; DP-4: nvidia-auto-select +2560+0, DP-0: nvidia-auto-select +0+0, DVI-I-1: 1280x960 +5120+0"
    Option         "SLI" "Off"
    Option         "TripleBuffer" "True"
    Option         "MultiGPU" "Off"
    Option         "BaseMosaic" "off"
    SubSection     "Display"
        Depth       24
    EndSubSection
EndSection
The most important statement regarding the suppression of tearing is
Option "ForceFullCompositionPipeline" "on"
Alternatively,
Option "ForceCompositionPipeline" "on"
seems to work equally well. Use the latter, if your graphics should react a bit sluggish.
We find more information about these options in the “nvidia-settings” application:
When you move your mouse over the option for “ForceCompositionPipeline” and “ForceFullCompositionPipeline”, you get
The Nvidia driver can use a composition pipeline to apply Xscreen transformations and rotations. “ForceCompositionPipeline” can be used to force the use of this pipeline, even when no transformations or rotations are applied to the screen. This option is implicitly set by ForceFullCompositionPipeline.
and, respectively,
“This option implicitly enables “ForceCompositionPipeline” and additionally makes use of the composition pipeline to apply ViewPortOut scaling.”
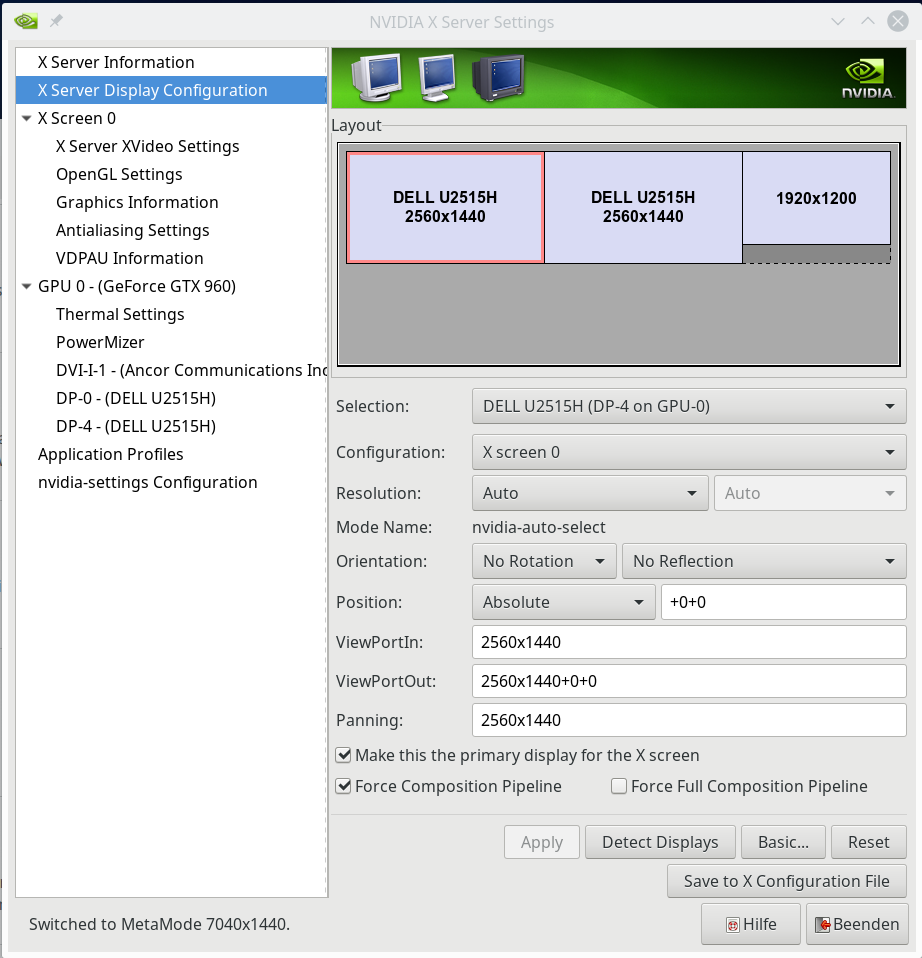
Important: If you want to test the setting via nidia-settings, you have to activate the options it for all three screens!.
When I first tested “ForceCompositionPipeline” I just set it on the page of “nvidia-settings” for the first screen of my three, wrongly assuming that this setting was applied in general. However, tearing did not disappear. I realized after some time that it still happened on 2 screens predominantly. I even suspected a different quality of the display-port cables to my screens to be the cause of tearing. Wrong … the ForceCompositionPipeline had been applied to one screen, only.
So, switch to the other screens by using the first combo-box on the “nvidia-settings”-page and set “ForceCompositionPipeline” for all screens. Do this before you eventually save the settings to a “xorg.conf”-file (as root). Your resulting xorg.conf file may look a bit different; the CompositionPipeline-settings might be included as a side-option of the meta-mode settings – and not in form of a special separate line as shown above.
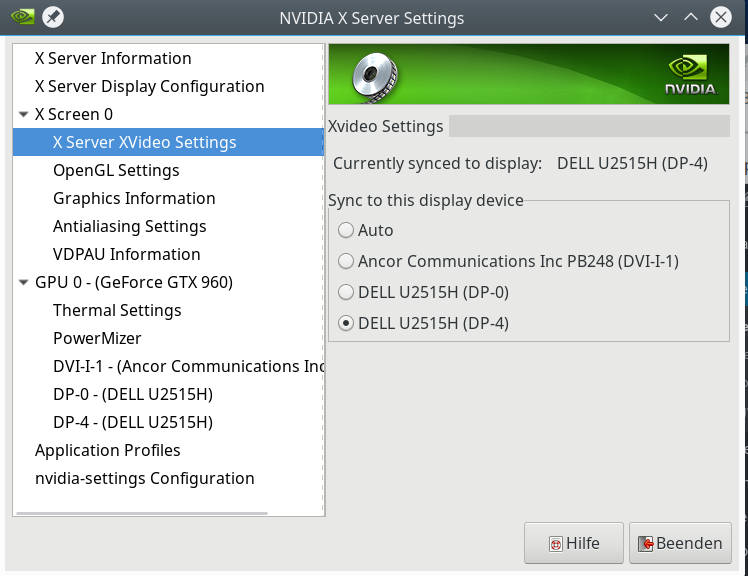
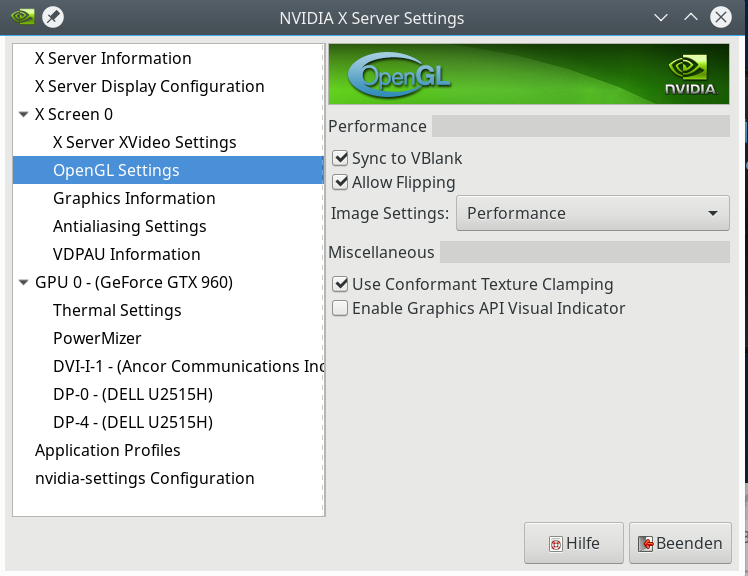
Regarding Xvideo- and OpenGL-settings you should activate syncing;
KDE Plasma settings
KDE Plasma settings for the screens should be consistent with the “nvidia-settings”. You use KDE’s “system-settings” >> “Display and Monitor” >> “Displays” and “Compositor”.
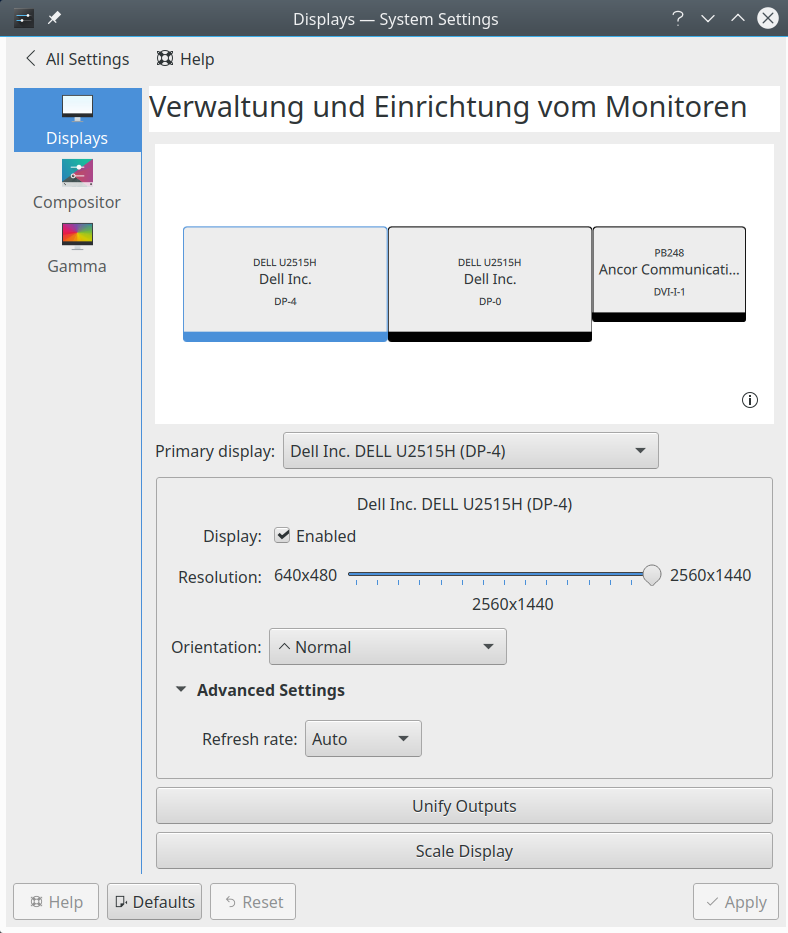
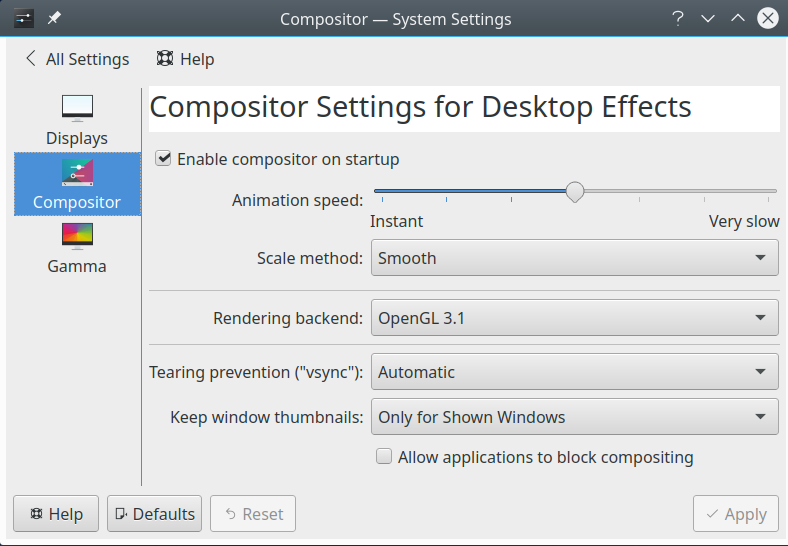
The combination of all the settings discussed above worked in my case – the tearing disappeared for videos in browsers, in video applications as well as on the Xinerama KDE Plasma screen in general.
Conclusion
It is easy to suppress video and screen tearing on an Opensuse Leap system with KDE PLasma and a Nvidia graphics card. The most important point is to activate “ForceCompositionPipeline” on all individual screens via “nvidia-settings” or to activate this option globally for the Xinerama screen of a multi-monitor configuration.