Ich habe einen Dell Precision M90 als PC-Ersatz (80GB SATA HD, 2GB RAM, 2.16 GHz Intel Dualcore). Bestückt war dieser Laptop bislang mit einer Dual-Boot-Konfiguration aus Opensuse 10.3 und Windows XP SP 3 (von Dell). Unter Windows XP läuft zudem VMware – um unter einem Opensuse 10.3-Gastsystem einen Apache2- und einen Samba-Server bereit zu stellen. Zudem habe ich eine externe USB-Disk, auf der ein separates Opensuse 11.1 und eine Xen-Installation für Experimente bootfähig zur Verfügung steht.
Da ich den Laptop im letzten Jahr nur sporadisch benutzt habe, konnte ich mit der bisherigen Installation gut leben. Windows ist halt träge (s.u.), aber wegen ein paar Präsentationen von PHP-Programmen denkt man nicht wirklich über eine bessere und umfassendere Neu-Installation nach. Jetzt – nach einer längeren Abwesenheit von meinen normalen Linux-PCs – reichte mir das nicht mehr.
Wunschkonfiguration
Ich wollte und will den Laptop nun primär unter Opensuse 11.2 und mit KDE 4.4 betreiben. Das auf einer physikalischen Partition installierte Win XP soll künftig in einer virtuellen VMware-Maschine unter Linux zum Einsatz kommen – mit der Wahlmöglichkeit, es später bei Bedarf auch direkt booten zu können.
Das angestrebte System lässt sich auf der Dell Precision Plattform mit ein wenig Experimentierfreude auch tatsächlich implementieren. Wie man ein in einer Dual Boot-Konfiguration vorhandenes Win XP in einer virtuellen Maschine unter Linux zum Laufen bringt, werde ich in einem nachfolgenden Artikel (Teil II) beschreiben.
In diesem ersten Artikel möchte ich dagegen einen kurzen Überblick darüber geben, was für Erfahrungen ich mit dem Dell-Precision-System bislang und in den letzten Tagen speziell unter Opensuse 11.2 gemacht habe.
Performance des Dell M90 unter Win XP (32 Bit):
Die Performance unter Win XP ist vom Gefühl her wirklich unzureichend. Hauptgrund ist die sehr schlechte Performance der Harddisk und/oder des SATA-Controllers in Kombination mit Win XP. Installiert sind die empfohlenen Intel-Chipset-Treiber, die den Treiber für den SATA-Controller beinhalten. Die Platte ist eine Seagate ST980825AS.
Dennoch gilt:
Allzu oft wartet man – oder besser das Win XP-System – auf den Abschluss von Harddisk-Operationen. Und damit meine ich, dass man das Gefühl hat, dass das ganze System steht oder träge wird, wenn größere Schreib- oder Leseoperationen auf der Harddisk durchgeführt werden. Die Platte ist eigentlich im Internet gut bewertet. Und Tests unter Linux zeigen, dass beim Kopieren von Platte zu Platte mehr als 15 MB/s möglich sind. Dennoch hinkt das Win-XP System immer wieder den Plattenoperationen hinterher. Das fängt beim Systemstart an, zieht sich über die Phase des initialen Virenscans hinweg und setzt sich im Normal-Betrieb bei allen plattenintensiven Operationen fort.
Als Linux-Anwender weiß ich vermutlich einfach nicht mehr, welch ineffektiver Systemnutzung man sich unter MS Windows ausgesetzt sieht und was man als einfacher Benutzer als “normal” akzeptieren muss. Wenn man das Arbeiten an einem ordentlichen Linux-PC mit ähnlicher Ausstattung gewohnt ist, macht sich auf dem Dell-Precision-System unter Win XP jedenfalls dauerhafter Frust breit.
Echtes Multitasking mit plattenintensiven Programmen im Hintergrund kann man da nicht betreiben, selbst wenn man feststellt, dass die CPU überhaupt nicht ausgelastet ist.
Ich weiß leider nicht, wem man wirklich die Schuld geben soll oder muss – F-Secure als Virenscanner unter Win XP, der schlechten Performance und dem schlechten Harddisk-Handling unter Win XP, dem Intel SATA-Driver oder dem Dell-System als Ganzem – das Plattensystem ist
jedenfalls unter Win XP ein echter und aus meiner Sicht inakzeptabler Engpass. Ehrlich gesagt habe ich auch wenig Lust dem Phänomen im Detail nachzugehen, wenn ich auf dem Sony-Laptop einer Bekannten unter Vista ein ähnlich träges Verhalten erlebe. Dasselbe gilt für ein XP-System auf einem Fujitsu-Siemens Laptop. Zu Windows 7 oder 64-Bit Varianten der Windows-Systeme kann ich mich nicht äußern.
Trotz der schlechten Platten-Performance ist es mit viel Geduld beim Hochfahren aller Komponenten möglich, unter dem Win XP System eine VMware Workstation mit einem Opensuse 10.3 als Gastsystem zu betreiben. Unter dem virtuellen Gastsystem laufen dann bei mir – wie gesagt – ein Samba-Fileserver und ein Apache2-Webserver. Ich benutze diese Kombination für die Präsentation von PHP-Serverprogrammen bei Kunden. Zum Einsatz kommt dabei auch Adobes Web Premium Suite mit Dreamweaver CSx. Das sind alles Ressourcenfresser. Aber Gott sei Dank benötigt das Opensuse Gast-System nur relativ wenig Hauptspeicher – 512 MB sind genug, auch wenn KDE 3.5 gestartet wird. Wenn das dann alles (Win XP, VMware, Adobe SW) mal hochgefahren ist, kann man ganz gut arbeiten – zumindest im Rahmen einer Präsentation. Man muss halt die 5 – 10 Minuten des Systemstarts und der Windows Upgrade-Orgien für ein freundliches Kundengespräch nutzen.
Was unter Win XP dagegen sehr gut funktioniert, ist die Lüftersteuerung. Der Lüfter geht nämlich kaum an. Zu bedenken ist hier aber, dass das System unter meinem Win XP nur mit 32 Bit läuft und die Grafikkarte wohl vollständig in einem 2D-Modus operiert und praktisch nie in einen 3D-Modus schaltet. Die thermische Belastung ist hier also von Haus aus gering. Die zwei Lüfter, im Besonderen der auf der CPU-Seite des Laptops, laufen deshalb nur in einem Minimalmodus, der geräuschmäßig nicht auffällt. Der CPU-Lüfter schaltet dagegen öfter einen Gang höher, wenn man anfängt, die virtuelle Maschine auszureizen. Bei ein wenig Web-Entwicklung und PHP-Testen passiert das aber praktisch nie. Und wenn, so läuft der Lüfter nicht auf Maximalstufe und das Geräusch ist gut auszuhalten. Also das muss ich sagen: Unter Win XP wird man praktisch keiner Geräuschentwicklung durch Lüfter ausgesetzt. Sehr gut !
Sehr gut funktioniert unter Win XP auch das Einstellen der Energiesparmöglichkeiten. Der Schirm erweist sich allerdings als Energiefresser.
Der Akku reicht von Haus aus ma. 2.5 – 3 Stunden – aber nur, wenn man die Helligkeit des Schirms um mindestens zwei Stufen reduziert. Bei einem Desktop-Ersatz-System ist das tolerierbar. Dell verkauft das System ja explizit nicht als Energiesparer – dafür ist es einfach nicht gedacht. Es ist eher ein mobiler Desktop. Das Gewicht ist für ein echtes Mobile-Gerät auch viel zu hoch. Wenn man allerdings eine kleine Workstation bei einem längeren Aufenthalt an einem stationären Ort braucht, ist der Laptop ein gute Wahl. Wenn man denn ein vernünftiges Betriebssystem installiert ……
Installation von Opensuse 11.2 (64 Bit) mit KDE 4.4
Die Installation von Opensuse 11.2 64 Bit ist auf dem Dell M90-Laptop völlig problemlos möglich – egal ob über das Internet oder von einer DVD. Das gilt auch unabhängig vom Ziel-Datenträger: Eine Installation auf einer externen USB-Disk lässt sich genauso durchführen ist wie eine Installation auf der eingebauten Harddisk.
Ich verwende i.d.R. tatsächlich zwei solcher Installationen. Gründe:
So kann man das Opensuse- System auf der USB-Disk auch auf anderen Systemen benutzen, die USB-bootfähig sind. Ferner kann man eines der beiden Systeme für Experimente benutzen, ohne das produktive System auf der jeweils anderen Disk zu gefährden. Ist die USB-Disk schneller als die eingebaute Disk von Dell, so lassen sich für die angestrebte Kombination mit Win XP evtl. auch Performance-Gewinne verzeichnen, wenn man das produktive Linux-System dort installiert. Auch auf normalen PCs bewährt es sich ja, das virtuelle System auf
einer anderen Harddisk als derjenigen für das Hauptsystem zu betreiben.
Mit ein wenig Bios- und Grub-Kosmetik kann man die USB-Installation so einrichten, dass ein Grub-Startmenü auf der USB-Disk selbst hinterlegt wird und dann sowohl einen Eintrag zum Booten des Betriebssystems auf der USB-Disk als auch weitere Einträge für Systeme auf internen Harddisk anbietet. Dieses Grub-Menü der USB-Disk erscheint nur dann, wenn beim Starten des Laptops die USB-Disk bereits angeschlossen ist. Im Laptop-BIOS muss die entsprechende USB-Disk als primäre Disk eingetragen sein. Hierzu schreibe ich mal einen separaten Artikel.
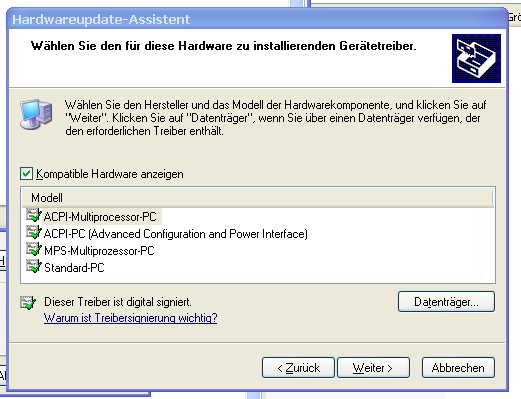
Was lässt sich sonst noch zur Installation sagen? Als Filesystem habe ich Ext4 installiert. Als Desktop wähle ich primär KDE, nachdem ich mich dort seit KDE 4.2 immer wohler fühle. Gnome installiere ich mir im Nachhinein zusätzlich, um da ein wenig auf dem Laufenden zu bleiben. Die automatische Hardware-Konfiguration, die der SuSE-Installer vorschlägt, lasse ich nicht zu. Ich möchte die Vorschläge des Installers lieber sehen und bestätigen. Dabei lernt man meist immer auch noch was über die betroffene Hardware.
Nachdem der SUSE-Installer seinen Teil erledigt hat, führe ich in der Regel (und nicht nur auf dem Laptop) noch folgende Schritte durch :
a) Internet-Anbindung
Zuerst sorge ich für eine Internet-Anbindung. An meinem jetzigen Aufenthaltsort kopple ich mich per WLAN an einen WLAN-Access-Punkt an. Für die eingebaute WLAN-Karte von Intel (eine Pro/Wireless 3945ABG) gilt, dass Sie sich mit Hilfe des KDE “KNetworkManagers” anstandslos einrichten lässt. Ich hatte und habe damit normalerweise überhaupt keine Probleme, zumindest dann nicht, wenn der zugehörige WLAN-Access-Point sauber konfiguriert ist. Bei WEP-Verbindungen (ja, sowas gibt es noch!) muss man sich ein wenig in die jeweils geforderte Konfiguration vertiefen – man beachte, ob ein Access Key im Hex-Format oder ein “gemeinsames Passwort” gefordert ist. Das Menü des KNetworkManager bietet alle Möglichkeiten – z.T. über Drop-Down-Menüs. WPA/WPA2-Verbindungen stellen gar kein Problem dar.
Die Konfiguration von Ethernet-Schnittstellen ist genauso einfach möglich. Hier greife ich gewohnheitsmäßig nicht zum KNetworkManager sondern zu YAST und der dortigen Verwaltung von if-down, if-up etc.. KNetworkmanager wird dabei leider deaktiviert – hier hilft aber ein anschließender Blick in die SUSE sysconfig-Dateien – z.B. per Yast und dem “/sysconfig”-Editor. Dort setzt man dann den USERCONTROL-Parameters unter “Hardware-Network-wlan0” wieder auf “yes”. Natürlich kann man auch die entsprechende Datei unter /etc/sysconfig editieren. Oder eben gleich den KNetworkmanager auch für die Konfiguration der Ethernet-Karten benutzen.
b) Updates
Steht die Internet-Anbindung, so versorge ich die YAST-SW-Installationsprogramme erst einmal mit den von mir bevorzugten Repositories. Für KDE 4.4 nutze ich das Factory-Repository. Hinzu kommen das Openoffice-Repository, das Mozilla-Repository, das M17N-Repository. Des weiteren nutze ich das Packman-Repository über einen der zugehörigen Mirror-Server und noch ein paar weitere Repositories aus dem Entwicklungsbereich. Ich führe dann alle notwendigen Updates durch – im Besonderen Kernel-Updates. Macht man das gleich, spart man sich später überflüssige Neukompilationen der Nvidia-Treiber-Module und der VMware-Module.
Sind die Repositories in die YAST-RPM-Verwaltung eingebunden, installiere ich KDE 4.4 – zuerst das Base-System und nach einem erneuten KDE-Start dann den Rest. Aus dem Packman-Repository hole ich mir die libxine-Bibliotheken, kaffeine, k3b und alles, was das Herz sonst noch im Xine-Umfeld begehrt. Hinzu kommen die neueste Openoffice-Version, C/C++-Compiler, der Kernel Source-Code, etc, etc….. Für KDE 4.4 ist es übrigens noch hilfreich, “Virtuoso” und “Akonadi” möglichst vollständig zu installieren. Virtuoso wird als Backend für Nepomuk, Strigi und Co. benutzt. Akonadi liefert in der Zukunft das neue
Backend für Adressbuch-, Mail- und andere Groupware-Dienste.
c) Nvidia-Treiber
Ist das System so auf einen aktuellen, brauchbaren Stand gebracht und u.a. in der Lage, Kernel-Module zu kompilieren, installiere ich den Nvidia-Treiber für die Quadro FX-Karte des Laptops. Hierzu benutze ich i.d.R. nie das Nvidia-Repository, sondern lade mir den neuesten Treiber – hier den 190.53-Treiber – von nvidia.de herunter. Die Installation inkl. Modul-Kompilation im Runlevel 3 (init 3) über die Shell geht – wie erwartet – problemfrei über die Bühne. Adaptive Clocking für die Grafikkarte ist automatisch aktiviert. Das kann man später unter KDE über das Nvidia-Settings-Panel im Powermizer-Bereich prüfen. Will man übrigens später ein Down(!)-Clocking der Taktrate der Videokarte ausprobieren, so muss man die “Coolbit”-Option in “/etc/X11/xorg.conf” setzen
Section “Screen”
Identifier “Screen0”
Device “Device0”
Monitor “Monitor0”
DefaultDepth 24
Option “Coolbits” “1”
# Option “RegistryDwords” “PowerMizerEnable=0x1; PerfLevelSrc=0x2222; PowerMizerLevel=0x3; PowerMizerDefault=0x3; PowerMizerDefaultAC=0x3;”
SubSection “Display”
Depth 24
EndSubSection
EndSection
Von einem Overclocking läßt man auf einem Laptop die Finger – schon wegen der Garantiebestimmungen. Ein Herunterfahren der Taktraten ist aber wegen Energieeinsparungen durchaus ein Thema. Siehe auch :
http://linux.aldeby.org/nvidia-powermizer-powersaving.html
http://linux.aldeby.org/enable-nvidia-coolbits-frequency-tuner.html
d) Hinweise zum Anpassen des Desktops
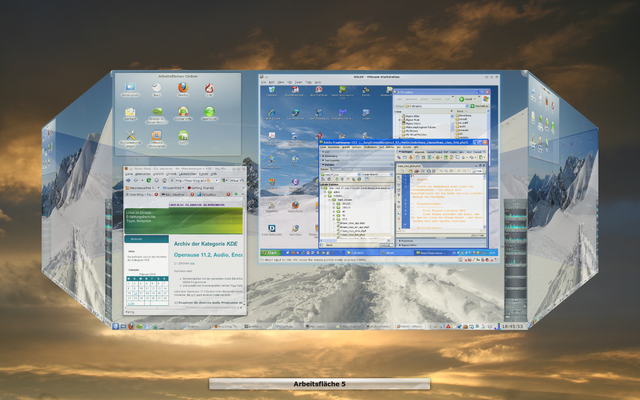
Nach einem init 5 und einem Login in den KDE-Desktop prüfe ich mit Hilfe der KDE-“Systemeinstellungen” ein paar OpenGL-, 3D- und Transparenz-Effekte aus. Alles läuft einwandfrei. Auch “compiz” läuft nach einer entsprechenden Installation wie es soll. Nun steht der Einrichtung eines “eye-candy”-3D-Desktops also nichts mehr im Wege. [MS Windows Anwendern aus dem Bekanntenkreis fallen hier dann doch immer wieder die Augen aus dem Kopf, welche hübschen Effekte unter Linux heute zum Standard gehören. Das ist es mir wert. Hier geht es natürlich nicht um sinnvolle Dinge für ernsthafte Arbeit – nur um etwas Werbung :-). ].
Ach ja – die Schriften. Hier installiere ich mir mit Hilfe der KDE-“Systemeinstellungen” zunächst die TTF-Schriften aus dem vorhandenen MS Windows-System. Das ist einfach der schnellste Weg. Danach stelle ich die Systemschriften auf “Verdana” und “Efont fixed” um, aktiviere die Schriftenglättung (mit dem Parameter “leicht” für das Subpixel-Hinting), schließe den Font-Bereich bis 10 Pt von der Glättung aus und voila – der Desktop zeigt nun superscharfe und glatte Schriften an. Will man das auch für Firefox und andere GTK-Anwendungen erreichen, genügt es leider nicht, die GTK-Parametrierungs-Möglichkeiten der “Systemeinstellungen” zu benutzen. Es müssen ferner einige GTK- und QT-Bibliotheken nachinstalliert werden. S. hierzu einen früheren Blog-Beitrag.
Bzgl. der Desktop-Suchmaschine Nepomuk sollte man folgenden Eintrag in der Datei “~/.kde4/share/config/nepomukserverrc” prüfen:
[main Settings]
Maximum memory=50
Storage Dir[$e]=$HOME/.kde4/share/apps/nepomuk/repository/main/
Used Soprano Backend=virtuosobackend
Jedes andere Backend (wie redland, aber auch soprano) ist entweder zu langsam oder funktioniert nach eigener Erfahrung unter KDE 4.4 nicht richtig. Hier sollte man sich die Log-Dateien für den Start des Akonadi-Servers mal ansehen. Bei Problemen hilft es ggf. die Akonadi- und Nepomuk-Konfigurationsdateien zu löschen und beide Komponenten neu zu starten.
e) Hinweise zum Audio-System
In den Laptop ist eine Standard-82801G-Soundkarte des Intel ICH7-Chipsatzes eingebaut. Die läuft mit OSS und Alsa. Der Suse-Installer wählt automatisch Alsa. Als Phonon-Backend unter KDE stelle ich “Xine”
statt Gstreamer ein. Damit habe ich wesentlich bessere Erfahrungen. Ansonsten muss man in den KDE-Systemeinstellungen für das Sound-Subsystem nichts verändern. KMix zeigt koreekt getrennte Regler für die Hauptlautsprecher und den LFE-Lautsprecher des Laptops an. Hinzu kommt ein Regler für den PCM-Kanal. Amarok 2.2.2 läuft hiermit bestens – und der vor kurzem hinzugekommene Equalizer hilft wirklich, dem Laptop einen brauchbaren Klang zu entlocken. In keinem Fall schlechter als unter dem Windows Media-Player. Für einen besseren Musikgenuss sind natürlich Kopfhörer zu empfehlen. (Ich verwende hier auf Reisen übrigens zusammenklappbare geschlossene AKG-Kopfhörer und bin damit sehr zufrieden).
f) K3b
K3B installiere ich mir übrigens aus dem Packman Repository – zusammen mit den dort vorhandenen Codecs. Brennen mit dem im Laptop vorhandenen DVD-Brenner ist für alle DVD- und CD-Typen problemlos möglich. Ich erinnere mich aber, einmal ein Firmware-Update durchgeführt zu haben, um für eine der DVD-Typen eien höhere Brenngeschwindigkeit zu erreichen.
g) KMail, Akonadi und das Adressbuch
Eine Anmerkung noch zu der (aus meiner Sicht verfehlten) Vorgehensweise bzgl. Kontact und Akonadi: Es ist wichtig zu begreifen, dass das “Default Adressbook”, das unter dem aktuellen “KDE 4.4 Kontact” eingerichtet wird, keine (!) Verbindung zu Kmail aufweist. Kmail nutzt wie alle anderen PIM-Programme außer der “Adressbuch”-Applikation bislang noch keine (!) Akonadi-Ressourcen.
In einer einfachen Erstinstallation muss man sich eine zusätzliche Kontact-Ressoure – nämlich ein Standard-KDE-Adressbuch einrichten (rechter Mausklick im Kontact-Adressbuch-Bereich auf die Adressbuchübersicht). Für ein lokales Adressbuch sollte die zugehörige Datei auf
/home/user_xyz/.kde4/share/apps/kabc/std.vcf
verweisen, wenn das vcf-Format gewählt wurde. Als Name habe ich “Adressbuch” verwendet. Andere Konfigurationsmöglichkeiten (z.B. mit Open-Xchange) führen hier zu weit.
Dieses Adressbuch wird schließlich unter Kmail erkannt und kann wie gewohnt benutzt werden.
[Wie es sich einem normalen User erschließen soll, dass das eingerichtete Default-Adressbuch nicht unter Kmail nutzbar ist, bleibt ein Rätsel, das die KDE-Entwicklungsleitung schnellstens lösen sollte. Zumal auch das Kmail Adressbuch “Default Addressbook” heißt.]
h) HW-Sensoren
Für Leute, die ein paar Temperaturwerte sehen wollen, empfiehlt sich ein Durchgang durch sensors-detect (die Sensors-Pakte muss man sich halt vorher installieren). Danach stehen einem Sensoren für beide CPU-Cores zur Verfügung (sagt jedenfalls die KDE-Systemüberwachung ksysguard).
Performance unter Opensuse 11.2 (64 Bit) mit KDE 4.4
Das Gesamtsystem erlebt schon beim Start unter Opensuse Linux eine enorme Beschleunigung. Nach 23 Sekunden ist der graphische Login möglich. Nach weiteren 9 – 10 Sekunden kann man arbeiten. Von solchen Zeiten kann man unter einem halbwegs mit Software ausgestatteten Win XP System nur träumen.
Im normalen Tagesbetrieb (Openoffice, Firefox, etc.) fallen Plattenzugriffe als Behinderungen des Systemablaufs nicht auf. Hier ist der Gegensatz zu MS Win XP enorm. UDMA6 ist unter Linux aktiviert.
/dev/sda:
Model=ST980825AS, FwRev=8.04, SerialNo=3MH0QGR1
Config={ HardSect NotMFM HdSw>15uSec Fixed DTR>10Mbs RotSpdTol>.5% }
RawCHS=16383/16/63, TrkSize=0, SectSize=0, ECCbytes=4
BuffType=unknown, BuffSize=8192kB, MaxMultSect=16, MultSect=8
CurCHS=16383/16/63, CurSects=16514064, LBA=yes, LBAsects=156301488
IORDY=on/off, tPIO={min:240,w/IORDY:120}, tDMA={min:120,rec:120}
PIO modes: pio0 pio1 pio2 pio3 pio4
DMA modes: mdma0 mdma1 mdma2
UDMA modes: udma0 udma1 udma2 udma3 udma4 udma5 *udma6
AdvancedPM=yes: unknown setting WriteCache=enabled
Drive conforms to: Unspecified: ATA/ATAPI-1,2,3,4,5,6,7
*
signifies the current active mode
Das System reagiert unter KDE 4.4 insgesamt recht spritzig – die Performance-Unterschiede zu meinen wesentlich besser ausgestatteten, normalen Workstations-PCs kann ich gut verschmerzen. Die typische CPU-Belastung bei folgenden geöffneten und aktiven Programmen
* Writer, Impress (Openoffice 3.2)
* Firefox beim Blog-Editieren,
* spielender Amarok (ogg-vorbis-Datei von angeschlossener USB-Disk) mit aktivem Equalizer ,
* Kontact (Kmail offen, Korganizer im Hintergrund),
* laufender KDE-Systemmonitor mit mehreren aktiven Datenblättern,
* laufendem gkrellm
* laufendes Miniprogramm für die Systemauslastung
* einigen Plasma-Miniprogrammen (RSS, Wetterbericht)
* Plattenplatzüberwachung
schwankt zwischen 3%-26% auf beiden Prozessorcores – beide allerdings bei nur 1000 MHz-Taktung. Geschätzte Mittelwerte: 17% auf einem Core, 10% auf dem anderen. Bei grafikintensiven Desktop-Aktionen (3D-Animationen des Desktops, intensive Zeichenoperationen und Objektbewegungen unter Impress) treten mal zusätzliche Peaks bis 50 % auf.
Enger wird die Sache, wenn die virtuelle Maschine mit Win XP von einer physikalischen Partition gestartet wird. Während des Startvorgangs stehen CPU und Platte natürlich unter Druck. Man kann dabei aber trotzdem bequem unter Linux weiterarbeiten – und das ist ein fundamentaler Unterschied zu allem, was man unter MS Windows erlebt.
Natürlich muss man der virtuellen Maschine schon etwas Speicher geben, damit ein minimales Chaching unter Win XP überhaupt möglich wird. Für einen Einsatz der Adobe Web Premium Suite wird 1 GB RAM empfohlen. Da ich aber selten Photoshop, Flash und Dreamweaver gleichzeitig verwende, gönne ich der virtuellen Maschine nur 800 MByte. Das ist nach bisherigen Tests ein ganz guter Kompromiss.
Einen Performance-Unterschied zwischen einer Ausstattung der virtuellen Maschine mit 2 oder 1 CPU konnte ich subjektiv nicht fühlen. Ich halte mich aber besser an die Empfehlungen von VMware, auf einem Dual-Core-System dem Gast-System nur einen Prozessor(-Kern) zu gönnen.
Die Zugriffe auf die Harddisk kommen bei laufender virtueller Maschine natürlich häufiger vor als im alleinigen Linux-Betrieb – seltsamerweise hat man aber nicht das Gefühl, dass Win XP als VMware Gast dabei wesentlich schlechter läuft als im nativen Zustand. So liegt z.B. die Startzeit bis zum Login beim “virtuellen” Win XP nur geringfügig über der entsprechenden Startzeit für den nativen Modus.
Durch die virtuelle Maschine gibt es natürlich auch eine höhere Grundbelastung der CPU, aber das ist bei einem zugeordneten Prozessor aber nicht so problematisch, wie man vielleicht meinen möchte. Betreibt man nur Dreamweaver, MS Office und eine Internet-Security-Suite auf dem Windows-System, so kann man fast genauso gut arbeiten, wie unter nativen Bedingungen. Sind die initialen Update- und Virusscanner-Orgien unter XP mal gelaufen, so führt das im Hintergrund im Leerlauf betriebene System (bei aktivem Gerätemanager zur Anzeige der Systembelastung und aktivem Dreamweaver ) lediglich zu einer höheren Grundbelastung des Systems von ca. 6-10%. Dabei waren alle oben aufgelisteten Programme unter Linux nach wie vor geöffnet. Die gesamte CPU-Belastung geht im Mittel aber auch dann kaum über 24 % (bei 1000 MHz auf dem einem und im Mittel 1333 MHz auf dem belasteten Core ) hinaus.
Auch während der Durchführung eines Acrobat und Camera Raw Updates auf dem virtuellen Win XP ging die effektive CPU-Belastung kaum über 35 % bei schwankender CPU-Taktung an. Die Wait I/Os auf dem durch die virtuelle Maschine belasteten Core stiegen jedoch deutlich an – mit Peaks bis zu 60%. Da bleiben aber immer noch genug Reserven für Linux – zumal dort das Festplatten-Caching eindeutig besser läuft. Alle Linux-Programme ließen sich während des Updates praktisch verzögerungsfrei bedienen – bis auf wenige kurze Augenblicke, in denen ein Plattenzugriff erforderlich wurde und das virtuelle System den Platten I/O bereits auf 100%
hochgetrieben hatte. Auch ein Kopierprozess von 1 GB auf der D-Disk des virtuellen Systems brachte den Linux-Host zu keinem Zeitpunkt aus dem Takt. Man konnte bestens weiterarbeiten.
Powermanagement unter Opensuse
Das Power-Management unter KDE’s “Systemeinstellungen” – “Erweitert” – “Energieverwaltung” funktioniert und die verschiedenen Optionen greifen auch. In den Standardeinstellungen sind das Prozessor- und das Systemschema auf “Performance” gestellt. Nach meiner Erfahrung läuft dann der Lüfter auf der CPU nahen Seite laufend auf einer mittleren Stufe. Leider ! Man kann hier aber defensiver vorgehen : Eine Einstellung des “Performance”-Schemas für Prozessor und System auf
* “Dynamisch (energiesparend)” für die Prozessortaktung,
* “Powersaving” für das System-Energiesparschema
hilft, die Temperatur des Systems spürbar zu senken – deutlich unter 50° Celsius im Normalbetrieb. Typische CPU-Core-Temperaturen liegen bei 46/47 Grad und 40/41 Grad. Ein Core ist seltsamerweise immer heißer. Das hat möglicherweise mit der Lüfteranordnung zu tun. Verständlicher wäre die Anzeige, wenn es sich bei der einen Temperatur um eine Prozessor-Kerntemperatur und bei dem anderen Wert um eine Oberflächentemperatur handeln würde – aber so weisen die HW-Sensoren (Ksensors) das nicht aus.
Unter Druck gehen die CPU-Temperaturen schon mal auf deutlich über 60 Grad hinaus – der dann auf höherer Drehzahl arbeitende Lüfter fängt das aber ab. Das Lüftergeräusch ist dann vernehmbar – ist aber immer noch nicht wirklich unangenehm. Im Gegensatz zu einigen anderen Dell-Laptops, die ich mal mein eigen nennen durfte.
Der Lüfter läuft dennoch deutlich öfter mit höherer Drehzahl als unter MS Windows. Ich weiß nicht wirklich, woran das liegt. Ggf. an der Grafikkarte, die unter KDE 4.4 sehr oft in den 3D-Modus schaltet und damit die Taktung der Nvidia-Quadro-Karte hochschraubt. Ich persönlich möchte halt ungern auf die Transparenz- und 3D-OpenGL-Effekte verzichten. Aber wen das stört, der kann sicher auch mit den 2D-Standard-Treibern leben.
Es hat sich auch gezeigt, dass der Lüfter – wenn er erst einmal auf eine höhere Drehzahl geschaltet hat – unter Linux nicht unbedingt zurückschaltet, selbst wenn die Temperatur des Systems abgesunken ist. Hier hilft manchmal die Tastenkombination
FN + y.
Elementare Systemkompnenten werden dadurch anscheinend resettet und der Lüfter springt nur wieder an, wenn das BIOS auch mit der abgesunkenen Temperatur nicht zufrieden ist.
Ein Übergang in den “Standby”-Zustand funktionierte bei mir mehrfach ohne Schwierigkeiten. Einmal stürzte Plasma beim Hochfahren aus dem Standby ab. Das blieb allerdings ohne Folgen – die Plasma-Oberfläche startete neu und alles war wieder OK.
Fazit
Win XP (32 Bit) auf einem Dell M90 ist eine Verschwendung von Ressourcen und macht wegen der trägen Performance keinen Spaß.
Ein 64-Bit-Linux-System passt viel, viel besser zu diesem Dell Precision Laptop. Nach meinen bisherigen Erfahrungen arbeiten zumindest Opensuse 11.2 (64 Bit) und KDE 4.4 problemlos mit diesem Laptop zusammen. Es gibt ferner keine Schwierigkeiten damit, ein bereits installiertes und nativ bootbares Win XP auch in einer virtuellen VMware-Maschine unter dem Opensuse-System zum Laufen zu bringen. Ein flüssiges Arbeiten unter Linux ist selbst bei gestarteter virtueller Maschine gewährleistet. Man kann durchaus sagen, dass Opensuse 11.2, KDE 4.4, VMware 7 ein fast ideales SW-Gespann für diesen Laptop darstellen.
Man fragt sich eigentlich, warum Dell die Nachfolger seine Precision-Systeme und im besonderen die Nachfolger des M90 nicht von Haus aus mit 64-Bit Linux-Systemen anbietet. Die Systeme sind als (mobiler) Workstation-Ersatz gedacht – und wer will denn
auf so einem Gerät mit Windows arbeiten? Außer im VMware-Fenster natürlich. Die letzten Tage haben mal wieder gezeigt, was Sache ist:
MS Windows gehört definitiv in ein “Fenster”, das unter der Kontrolle von Linux, VMware oder VirtualBox steht. Da stört es nicht und behindert den normalen Arbeitsprozess eines produktiven Anwenders nicht.
Gegenüber einem KDE 4.4-Desktop wirken Windows XP und Vista zudem altertümlich und optisch unattraktiv. (Von der zunehmenden Behandlung der Anwender als hirnlose Wesen durch die diversen Microsoft-Systeme ganz zu schweigen.) Wäre unter dem aktuellen Kontact unter KDE 4.4 eine verständliche Adressbuch-Behandlung gegeben, würde sich der KDE-Desktop langsam sogar einem wünschenswert optimalen Zustand annähern. Wer sich damit und mit Akonadi nicht rumschlagen will, kann aber auf KDE 4.3 ausweichen.
Aus Anwendersicht bleibt im Zusammenhang mit dem Dell M90 allerdings die geräuschfreiere Lüfteraktivität unter MS Windows zu vermerken. Eine defensive Energiepolitik unter Linux verbessert zwar die Situation zwar deutlich ohne einen reibungslosen Betrieb zu gefährden. Man kommt aber an die den fast geräuschlosen, minimalen Lüfterbetrieb unter MS Windows nicht heran.