I continue with my efforts of writing a small Python class by which I can setup and test a Multilayer Perceptron [MLP] as a simple example for an artificial neural network [ANN]. In the last two articles of this series
A simple program for an ANN to cover the Mnist dataset – II – initial random weight values
A simple program for an ANN to cover the Mnist dataset – I – a starting point
I defined some code elements, which controlled the layers, their node numbers and built weight matrices. We succeeded in setting random initial values for the weights. This enables us to work on the forward propagation algorithm in this article.
Methods to cover training and mini-batches
As we later on need to define methods which cover “training epochs” and the handling of “mini-batches” comprising a defined number of training records we extend our set of methods already now by
An “epoch” characterizes a full training step comprising
- propagation, cost and derivative analysis and weight correction of all data records or samples in the set of training data, i.e. a loop over all mini-batches.
Handling of a mini-batch comprises
- (vectorized) propagation of all training records of a mini-batch,
- cumulative cost analysis for all training records of a batch,
- cumulative, averaged gradient evaluation of the cost function by back-propagation of errors and summation over all records of a training batch,
- weight corrections for nodes in all layers based on averaged gradients over all records of the batch data.
Vectorized propagation means that we propagate all training records of a batch in parallel. This will be handled by Numpy matrix multiplications (see below).
We shall see in a forthcoming post that we can also cover the cumulative gradient calculation over all batch samples by matrix-multiplications where we shift the central multiplication and summation operations to appropriate rows and columns.
However, we do not care for details of training epochs and complete batch-operations at the moment. We use the two methods “_fit()” and “_handle_mini_batch()” in this article only as envelopes to trigger the epoch loop and the matrix operations for propagation of a batch, respectively.
Modified “__init__”-function
We change and extend our “__init_”-function of class MyANN a bit:
    def __init__(self,
                 my_data_set = "mnist",
                 n_hidden_layers = 1,
                 ay_nodes_layers = [0, 100, 0], # array which should have as much elements as n_hidden + 2
                 n_nodes_layer_out = 10,  # expected number of nodes in output layer

                 my_activation_function = "sigmoid",
                 my_out_function        = "sigmoid",

                 n_size_mini_batch = 50,  # number of data elements in a mini-batch

                 n_epochs      = 1,
                 n_max_batches = -1,  # number of mini-batches to use during epochs - > 0 only for testing
                                      # a negative value uses all mini-batches

                 vect_mode = 'cols',

                 figs_x1=12.0, figs_x2=8.0,
                 legend_loc='upper right',

n                 b_print_test_data = True

                 ):
        '''
        Initialization of MyANN
        Input:
            data_set: type of dataset; so far only the "mnist", "mnist_784" datsets are known
                      We use this information to prepare the input data and learn about the feature dimension.
                      This info is used in preparing the size of the input layer.
            n_hidden_layers = number of hidden layers => between input layer 0 and output layer n

            ay_nodes_layers = [0, 100, 0 ] : We set the number of nodes in input layer_0 and the output_layer to zero
                              Will be set to real number afterwards by infos from the input dataset.
                              All other numbers are used for the node numbers of the hidden layers.
            n_nodes_out_layer = expected number of nodes in the output layer (is checked);
                                this number corresponds to the number of categories NC = number of labels to be distinguished

            my_activation_function : name of the activation function to use
            my_out_function : name of the "activation" function of the last layer which produces the output values

            n_size_mini_batch : Number of elements/samples in a mini-batch of training data
                                The number of mini-batches will be calculated from this

            n_epochs : number of epochs to calculate during training
            n_max_batches : > 0: maximum of mini-batches to use during training
                            < 0: use all mini-batches

            vect_mode: Are 1-dim data arrays (vctors) ordered by columns or rows ?

            figs_x1=12.0, figs_x2=8.0 : Standard sizing of plots ,
            legend_loc='upper right': Position of legends in the plots

            b_print_test_data: Boolean variable to control the print out of some tests data

         '''

        # Array (Python list) of known input data sets
        self._input_data_sets = ["mnist", "mnist_784", "mnist_keras"]
        self._my_data_set = my_data_set

        # X, y, X_train, y_train, X_test, y_test
            # will be set by analyze_input_data
            # X: Input array (2D) - at present status of MNIST image data, only.
            # y: result (=classification data) [digits represent categories in the case of Mnist]
        self._X       = None
        self._X_train = None
        self._X_test  = None
        self._y       = None
        self._y_train = None
        self._y_test  = None

        # relevant dimensions
        # from input data information;  will be set in handle_input_data()
        self._dim_sets     = 0
        self._dim_features = 0
        self._n_labels     = 0   # number of unique labels - will be extracted from y-data

        # Img sizes
        self._dim_img      = 0 # should be sqrt(dim_features) - we assume square like images
        self._img_h        = 0
        self._img_w        = 0

        # Layers
        # ------
        # number of hidden layers
        self._n_hidden_layers = n_hidden_layers
        # Number of total layers
        self._n_total_layers = 2 + self._n_hidden_layers
        # Nodes for hidden layers
        self._ay_nodes_layers = np.array(ay_nodes_layers)
        # Number of nodes in output layer - will be checked against information from target arrays
        self._n_nodes_layer_out = n_nodes_layer_out


        # Weights
        # --------
        # empty List for all weight-matrices for all layer-connections
        # Numbering :
        # w[0] contains the weight matrix
which connects layer 0 (input layer ) to hidden layer 1
        # w[1] contains the weight matrix which connects layer 1 (input layer ) to (hidden?) layer 2
        self._ay_w = []

        # --- New -----
        # Two lists for output of propagation
        # __ay_x_in  : input data of mini-batches on the different layers; the contents is calculated by the propagation algorithm
        # __ay_a_out : output data of the activation function; the contents is calculated by the propagation algorithm
        # Note that the elements of these lists are numpy arrays
        self.__ay_X_in  = []
        self.__ay_a_out = []


        # Known Randomizer methods ( 0: np.random.randint, 1: np.random.uniform )
        # ------------------
        self.__ay_known_randomizers = [0, 1]

        # Types of activation functions and output functions
        # ------------------
        self.__ay_activation_functions = ["sigmoid"] # later also relu
        self.__ay_output_functions     = ["sigmoid"] # later also softmax

        # the following dictionaries will be used for indirect function calls
        self.__d_activation_funcs = {
            'sigmoid': self._sigmoid,
            'relu':    self._relu
            }
        self.__d_output_funcs = {
            'sigmoid': self._sigmoid,
            'softmax': self._softmax
            }

        # The following variables will later be set by _check_and set_activation_and_out_functions()
        self._my_act_func = my_activation_function
        self._my_out_func = my_out_function
        self._act_func = None
        self._out_func = None

        # number of data samples in a mini-batch
        self._n_size_mini_batch = n_size_mini_batch
        self._n_mini_batches = None  # will be determined by _get_number_of_mini_batches()

        # number of epochs
        self._n_epochs = n_epochs
        # maximum number of batches to handle (<0 => all!)
        self._n_max_batches = n_max_batches


        # print some test data
        self._b_print_test_data = b_print_test_data

        # Plot handling
        # --------------
        # Alternatives to resize plots
        # 1: just resize figure  2: resize plus create subplots() [figure + axes]
        self._plot_resize_alternative = 1
        # Plot-sizing
        self._figs_x1 = figs_x1
        self._figs_x2 = figs_x2
        self._fig = None
        self._ax  = None
        # alternative 2 does resizing and (!) subplots()
        self.initiate_and_resize_plot(self._plot_resize_alternative)


        # ***********
        # operations
        # ***********

        # check and handle input data
        self._handle_input_data()
        # set the ANN structure
        self._set_ANN_structure()

        # Prepare epoch and batch-handling - sets mini-batch index array, too
        self._prepare_epochs_and_batches()

        # perform training
        start_c = time.perf_counter()
        self._fit(b_print=True, b_measure_batch_time=False)
        end_c = time.perf_counter()
        print('\n\n ------')
        print('Total training Time_CPU: ', end_c - start_c)
        print("\nStopping program regularily")
        sys.exit()
Readers who have followed me so far will recognize that I renamed the parameter “n_mini_batch” to “n_size_mini_batch” to indicate its purpose a bit more clearly. We shall derive the number of required mini-batches form the value of this parameter.
I have added two new parameters:
- n_epochs = 1
- n_max_batches = -1
“n_epochs” will later receive the user’s setting for the number of epochs to follow during training. “n_max_Batches” allows us to limit the number of mini-batches to analyze during tests.
The kind reader will also have noticed that I encapsulated the series of operations for preparing the weight-matrices for the ANN in a new method “_set_ANN_structure()”
    '''-- Main method to set ANN structure --'''
    def _set_ANN_structure(self):
        # check consistency of the node-number list with the number of hidden layers (n_hidden)
        self._check_layer_and_node_numbers()
        # set node numbers for the input layer and the output layer
        self._set_nodes_for_input_output_layers()
        self._show_node_numbers()

        # create the weight matrix between input and first hidden layer
        self._create_WM_Input()
        # create weight matrices between the hidden layers and between tha last hidden and the output layer
        self._create_WM_Hidden()

        # check and set activation functions
        self._check_and_set_activation_and_out_functions()

        return None
The called functions have remained unchanged in comparison to the last article.
Preparing epochs and batches
We can safely assume that some steps must be performed to prepare epoch- and batch handling. We, therefore, introduced a new function “_prepare_epochs_and_batches()”. For the time being this method only calculates the number of mini-batches from the input parameter “n_size_mini_batch”.
We use the Numpy-function “array_split()” to split the full range of input data into batches.
    ''' -- Main Method to prepare epochs -- '''
    def _prepare_epochs_and_batches(self):
        # set number of mini-batches and array with indices of input data sets belonging to a batch
        self._set_mini_batches()
        return None
##
    ''' -- Method to set the number of batches based on given batch size -- '''
    def _set_mini_batches(self, variant=0):
        # number of mini-batches?
        self._n_mini_batches = math.ceil( self._y_train.shape[0] / self._n_size_mini_batch )
        print("num of mini_batches = " + str(self._n_mini_batches))

        # create list of arrays with indices of batch elements
        self._ay_mini_batches = np.array_split( range(self._y_train.shape[0]), self._n_mini_batches )
        print("\nnumber of batches : " + str(len(self._ay_mini_batches)))
        print("length of first batch : " + str(len(self._ay_mini_batches[0])))
        print("length of last batch : "  + str(len(self._ay_mini_batches[self._n_mini_batches - 1]) ))
        return None
Note that the approach may lead to smaller batch sizes than requested by the user.
array_split() cuts out a series of sub-arrays of indices of the training data. I.e., “_ay_mini_batches” becomes a 1-dim array, whose elements are 1-dim arrays, too. Each of the latter contains a collection of indices for selected samples of the training data – namely the indices for those samples which shall be used in the related mini-batch.
Preliminary elements of the method for training – “_fit()”
For the time being method “_fit()” is used for looping over the number of epochs and the number of batches:
    ''' -- Method to set the number of batches based on given batch size -- '''
    def _fit(self, b_print = False, b_measure_batch_time = False):
        # range of epochs
        ay_idx_epochs  = range(0, self._n_epochs)

        # limit the number of mini-batches
        n_max_batches = min(self._n_max_
batches, self._n_mini_batches)
        ay_idx_batches = range(0, n_max_batches)
        if (b_print):
            print("\nnumber of epochs = " + str(len(ay_idx_epochs)))
            print("max number of batches = " + str(len(ay_idx_batches)))

        # looping over epochs
        for idxe in ay_idx_epochs:
            if (b_print):
                print("\n ---------")
                print("\nStarting epoch " + str(idxe+1))

            # loop over mini-batches
            for idxb in ay_idx_batches:
                if (b_print):
                    print("\n ---------")
                    print("\n Dealing with mini-batch " + str(idxb+1))
                if b_measure_batch_time:
                    start_0 = time.perf_counter()
                # deal with a mini-batch
                self._handle_mini_batch(num_batch = idxb, b_print_y_vals = False, b_print = b_print)
                if b_measure_batch_time:
                    end_0 = time.perf_counter()
                    print('Time_CPU for batch ' + str(idxb+1), end_0 - start_0)

        return None
#
We limit the number of mini_batches. The double-loop-structure is typical. We tell function “_handle_mini_batch(num_batch = idxb,…)” which batch it should handle.
Preliminary steps for the treatment of a mini-batch
We shall build up the operations for batch handling over several articles. In this article we clarify the operations for feed forward propagation, only. Nevertheless, we have to think a step ahead: Gradient calculation will require that we keep the results of propagation layer-wise somewhere.
As the number of layers can be set by the user of the class we save the propagation results in two Python lists:
- ay_Z_in_layer = []
- ay_A_out_layer = []
The Z-values define a collection of input vectors which we normally get by a matrix multiplication from output data of the last layer and a suitable weight-matrix. The “collection” is our mini-batch. So, “ay_Z_in_layer” actually is a 2-dimensional array.
For the ANN’s input layer “L0”, however, we just fill in an excerpt of the “_X”-array-data corresponding to the present mini-batch.
Array “ay_A_out_layer[n]” contains the results of activation function applied onto the elements of “ay_Z_in_layer[n]” of Layer “Ln”. (In addition we shall add a value for a bias neutron; see below).
Our method looks like:
    ''' -- Method to deal with a batch -- '''
    def _handle_mini_batch(self, num_batch = 0, b_print_y_vals = False, b_print = False):
        '''
        For each batch we keep the input data array Z and the output data A (output of activation function!)
        for all layers in Python lists
        We can use this as input variables in function calls - mutable variables are handled by reference values !
        We receive the A and Z data from propagation functions and proceed them to cost and gradient calculation functions

        As an initial step we define the Python lists ay_Z_in_layer and ay_A_out_layer
        and fill in the first input elements for layer L0
        '''
        ay_Z_in_layer  = [] # Input vector in layer L0;  result of a matrix operation in L1,...
        ay_A_out_layer = [] # Result of activation function

        #print("num_batch = " + str(num_batch))
        #print("len of ay_mini_batches = " + str(len(self._ay_mini_batches)))
        #print("_ay_mini_batches[0] = ")
        #print(self._ay_mini_batches[num_batch])

        # Step 1: Special treatment of the ANN's input Layer L0
        # Layer L0: Fill in the input vector for the ANN's input layer L0

 ay_Z_in_layer.append( self._X_train[(self._ay_mini_batches[num_batch])] ) # numpy arrays can be indexed by an array of integers
        #print("\nPropagation : Shape of X_in = ay_Z_in_layer = " + str(ay_Z_in_layer[0].shape))
        if b_print_y_vals:
            print("\n idx, expected y_value of Layer L0-input :")
            for idx in self._ay_mini_batches[num_batch]:
                print(str(idx) + ', ' + str(self._y_train[idx]) )

        # Step 2: Layer L0: We need to transpose the data of the input layer
        ay_Z_in_0T       = ay_Z_in_layer[0].T
        ay_Z_in_layer[0] = ay_Z_in_0T

        # Step 3: Call the forward propagation method for the mini-batch data samples
        self._fw_propagation(ay_Z_in = ay_Z_in_layer, ay_A_out = ay_A_out_layer, b_print = b_print)

        if b_print:
            # index range of layers
            ilayer = range(0, self._n_total_layers)
            print("\n ---- ")
            print("\nAfter propagation through all layers: ")
            for il in ilayer:
                print("Shape of Z_in of layer L" + str(il) + " = " + str(ay_Z_in_layer[il].shape))
                print("Shape of A_out of layer L" + str(il) + " = " + str(ay_A_out_layer[il].shape))


        # Step 4: To be done: cost calculation for the batch
        # Step 5: To be done: gradient calculation via back propagation of errors
        # Step 6: Adjustment of weights

        # try to accelerate garbage handling
        if len(ay_Z_in_layer) > 0:
            del ay_Z_in_layer
        if len(ay_A_out_layer) > 0:
            del ay_A_out_layer

        return None
Why do we need to transpose the Z-matrix for layer L0?
This has to do with the required matrix multiplication of the forward propagation (see below).
The function “_fw_propagation()” performs the forward propagation of a mini-batch through all of the ANN’s layers – and saves the results in the lists defined above.
Important note:
We transfer our lists (mutable Python objects) to “_fw_propagation()”! This has the effect that the array of the corresponding values is referenced from within “_fw_propagation()”; therefore will any elements added to the lists also be available outside the called function! Therefore we can use the calculated results also in further functions for e.g. gradient calculations which will later be called from within “_handle_mini_batch()”.
Note also that this function leaves room for optimization: It is e.g. unnecessary to prepare ay_Z_in_0T again and again for each epoch. We will transfer the related steps to “_prepare_epochs_and_batches()” later on.
Forward Propagation
In one of my last articles in this blog I already showed how one can use Numpy’s Linear Algebra features to cover propagation calculations required for information transport between two adjacent layers of a feed forward “Artificial Neural Network” [ANN]:
Numpy matrix multiplication for layers of simple feed forward ANNs
The result was that we can cover propagation between neighboring layers by a vectorized multiplication of two 2-dim matrices – one containing the weights and the other vectors of feature data for all mini-batch samples. In the named article I discussed in detail which rows and columns are used for the central multiplication with weights and summations – and that the last dimension of the input array should account for the mini-batch samples. This requires the transpose operation on the input array of Layer L0. All other intermediate layer results (arrays) do already get the right form for vectorizing.
“_fw_propagation()” takes the following form:
    ''' -- Method to handle FW propagation for a mini-batch --'''
    def _fw_propagation(self, ay_Z_in, ay_A_out, b_print= False):

        b_internal_timing = False

        # index range of layers
        ilayer = range(0, self._n_total_layers-1)

        # propagation loop
        for il in ilayer:
            if b_internal_timing: start_0 = time.perf_counter()

            if b_print:
                print("\nStarting propagation between L" + str(il) + " and L" + str(il+1))
                print("Shape of Z_in of layer L" + str(il) + " (without bias) = " + str(ay_Z_in[il].shape))

            # Step 1: Take input of last layer and apply activation function
            if il == 0:
                A_out_il = ay_Z_in[il] # L0: activation function is identity
            else:
                A_out_il = self._act_func( ay_Z_in[il] ) # use real activation function

            # Step 2: Add bias node
            A_out_il = self._add_bias_neuron_to_layer(A_out_il, 'row')
            # save in array
            ay_A_out.append(A_out_il)
            if b_print:
                print("Shape of A_out of layer L" + str(il) + " (with bias) = " + str(ay_A_out[il].shape))

            # Step 3: Propagate by matrix operation
            Z_in_ilp1 = np.dot(self._ay_w[il], A_out_il)
            ay_Z_in.append(Z_in_ilp1)

            if b_internal_timing:
                end_0 = time.perf_counter()
                print('Time_CPU for layer propagation L' + str(il) + ' to L' + str(il+1), end_0 - start_0)

        # treatment of the last layer
        il = il + 1
        if b_print:
            print("\nShape of Z_in of layer L" + str(il) + " = " + str(ay_Z_in[il].shape))
        A_out_il = self._out_func( ay_Z_in[il] ) # use the output function
        ay_A_out.append(A_out_il)
        if b_print:
            print("Shape of A_out of last layer L" + str(il) + " = " + str(ay_A_out[il].shape))

        return None
#
First we set a range for a loop over the layers. Then we apply the activation function. In “step 2” we add a bias-node to the layer – compare this to the number of weights, which we used during the initialization of the weight matrices in the last article. In step 3 we apply the vectorized Numpy-matrix multiplication (np.dot-operation). Note that this is working for layer L0, too, because we already transposed the input array for this layer in “_handle_mini_batch()”!
Note that we need some special treatment for the last layer: here we call the out-function to get result values. And, of course, we do not add a bias neuron!
It remains to have a look at the function “_add_bias_neuron_to_layer(A_out_il, ‘row’)”, which extends the A-data by a constant value of “1” for a bias neuron. The function is pretty simple:
    ''' Method to add values for a bias neuron to A_out '''
    def _add_bias_neuron_to_layer(self, A, how='column'):
        if how == 'column':
            A_new = np.ones((A.shape[0], A.shape[1]+1))
            A_new[:, 1:] = A
        elif how == 'row':
            A_new = np.ones((A.shape[0]+1, A.shape[1]))
            A_new[1:, :] = A
        return A_new
A first test
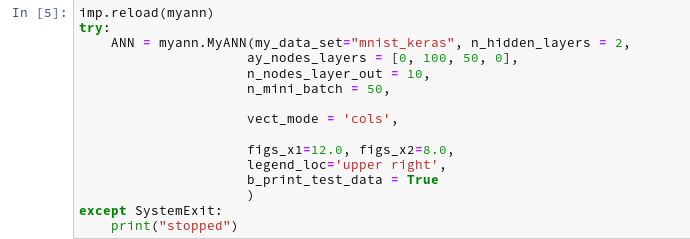
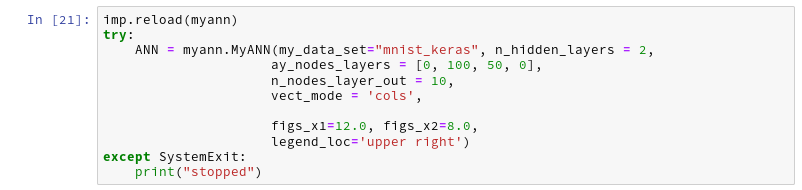
We let the program run in a Jupyter cell with the following parameters:
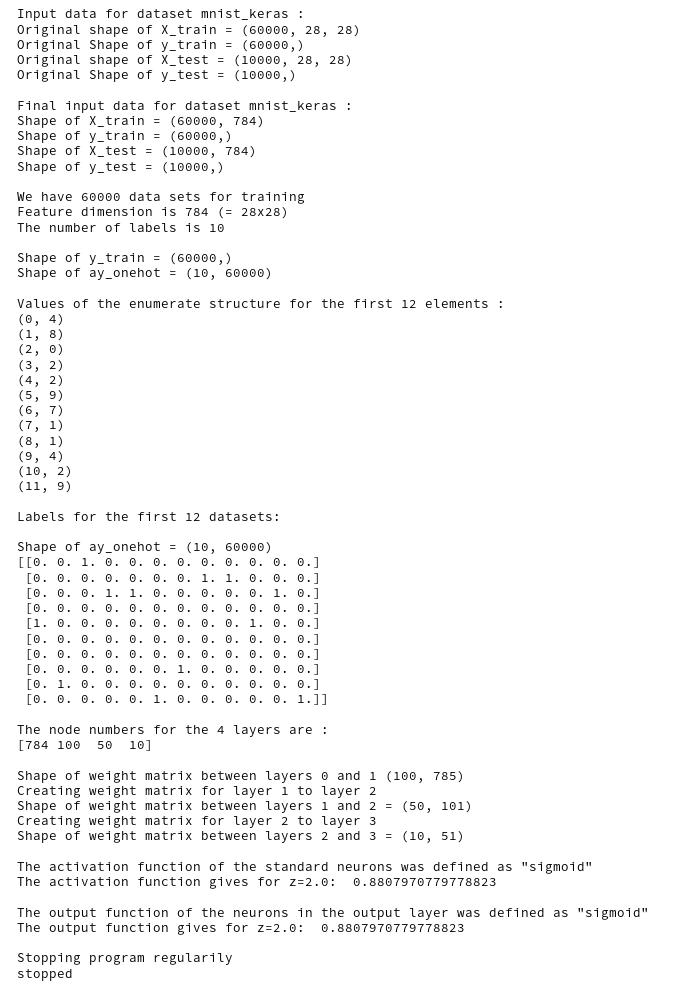
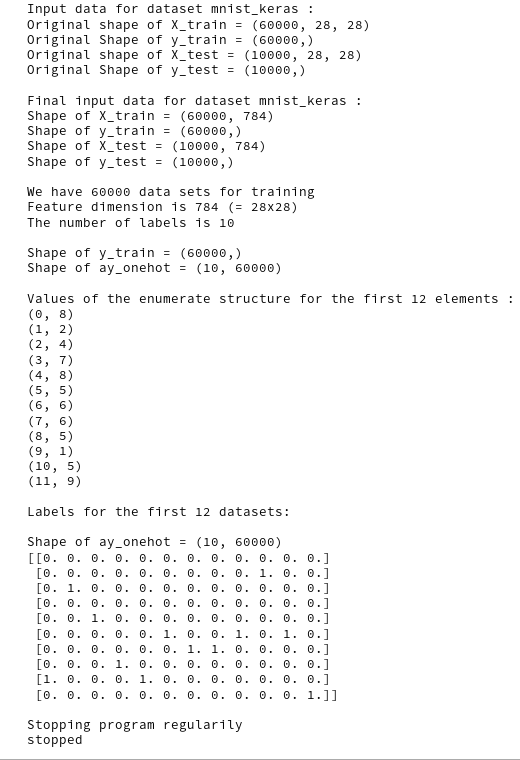
This produces the following output ( I omitted the output for initialization):
Input data for dataset mnist_keras :
Original shape of X_train = (60000, 28, 28)
Original Shape of y_train = (60000,)
Original shape of X_test = (10000, 28, 28)
Original Shape of y_test = (10000,)

Final input data for dataset mnist_keras :
Shape of X_train = (60000, 784)
Shape of y_train = (60000,)
Shape of X_test = (10000, 784)
Shape of y_test = (10000,)

We have 60000 data sets for training
Feature dimension is 784 (= 28x28)
The number of labels is 10

Shape of y_train = (60000,)
Shape of ay_onehot = (10, 60000)

Values of the enumerate structure for the first 12 elements :
(0, 6)
(1, 8)
(2, 4)
(3, 8)
(4, 6)
(5, 5)
(6, 9)
(7, 1)
(8, 3)
(9, 8)
(10, 9)
(11, 0)

Labels for the first 12 datasets:

Shape of ay_onehot = (10, 60000)
[[0. 0. 0. 0. 0. 0. 0. 0. 0. 0. 0. 1.]
 [0. 0. 0. 0. 0. 0. 0. 1. 0. 0. 0. 0.]
 [0. 0. 0. 0. 0. 0. 0. 0. 0. 0. 0. 0.]
 [0. 0. 0. 0. 0. 0. 0. 0. 1. 0. 0. 0.]
 [0. 0. 1. 0. 0. 0. 0. 0. 0. 0. 0. 0.]
 [0. 0. 0. 0. 0. 1. 0. 0. 0. 0. 0. 0.]
 [1. 0. 0. 0. 1. 0. 0. 0. 0. 0. 0. 0.]
 [0. 0. 0. 0. 0. 0. 0. 0. 0. 0. 0. 0.]
 [0. 1. 0. 1. 0. 0. 0. 0. 0. 1. 0. 0.]
 [0. 0. 0. 0. 0. 0. 1. 0. 0. 0. 1. 0.]]

The node numbers for the 4 layers are :
[784 100  50  10]

Shape of weight matrix between layers 0 and 1 (100, 785)
Creating weight matrix for layer 1 to layer 2
Shape of weight matrix between layers 1 and 2 = (50, 101)
Creating weight matrix for layer 2 to layer 3
Shape of weight matrix between layers 2 and 3 = (10, 51)

The activation function of the standard neurons was defined as "sigmoid"
The activation function gives for z=2.0:  0.8807970779778823

The output function of the neurons in the output layer was defined as "sigmoid"
The output function gives for z=2.0:  0.8807970779778823
num of mini_batches = 300

number of batches : 300
length of first batch : 200
length of last batch : 200

number of epochs = 1
max number of batches = 2

 ---------

Starting epoch 1

 ---------

 Dealing with mini-batch 1

Starting propagation between L0 and L1
Shape of Z_in of layer L0 (without bias) = (784, 200)
Shape of A_out of layer L0 (with bias) = (785, 200)

Starting propagation between L1 and L2
Shape of Z_in of layer L1 (without bias) = (100, 200)
Shape of A_out of layer L1 (with bias) = (101, 200)

Starting propagation between L2 and L3
Shape of Z_in of layer L2 (without bias) = (50, 200)
Shape of A_out of layer L2 (with bias) = (51, 200)

Shape of Z_in of layer L3 = (10, 200)
Shape of A_out of last layer L3 = (10, 200)

 ----

After propagation through all layers:
Shape of Z_in of layer L0 = (784, 200)
Shape of A_out of layer L0 = (785, 200)
Shape of Z_in of layer L1 = (100, 200)
Shape of A_out of layer L1 = (101, 200)
Shape of Z_in of layer L2 = (50, 200)
Shape of A_out of layer L2 = (51, 200)
Shape of Z_in of layer L3 = (10, 200)
Shape of A_out of layer L3 = (10, 200)

 ---------

 Dealing with mini-batch 2

Starting propagation between L0 and L1
Shape of Z_in of layer L0 (without bias) = (784, 200)
Shape of A_out of layer L0 (with bias) = (785, 200)

Starting propagation between L1 and L2
Shape of Z_in of layer L1 (without bias) = (100, 200)
Shape of A_out of layer L1 (with bias) = (101, 200)

Starting propagation between L2 and L3
Shape of Z_in of layer L2 (without bias) = (50, 200)
Shape of A_out of layer L2 (with bias) = (51, 200)

Shape of Z_in of layer L3 = (10, 200)
Shape of A_out of last layer L3 = (10, 200)

 ----

After propagation through all layers:
Shape of Z_in of layer L0 = (784, 200)
Shape of A_out of layer L0 = (785, 200)
Shape of Z_in of layer L1 = (100, 200)
Shape of A_out of layer L1 = (101, 200)
Shape of Z_in of layer L2 = (50, 200)
Shape of A_
out of layer L2 = (51, 200)
Shape of Z_in of layer L3 = (10, 200)
Shape of A_out of layer L3 = (10, 200)


 ------
Total training Time_CPU:  0.010270356000546599

Stopping program regularily
stopped
We see that the dimensions of the Numpy arrays fit our expectations!
If you raise the number for batches and the number for epochs you will pretty soon realize that writing continuous output to a Jupyter cell costs CPU-time. You will also notice strange things regarding performance, multithreading and the use of the Linalg library OpenBlas on Linux system. I have discussed this extensively in a previous article in this blog:
Linux, OpenBlas and Numpy matrix multiplications – avoid using all processor cores
So, for another tests we set the following environment variable for the shell in which we start our Jupyter notebook:
export OPENBLAS_NUM_THREADS=4
This is appropriate for my Quad-core CPU with hyperthreading. You may choose a different parameter on your system!
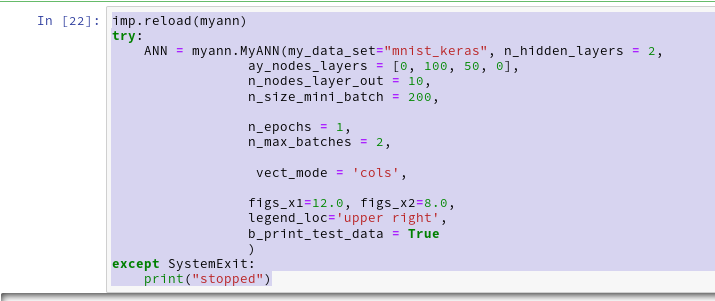
We furthermore stop printing in the epoch loop by editing the call to function “_fit()”:
self._fit(b_print=False, b_measure_batch_time=False)
We change our parameter setting to:
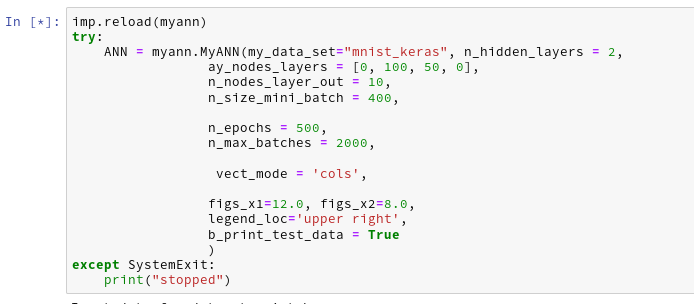
Then the last output lines become:
The node numbers for the 4 layers are :
[784 100  50  10]

Shape of weight matrix between layers 0 and 1 (100, 785)
Creating weight matrix for layer 1 to layer 2
Shape of weight matrix between layers 1 and 2 = (50, 101)
Creating weight matrix for layer 2 to layer 3
Shape of weight matrix between layers 2 and 3 = (10, 51)

The activation function of the standard neurons was defined as "sigmoid"
The activation function gives for z=2.0:  0.8807970779778823

The output function of the neurons in the output layer was defined as "sigmoid"
The output function gives for z=2.0:  0.8807970779778823
num of mini_batches = 150

number of batches : 150
length of first batch : 400
length of last batch : 400


 ------
Total training Time_CPU:  146.44446582399905

Stopping program regularily
stopped
Good !
The time required to repeat this kind of forward propagation for a network with only one hidden layer with 50 neurons and 1000 epochs is around 160 secs. As backward propagation is not much more complex than forward propagation this already indicates that we should be able to train such a most simple MLP with 60000 28×28 images in less than 10 minutes on a standard CPU.
Conclusion
In this article we saw that coding forward propagation is a pretty straight-forward exercise with Numpy! The tricky thing is to understand the way numpy.dot() handles vectorizing of a matrix product and which structure of the matrices is required to get the expected numbers!
In the next article
A simple program for an ANN to cover the Mnist dataset – IV – the concept of a cost or loss function
we shall start working on cost and gradient calculation.