During my present article series on a simple CNN we have seen how we set up and train such an artificial neural network with the help of Keras.
A simple CNN for the MNIST dataset – VI – classification by activation patterns and the role of the CNN’s MLP part
A simple CNN for the MNIST dataset – V – about the difference of activation patterns and features
A simple CNN for the MNIST dataset – IV – Visualizing the activation output of convolutional layers and maps
A simple CNN for the MNIST dataset – III – inclusion of a learning-rate scheduler, momentum and a L2-regularizer
A simple CNN for the MNIST datasets – II – building the CNN with Keras and a first test
A simple CNN for the MNIST datasets – I – CNN basics
Lately we managed to visualize the activations of the maps which constitute the convolutional layers of a CNN {Conv layer]. A Conv layer in a CNN basically is a collection of maps. The chain of convolutions produces characteristic patterns across the low dimensional maps of the last (i.e. the deepest) convolutional layer – in our case of the 3rd layer “Conv2D_3”. Such patterns obviously improve the classification of images with respect to their contents significantly in comparison to pure MLPs. I called a node activation pattern within or across CNN maps a FCP (see the fifth article of this series).
The map activations of the last convolutional layer are actually evaluated by a MLP, whose dense layer we embedded in our CNN. In the last article we therefore also visualized the activation values of the nodes within the first dense MLP-layer. We got some indications that map activation patterns, i.e. FCPs, for different image classes indeed create significantly different patterns within the MLP – even when the human eye does not directly see the decisive difference in the FCPs in problematic and confusing cases of input images.
In so far the effect of the transformation cascade in the convolutional parts of a CNN is somewhat comparable to the positive effect of a cluster analysis of MNIST images ahead of a MLP classification. Both approaches correspond to a projection of the input data into lower dimensional representation spaces and provide clearer classification patterns to the MLP. However, convolutions do a far better job to produce distinguished patterns for a class of images than a simple cluster analysis. The assumed reason is that chained convolutions somehow identify characteristic patterns within the input images themselves.
Is there a relation between a FCP and a a pattern in the pixel distribution of the input image?
But so far, we did not get any clear idea about the relation of FCP-patterns with pixel patterns in the original image. In other words: We have no clue about what different maps react to in terms of characteristic patterns in the input images. Actually, we do not even have a proof that a specific map – or more precisely the activation of a specific map – is triggered by some kind of distinct pattern in the value distribution for the original image pixels.
I call an original pattern to which a CNN map strongly reacts to an OIP; an OIP thus represents a certain geometrical pixel constellation in the input image which activates neurons in a specific map very strongly. Not more, not less. Note that an OIP therefore represents an idealized pixel constellation – a pattern which at best is free of any disturbances which might reduce the activation of a specific map. Can we construct an image with just the required OIP pixel constellation to trigger a map optimally? Yes, we can – at least approximately.
In the present article I shall outline the required steps which will enable us to visualize OIPs later on. In my opinion this is an important step to understand the abilities of CNNs a bit better. In particular it helps to clarify whether and in how far the term “feature detection” is appropriate. In our case we look out for primitive patterns in the multitude of MNIST images of handwritten digits. Handwritten digits are interesting objects regarding basic patterns – especially as we humans have some very clear abstract and constructive concepts in mind when we speak about basic primitive elements of digit notations – namely line and bow segments which get arranged in specific ways to denote a digit.
At the end of this article we shall have a first look at some OIP patterns which trigger a few chosen individual maps of the third convolutional layer of our CNN. In the next article I shall explain required basic code elements to create such OIP pictures. Subsequent articles will refine and extend our methods towards a more systematic analysis.
Questions and objectives
We shall try to answer a series of questions to approach the subject of OIPs and features:
- How can Keras help us to find and visualize an OIP which provokes a maximum average reaction of a map?
- How well is the “maximum” defined with respect to input data of our visualization method?
- Do we recognize sub-patterns in such OIPs?
- How do the OIPs – if there are any – reflect a translational invariance of complex, composed patterns?
- What does a maximum activation of an individual node of a map mean in terms of an input pattern?
What do I mean by “maximum average reaction“? A specific map of a CNN corresponds to a 2-dim array of “neurons” whose activation functions produce some output. The basic idea is that we want to achieve a maximum average value of this output by systematically optimizing initially random input image data until, hopefully, a pattern emerges.
Basic strategy to visualize an OIP pattern
In a way we shall try to create order out of chaos: We want to systematically modify an initial random distribution of pixel values until we reach a maximum activation of the chosen map. We already know how to systematically approach a minimum of a function depending on a multidimensional arrangement of parameters. We apply the “gradient descent” method to a hyperplane created by a suitable loss-function. Considering the basic principles of “gradient descent” we may safely assume that a slightly modified gradient guided approach will also work for maxima. This in turn means:
We must define a map-specific “loss” function which approaches a maximum value for optimum node activation. A suitable simple function could be a sum or average increasing with the activation values of the map’s nodes. So, in contrast to classification tasks we will have to use a “gradient ascent” method- The basic idea and a respective simple technical method is e.g. described in the book of F. Chollet (Deep Learning mit Python und Keras”, 2018, mitp Verlag; I only have the German book version, but the original is easy to find).
But what is varied in such an optimization model? Certainly not the weights of the already trained CNN! The variation happens with respect to the input data – the initial pixel values of the input image are corrected by the gradient values of the loss function.
Next question: What do we choose as a starting point of the optimization process? Answer: Some kind of random distribution of pixel values. The basic hope is that a gradient ascent method searching for a maximum of a loss function would also “converge“.
Well, here began my first problem: Converge in relation to what exactly? With respect to exactly one input input image or to multiple input images with different initial statistical distributions of pixel data? With fluctuations defined on different wavelength levels? (Physicists and mathematicians automatically think of a Fourier transformation at this point 🙂 ). This corresponds to the question whether a maximum found for a certain input image really is a global maximum. Actually, we shall see that the meaning of convergence is a bit fuzzy in our present context and not as well defined as in the case of a CNN-training.
To discuss fluctuations in statistical patterns at different wavelength is not so far-fetched as it may seem: Already the basic idea that a map reacts to a structured and maybe sub-structured OIP indicates that pixel correlations or variations on different length scales might play a role in triggering a map. We shall see that some maps do not react to certain “random” patterns at all. And do not forget that pooling operations induce the analysis of long range patterns by subsequent convolutional filters. The relevant wavelength is roughly doubled by each of our pooling operations! So, filters at deep convolutional layers may exclude patterns which do not show some long range characteristics.
The simplified approach discussed by Chollet assumes statistical variations on the small length scale of neighboring pixels; he picks a random value for each and every pixel of his initial input images without any long range correlations. For many maps this approach will work reasonably well and will give us a basic idea about the average pattern or, if you absolutely want to use the expression, “feature”, which a CNN-map reacts to. But being able to vary the length scale of pixel values of input images will help us to find patterns for sensitive maps, too.
We may not be able to interpret a specific activation pattern within a map; but to see what a map on average and what a single node of a map reacts to certainly would mean some progress in understanding the relation between OIPs and FCPs.
An example
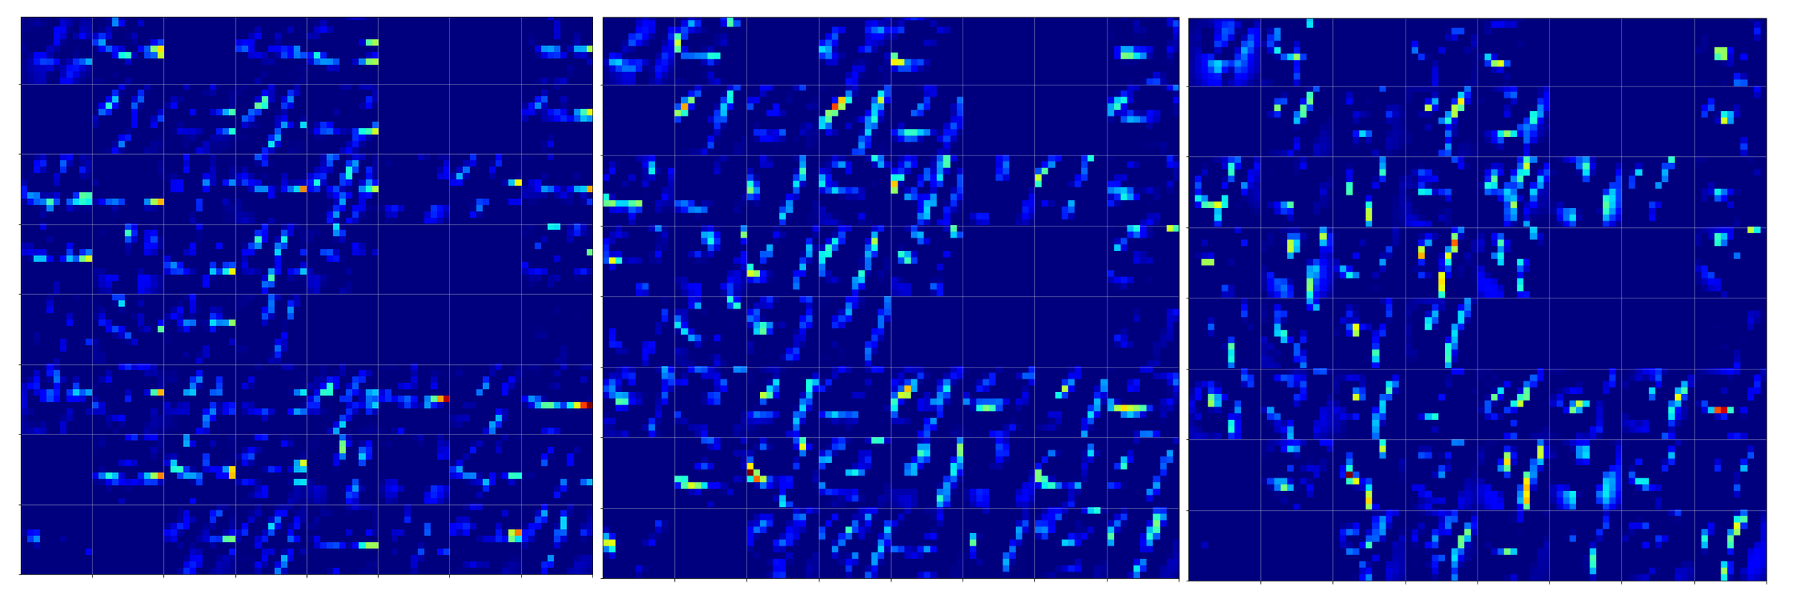
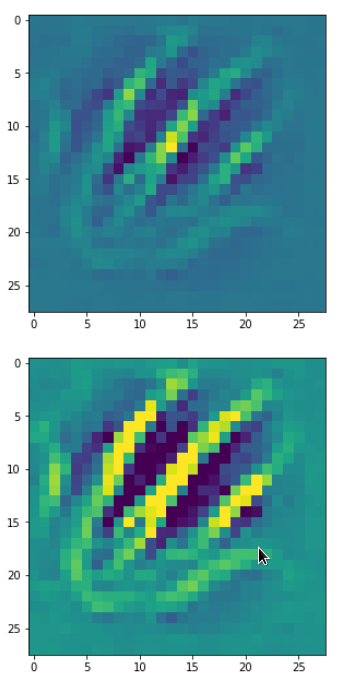
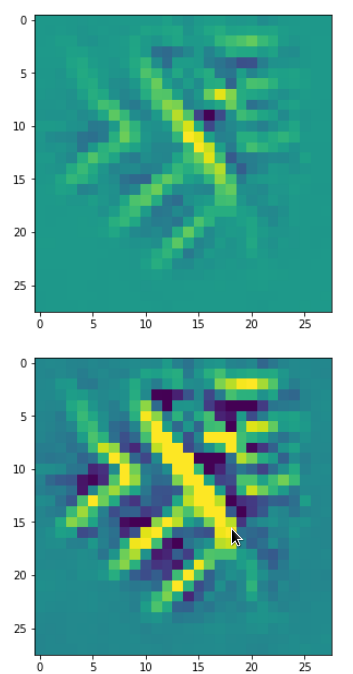
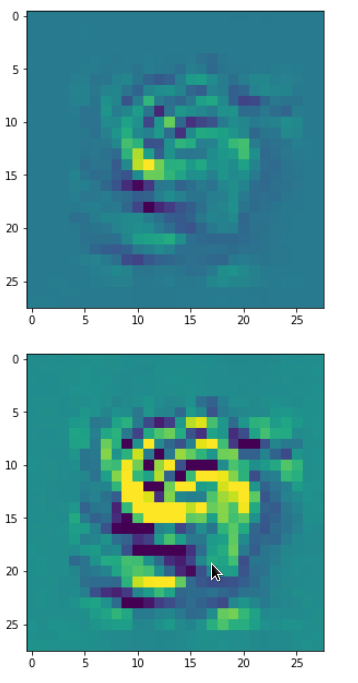
The question what an OIP is depends on the scales you look at and also where an OIP appears within a real image. To confuse you a bit: Look at he following OIP-picture which triggered a certain map strongly:
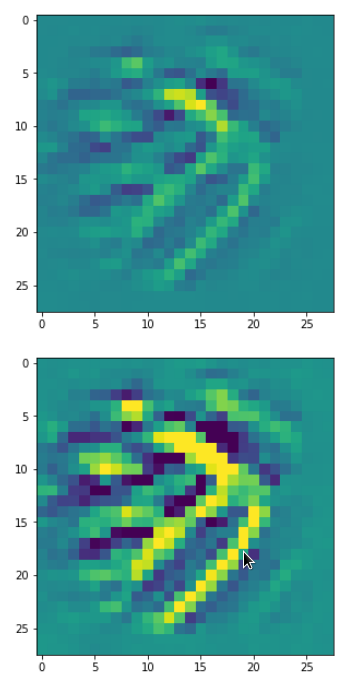
The upper image was prepared with a plain color map, the lower with some contrast enhancement. I use this two-fold representation also later for other OIP-pictures.
Actually, it is not so clear what elementary pattern our map reacts to. Two parallel line segments with a third one crossing perpendicular at the upper end of the parallel segments?
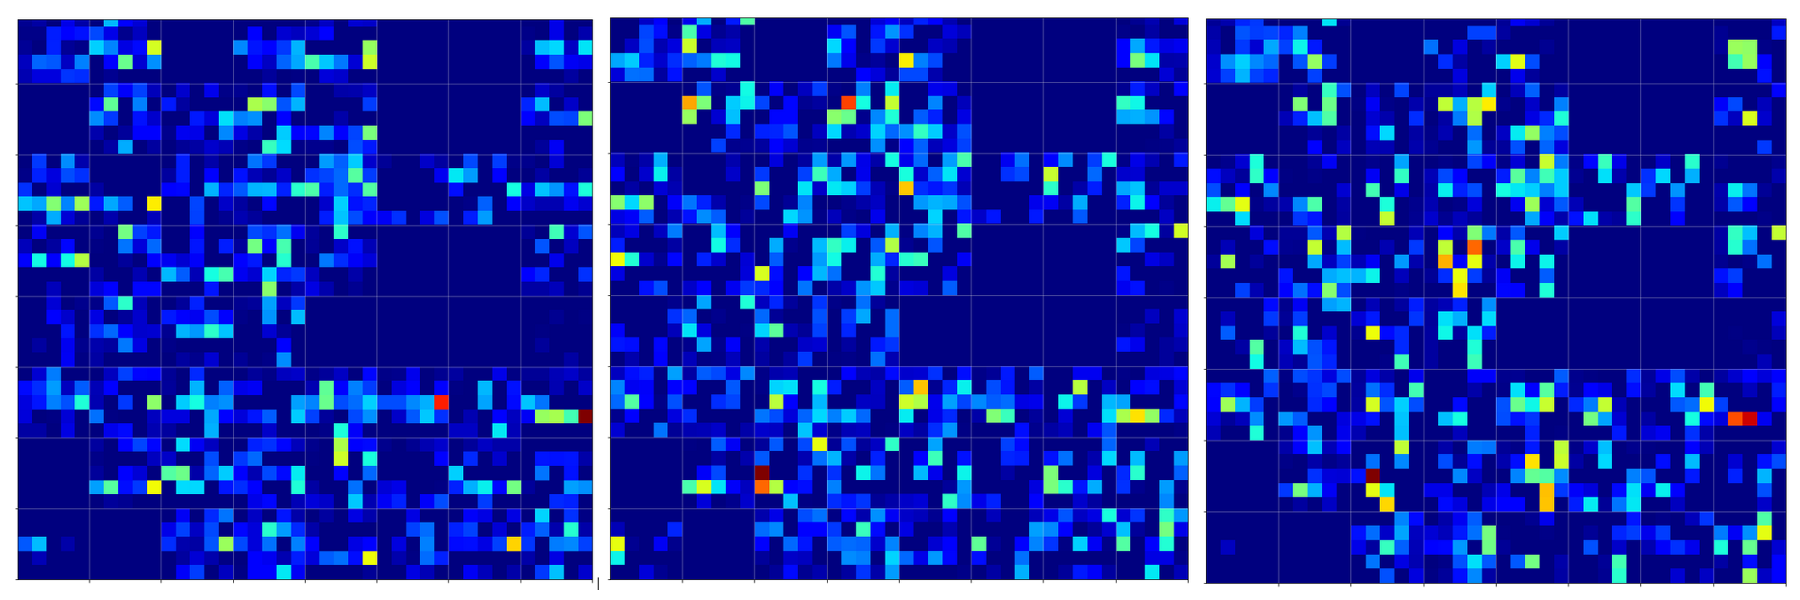
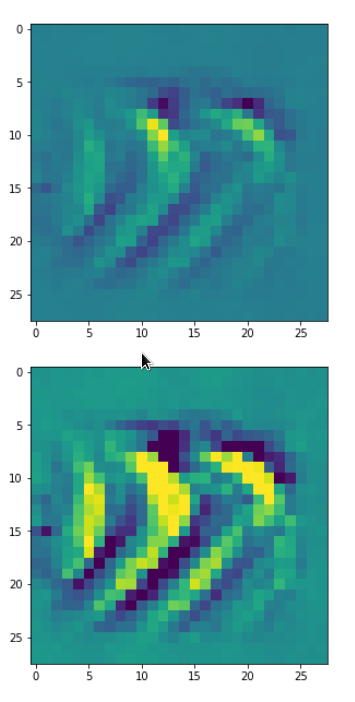
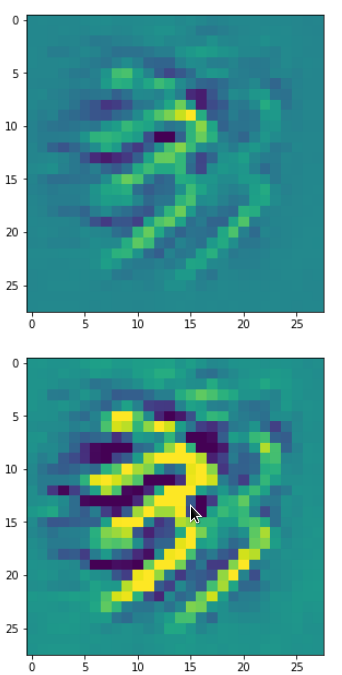
One reason for being uncertain is that some patterns on a scale of lets say a fourth of the original image may appear at different locations in original images of the same class. If a network really learned about such reappearance of patterns the result for an optimum OIP may be a superposition of multiple elementary patterns at different locations. Look at the next two OIP pictures for the very same map – these patterns emerged from a slightly different statistical variation of the input pixel values:


Now, we recognize some elementary structures much better – namely a combination of bows with slightly different curvatures and elongations. Certainly useful to detect “3” digits, but parts of “2”s, too!
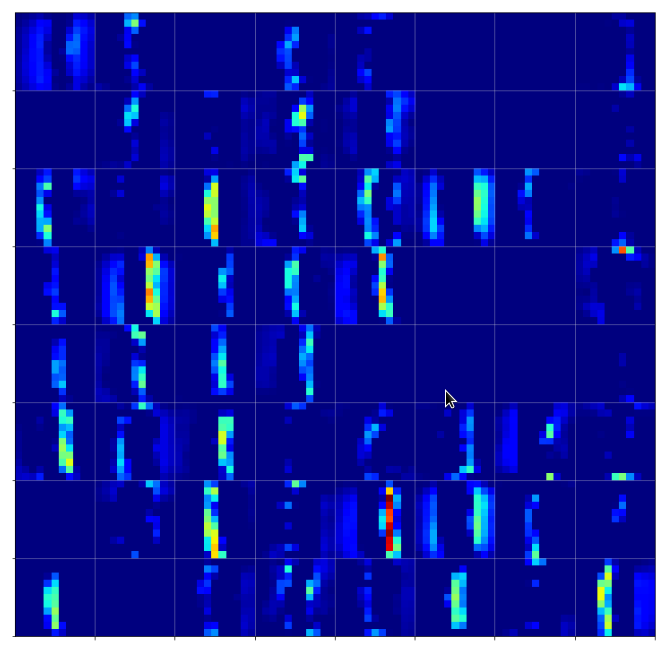
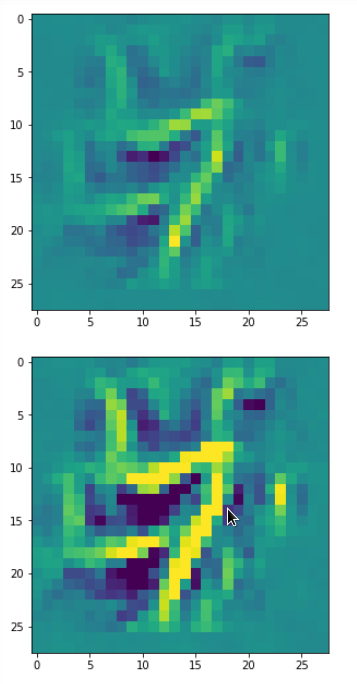
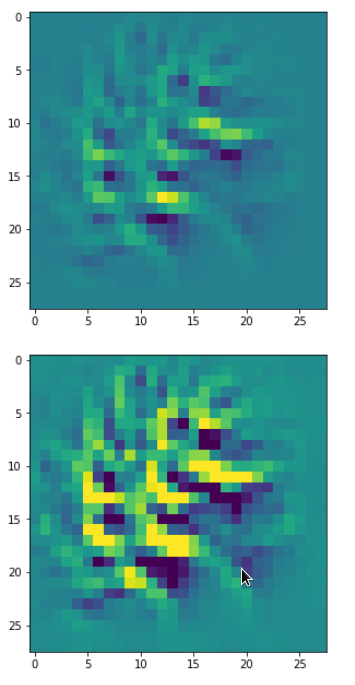
A different version of another map is given here:
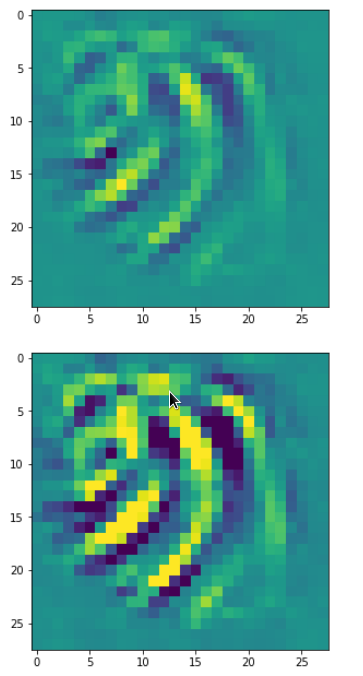

Due to the large scale structure over the full height of the input this map is much better suited to detect “9”s at different places.
You see that multiple filters on different spatial resolution levels have to work together in this case to reflect one bow – and the bows elongation gets longer with their position to the right. It seems that the CNN has learned that bow elements with the given orientation on the left side of original images are smaller and have a different degree of curvature than to the right of a MNIST input image. So what is the OIP or what is the “feature” here? The superposition of multiple translationally shifted and differently elongated bows? Or just one bow?
Unexpected technical hurdles
I was a bit surprised that I met some technical difficulties along my personal way to answer the questions posed above. The first point is that only a few text book authors seem to discuss the question at all; F. Chollet being the remarkable exception and most authors in the field, also of articles on the Internet, refer to his ideas and methods. I find this fact interesting as many authors of introductory books on ANNs just talk about “features” and make strong claims about what “features” are in terms of entities and their detection by CNNs – but they do not provide any code to verify the almost magic “identification” of conceptual entities as “eyes”, “feathers”, “lips”, etc..
Then there are articles of interested guys, which appear at specialized web sites, as e.g. the really read-worthy contribution of the physicist F. Graetz: https://towardsdatascience.com/how-to-visualize-convolutional-features-in-40-lines-of-code-70b7d87b0030 on “towardsdatascience.com”. His color images of “features” within CIFAR images are impressive; you really should have a look at them.
But he as other authors usually take pre-trained nets like VGG16 and special datasets as CIFAR with images of much higher resolution than MNIST images. But I wanted to apply similar methods upon my own simple CNN and MNIST data. Although an analysis of OIPs of MNIST images will certainly not produce such nice high resolution color pictures as the ones of Graetz, it might be easier to extract and understand some basic principles out of numerical experiments.
Unfortunately, I found that I could not just follow and copy code snippets of F. Chollet. Partially this had to do with necessary changes Tensorflow 2 enforced in comparison to TF1 which was used by F. Chollet. Another problem was due to standardized MNIST images my own CNN was trained on. Disregarding the point of standardization during programming prevented convergence during the identification of OIPs. Another problem occurred with short range random value variations for the input image pixels as a starting point. Choosing independent random values for individual pixels suppresses long range variations; this in turn often leads to zero gradients for averaged artificial “costs” of maps at high layer levels.
A better suitable variant of Chollet’s code with respect to TF 2 was published by a guy named Mohamed at “https://www.kaggle.com/questions-and-answers/121398“. I try to interpret his line of thinking and coding in my forthcoming articles – so all credit belongs to him and F. Chollet. Nevertheless, as said, I still had to modify their code elements to take into account special aspects of my own trained CNN.
Basic outline for later coding
We saw already in previous articles that we can build new models with Keras and TensorFlow 2 [TF2] which connect some input layer with the output of an intermediate layer of an already defined CNN- or MLP-model. TF2 analyses the respective dependencies and allows for a forward propagation of input tensors to get the activation values ( i.e. the output values of the activation function) at the intermediate layer of the original model – which now plays the role of an output layer in the new (sub-) model.
However, TF2 can do even more for us: We can define a specific cost function, which depends on the output tensor values of our derived sub-model. TF2 will also (automatically) provide gradient values for this freshly defined loss function with respect to input values which we want to vary.
The basic steps to construct images which trigger certain maps optimally is the following:
- We construct an initial input image filled with random noise. In the case of MNIST this input image would consist of input values on a 1-dim gray scale. We standardize the input image data as our CNN has been trained for such images.
- We build a new model based on the layer structure of our original (trained) CNN-model: The new model connects the input-image-tensor at the input layer of the CNN with the output generated of a specific feature map at some intermediate layer after the forward propagation of the input data.
- We define a new loss function which should show a maximum value for the map output – depending of course on optimized input image data for the chosen specific map.
- We define a suitable (stochastic) gradient ascent method to approach the aspired maximum for corrected input image data.
- We “inform” TF2 about the gradient’s dependencies on certain varying variables to give us proper gradient values. This step is of major importance in Tensorflow environments with activated “eager execution”. (In contrast to TF1 “eager execution” is the standard setting for TF2.)
- We scale (= normalize) the gradient values to avoid too extreme corrections of the input data.
- We take into account a standardization of the corrected input image data. This will support the overall convergence of our approach.
- We in addition apply some tricks to avoid a over-exaggeration of small scale components (= high frequency components in the sense of a Fourier transform) in the input image data.
Especially the last point was new to me before I read the code of Mohamed at Kaggle. E.g. F. Chollet does not discuss this point in his book. But it is a very clever thought that one should care about low and high frequency contributions in patterns which trigger maps at deep convolutional layers. Whereas Mohamed discusses the aspect that high frequency components may guide the optimization process into overall side maxima during gradient ascent, I would in addition say that not offering long range variations already in the statistical input data may lead to a total non-activation of some maps. Actually, this maybe is an underestimated crucial point in the hunt for patterns which trigger maps – especially when we deal with low resolution input images.
Eager mode requirements
Keras originally provided a function “gradients()” which worked with TF1 graphs and non-eager execution mode. However, T2 executes code in eager mode automatically and therefore we have to use special functions to control gradients and their dependencies on changing variables (see for a description of “eager execution” https://www.tensorflow.org/guide/eager?hl=en ).
Among other things: TF2 provides a special function to “watch” variables whose variations have an impact on loss functions and gradient values with respect to a defined (new) model. (An internal analysis by TF2 of the impact of such variations is of course possible because our new sub-model is based on an already given layer structures of the original CNN-model.)
Visualization of some OIP-patterns in MNIST images as appetizers
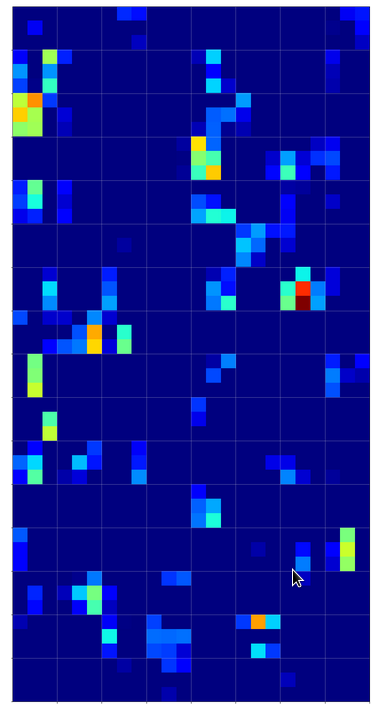
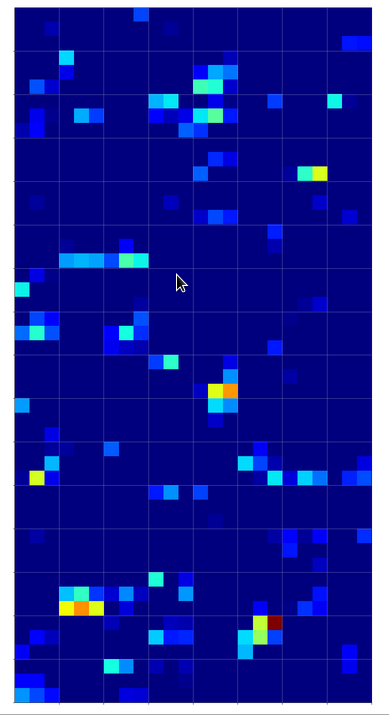
Enough for today. To raise your appetite for more I present some images of OIPs. I only show patterns triggering maps on the third Conv-layer.
There are simple patterns:


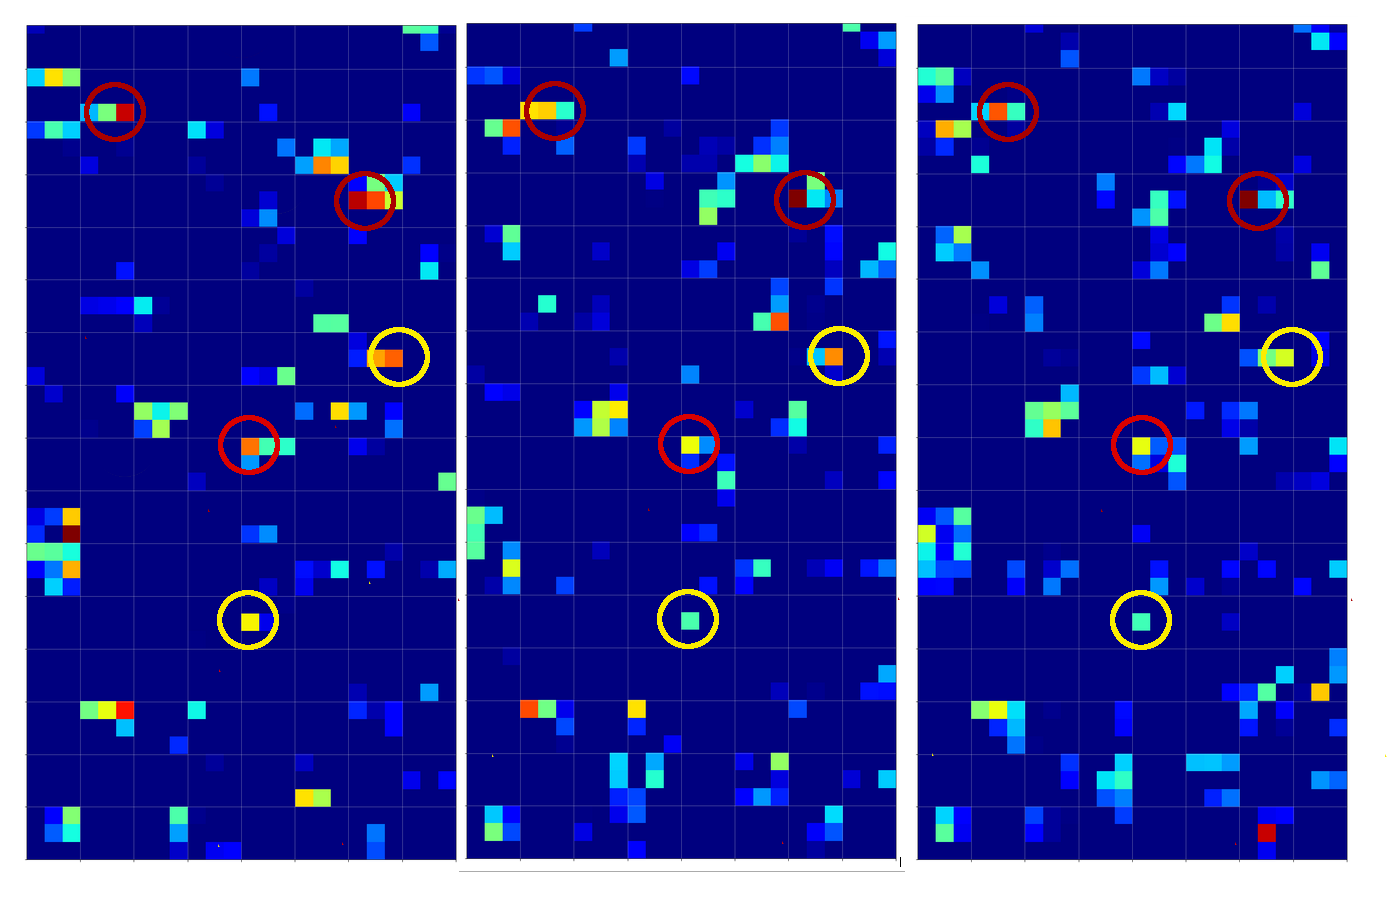
But there are also more complex ones:
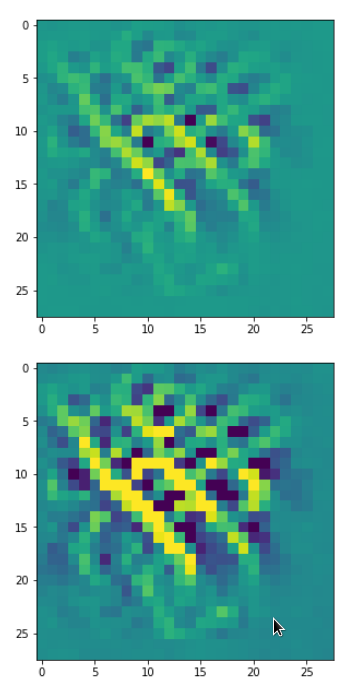

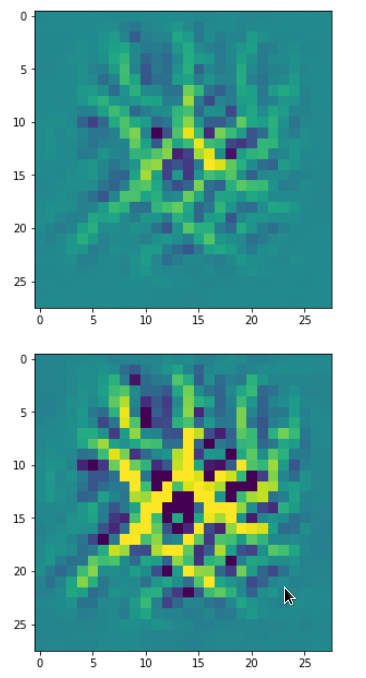
A closer look shows that the complexity results from translations and rotations of elementary patterns.
Conclusion
In this article we have outlined steps to build a program which allows the search for OIPs. The reader has noticed that I try to avoid the term “features”. First images of OIPs show that such patterns may appear a bit different in different parts of original input images. The maps of a CNN seem to take care of this. This is possible, only, if and when pixel correlations are evaluated over many input images and if thereby variations on larger spatial scales are taken into account. Then we also have images which show unique patterns in specific image regions – i.e. a large scale pattern without much translational invariance.
We shall look in more detail at such points as soon as we have built suitable Python functions. See the next post